Best DIY Acoustic Treatment For Home Studio (Complete Build Guide)
Best DIY acoustic treatment for home studio builds costs 50-70% less than buying commercial panels, but only if you use the right materials and place the panels where they actually matter — bare walls covered in random panels do almost nothing compared to targeted treatment at the spots where reflections cause the most damage.
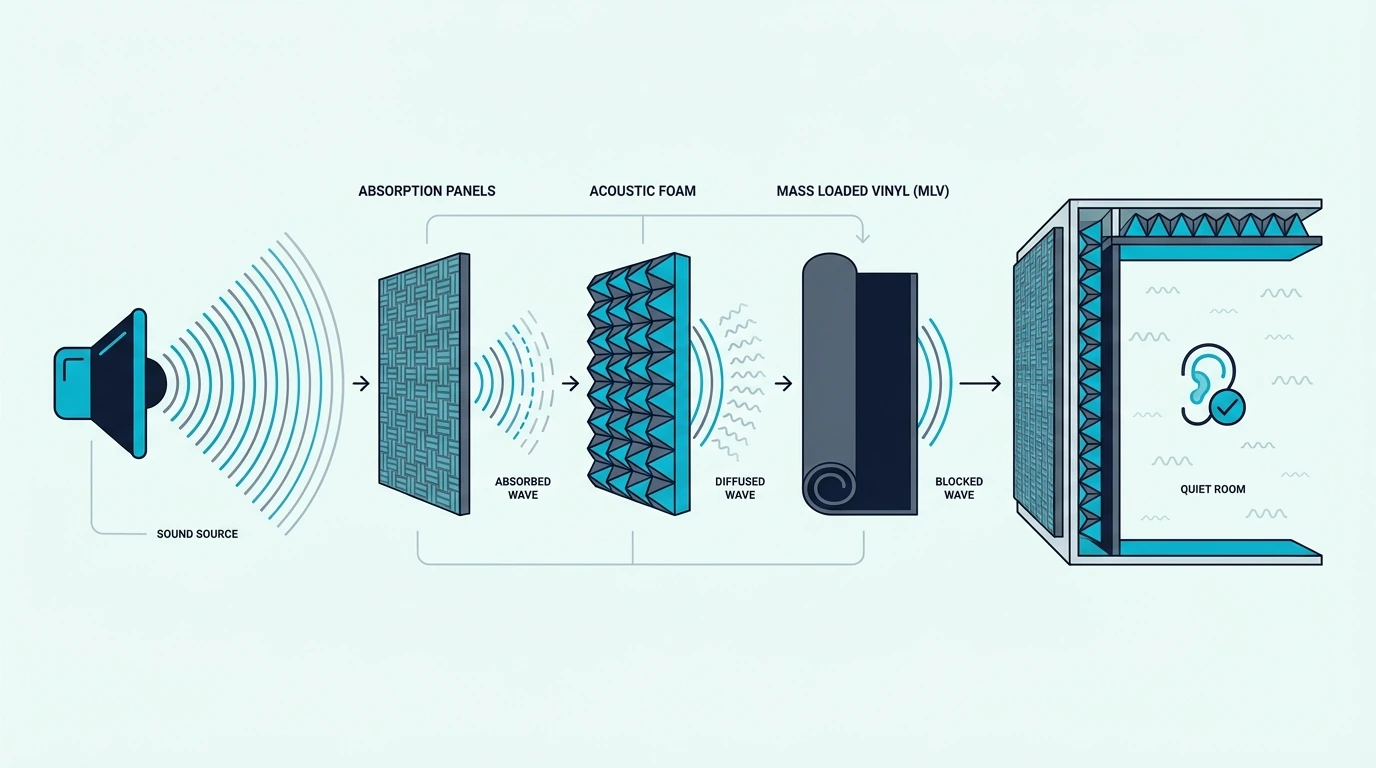
The problem most home studio builders face is not a lack of panels — it is panels made from the wrong material, placed in the wrong locations. A room full of thin foam squares looks treated but still sounds muddy and boxy because foam does not absorb the low-mid frequencies where most room problems live.
DIY panels built from rigid fiberglass or mineral wool boards solve the actual acoustic problems. A 2-inch panel made from 3 lb per cubic foot insulation achieves NRC 1.0 — absorbing virtually all mid and high frequency energy.
A 4-inch bass trap in the corners controls the low-frequency buildup that makes mixes translate poorly to other systems.
Below you will find the complete materials list, step-by-step build instructions, and placement priorities for a full home studio treatment. Start with two panels at the first reflection points on the side walls — that single step produces the biggest improvement in recording and mixing accuracy.
DIY acoustic panels built from rigid fiberglass or mineral wool cost 15-25 dollars each in materials and outperform most commercial panels selling for 50-100 dollars. Build 2-inch thick panels for wall reflections and 4-inch thick bass traps for corners. Place panels at first reflection points first, then add bass traps, then treat the ceiling. A full home studio treatment (8-10 panels plus bass traps) costs 200-400 dollars in materials.
Why DIY Is The Smart Choice For Home Studio Treatment
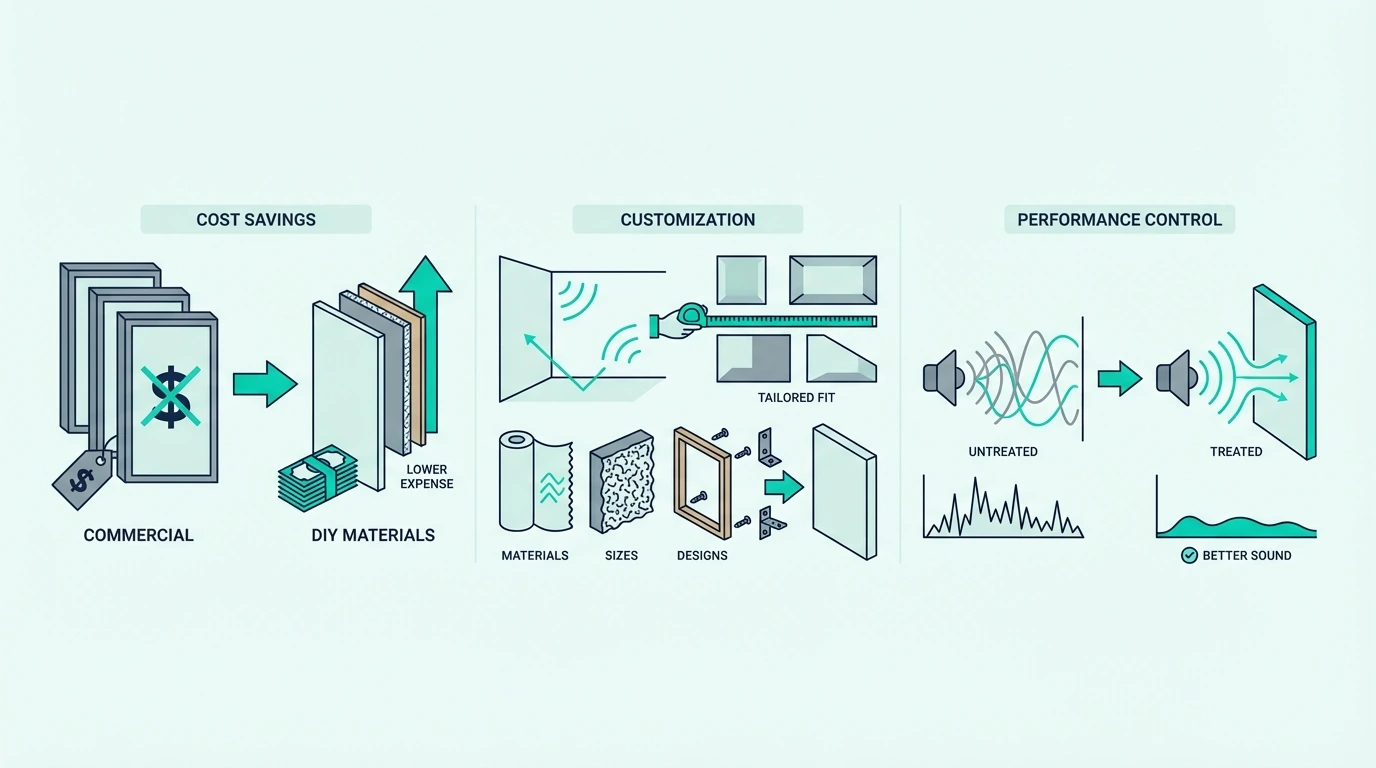
DIY acoustic panels outperform most commercial alternatives at a fraction of the cost. The reason is simple — you control the insulation material, thickness, and density, which are the only factors that determine acoustic performance.
Commercial panels charge a premium for aesthetics, packaging, and brand name. The actual insulation inside most commercial panels is the same material you can buy at an insulation distributor or hardware store for far less.
A DIY 2×4 foot panel costs approximately 15-25 dollars in materials depending on the insulation you choose. A comparable commercial panel costs 50-100 dollars.
For a full studio treatment requiring 8-12 panels, the savings add up to hundreds of dollars.
The tradeoff is time and effort. Building panels requires basic tools, a workspace, and a few hours of construction time.
If your time is worth more than the savings, pre-built kits deliver good results with zero build time.
For everyone else, DIY is the clear winner. The cost breakdown guide compares DIY versus commercial at every price point.
What Materials Do You Need For DIY Acoustic Panels
Every DIY acoustic panel has three components: insulation core, frame, and fabric covering. The insulation is the only component that affects acoustic performance — the frame and fabric are structural and cosmetic.
Insulation — Rockwool vs Fiberglass
The two standard insulation materials for DIY acoustic panels are rigid fiberglass (like Owens Corning 703) and mineral wool (like Rockwool or Rockboard). Both work well.
The choice comes down to availability and price in your area.
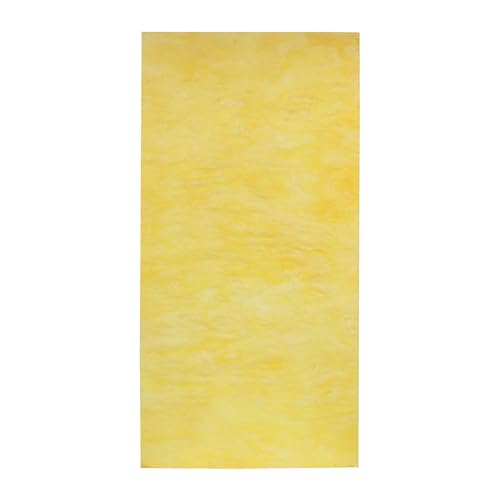
Rigid fiberglass at 3 lb per cubic foot density is the traditional recommendation. OC 703 at 2 inches thick achieves NRC 1.0.
It holds its shape, cuts cleanly with a bread knife, and fits into frames without compression.
Mineral wool at similar densities performs nearly identically.
Rockboard 60 rigid mineral wool boards come in standard 24×48 inch sizes ready to drop into a frame. The 6 lb per cubic foot density makes them particularly effective for bass traps where maximum low-frequency absorption matters.
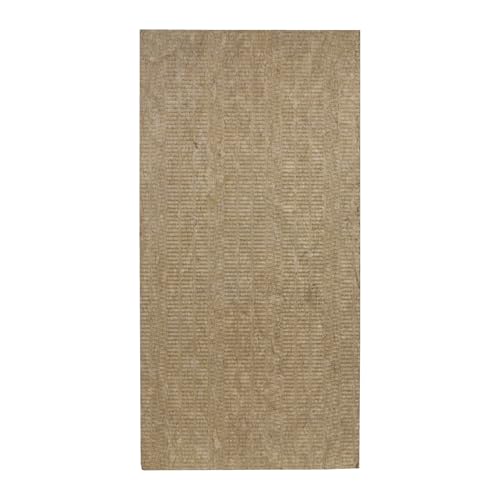
Rockboard 60 rigid mineral wool boards
Rockwool Safe’n’Sound batts from hardware stores are the budget option. They are not rigid boards — they are flexible batts that need a frame to hold their shape.
They cost roughly 1 dollar per square foot compared to 3-4 dollars per square foot for rigid boards. The acoustic performance is slightly lower but still vastly superior to foam.
The fiberglass treatment guide and the Rockwool treatment guide cover each material in detail including NRC data, handling tips, and sourcing options.
Frame Lumber And Hardware
Standard wall panels use 1×4 lumber (actual dimensions 3/4 x 3-1/2 inches) for the frame. This creates a frame depth of approximately 3.5 inches — enough for a 2-inch insulation board with air space behind it.
For thicker bass traps, use 1×6 or 2×4 lumber. A 2×4 frame accommodates 4 inches of insulation or two stacked 2-inch boards.
Hardware list per panel: – 4 pieces of 1×4 lumber cut to size (two at 48 inches, two at 22.5 inches for a 24×48 panel) – 8 wood screws (2.5 inch) – 2 L-brackets or corner braces (optional but add rigidity) – 2 picture hanging D-rings with screws – Corresponding wall anchors or hooks
Total lumber and hardware cost per panel is approximately 5-8 dollars depending on local lumber prices.
Fabric — What Works And What Does Not
The fabric covering a panel must be acoustically transparent — meaning sound passes through it to reach the insulation behind. If the fabric reflects sound, the insulation does nothing.
Fabrics that work: Guilford of Maine is the industry standard. Burlap, speaker cloth, and loosely woven polyester blends also work.
SoundAssured acoustical fabric is a budget-friendly option at roughly one-third the price of Guilford of Maine.
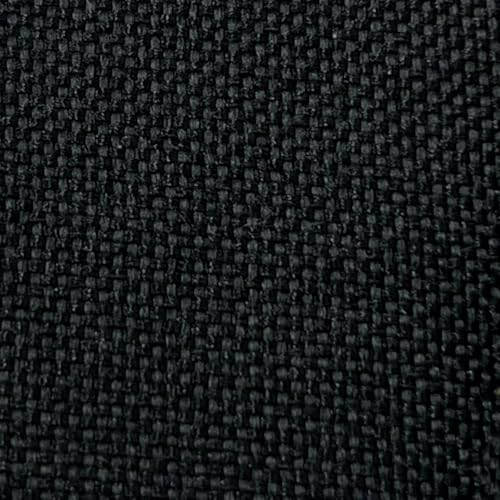
SoundAssured acoustical fabric
Fabrics that do not work: Canvas, vinyl, leather, and tightly woven cotton reflect too much sound. If you hold the fabric to your mouth and blow through it, you should feel air pass through easily.
If the fabric blocks airflow, it blocks sound.
The simple test: hold the fabric up to your mouth and blow. If air passes through freely, the fabric works for acoustic panels.
Get Studio Tips Weekly
Join 5,000+ creators getting acoustic treatment advice every week.
No spam. Unsubscribe anytime.How To Build DIY Acoustic Panels — Step By Step
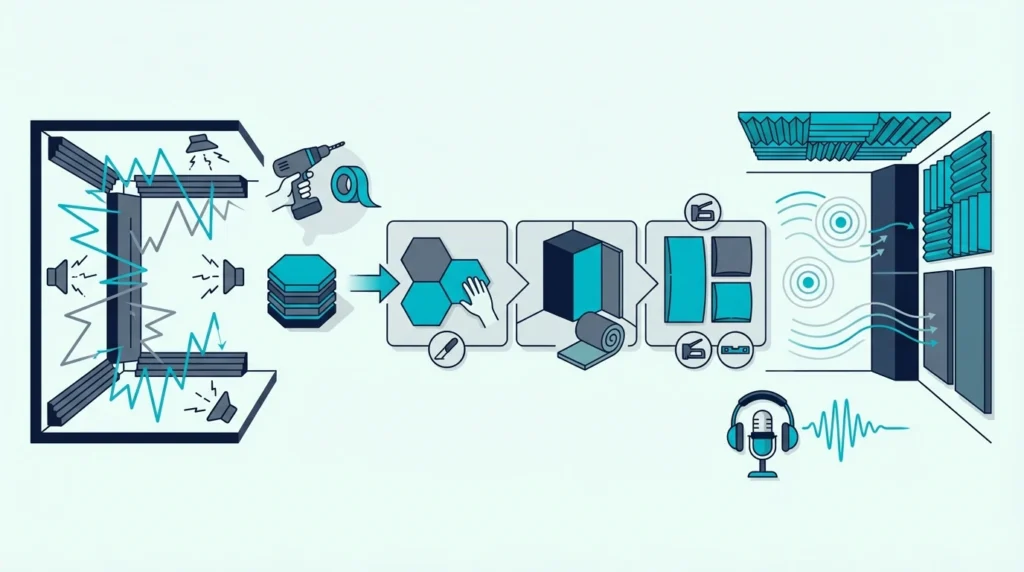
The build process is the same regardless of which insulation material you choose. Each panel takes approximately 30-45 minutes once you have the materials ready.
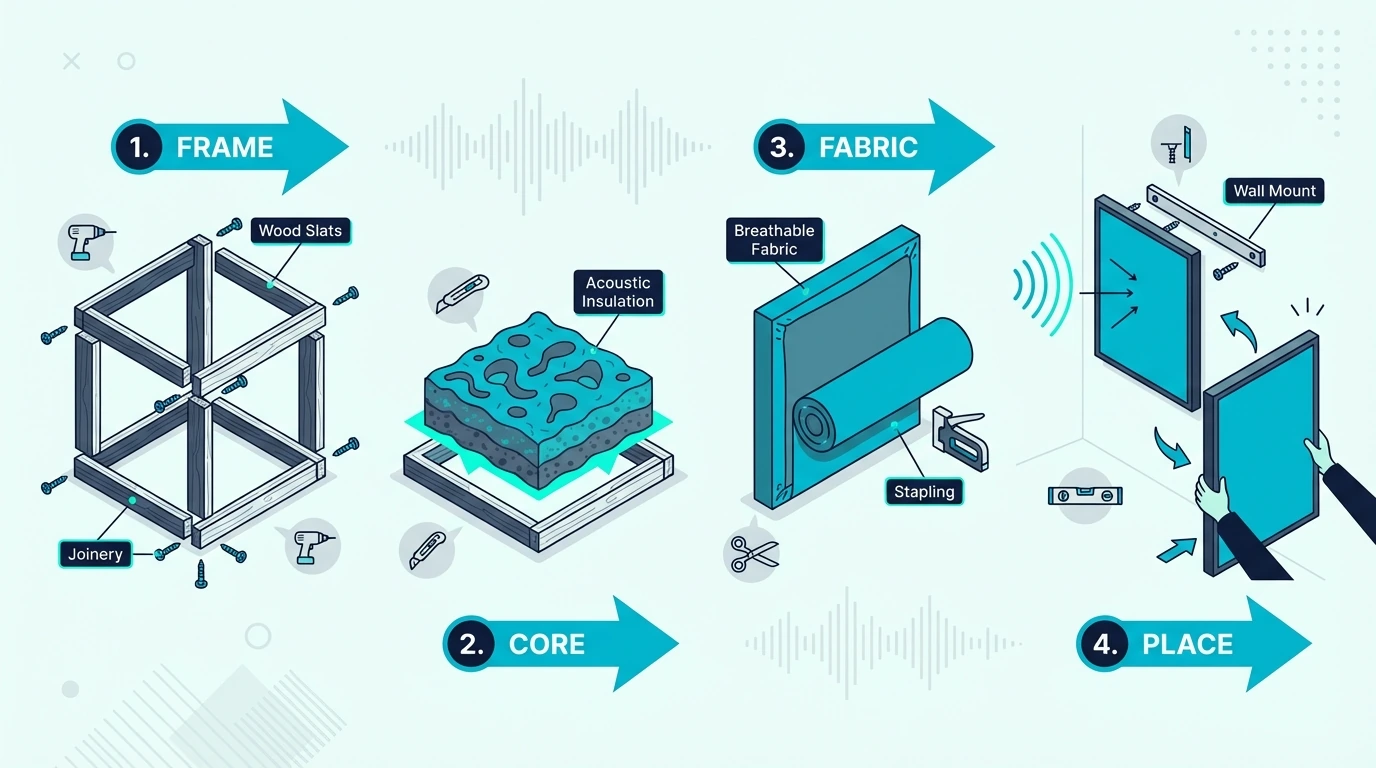
Building The Frame
Cut your 1×4 lumber to size. For a standard 24×48 inch panel, cut two pieces at 48 inches (long sides) and two pieces at 22.5 inches (short sides — accounting for the 3/4 inch thickness of the long pieces on each end).
Pre-drill pilot holes to prevent splitting. Screw the short pieces between the long pieces using two screws per corner.
The frame should be square — check by measuring diagonally from corner to corner. Both diagonal measurements should be equal.
For panels larger than 24×48 inches, add a cross brace across the middle for rigidity. This prevents the frame from warping over time.
Installing The Insulation
Cut the insulation to fit snugly inside the frame. Use a bread knife or serrated edge for fiberglass and a utility knife for mineral wool.
The insulation should press lightly against the frame sides without compression — compressed insulation loses air space and absorbs less effectively.
Wear gloves, long sleeves, and a dust mask when handling fiberglass or mineral wool. Both materials release fine particles that irritate skin and lungs. For rooms with concrete walls, use masonry anchors instead of drywall screws when mounting the finished panels.
Work outdoors or in a well-ventilated space.
For bass traps requiring 4 inches of insulation, stack two 2-inch boards inside the deeper frame. They should fit without adhesive — the frame holds them in place.
Wrapping With Fabric
Lay the fabric face-down on a clean surface. Place the panel face-down on top of the fabric, centered.
Pull one long side of the fabric over the back of the frame and staple every 3-4 inches using a staple gun.
Flip to the opposite long side. Pull the fabric taut (not stretched — just smooth with no wrinkles) and staple.
Repeat for the top and bottom short sides.
For the corners, fold the fabric neatly like wrapping a gift — fold one flap under, then pull the other over it and staple. Clean corner folds make the difference between a professional-looking panel and a sloppy one.
Trim excess fabric on the back with scissors. The finished panel should have smooth, wrinkle-free fabric on the front with all staples hidden on the back.
How To Build DIY Bass Traps

Bass traps follow the same construction process but use thicker insulation and are designed for room corners where low-frequency energy accumulates.
Corner Bass Trap Design
The most effective DIY bass trap is a flat panel mounted across a room corner with an air gap behind it. Build a standard 24×48 inch panel with a 2×4 frame (3.5 inches deep) and fill it with 4 inches of insulation — two stacked 2-inch rigid boards.
Mount the panel across the corner at a 45-degree angle. The triangular air space behind the panel acts as additional absorption volume, extending the effective low-frequency performance below what the insulation thickness alone would achieve.
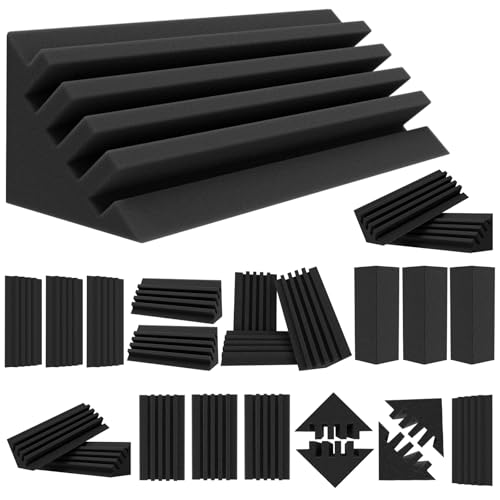
A single bass trap in each of the four vertical room corners makes a dramatic difference in low-frequency clarity. For builders who prefer a no-construction option for corners, TroyStudio foam bass traps friction-fit into corners without frames and address mid-bass buildup while you plan a full fiberglass build. The corner treatment guide covers bass trap placement and sizing in detail.
TroyStudio foam bass traps
Floor-To-Ceiling Bass Traps
For maximum bass control, build floor-to-ceiling bass traps that span the entire height of the room corner. These require longer frames (typically 6-8 feet) and more insulation, but they provide significantly more low-frequency absorption than smaller panels.
Use 2×4 lumber for the frame to support the weight of the insulation over the full height. Add at least two cross braces to prevent the frame from bowing.
Floor-to-ceiling traps are the single most effective treatment for small rooms where bass modes cause the most audible problems. They are especially critical for mixing rooms where accurate bass monitoring determines mix quality.
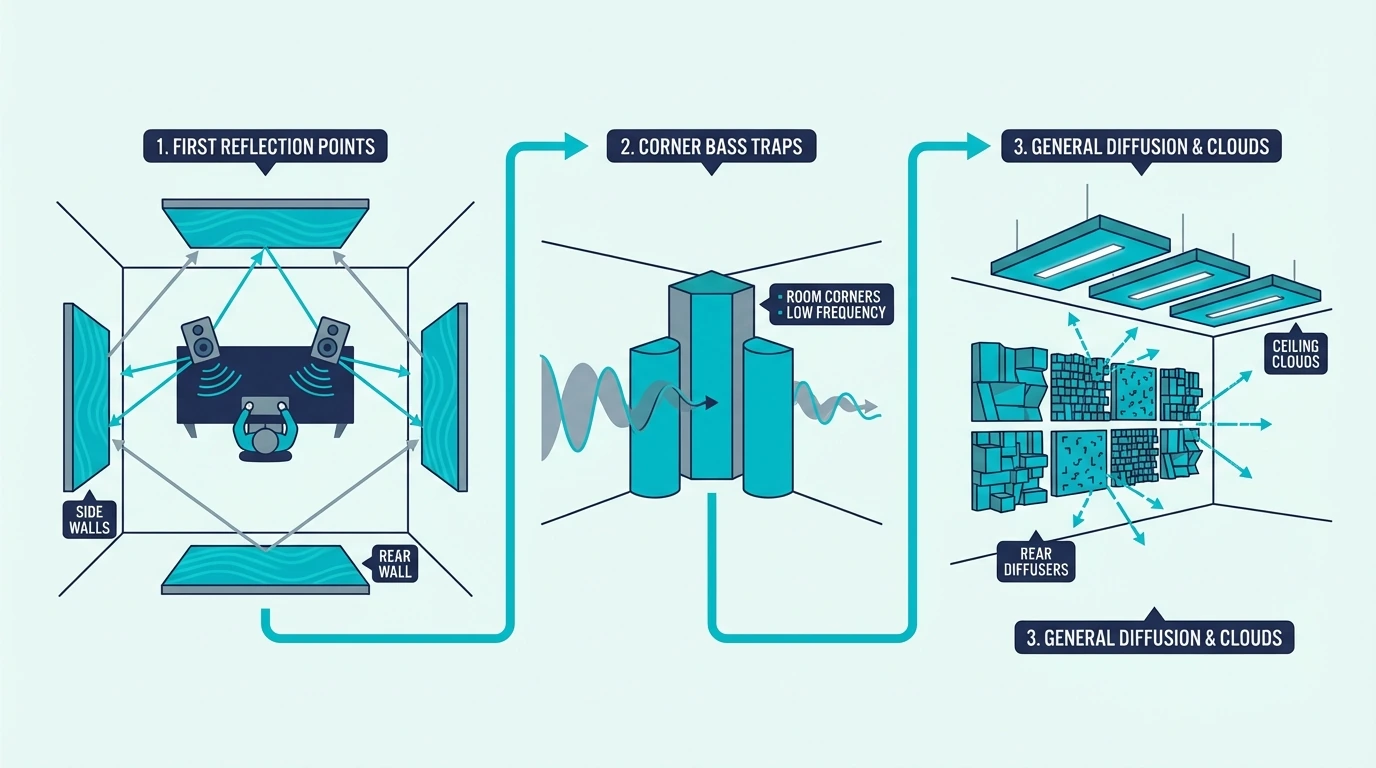
Where To Place DIY Panels — Priority Order
The placement priority for a home studio follows the same order regardless of room size:
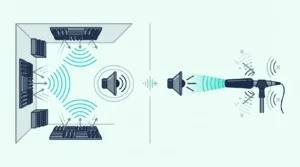
First reflection points on side walls — the spots where sound from your speakers bounces off the side walls to your listening position. Sit at the mix position and have someone slide a mirror along each side wall. Where you can see the speaker cone in the mirror is the first reflection point.
Ceiling reflection point — directly above the equilateral triangle formed by your speakers and listening position. A ceiling cloud at this position eliminates the ceiling reflection that causes comb filtering.
Corner bass traps — all four vertical corners. Start with the front two corners behind your speakers. Add the rear corners if budget allows.
Rear wall — absorption or diffusion on the rear wall controls late reflections that add unwanted reverb to your monitoring.
Front wall behind speakers — reduces the immediate reflection from the wall behind your monitors.
The home studio treatment guide covers room-specific placement with measurements and diagrams. For small rooms, the treatment priorities shift slightly because standing waves are more severe at shorter wall distances.
DIY vs Pre-Built — When To Skip The Build
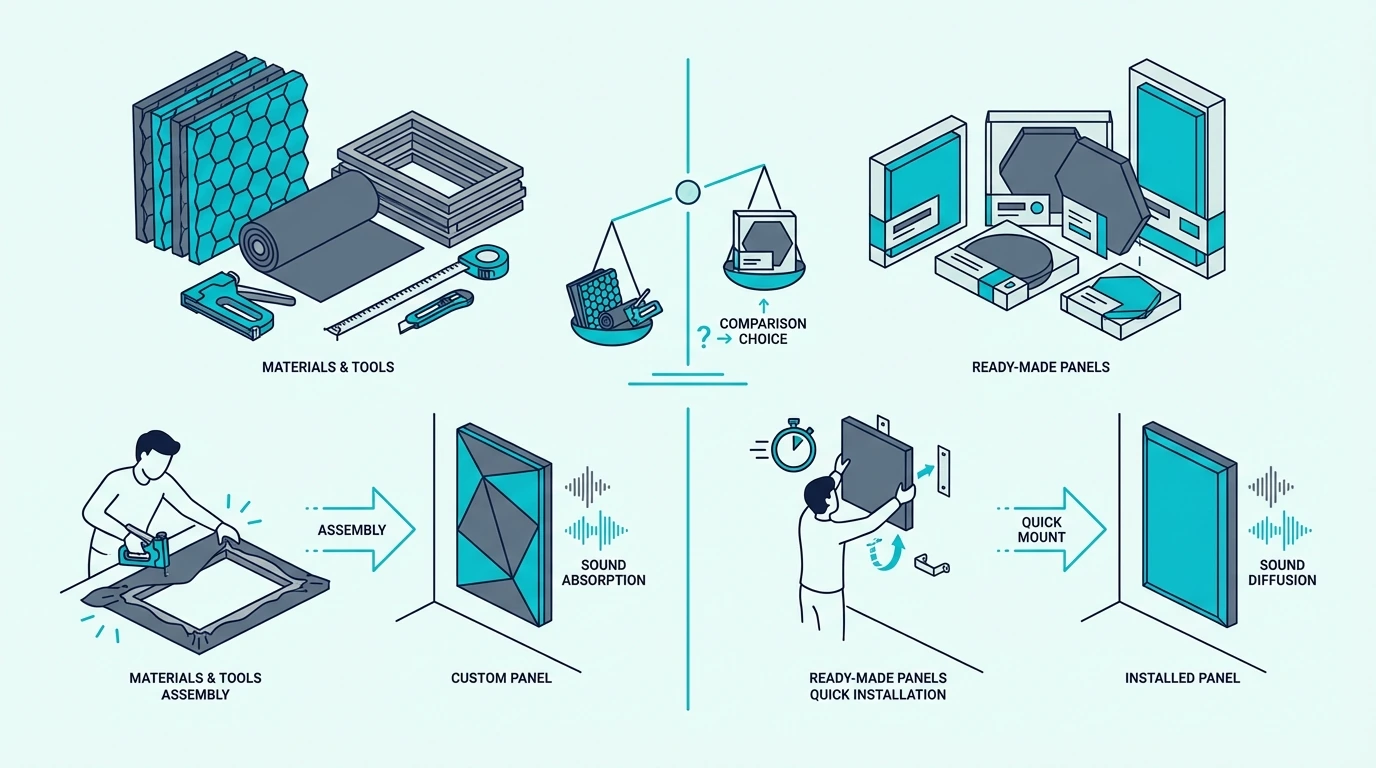
DIY panels deliver the best performance per dollar, but not everyone wants to build.
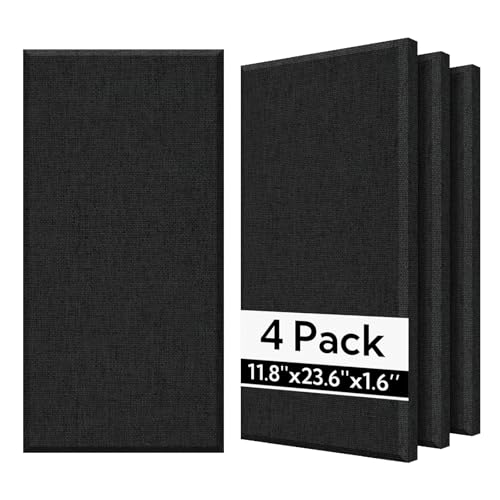
If you prefer convenience over cost savings, pre-built fiberglass panels arrive ready to hang. A 4-pack covers two first reflection points and delivers meaningful improvement with zero build time.
pre-built fiberglass panels
The tradeoff is thickness. Most affordable pre-built panels are 1 inch thick, which limits absorption to frequencies above approximately 500 Hz.
DIY panels at 2-4 inches thick absorb deeper into the frequency range where room problems are most severe.
For a full comparison of pre-built options at every price point, the budget treatment guide ranks commercial panels by performance per dollar.
The Bottom Line
DIY acoustic treatment is the most cost-effective way to treat a home studio. Rigid fiberglass or mineral wool panels at 2 inches thick absorb more effectively than commercial alternatives at 2-3 times the price.
Build wall panels first for first reflection points, then add corner bass traps. A full treatment of 8-10 panels plus four bass traps costs 200-400 dollars in materials and transforms an untreated room into a usable recording and mixing environment.
The full guide to acoustic treatment covers the complete treatment workflow from room analysis to final placement. For rooms where you cannot mount permanent panels, the temporary treatment guide covers portable and removable alternatives.
Frequently Asked Questions
How much does it cost to build DIY acoustic panels?
A single 24×48 inch panel costs approximately 15-25 dollars in materials — insulation, lumber, fabric, and hardware. A full home studio treatment of 8-10 panels plus bass traps costs 200-400 dollars total.
The biggest variable is insulation cost. Rigid boards like Owens Corning 703 and Rockboard cost more per panel than flexible batts (Rockwool Safe’n’Sound) but produce a cleaner build that holds its shape without additional support.
Are DIY acoustic panels as good as commercial ones?
DIY panels using the same insulation material at the same thickness perform identically to commercial panels. In many cases, DIY panels outperform commercial alternatives because you can choose thicker insulation and higher density materials that budget commercial panels cannot afford to include.
Commercial panels pay for aesthetics, brand name, and convenience. The acoustic performance comes entirely from the insulation core, which you can source yourself for far less.
What tools do I need to build acoustic panels?
The minimum tool list: a saw (miter saw or circular saw) for cutting lumber, a drill for pilot holes and screws, a staple gun for attaching fabric, a tape measure, and a utility knife or bread knife for cutting insulation. A speed square helps ensure square corners.
If you do not own these tools, the home theater guide covers simpler construction methods that require fewer specialized tools.