How To Build A Membrane Bass Trap — DIY Resonant Absorber For Targeted Low Frequencies
How to build a membrane bass trap is one of the most searched DIY acoustic questions because membrane traps solve a problem that standard porous absorbers can’t — they target specific bass frequencies with surgical precision using a fraction of the depth, but the build requires careful calculation and airtight construction that most guides gloss over.
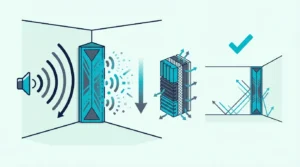
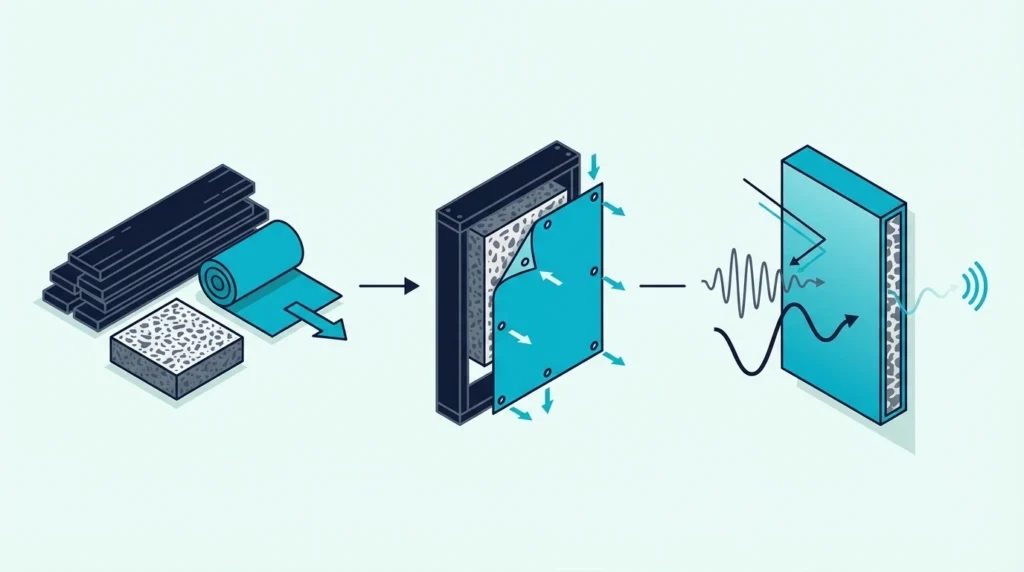
A membrane bass trap works differently from a standard porous bass trap. Instead of absorbing sound through friction in a fibrous material, a membrane trap uses a thin, flexible panel mounted over a sealed air cavity — the panel vibrates at a specific resonant frequency, converting that frequency’s energy into heat through the panel’s internal damping and any absorptive material inside the cavity.
The advantage is depth efficiency — a membrane trap only 4 inches deep can absorb at 60-80 Hz, where a porous absorber would need to be 2-3 feet thick to reach the same frequency. The disadvantage is narrow bandwidth, as membrane traps only absorb effectively within a small range around their tuned frequency.
Below, you’ll find the resonance formula explained in practical terms, a complete step-by-step build guide, the difference between limp mass and rigid panel designs, and how to build a tube-style variant.
A membrane bass trap is a sealed box with a flexible front panel that vibrates at a calculated resonant frequency, absorbing that specific bass frequency range. Build one from MDF or plywood for the box, thin plywood (3-6mm) or mass-loaded vinyl for the membrane, and mineral wool inside to widen the absorption bandwidth. Use the formula f = (60 / √(m × d)) where m is membrane mass in kg/m² and d is cavity depth in meters to calculate your target frequency.
What Is A Membrane Bass Trap And How Does It Work?
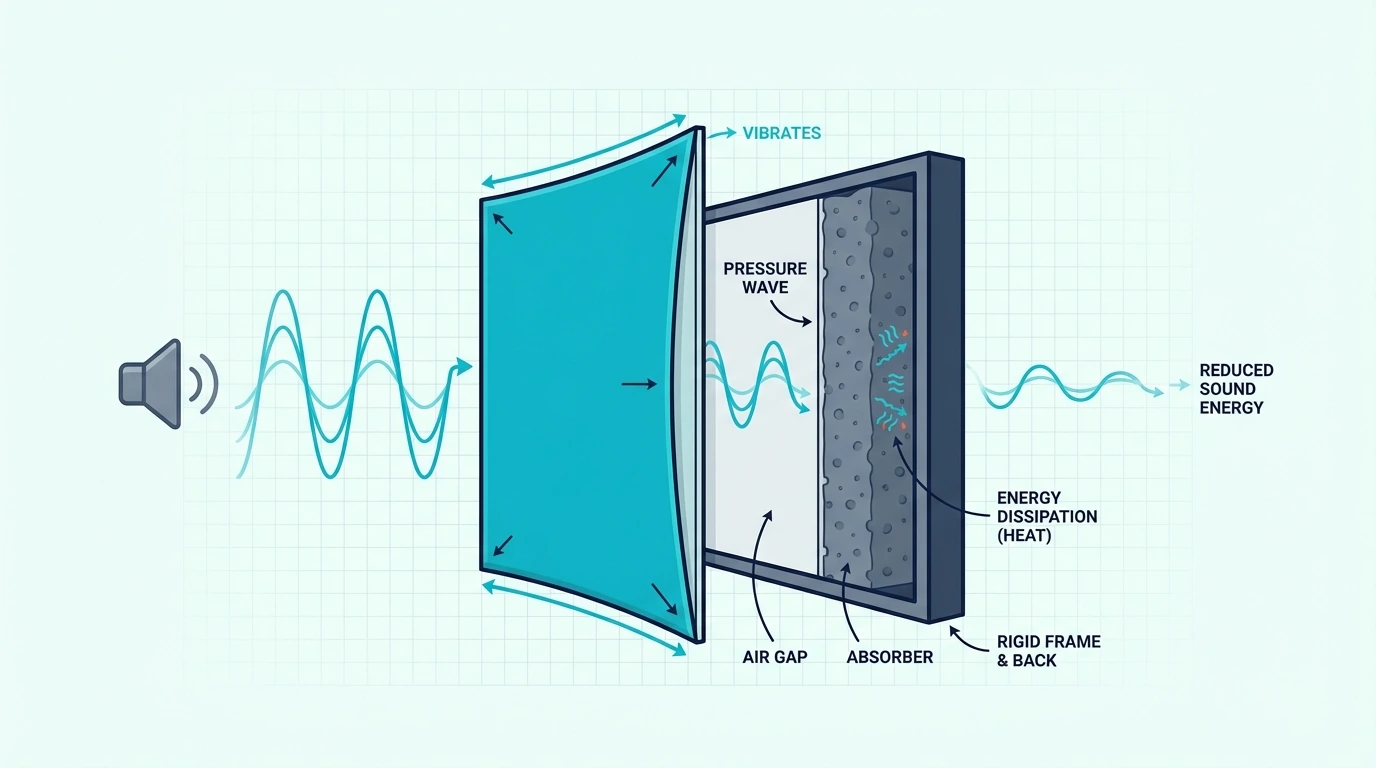
A membrane bass trap (also called a panel absorber or diaphragmatic absorber) is a sealed box with a thin, flexible front panel that resonates at a specific frequency. When bass sound waves hit the panel, it flexes back and forth — this mechanical vibration converts acoustic energy into heat through friction within the panel material and any damping material inside the cavity.
The resonant frequency depends on two factors: the mass of the membrane panel and the depth of the sealed air cavity behind it. A heavier panel or a deeper cavity produces a lower resonant frequency, while a lighter panel or shallower cavity produces a higher one.
This makes membrane traps fundamentally different from porous absorbers like fiberglass and mineral wool panels — porous absorbers work across a broad frequency range but need massive depth to reach low bass. Membrane traps target a narrow frequency band but do it in a compact package.
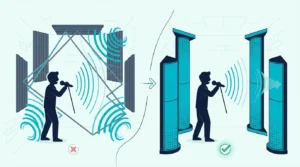
The practical benefit is treating specific room modes — the resonant frequencies where your room amplifies bass unevenly. If your room has a 63 Hz mode causing a 12 dB peak at your listening position, a membrane trap tuned to 63 Hz addresses that exact problem without absorbing the frequencies that don’t need treatment.
How To Calculate Your Membrane Trap Dimensions

The resonant frequency of a membrane bass trap follows this simplified formula:
f = 60 / √(m × d)
Where: – f = resonant frequency in Hz – m = surface mass of the membrane in kg/m² – d = depth of the air cavity in meters
For example, a 3mm plywood membrane (approximately 1.8 kg/m²) over a 100mm (0.1m) deep cavity produces a resonant frequency of approximately 60 / √(1.8 × 0.1) = 60 / √0.18 = 60 / 0.424 = 141 Hz.
Choosing Your Target Frequency
Measure your room to find the worst bass mode before designing your trap. Use free software like REW (Room EQ Wizard) with an inexpensive measurement microphone to run a frequency sweep at your listening position.
Look for peaks in the 40-150 Hz range — these are the room modes causing the most audible problems, and the tallest peak is your primary target frequency. A room mode calculator (based on your room’s length, width, and height) can also predict where modes will occur.
Panel Mass And Cavity Depth Trade-offs
You can hit the same target frequency with different combinations of panel mass and cavity depth. A heavier panel with a shallow cavity produces the same resonant frequency as a lighter panel with a deeper cavity.
Heavier panel (thicker plywood or MLV): More compact overall depth but harder to get the panel to vibrate freely. Requires careful edge mounting to avoid dampening the panel’s movement.
Deeper cavity: Easier to build and more forgiving of construction imperfections. The deeper the box, the lower you can tune without needing an extremely heavy membrane.
For most DIY builds, a cavity depth of 100-200mm (4-8 inches) with 3-6mm plywood as the membrane covers the practical range of 60-150 Hz — the zone where most room mode problems live.
Get Studio Tips Weekly
Join 5,000+ creators getting acoustic treatment advice every week.
No spam. Unsubscribe anytime.Step-By-Step Membrane Bass Trap Build
This build creates a membrane trap approximately 600×600mm (24×24 inches) face area with adjustable cavity depth. Total material cost is roughly $30-50 per trap.
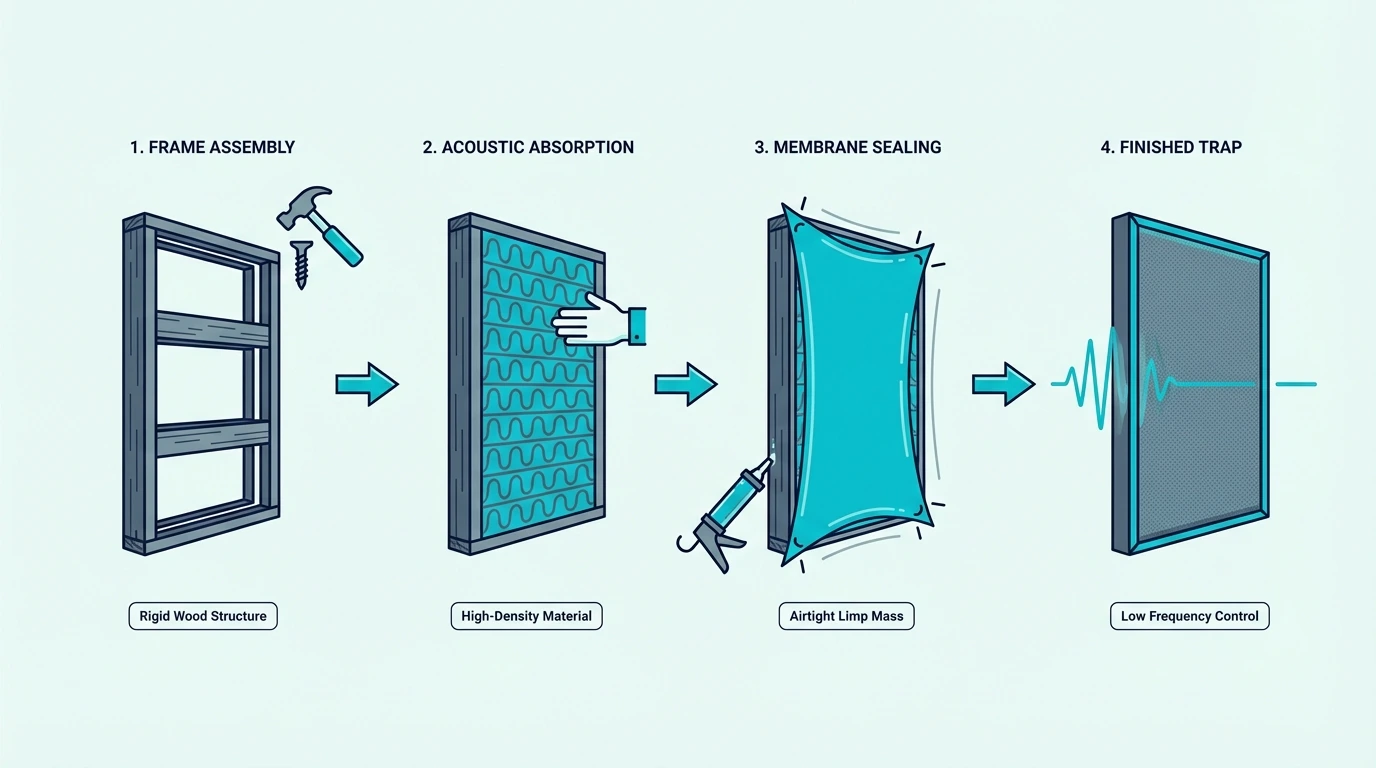
Building The Sealed Box
Cut five pieces of 18mm (3/4-inch) MDF or plywood — four sides and one back panel. The internal dimensions determine your cavity depth, so plan accordingly (100-200mm deep for most applications).
Assemble the box with wood glue and screws at every joint, then apply a bead of acoustic sealant (or standard silicone caulk) along every interior seam — the box must be completely airtight for the trap to function correctly. Any air leak acts as a port that changes the resonant behavior unpredictably.
Add internal bracing if the box is larger than 600mm in any dimension. A single cross-brace of MDF glued and screwed across the center of the back panel prevents the box walls from resonating at unwanted frequencies.
Attaching The Membrane
Cut your membrane material (3-6mm plywood or mass-loaded vinyl) to match the outer dimensions of the box opening. The membrane should cover the open face completely with no gaps.
Attach the membrane to the box frame using screws every 50-75mm (2-3 inches) around the perimeter, with a gasket of foam weatherstrip tape between the membrane and the box edge. The weatherstrip creates an airtight seal while allowing the membrane to vibrate freely.
Do not glue the membrane directly to the box — gluing over-constrains the edges and reduces the panel’s ability to flex, which raises the effective resonant frequency and reduces absorption efficiency.
Adding Internal Damping
Place a layer of mineral wool or fiberglass insulation inside the cavity, covering the back wall but not touching the membrane. Leave a 25-50mm (1-2 inch) air gap between the damping material and the membrane face.
The damping material widens the absorption bandwidth from a narrow spike (perhaps 10-15 Hz wide) to a broader curve (30-50 Hz wide). Without damping the trap only absorbs at its exact resonant frequency, but with damping it covers a useful range on either side.
A 50mm (2-inch) layer of mineral wool at 4+ PCF density inside the cavity is sufficient. More damping material broadens the bandwidth further but reduces the peak absorption at the center frequency — it’s a tradeoff between depth and breadth of absorption.
Limp Mass vs Rigid Panel Membrane Traps
Membrane traps use two fundamentally different panel types, and each behaves differently acoustically.
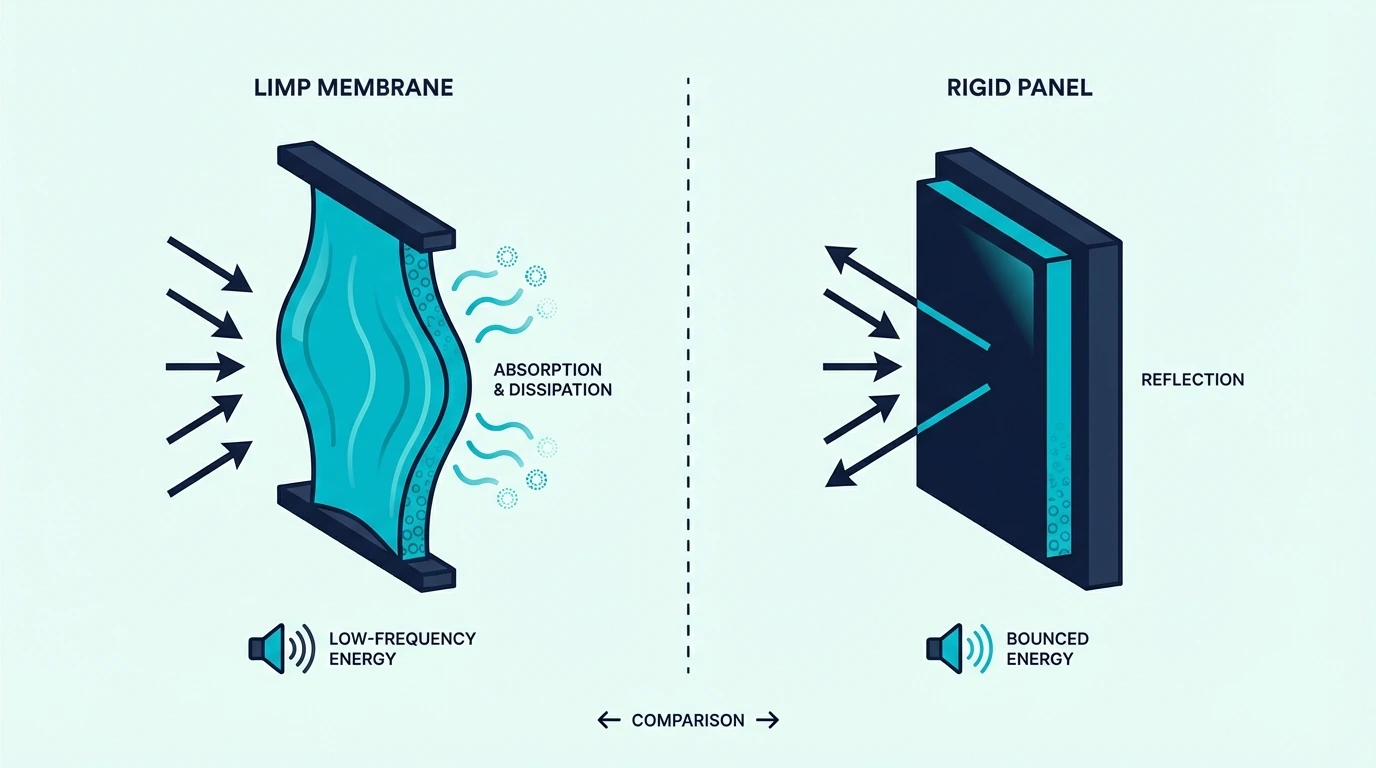
Rigid panel traps use thin plywood (3-6mm) as the membrane — the plywood has its own stiffness, which means it vibrates as a plate with complex modal patterns across its surface. This creates multiple resonant peaks at harmonically related frequencies, giving somewhat broader absorption than a single-frequency design.
Limp mass traps use materials with no inherent stiffness — mass-loaded vinyl (MLV), rubber sheeting, or heavy fabric. A limp mass membrane vibrates purely based on its weight and the air spring behind it, producing a cleaner single resonant peak at the calculated frequency.
For DIY builds, rigid plywood panels are easier to work with and more forgiving of construction imperfections. Limp mass designs require more careful sealing and edge treatment because the flexible material is harder to attach airtight.
If you’re targeting a single known room mode, a limp mass design gives more precise tuning. If you want broader bass absorption across a range, a rigid plywood panel with internal damping is the more practical choice.
How To Build A Tube (Round) Bass Trap
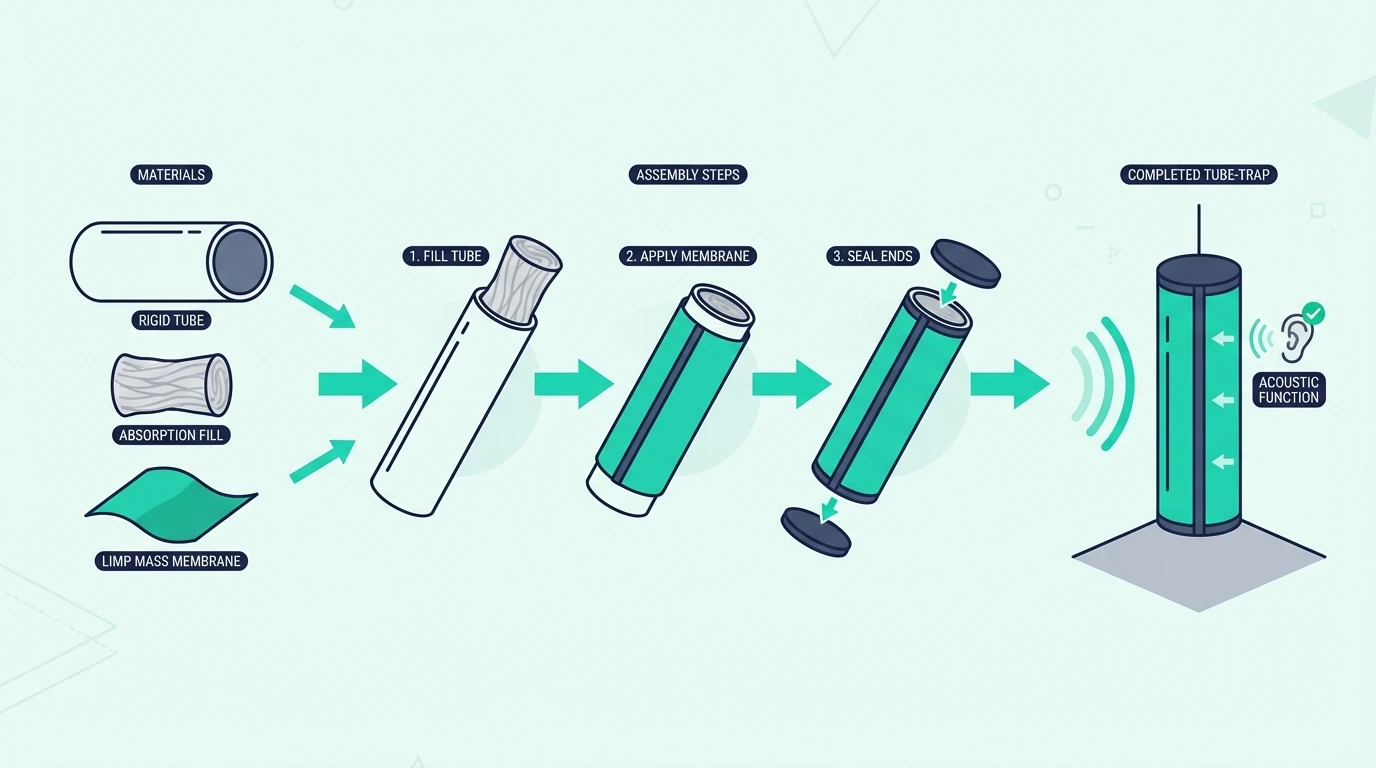
Tube bass traps use a cylindrical form — typically cardboard sonotube or PVC pipe — instead of a rectangular box. The circular cross-section creates a naturally rigid enclosure that resists flexing, and the aesthetic is distinctive compared to rectangular panels.
Materials: A 12-inch diameter sonotube (available at concrete supply stores for $15-25 per 4-foot section), a circular disc of 3-6mm plywood for each end cap, and mineral wool insulation for internal damping.
Build process: Cut the sonotube to your desired length (typically 24-48 inches), then cut two plywood circles to fit the tube diameter. Attach one circle permanently as the back cap with adhesive and screws, fill the interior with mineral wool leaving a 1-2 inch gap from the front opening, and attach the front membrane circle using screws and weatherstrip gasket tape.
The resonant frequency follows the same formula as rectangular traps — the tube’s cross-sectional area and depth determine the air volume, while the membrane mass sets the resonance point. Tubes look impressive standing vertically in corners and work well as corner-mounted treatments.
The Bottom Line
A membrane bass trap targets specific bass frequencies that porous absorbers can’t reach at practical depths — build one from MDF, thin plywood, and mineral wool for $30-50 per trap. Use the resonance formula to calculate dimensions for your room’s worst mode, and ensure completely airtight construction for proper function.
For general bass control across a broad frequency range, standard porous bass traps are simpler and more forgiving to build. The 4 Pack Bass Traps for Ceiling Corner handles broadband absorption without any calculation or sealed construction.
For treating multiple corners efficiently, the 8 Pack Bass Traps Acoustic Foam Corner covers all four vertical corners and pairs well with a tuned membrane trap for targeted problem frequencies.
Frequently Asked Questions
What is the best shape for a bass trap?
Rectangular is the easiest shape to build and performs identically to cylindrical or triangular designs acoustically. Shape has minimal impact on absorption performance — thickness (for porous traps) or tuning accuracy (for membrane traps) matters far more.
Can you build a tuned bass trap without calculations?
Building a tuned membrane trap without calculations defeats the purpose — the entire value of a resonant trap is targeting a specific frequency. Without calculating the resonance point, you’re guessing at the dimensions and may end up with a trap tuned to a frequency that doesn’t need treatment in your room.
How does a membrane trap compare to a Helmholtz trap?
Both are resonant absorbers that target specific frequencies, but they work through different mechanisms. A membrane trap uses panel vibration to absorb energy, while a Helmholtz resonator uses air resonating through a port or slot. Helmholtz traps are harder to build accurately because the port dimensions are critical and small errors cause large tuning shifts.