
Struggling with too many clicks and menus when producing music in Ableton Live? Wish you could control instruments, effects, mixing, and more directly from MIDI keyboards, pads, and faders?
By properly assigning external MIDI controls, you can manipulate Ableton Live’s entire workflow in dynamic and intuitive ways.
Let’s dive in and explore how to utilize MIDI mapping to enhance both your production efficiency and performance capabilities when making music with Ableton Live!
How Do I Assign MIDI Controls in Ableton Live?
The key to MIDI control is making assignments between your hardware controls and Ableton’s parameters.
This links them so moving a knob, fader, etc on your MIDI keyboard or pad controller adjusts settings in real-time.
We’ll explore the specifics of making assignments deeper below.
What are MIDI Controls?
MIDI, which stands for Musical Instrument Digital Interface, is a protocol developed in the early 1980s which allows electronic music instruments, controllers, computers, and other equipment to connect with each other.
MIDI controllers are hardware devices that allow you to control parameters and functions in applications using MIDI data through buttons, knobs, keys, pads, faders and other components.
By enabling MIDI control in a DAW like Ableton Live, you can use a MIDI controller to manipulate software instruments, control mixer levels, trigger clips and scenes, apply effects, control synths and so much more.
This allows for a hands-on, tactile control experience and dynamic performances by using hardware alongside your software.
Preparing Your External MIDI Controller

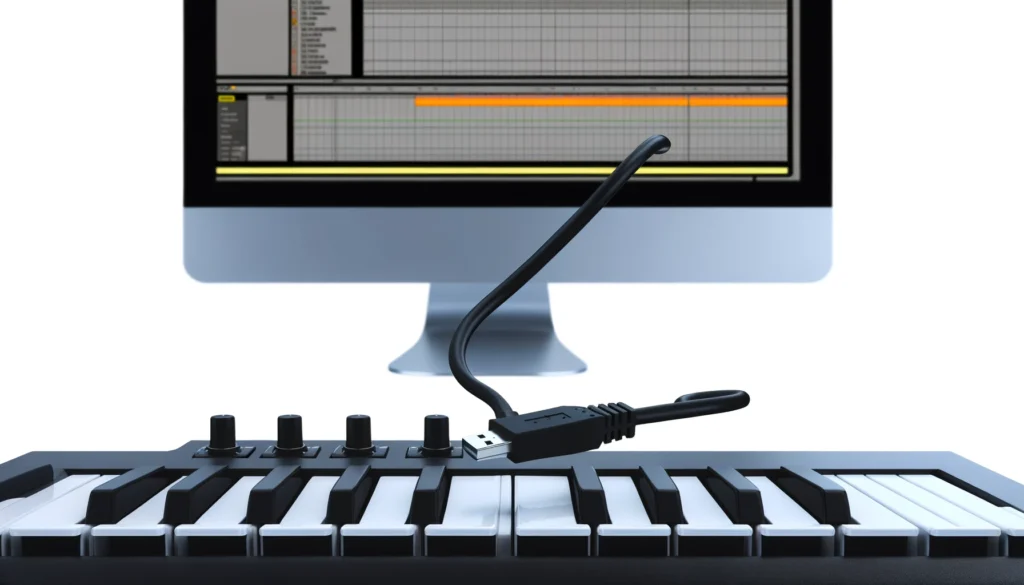
Before you can assign your external MIDI controller in Ableton Live, you need to make sure it is properly connected to your computer and set up.
Connecting your MIDI Controller to your Computer
The first step is connecting your MIDI keyboard, drum pad controller, or other MIDI device to your computer.
Most MIDI controllers connect via USB cable, so simply plug the controller into a USB port on your computer.
Some may use 5-pin MIDI connectors instead, which would require a MIDI interface.
Refer to your hardware’s documentation for specifics on physically connecting it.
Setting up the Controller in Ableton’s Preferences
Next, you need to set up Ableton Live to recognize your Controller.
Open Ableton’s Preferences menu and select the MIDI tab.
Your connected MIDI devices should appear under MIDI Ports.
Enable track for any devices you want to use by clicking the on button next to them.Under Control Surface, you can also choose to enable dedicated scripts for supported controllers for additional functionality.
Choosing a MIDI Channel
Under MIDI Ports, select your controller and you have the option to set a MIDI input and output channel.
It is often best to set your controller to transmit on channel 1 unless you have multiple MIDI devices sending Ableton commands.
Assigning Controls in Ableton
Once your MIDI controller is properly set up, you can assign its various buttons, knobs, faders and pads to control parameters in Ableton Live.
There are a few different approaches to MIDI mapping, depending on what you want to control.
Assigning to Track Parameters
To map a MIDI control to a Device or track parameter:
First, select the track which contains the device or parameters you wish to map.
If it is a MIDI or audio track, you can assign controls to volume, pan, send levels and more.
For an instrument device like a virtual synth, you can map controls to any parameter on that device.
Next, click the triangular drop down menu in the upper right device view window and click MIDI Assign.
Alternatively, you can right click on a parameter and select Assign MIDI Map Range.
In mapping mode, move a knob, fader or other control element on your MIDI keyboard.
The assigned parameter in Ableton will become highlighted.
Then, while moving the hardware control, click on the software parameter you want to map it to in Live.
The two are now linked.
By default, the parameter assignment uses Absolute mode.
So control values from the MIDI controller match the value range for device parameters in Live directly.
You can change it to Relative mode in Mapping mode’s upper left dropdown instead, for a scaled 0-127 range instead.
Repeat this for other controls/parameters you wish to assign.
When done, exit MIDI Mapping mode.
Assigning to Device Parameters
To assign controls to parameters for an Instrument Device like a virtual synthesizer:
Add the instrument device such as Operator or Simpler to a track.
Open the device view so you can see all device parameters.
Click the upper right drop-down menu for the Device View and click Enter MIDI Map Mode.
For each MIDI control you want to map, move that control, then click on the parameter in the software instrument you want to assign it to.
These can include things like oscillator/filter/envelope controls, effects settings, LFOs and so on.
Map controls to the most important synth parameters for easy sound editing.
When finished mapping, exit MIDI Map Mode.
Now when you adjust your hardware MIDI controls, it will change values for the instrument device in realtime.
This allows you to shape your sound on-the-fly.
Setting Min/Max Ranges
In MIDI Map Mode, right click on an assigned parameter.
Here, you can set the minimum and maximum range for a mapping.
This lets you scale a hardware controller’s range to suit exactly what’s needed for the software parameter.
For example, by default a knob may send MIDI values from 0 to 127.
But for controlling a Filter Cutoff that only needs 30Hz to 10KHz, you would set Min to 30 and Max to 10000.
Now that knob will adjust the Filter Cutoff over exactly the needed frequency range.
Unlinking Assignments
To remove a MIDI mapping:
Re-enter MIDI Map Mode.
Right click on the mapped parameter in Live and select Unmap from the context menu.
This clears the assignment.
You can also clear all MIDI mappings by clicking the arrow icon at the left of the MIDI Map Mode box rather than manually unmapping each one.
Additional Assignment Options
Here are some additional tips for MIDI mapping in Ableton Live:
Enable Takeover Mode by clicking its button in the Mapping Mode window.
This makes it so hardware controls only affect a parameter when moved past the current value.
This prevents parameter jumps when moving controls.
You can right click on parameters to show additional options like mapping to Next/Previous parameters for sequencer style control of multiple chained parameters.
More advanced users can create custom MIDI effect racks consisting of multiple chains of instruments and effects which can be controlled as a unit from MIDI controllers.
Getting the Most Out of MIDI Control
MIDI opens up vast creative possibilities when producing music.
Here are some tips for ways to utilize mappings along with things to keep in mind when controlling Live sets via MIDI.
Use extensive mappings to manipulate instruments, effects, mixer and transport functions without ever needing to touch your computer while performing.
This allows for dynamic DJ sets or instrumental improvisations using Live.
Map parameters and functions to MIDI controls oriented for easy performance use – like setting cue points on trigger pads, assigning filters to knobs, and activating clips/scenes to fader strips or buttons.
While extremely useful, MIDI mappings do have some limitations.
Bear in mind things like no access to context menus or editing via MIDI.
So it’s best used for manipulation rather than intricate editing.
Try using companion mobile apps for MIDI controllers to supplement their capabilities by programming control layouts customized for your needs.
Integrate these with Live for expanded dynamic software/hardware control.
Advanced users should look into Max4Live devices which can enable intricate custom MIDI control systems, building unique interfaces tailored specifically for your musical requirements.
By taking some time to properly assign your MIDI controls to key parameters, you can greatly improve both your production workflow with Ableton Live as well as open up new doors for spontaneous creative expression and dynamic software manipulation while performing.
So utilize all that external gear with customized mappings!
Conclusion
By taking time to properly map external MIDI controls to key parameters in Ableton Live, you enable deeper creative possibilities and optimized workflow.
Follow the steps outlined here to unlock Ableton’s full potential with customized MIDI mapping!