How to Connect MIDI Keyboard to FL Studio — Step-by-Step Setup That Works Every Time
How to connect MIDI keyboard to FL Studio is one of the first things every new FL Studio producer needs to figure out, but the process trips people up because FL Studio handles MIDI input differently than most DAWs — and the default settings won’t detect your controller automatically.
The mistake most beginners make is plugging in their keyboard and expecting FL Studio to work like GarageBand where everything auto-connects. FL Studio requires you to manually enable your MIDI device in the settings before it responds to any input, and skipping that step leads to the frustrating silence that makes people think their controller is broken.
This guide walks through the exact connection process for USB MIDI keyboards in FL Studio, from first plug-in to playing your first note. You will also learn how to set up MIDI learn for knobs and faders, fix common connection problems, and configure controllers with native FL Studio integration.
Below you will find the step-by-step setup process, followed by troubleshooting for the most common connection failures and a guide to getting the most out of your specific controller type in FL Studio.
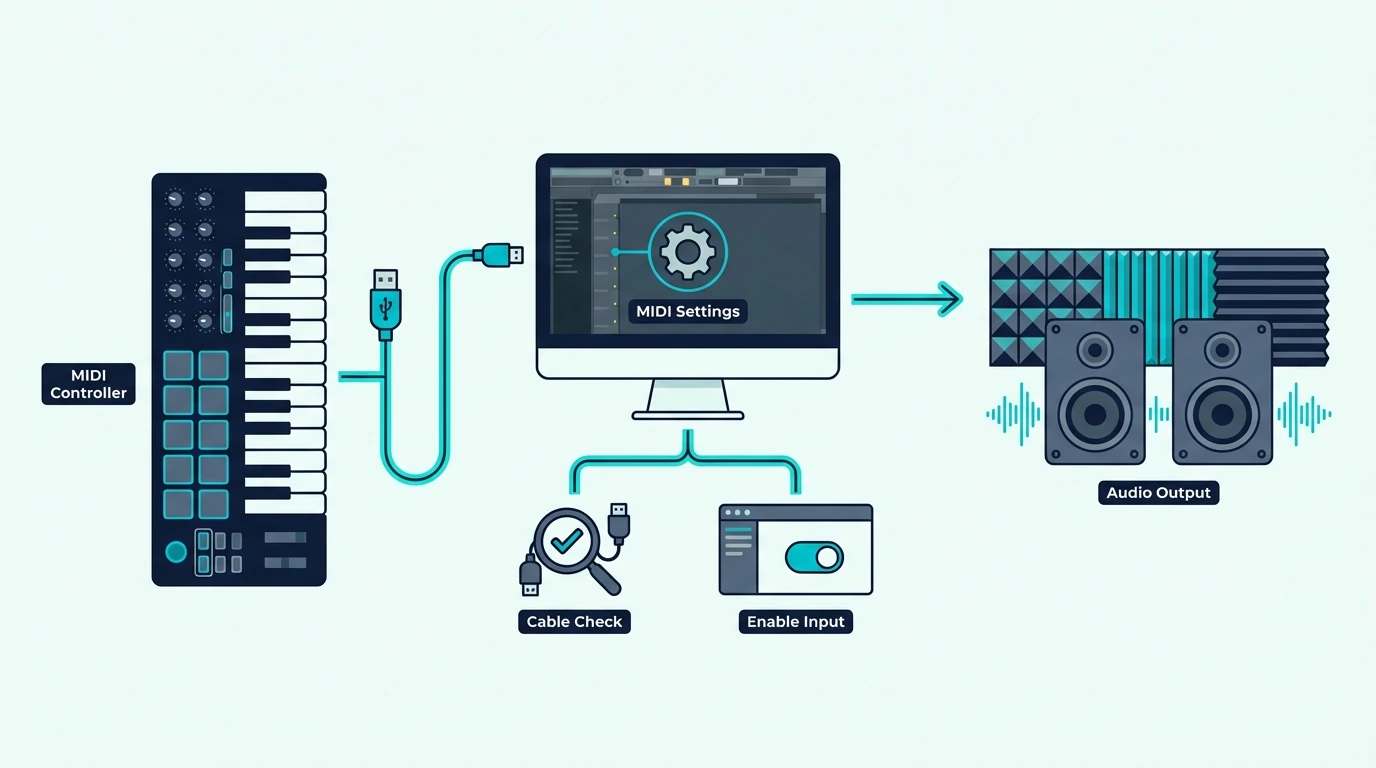
To connect a MIDI keyboard to FL Studio: plug in via USB, open Options then MIDI Settings, find your controller in the input list, click Enable, and close settings. Select any channel in the channel rack and press a key — you should hear sound immediately. If not, check that the controller is powered and the correct MIDI port is enabled.
How Do You Connect a MIDI Keyboard to FL Studio Step by Step
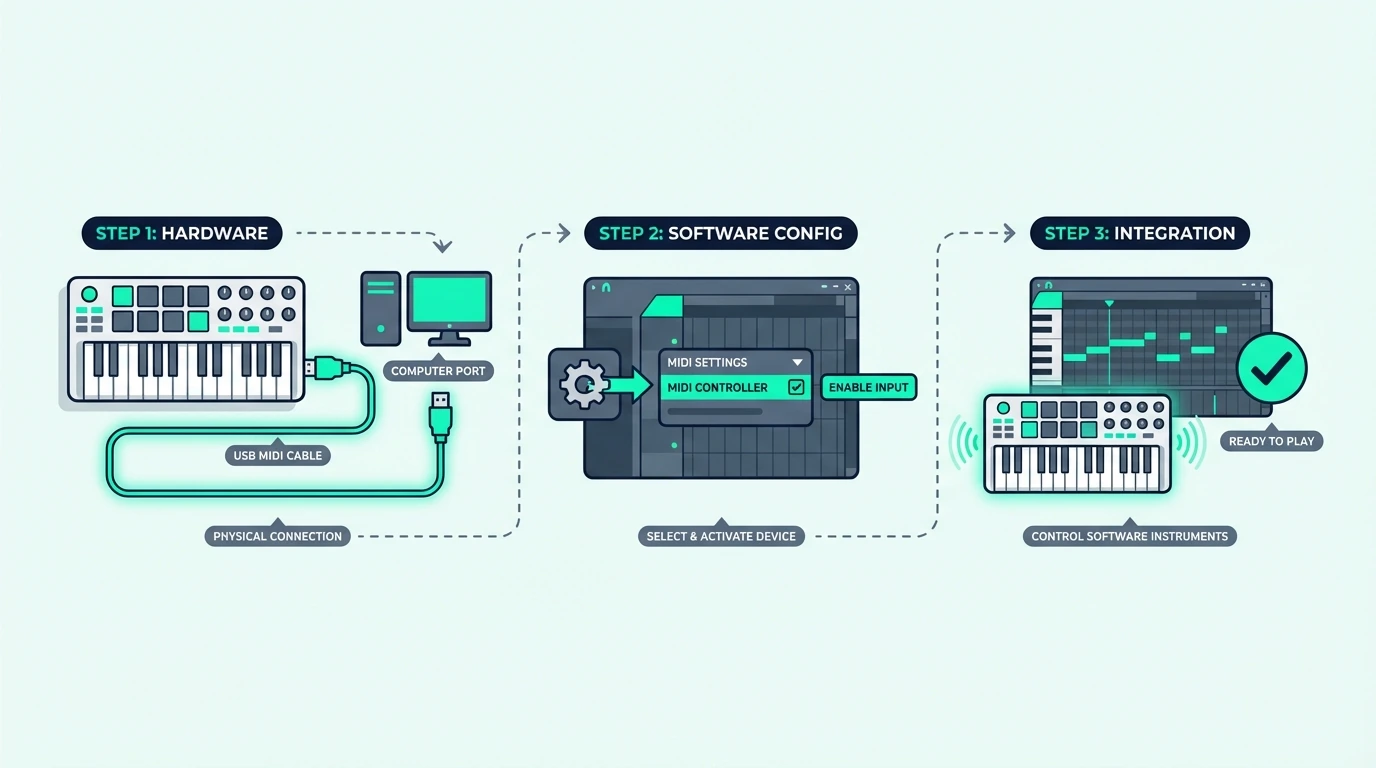
The connection process takes under two minutes when you follow the correct sequence. Here is the exact order that works with every USB MIDI keyboard on both Windows and Mac versions of FL Studio.
Step 1 — Plug In Your MIDI Keyboard
Connect your MIDI keyboard to your computer via USB before opening FL Studio. Most modern controllers are class-compliant, meaning they require no driver installation — the operating system recognizes them automatically as MIDI devices.
If your controller shipped before 2015 or uses a proprietary connection, check the manufacturer’s website for updated drivers. Install them before proceeding.
Step 2 — Open FL Studio MIDI Settings
Launch FL Studio and navigate to Options in the top menu bar, then click MIDI Settings. The MIDI Settings panel shows two sections: Input and Output.
Your MIDI keyboard should appear in the Input section. If you see multiple entries (some controllers create both a MIDI port and a DAW control port), you may need to enable both.
Step 3 — Enable Your Controller
Click on your controller’s name in the Input list. The Enable switch activates that MIDI port for input. Some controllers show a green indicator when active.
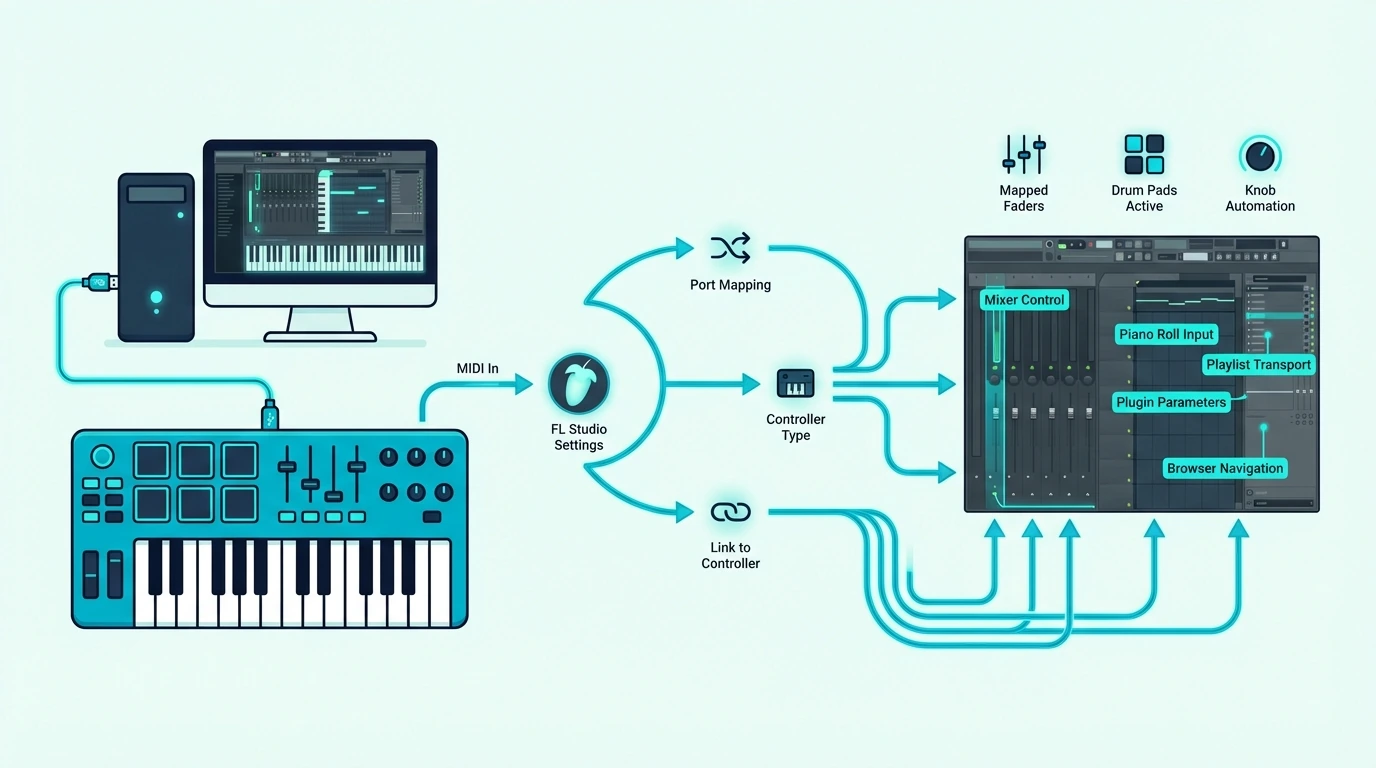
For controllers with native FL Studio support like the Novation FLkey Mini, select the controller script from the dropdown menu next to the port entry. This loads the native mapping that connects pads to the channel rack and knobs to the mixer automatically.
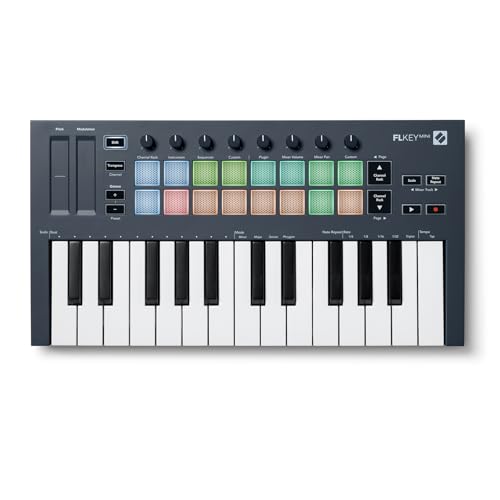
Novation FLkey Mini
Step 4 — Test The Connection
Close the MIDI Settings window. Click on any channel in the channel rack (a default kick, snare, or synth channel) to select it. Press a key on your MIDI keyboard.
If you hear sound, the connection is complete. FL Studio routes MIDI input to whichever channel is currently selected in the channel rack. Clicking a different channel switches which instrument your keyboard controls.
Step 5 — Configure Additional Controls
If your controller has knobs, faders, or pads beyond the keys, those need separate configuration through MIDI learn. Right-click any knob or fader in FL Studio, select “Link to controller,” then move the corresponding control on your hardware. FL Studio captures the MIDI CC assignment and saves it.
The Akai Professional MPK Mini MK3 has 8 knobs that map to FL Studio parameters through this MIDI learn process. Each knob takes about 30 seconds to configure, and the mappings save with your FL Studio template.
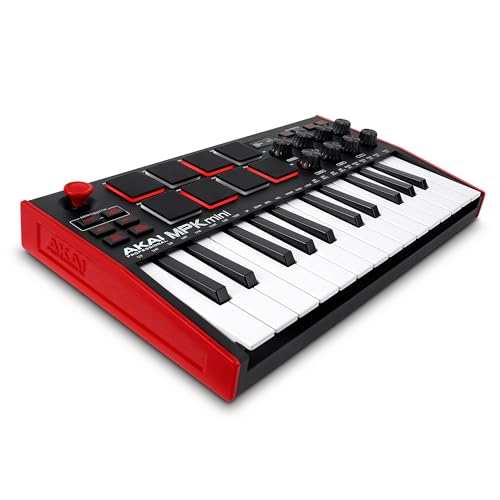
Akai Professional MPK Mini MK3
How Do You Fix MIDI Connection Problems in FL Studio
When the basic setup does not work, one of these four issues is almost always the cause. Work through them in order before assuming your hardware is defective.
Controller Not Appearing In MIDI Settings
If your MIDI keyboard does not show up in the FL Studio MIDI Settings input list, the operating system has not recognized the device. Close FL Studio, unplug the USB cable, wait five seconds, plug it back in, and reopen FL Studio.
On Windows, check Device Manager (right-click Start, Device Manager) and look for your controller under “Sound, video and game controllers” or “USB controllers.” If it shows an error icon, reinstall the driver from the manufacturer’s website.
On Mac, open Audio MIDI Setup (Applications, Utilities) and verify the controller appears in the MIDI Studio window. If it does not appear there, FL Studio cannot see it either.
Keys Play But No Sound
If your keyboard sends MIDI data (you can see the MIDI activity indicator flash in FL Studio’s toolbar) but no sound comes out, check that a channel is selected in the channel rack. FL Studio requires an active channel selection — if nothing is highlighted, MIDI input has nowhere to go.
Also verify that the channel contains a sound-generating plugin. Empty channels or audio-only channels do not respond to MIDI keyboard input.
Latency And Delayed Response
If there is a noticeable delay between pressing a key and hearing sound, the issue is audio buffer size, not MIDI connection. Go to Options, Audio Settings, and reduce the buffer length. A setting of 256 or 512 samples works for most systems.
ASIO drivers provide the lowest latency on Windows. FL Studio includes FL ASIO as a default, but third-party ASIO drivers (like ASIO4ALL for systems without a dedicated audio interface) often perform better. The M-AUDIO Keystation 49 MK3 and similar controllers do not add latency — the delay comes entirely from your audio driver configuration.
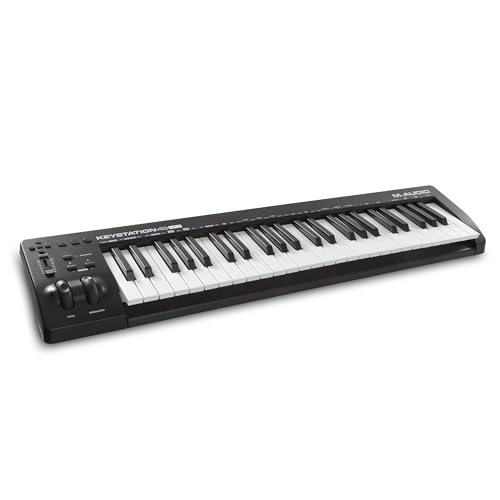
M-AUDIO Keystation 49 MK3
Multiple Controllers Or Ports Conflicting
If you have multiple MIDI devices connected, FL Studio may route input from the wrong port. In MIDI Settings, assign each controller to a specific MIDI port number (1-16) rather than leaving them all on the default. This prevents one controller’s data from interfering with another.
Get Studio Tips Weekly
Join 5,000+ creators getting acoustic treatment advice every week.
No spam. Unsubscribe anytime.How Do You Maximize Your MIDI Controller in FL Studio
Once basic MIDI input works, these FL Studio-specific features unlock deeper integration with your controller.
Channel Rack Navigation
FL Studio lets you assign MIDI notes to specific channel rack slots. In the channel rack, right-click any channel and select “Assign to keyboard controller.” This maps that channel’s sound to a specific key range on your keyboard.
Split your keyboard into zones — bass sounds on the left octave, lead sounds on the right — for real-time multi-instrument performance without switching channels.
FPC For Finger Drumming
FL Studio’s FPC plugin creates a virtual pad controller that maps to your keyboard’s pads or keys. Load FPC on a mixer channel, drag drum samples onto the pad grid, and trigger them from your MIDI controller.
The Novation FLkey series maps pads to FPC automatically through native integration. Other controllers need manual MIDI mapping in FPC’s settings, which takes about five minutes for a full 16-pad layout.
Recording MIDI Performances
Press the record button in FL Studio’s transport bar (or press R), then play your MIDI keyboard. FL Studio captures your performance as a MIDI pattern on the selected channel. The pattern appears in the channel rack ready for editing, quantization, and arrangement.
Right-click the recorded pattern and select “Piano roll” to edit individual notes, adjust timing, change velocities, and add automation. FL Studio’s piano roll is the most powerful MIDI editor in any DAW — ghost notes, slide notes, and per-note automation make complex programming faster than any competitor.
Saving Your Template
After configuring MIDI settings, channel routing, and MIDI learn assignments, save the project as a template (File, Save as template). Every new FL Studio project loads with your MIDI configuration pre-applied — zero setup time per session.
This template approach means you configure your MIDI controller once and it works identically every time you open FL Studio.
The Bottom Line
Connecting a MIDI keyboard to FL Studio takes under two minutes: plug in via USB, enable in Options then MIDI Settings, select a channel, and play. The Novation FLkey series adds native integration that maps pads and knobs to the channel rack and mixer automatically. Generic controllers like the Akai MPK Mini MK3 work perfectly through MIDI learn with a few minutes of one-time setup.
If your controller is not detected, check USB connections and drivers first. If keys play but no sound comes out, verify a channel is selected in the channel rack. If latency is noticeable, reduce your audio buffer size in Audio Settings.
Frequently Asked Questions
Why is my MIDI keyboard not working in FL Studio?
The most common cause is not enabling the controller in MIDI Settings. Open Options, MIDI Settings, and click Enable on your controller’s input entry. If the controller does not appear in the list, unplug it, replug it, and restart FL Studio.
Do I need a specific MIDI keyboard for FL Studio?
No — any USB MIDI keyboard works with FL Studio through the standard MIDI Settings configuration. The Novation FLkey series offers native integration that eliminates manual setup, but it is a convenience feature rather than a requirement.
How do I reduce latency when playing MIDI in FL Studio?
Go to Options, Audio Settings, and reduce the buffer length to 256 or 512 samples. On Windows, switch to an ASIO audio driver (FL ASIO or ASIO4ALL) for the lowest latency. The MIDI keyboard itself adds zero latency — the delay comes from audio processing in your computer.
Can I use multiple MIDI keyboards in FL Studio at the same time?
Yes — FL Studio supports multiple MIDI input devices simultaneously. In MIDI Settings, assign each controller to a different MIDI port number. FL Studio treats each port as an independent input source, so you can play keys on one controller while triggering pads on another.