Best MIDI Foot Controller — Hands-Free MIDI Control for Live Rigs
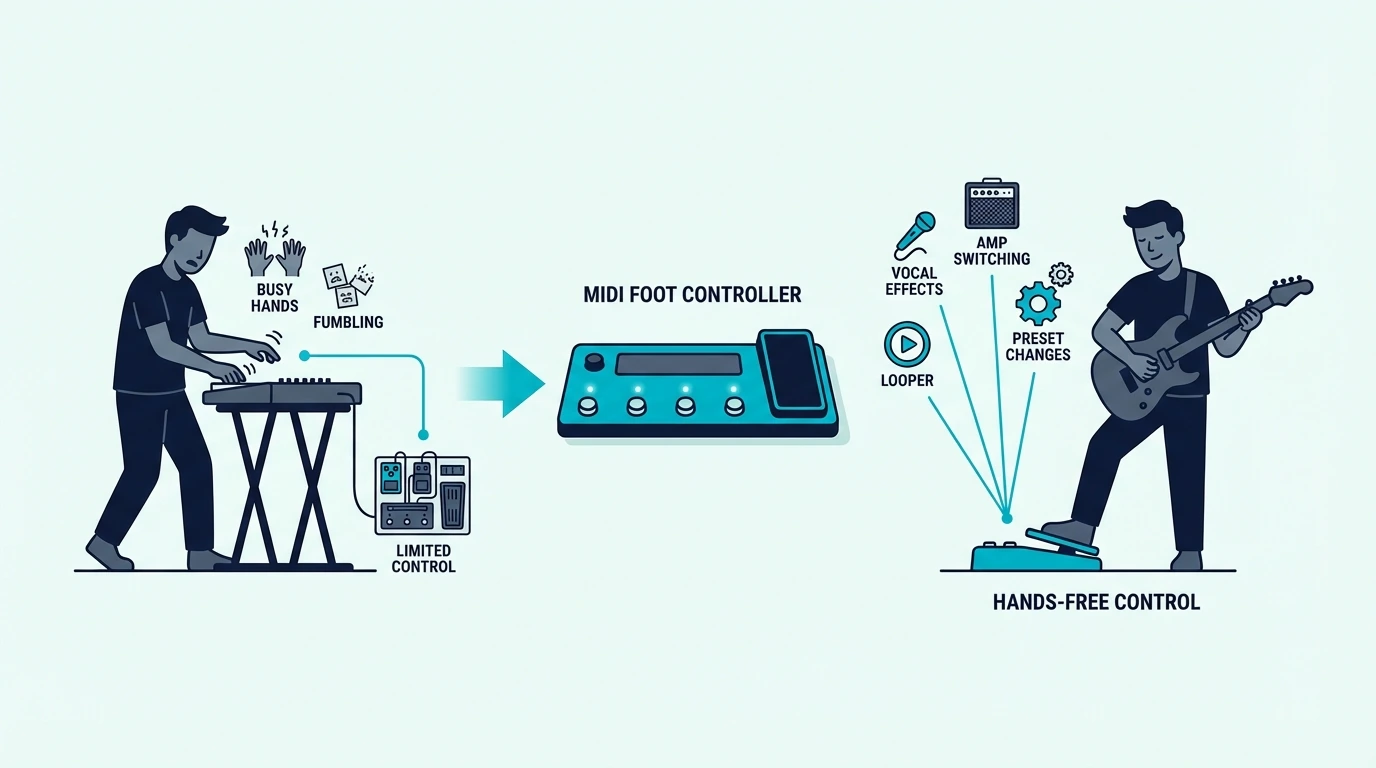
Best MIDI foot controller is the difference between a clean preset change and an awkward onstage scramble, but the right pick depends less on brand and more on how many commands you actually need underfoot.
The frustration is that many players buy the wrong kind of foot controller for their rig. Too few switches, the wrong connection format, or no expression support is what causes missed patch changes, clumsy scene jumps, and extra tap-dancing during a set.
Match the controller to your setup and the payoff is immediate: faster preset changes, better transport control, and reliable hands-free command over software or hardware without breaking performance flow.
Below you will find our top picks sorted by rig type, followed by a guide to choosing the right switch count, connectivity, and control style for your setup.
The best MIDI foot controller for most live rigs is the Behringer FCB1010 because it gives you 10 switches and 2 built-in expression pedals at a very fair price. If you want stronger DAW integration and more flexible routing, the Nektar Pacer is the better premium choice. Compact setups should look at the PaintAudio MIDI Captain NANO 4 or the BT MIDI Foot Controller Wireless when full-size pedalboards feel excessive.
What A MIDI Foot Controller Actually Does
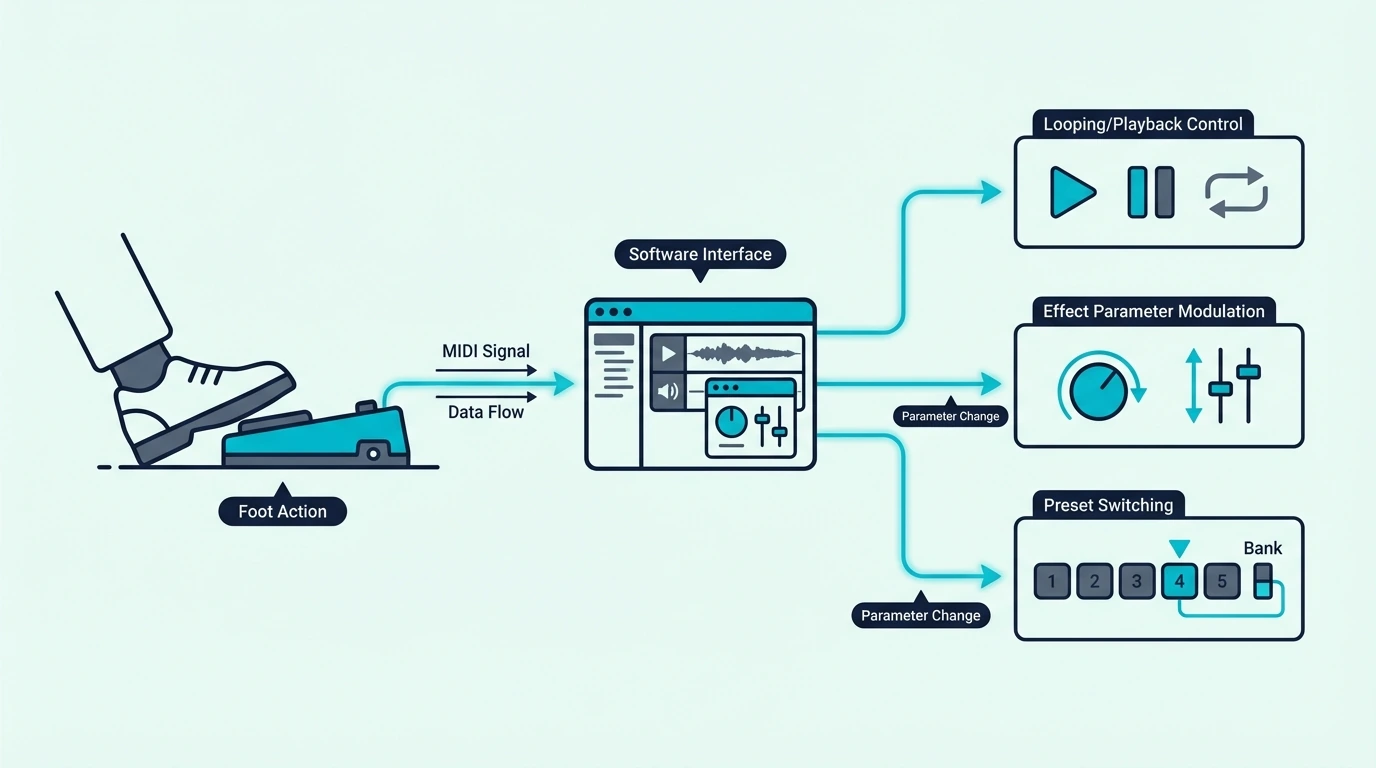
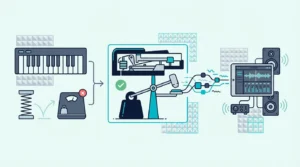
A MIDI foot controller is a floor unit with switches, pedals, or both that sends MIDI messages when you press them with your foot. The messages travel to your DAW, hardware synth, guitar processor, or lighting rig — triggering actions without your hands leaving the instrument.
Program Change Messages For Preset Switching
The most common foot controller function is sending MIDI Program Change messages. Each foot switch sends a different program number, and the receiving device (guitar processor, synth, DAW) loads the corresponding preset instantly.
A guitarist with 8 foot switches can jump between 8 different amp and effects presets during a live set without bending down to a pedalboard or touching a screen. That instant switching is what separates a smooth live performance from one interrupted by gear fumbling between songs.
Expression Pedals For Real-Time Control
Expression pedals (the rocking type, like a wah pedal) send continuous MIDI CC data as you rock them forward and back. Map an expression pedal to volume for smooth fade-ins and fade-outs. Map it to a synth filter for foot-controlled sweeps. Map it to reverb depth for ambient swells during a performance.
Units like the Behringer FCB1010 build the expression pedals in, while the Nektar Pacer lets you add external expression pedals only if your rig needs them.
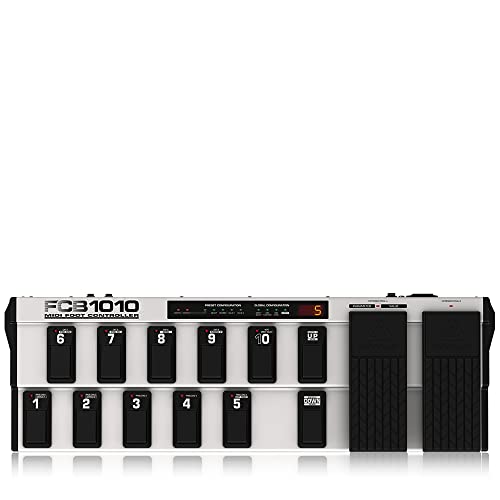
Behringer FCB1010
Compact Four-Switch Units For Simple Setups
Not every performer needs a full 10-switch board. Many players only need patch up, patch down, start/stop, and one utility control like tap tempo or loop toggle.
The PaintAudio MIDI Captain NANO 4 and the BT MIDI Foot Controller Wireless cover that smaller job far better than a full pedalboard.
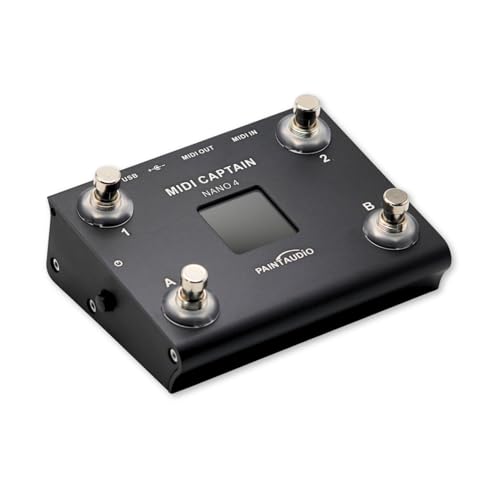
PaintAudio MIDI Captain NANO 4
What Are the Best MIDI Foot Controllers

Here are 6 dedicated MIDI foot controllers sorted by how much switching power and connectivity you need on stage.
The Behringer FCB1010 wins Best Overall because it solves the biggest live-performance problem in one box: lots of switches plus continuous control. Ten switches and two built-in expression pedals cover most live rigs, rack processors, and software setups without needing extra accessories.
The Nektar Pacer is the best choice for DAW-heavy setups because it goes far beyond simple preset changes. USB MIDI, standard MIDI, relay switching, and Nektar’s DAW templates make it more adaptable than most pedalboards for hybrid software-and-hardware rigs, especially if you run Ableton or Logic Pro on stage.
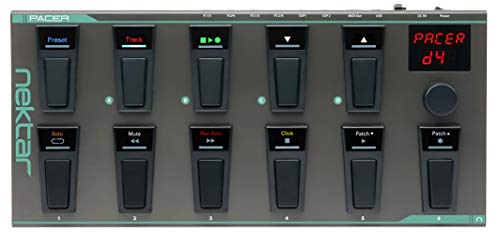
Nektar Pacer
The MeloAudio MIDI Commander is the best value pick if you want a real multi-switch controller without paying premium money. It is especially attractive for players who need a compact floor unit with both USB and MIDI support.
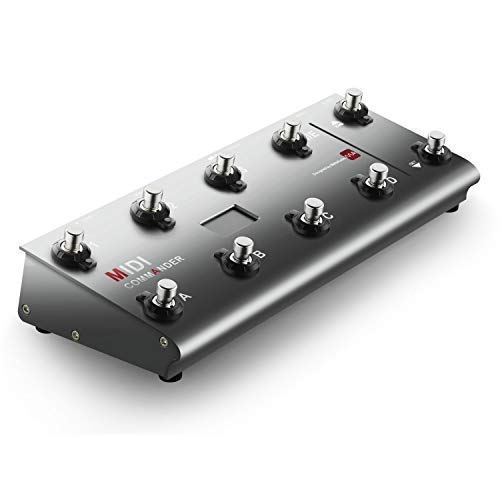
MeloAudio MIDI Commander
The Paint Audio MIDI Captain is the best hybrid-rig option for players who jump between software instruments, hardware processors, and layered commands. It is more programmable than entry-level boards and better suited to complex patch-change routines.
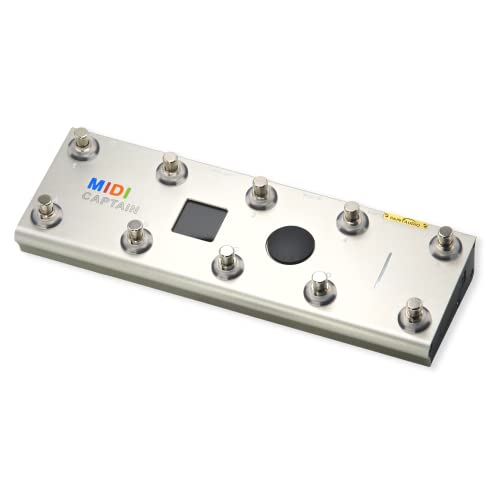
Paint Audio MIDI Captain
The PaintAudio MIDI Captain NANO 4 is the compact pick for minimal rigs. It covers the most common live tasks — program changes, transport, loop control, and utility commands — without forcing you to haul a full-size pedalboard.
And the BT MIDI Foot Controller Wireless is the cheapest good entry point for musicians who want hands-free MIDI without committing to a large pedalboard. It is best for lightweight rigs, mobile setups, and basic app or DAW control, especially for iPad music setups.
BT MIDI Foot Controller Wireless
Get Studio Tips Weekly
Join 5,000+ creators getting acoustic treatment advice every week.
No spam. Unsubscribe anytime.Who Needs A MIDI Foot Controller
Foot controllers serve specific performer types. Understanding whether your workflow benefits from foot control prevents you from buying hardware that sits unused on the floor.
Guitarists And Bass Players
Guitarists who use amp modeling software (Guitar Rig, Helix Native, BIAS FX) or hardware processors need foot switches to change presets without stopping mid-song. A MIDI foot controller with 4 to 12 switches handles patch changes, effect toggles, and bank navigation during live performance.
Bass players use foot controllers for the same reason — switching between clean, overdriven, and effects-heavy tones during a set requires instant hands-free access that only foot switches provide.
Live Performers With Patch Changes
Live performers running multiple presets, scenes, or backing-track cues need to change sounds between sections without bending over to a laptop or rack unit. A MIDI foot controller sends program change or control change messages instantly, so the next sound or cue is ready the moment you need it.
Units like the Nektar Pacer or Paint Audio MIDI Captain give you that hands-and-feet control without relying on a trackpad mid-song.
Worship Musicians And Theater Performers
Worship teams and theater pit musicians frequently need to change sounds between sections of a song or between songs on a setlist. A foot controller with a display showing the current patch name eliminates the guesswork of remembering which switch loads which sound.
That kind of cue-heavy workflow is exactly where boards like the Nektar Pacer and Behringer FCB1010 earn their keep.
Studio Producers Who Record Live
Producers who record their own performances benefit from hands-free transport control. Pressing a foot switch to start recording, punch in, or trigger a click track keeps your focus on the take instead of pulling you back to the mouse, and it pairs especially well with flexible MIDI software workflows.
Even a compact unit like the PaintAudio MIDI Captain NANO 4 or the BT MIDI Foot Controller Wireless can make recording smoother by taking basic transport actions off the mouse and screen.
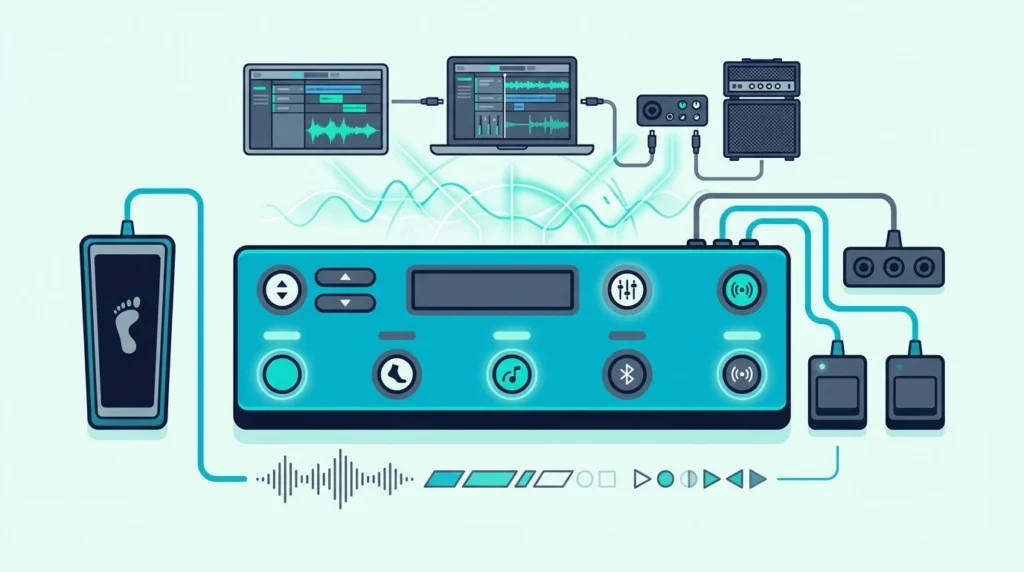
Should You Choose USB or 5-Pin MIDI for a Foot Controller

Foot controllers connect through two main interfaces, and the right choice depends on what you are controlling.
USB MIDI Foot Controllers
USB foot controllers connect directly to your computer and appear as MIDI input devices in your DAW. They work with any software that accepts MIDI — Ableton, Logic, FL Studio, MainStage, and every other major platform.
The advantage is simplicity. One USB cable handles both data and power. Your DAW sees the foot controller as a separate MIDI device from the rest of your rig, so everything can stay active simultaneously without routing conflicts.
5-Pin MIDI Foot Controllers
Traditional 5-pin DIN foot controllers connect to hardware devices with MIDI input jacks — synth modules, guitar processors, lighting controllers, and rack-mounted effects. They do not connect directly to a computer without a USB-to-MIDI interface.
The advantage is hardware compatibility. If your live rig includes standalone hardware that predates USB, a 5-pin foot controller communicates directly without a computer in the signal chain. That reliability matters on stage where computer crashes would end a performance.
Hybrid Units
Some foot controllers include both USB and 5-pin outputs, letting you control software and hardware simultaneously. This hybrid approach covers every scenario — USB to your laptop for MainStage patches and 5-pin to your guitar processor for amp presets.
The Paint Audio MIDI Captain and the MeloAudio MIDI Commander are strong examples because they are built to move between computer-based and hardware-based control without changing your whole rig.
Choosing The Right Number Of Switches
Foot controllers range from single-switch sustain pedals to 12-switch units with expression pedals and display screens. The right size depends on how many presets or functions you need instant access to during a performance.
Four switches handle basic preset changes for most live musicians, which is exactly why compact units like the PaintAudio MIDI Captain NANO 4 work so well for simple rigs. Ten-switch boards like the Behringer FCB1010 and Nektar Pacer make more sense once each song in your set needs multiple dedicated commands.
Beginners should start with a compact four-switch unit and upgrade to a larger board only when live performance demands more dedicated commands. Software shortcuts can cover transport at first, but regular live use is where a real foot controller starts paying for itself.
The Bottom Line
MIDI foot controllers solve one specific problem: hands-free control during live performance, cue changes, and transport commands. Guitarists need them for preset switching. Live performers use them for scene changes between songs. Studio producers benefit from them for foot-operated recording control.
The Behringer FCB1010 is the best MIDI foot controller for most players because it gives you enough switches and expression control to handle serious live work at a reasonable price. If your rig is DAW-heavy, buy the Nektar Pacer. If you only need a few commands in a compact format, the PaintAudio MIDI Captain NANO 4 keeps things simple.
Start with the number of switches your set actually needs, not the biggest board you can afford. A compact four-switch unit solves plenty of real-world setups, while full pedalboards only make sense when the extra commands will genuinely get used.
Frequently Asked Questions
What is a MIDI foot controller used for?
A MIDI foot controller sends program change and control change messages via foot switches, freeing your hands for playing. Guitarists use them to switch amp presets. Live performers use them to change scenes or patches between songs. Producers use them for hands-free DAW transport control during recording.
Do I need a MIDI foot controller for studio production?
Not strictly — most studio producers control their DAW with mouse clicks and on-screen shortcuts. A foot controller adds value if you record your own performances and want hands-free transport control while staying focused on the take.
Can I use a sustain pedal as a MIDI foot controller?
A sustain pedal sends only one MIDI message (usually CC 64 on/off) through a pedal input. A dedicated MIDI foot controller sends multiple program change and CC messages through its own USB or MIDI connection. They serve different purposes — sustain pedals hold notes, while foot controllers switch presets and trigger actions.
What is the difference between a MIDI foot controller and a MIDI pedalboard?
The terms are often used interchangeably. “Foot controller” typically refers to a unit with switches that send MIDI messages. “Pedalboard” can mean the same thing or refer to a guitar effects pedalboard that may or may not have MIDI capability. Check whether the unit sends MIDI data — some guitar pedalboards are analog-only with no MIDI output.