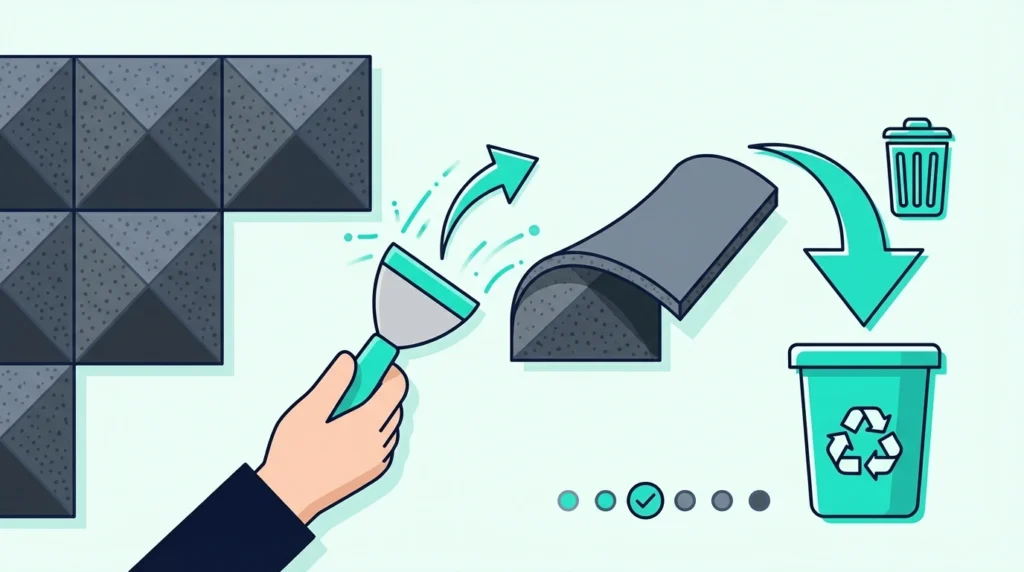
How to Remove Acoustic Foam From Walls Without Damaging Paint
If you’re trying to remove acoustic foam from walls, you can do it fast — but that’s how you end up peeling paint.
The problem isn’t the foam.
It’s the adhesive behind it (especially spray glue) and the first hard pull that takes drywall paper with it.
Done right, you can get panels off cleanly, soften residue instead of scraping, and keep repairs to small touch-ups.
Start by identifying how the foam was mounted, then follow the matching method below.
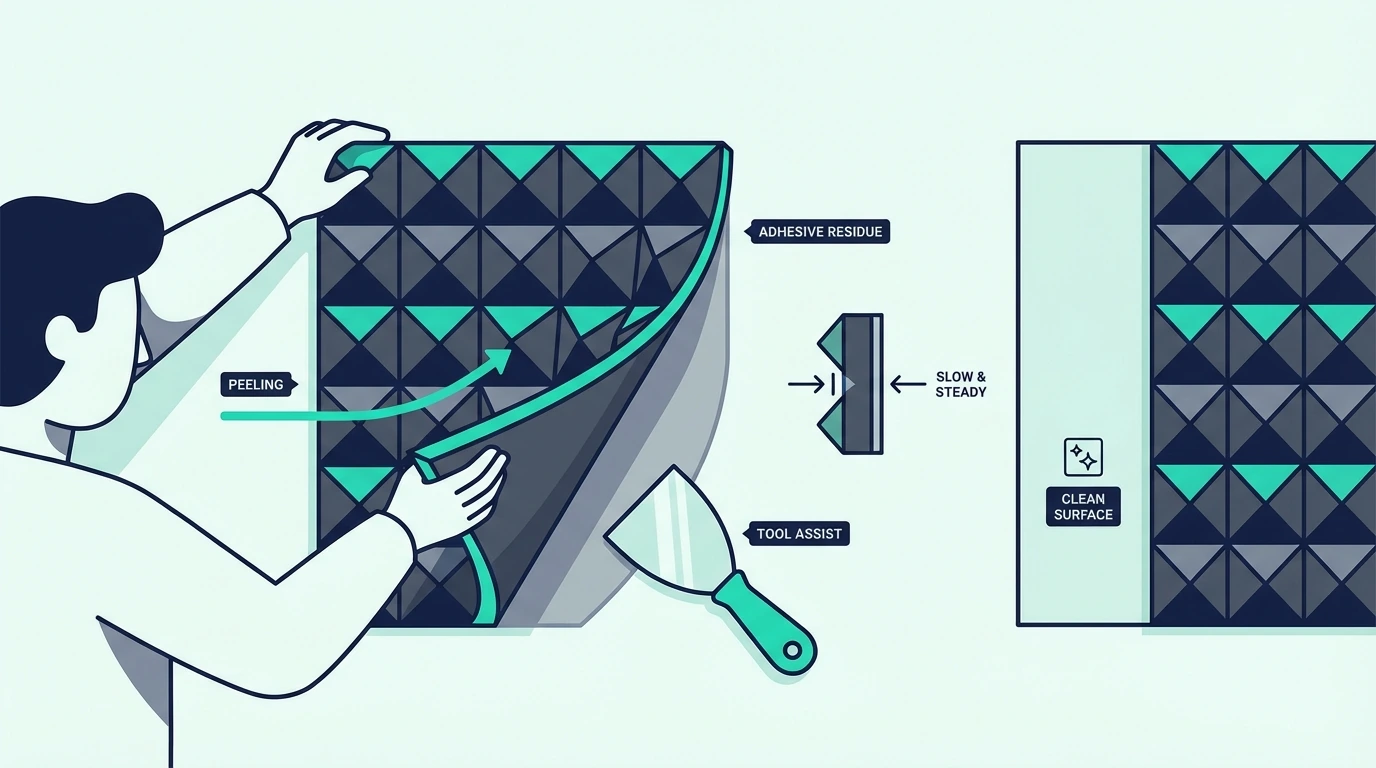
Heat + slow peeling is the default approach for most installs.
Warm the adhesive, then peel the foam slowly from a corner while keeping tension low and steady. Clean the leftover residue with an adhesive remover and a plastic scraper, then spot-prime and touch up paint if you expose drywall.
How Do You Remove Acoustic Foam From Walls?
The removal method depends on how the foam was attached. Different adhesives fail in different ways, and the “wrong” approach is what usually causes paint to tear or pull off drywall paper.
The Short Answer: Heat + Slow Peeling
Most acoustic foam removal follows the same basic pattern. Warm the bond, then peel slowly from a corner.
Heat matters because cold adhesive is brittle and grabs harder. Warming it makes the glue more pliable, so the foam releases with less force.
If you take one thing from this page, it’s this: don’t rush. Fast pulls rip paint even if your technique is “correct.”
Will Removing Foam Damage Your Walls?
It depends on the adhesive. Command strips and some tapes come off clean, while spray adhesive often takes at least some paint with it.
Wall texture and paint quality matter too. Flat paint on fresh drywall is easier to damage than a well-cured eggshell or semi-gloss finish.
Age matters just as much as product choice. Older installs bond harder than foam that has only been up a few weeks, so “quick fixes” are more likely to rip paint.
If spray adhesive was used, plan on minor touch-ups even if you are careful. If the foam has been up for years, you may need primer and a small repaint instead of just spot dabs.
If you’re debating whether the foam is even worth saving, skim can acoustic foam get old? before you spend an afternoon scraping.
How Do Wall Types Change the Risk?
Drywall with flat or matte paint is the easiest to scar because the paint molecules don’t form a tight, plasticized bond. When you pull foam off fast, the adhesive often grabs the paint and the top layer of paper, leading to a “fuzzy” scar that is hard to hide.
Semi-gloss and satin finishes are a bit tougher and more resistant to solvents, but they still peel if you shock the bond. In these cases, the paint often comes off in large, crisp flakes rather than tearing the paper underneath.
Plaster walls are usually more forgiving structurally because they are much denser than drywall cores. However, old paint on top of plaster can still delaminate in large sheets if moisture or age has already weakened the bond.
Concrete and masonry surfaces rarely peel or tear, but they present a different challenge. Adhesive residue can be much harder to dissolve and scrape out of the tiny pits and textures found in concrete.
When to Accept Residue vs. Risking Damage
If you start to see paper fibers or raw gypsum peek through, treat that as a hard stop. From that point on you are in repair mode, not “just cleaning up,” and every extra pull without primer will make the patch larger.
Sometimes it is smarter to leave a thin, tack-free layer of residue rather than chasing perfection. If the residue is flat and doesn’t smell, you can often prime right over it before repainting the section.
If you know the wall will need repainting anyway, focus on keeping the damage in one contained zone. That mindset makes it easier to skim and roll a small section instead of chasing dozens of tiny chips across the room.
What is the Best Removal Method for Each Adhesive Type?
Start by identifying what’s holding the foam up. If you’re not sure, peel back one corner and look for tape, strips, or a sprayed glue film clinging to the wall.
Think of it as a small decision tree. If you see sprayed glue, treat it as high-risk and move slowly; if you see strips or pads, you can usually focus on the release mechanism instead of brute force.
If you want a deeper breakdown of what people use to mount foam (and what it does to walls), see acoustic foam adhesive.
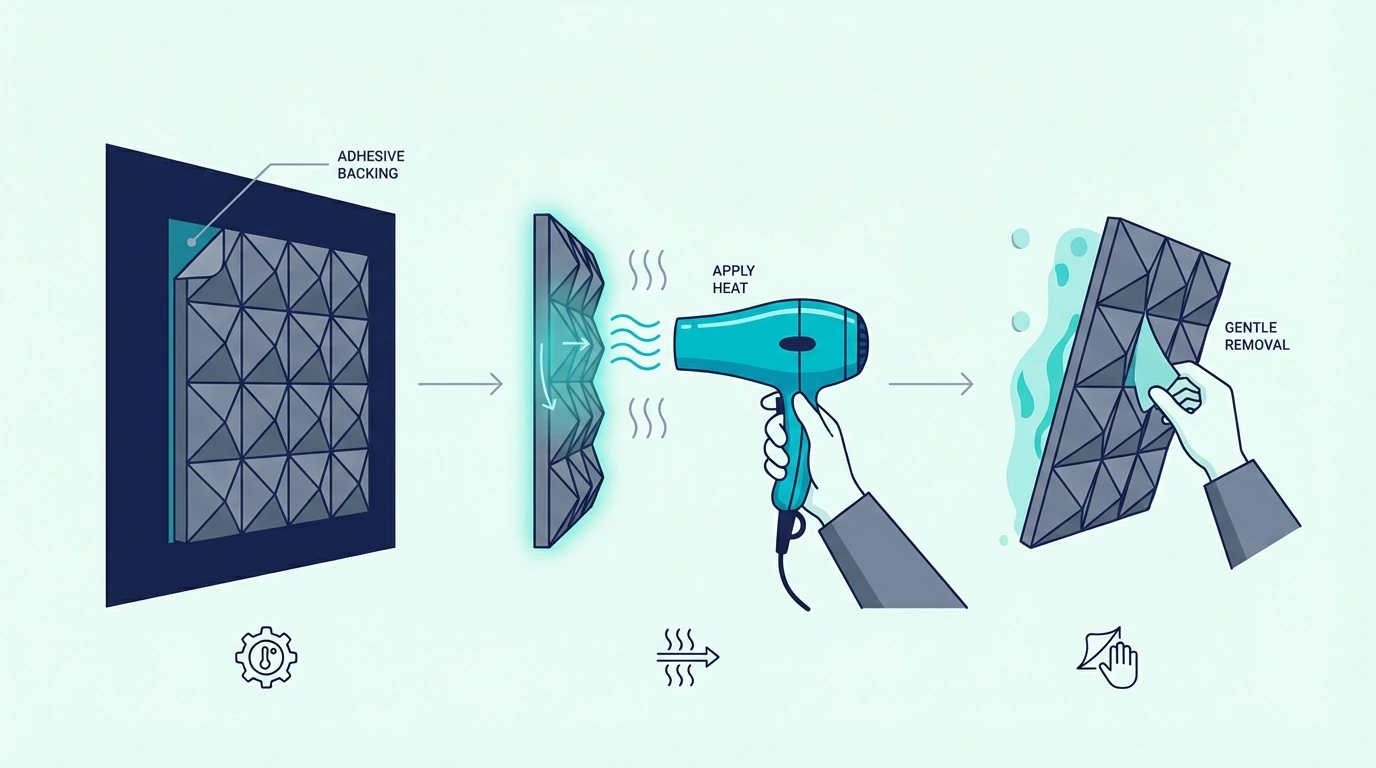
Spray Adhesive Foam: Heat Gun Method
Spray adhesive creates the strongest bond. It’s also where most wall damage happens if you get impatient.
Start with a hairdryer, and only move to a heat gun if the bond won’t soften. If you use a heat gun, keep it on low, keep it moving, and don’t let the foam get hot enough to deform.
Heat a small area, then test a corner with gentle pressure. If it doesn’t release, add time and keep the heat moving.
Work in small sections. Warm, peel a few inches, then warm the next section.
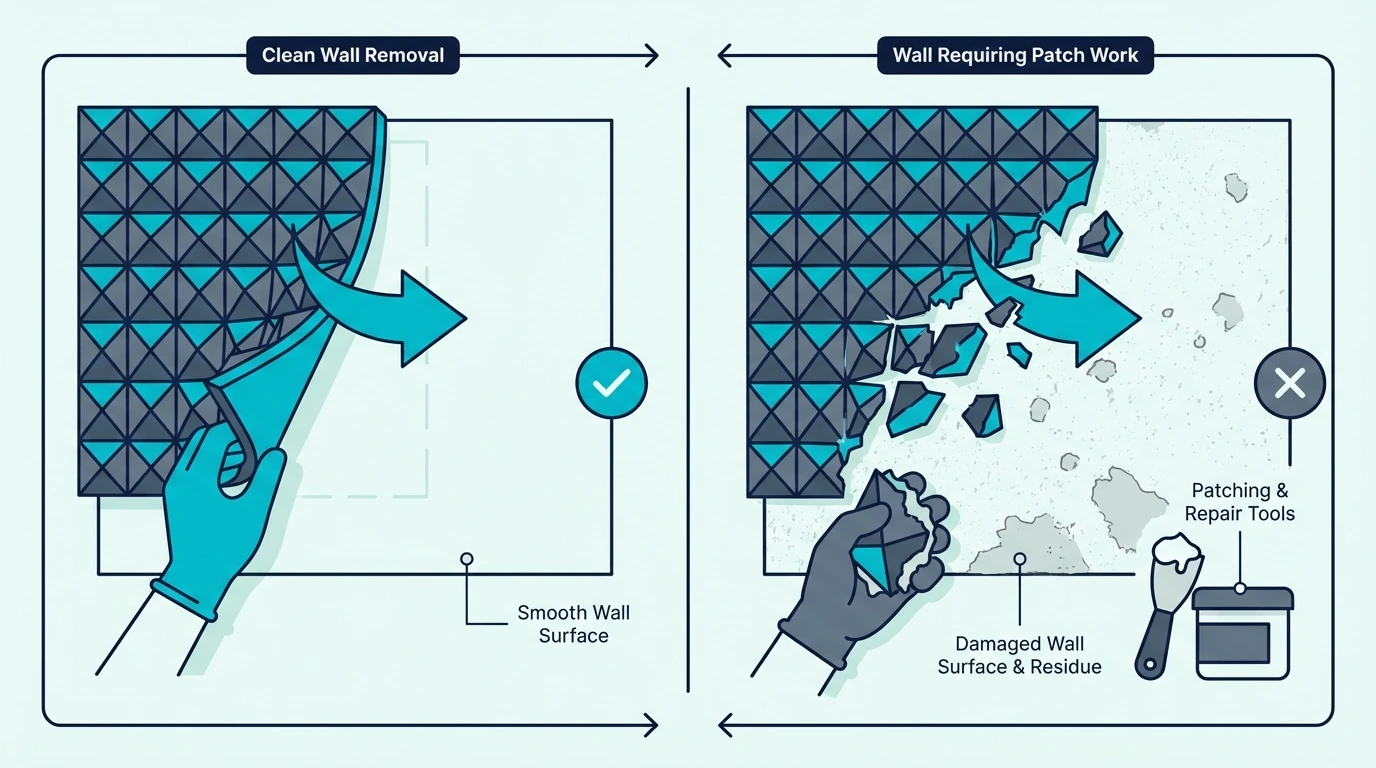
Command Strips: Pull Tab Method
Command strips are the easiest because they’re designed to release cleanly. Look for pull tabs at the bottom edge of each strip.
Stretch the tab slowly and keep it parallel to the wall. Don’t yank outward.
If tabs are hidden, peel back one corner of the foam to expose them. If you’re reinstalling later, our acoustic foam wall installation guide shows damage-minimizing mounting options.
If you’re starting over, this how to put acoustic foam on a wall guide covers cleaner mounting methods than spray glue.
Double-Sided Tape: Dental Floss Method
Double-sided tape responds well to the dental floss trick. Floss is thin enough to slice adhesive without gouging the wall.
Slide floss behind one corner and use a gentle sawing motion. If the tape starts tearing paint, stop and use heat to soften it first.
Work across the entire panel before you pull. That keeps the release even instead of tearing in one spot.
Mounting Squares: Slow Peel Method
Mounting squares sit between Command strips and spray adhesive. They don’t have pull tabs, but they’re usually less aggressive than spray glue.
Start at a corner and peel slowly. If you feel the paint start to lift, stop and apply heat to that section.
Most of the time, slow peel plus spot heat is enough. If the squares are rock-hard, treat them like spray adhesive and plan on touch-up.
Get Studio Tips Weekly
Join 5,000+ creators getting acoustic treatment advice every week.
No spam. Unsubscribe anytime.How Do You Remove Spray-Adhesive Foam Step-by-Step?
Spray adhesive is common and it’s the trickiest to undo cleanly. This is the step-by-step that keeps damage small and repairable.
Step 1: Heat the Adhesive
Start with a hairdryer on high. If you use a heat gun, stay on low and keep it moving.
Use slow, overlapping passes for even heat. Hot spots can deform foam while cold spots stay bonded.
Heat until the foam feels warm, not hot. Then test a corner.
Step 2: Peel Slowly From One Corner
Start at a bottom corner where gravity helps. Peel back slowly at an angle instead of yanking straight outward.
Use steady, gentle pressure. If you feel strong resistance, stop and reheat.
Work across the panel in a rolling motion. You’re peeling a sticker, not ripping tape.
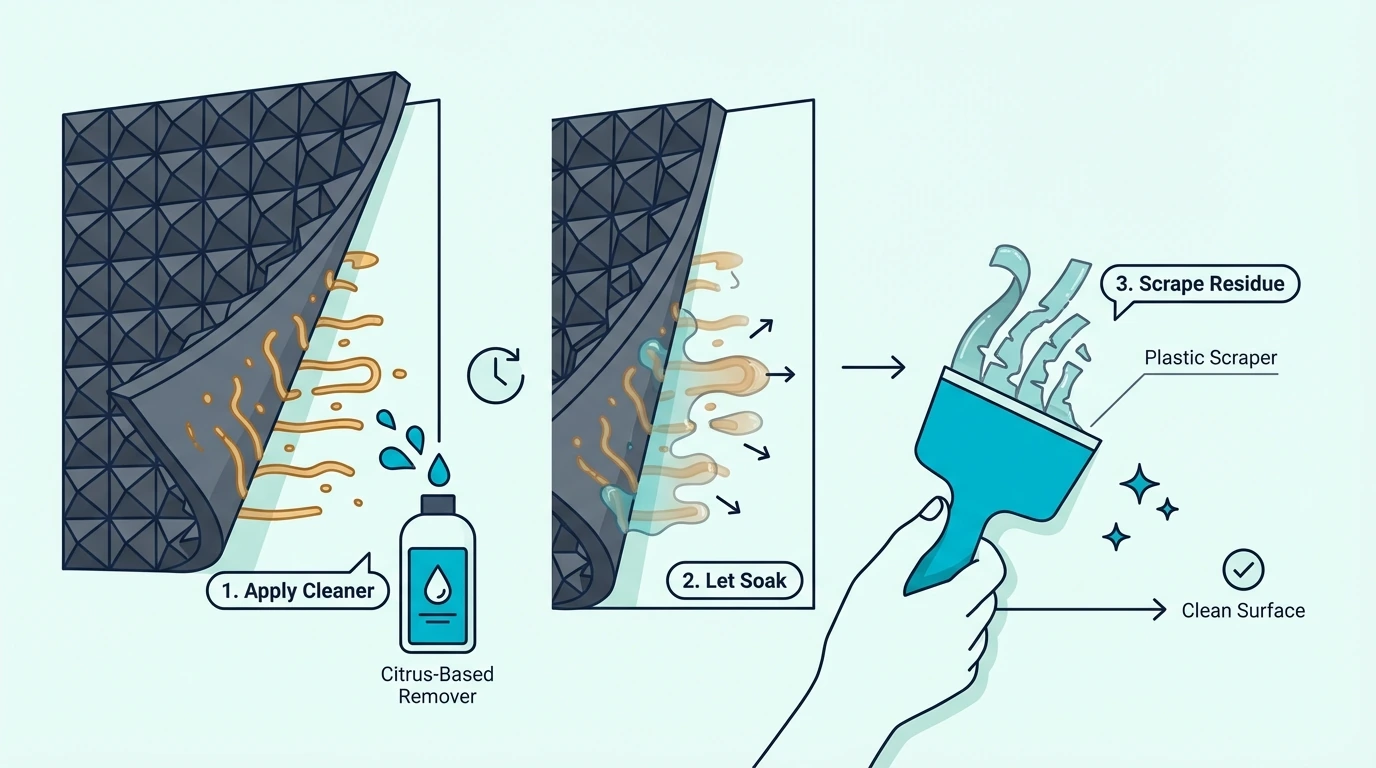
Step 3: Remove Adhesive Residue
Some residue is normal with spray adhesive. The goal is to remove it without scuffing drywall.
Apply adhesive remover and let it sit before you scrape. You want the solvent doing the work, not your wrist.
Use a plastic scraper to lift softened glue. Avoid metal blades.
Step 4: Touch Up Wall If Needed
Check the wall as you go. Small paint lifts are common and easy to repair.
Prime any exposed drywall before you paint. That prevents flashing and uneven sheen.
Match your wall color as closely as you can. For larger damage, plan on rolling a small section instead of dabbing dots.
How Do You Remove Sticky Adhesive Residue After Foam Removal?
Residue is usually the most annoying part. The foam is gone, but the wall stays tacky and grabs dust.
Best Products for Adhesive Removal
Citrus-based removers are a safe starting point for painted walls. One reliable option is Goo Gone Original Liquid.
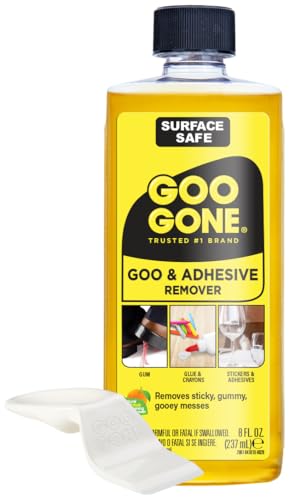
Goo Gone Original Liquid (8 oz)
If you want a small kit for stubborn spots, Perco Glue Off adhesive remover kit is another solid option.
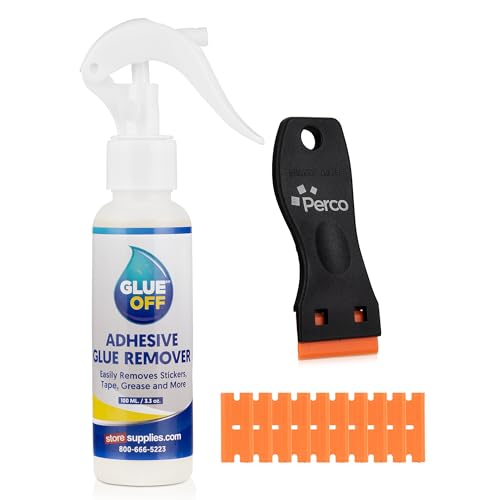
Perco Glue Off adhesive remover kit
Apply remover, then wait a few minutes before you touch it. Rushing is what turns “residue” into “paint damage.”
For stubborn glue, apply a second coat and cover it with plastic wrap. That slows evaporation and keeps the solvent working longer.
Tools That Won’t Damage Your Walls
Plastic scrapers are your friend here. Metal blades are faster, but they can gouge drywall in one slip.
A simple tool upgrade is a plastic razor scraper set like a plastic razor blade scraper.
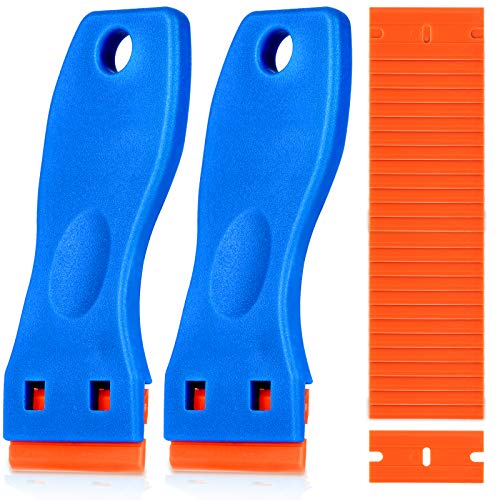
KUSUFEFI plastic razor blade scraper (60 blades)
Microfiber cloths pick up dissolved residue better than paper towels. Paper towels tend to smear glue instead of lifting it.
If you’re planning to reuse the foam after removal, clean it before you reinstall it. This guide on cleaning acoustic foam will help you avoid grinding residue and dust into the pores.
What If Paint Gets Damaged?
Some paint damage is inevitable with spray adhesive. The question isn’t whether damage will occur — it’s how to fix it properly.
Minor Damage: Touch-Up Paint
Small spots of exposed drywall need primer before paint. Skip the primer and the repair will show as a different texture and sheen.
Apply thin coats and feather the edges. Heavy paint application creates visible ridges around the repair.
Let each coat dry completely before judging the color match. Wet paint looks different than dried paint.
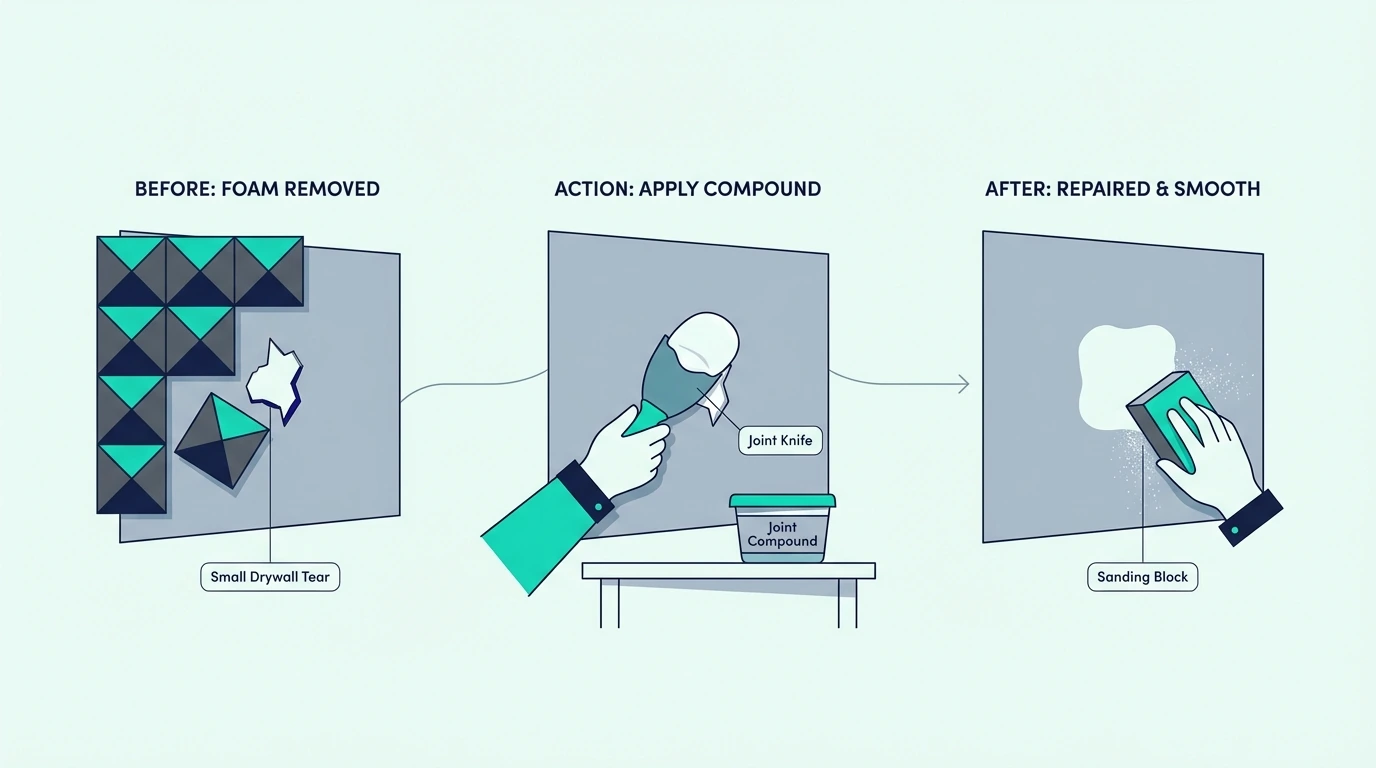
Major Damage: Skim Coat and Repaint
Large areas of damage may need skim coating with joint compound. This creates a smooth surface for repainting.
Sand the dried compound lightly with fine-grit sandpaper. Heavy sanding creates depressions that show through paint.
Prime the entire repaired area before painting. This ensures consistent sheen and color absorption.
How Do You Fix Damaged Walls After Removing Acoustic Foam?
Once the foam is gone, the real work of restoring the room begins. Depending on the adhesive used, you will likely face one of three scenarios that require specific repair steps.
Scenario 1: Tacky Residue but No Paint Damage
If the wall is still sticky but the paint is intact, your priority is removing the tack without softening the paint. Apply a citrus-based remover and use a clean microfiber cloth to “lift” the glue rather than scrubbing it.
If you scrub too hard, you can create “burnish marks” on flat paint which look like shiny spots. Always work from the outside of the glue spot inward to prevent spreading the adhesive further.
Scenario 2: Small Paint Chips and “Fuzziness”
This occurs when the adhesive takes the top coat of paint but leaves the drywall paper mostly intact. Sand the edges of the chip lightly with 220-grit sandpaper to “feather” the transition between paint and paper.
You want to remove the hard “lip” of the remaining paint so the repair feels flush to the touch.
For deeper tears, start with a 120-grit to level the area, then move to 220-grit for a smooth finish before priming. Applying a thin layer of primer-sealer specifically designed for drywall repair is crucial here.
Standard water-based primer can actually cause exposed paper fibers to swell, so using a dedicated sealer ensures the paper remains flat before you apply the final coat of wall paint.
Apply a thin layer of primer-sealer specifically designed for drywall repair. This prevents the paper from bubbling when you apply the final coat of water-based wall paint.
Scenario 3: Deep Tears and Exposed Gypsum
If you see the brown paper layer or white chalky gypsum, you must use a specialized “problem surface” primer. Standard wall paint will cause the exposed paper fibers to swell and create a permanent bump.
After priming, apply a thin skim coat of lightweight joint compound using a 6-inch putty knife. Wait for it to dry, sand it smooth, and then apply a second coat of primer before your final paint.
Tenant vs. Homeowner: Choosing Your Removal Strategy
The stakes of foam removal change depending on who owns the wall. If you are a tenant, your priority is avoiding security deposit deductions; if you are a homeowner, you may prioritize speed over surface perfection.
The Renter’s “Zero-Damage” Protocol
If you are renting, you should always assume the adhesive is stronger than the paint. Use the hairdryer method for every single panel, even if the first few seem to come off easily.
Never use metal scrapers or harsh chemical solvents that can discolor the paint sheen. If you hit a stubborn spot, it is better to leave a tiny bit of foam residue than to create a crater in the drywall that requires professional matching.
The Homeowner’s “Clean Slate” Strategy
Homeowners often remove foam because they are ready to upgrade to professional panels or change the room’s function. In this case, you can move faster by accepting that a full skim coat and repaint might be the best path to a “like-new” wall.
Instead of spending hours with a hairdryer, you can use a wider scraper to remove the bulk of the foam. Once the wall is bare, sand the entire section down to the primer layer before applying a fresh coat of high-quality eggshell paint.
How Do You Prevent Wall Damage in Your Next Studio Setup?
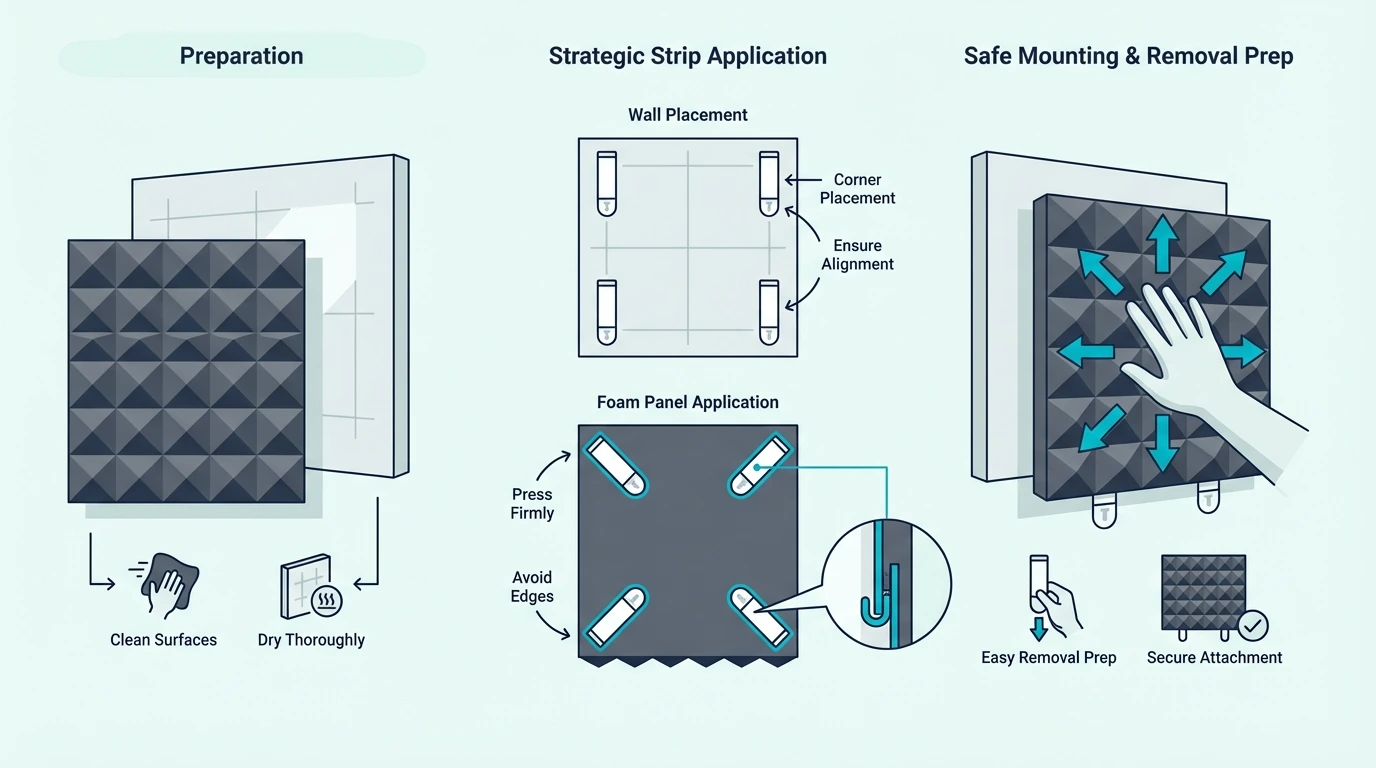
If you’re reinstalling foam or helping someone else set up their space, use removal-friendly mounting methods from the start.
Renter-Friendly Mounting Options
Command Picture Hanging Strips work well for lightweight foam panels. The pull-tab design allows clean removal without wall damage.
Mounting boards create a removable backing. Attach foam to a thin board, then hang the board with easily-removed hardware.
T-pins work on textured walls and leave only tiny holes. Push pins through foam edges into drywall — no adhesive needed.
If you want a clean install that won’t turn into a repair job later, start with the right adhesive. This guide to the best adhesive for acoustic foam breaks down the tradeoffs.
If you removed foam because it was warped or vacuum-packed, let it recover before you mount it again. Here’s the practical guide to decompressing acoustic foam.
When Spray Adhesive Makes Sense
Spray adhesive is appropriate for permanent installations where you own the space and don’t plan to move the foam.
Accept that removal will require touch-up paint. Factor this cost into your decision when choosing mounting methods.
The acoustic performance is identical regardless of mounting method. Choose based on your removal needs, not sound quality.
How Do You Safely Dispose of Old Acoustic Foam?
Once the foam is removed, you must decide whether it is worth saving or if it belongs in the trash. Polyurethane foam is a petroleum-based product, and its disposal requires a bit more thought than standard household waste.
Can Acoustic Foam Be Recycled?
In most municipalities, standard curbside recycling programs do not accept acoustic foam. The open-cell structure and chemical fire retardants make it difficult to process alongside common plastics.
However, some specialized foam recyclers can grind down old panels to be used as carpet padding or “rebond” foam. Check with your local waste management authority to see if a foam-specific drop-off center exists in your area.
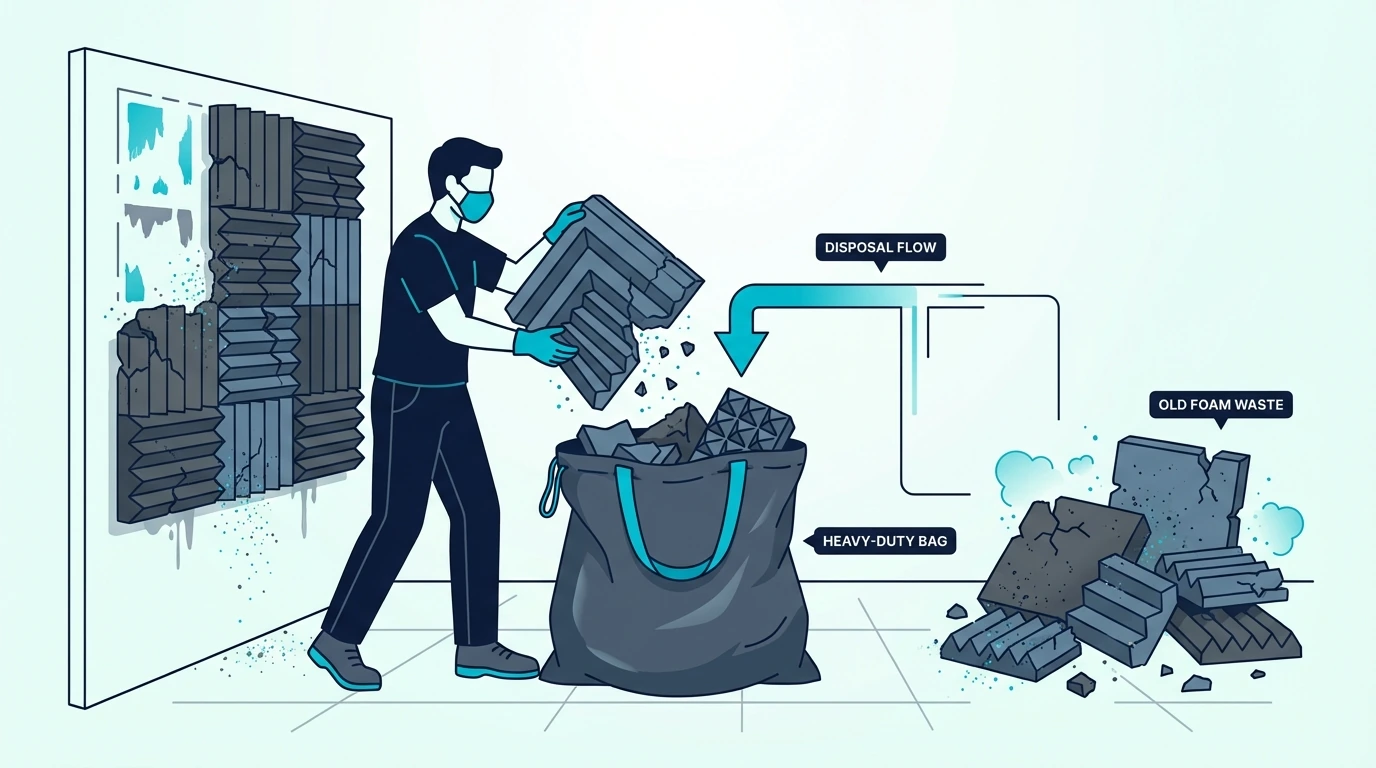
Dealing with Crumbling and “Dry Rot”
If your foam is more than five years old, it may have developed “dry rot,” where the chemical bonds break down and the material becomes brittle. Crumbling foam creates fine dust that can be a respiratory irritant and a significant mess to clean.
If you see fine yellow or gray powder coming off the panels during removal, do not try to save them. Seal the panels in heavy-duty plastic bags immediately to prevent the dust from spreading through your HVAC system or into your recording gear.
The Bottom Line
Removing acoustic foam from walls ranges from trivial to tedious, depending on the adhesive. Command strips and mounting tape usually come off clean.
Spray adhesive is the one that requires heat, patience, and probably some touch-up paint.
The universal rule is slow down. Every rushing mistake creates more wall damage than careful, patient removal.
Heat the adhesive, peel gradually, and have adhesive remover ready for the residue.
If you’re reinstalling foam elsewhere, consider renter-friendly mounting methods. The acoustic performance is the same, and future you will appreciate the easy removal.
For more on maintaining your setup, see how to clean acoustic foam properly. If your foam is old, learn when to replace acoustic foam instead of reinstalling it.
Before mounting new foam elsewhere, learn how to put acoustic foam on a wall properly to avoid repeating these mistakes. If you are starting over with a new studio layout, check our guide on where to place acoustic foam for maximum impact.
Frequently Asked Questions
Will pulling off acoustic foam rip off paint?
With spray adhesive, usually yes — at least in some spots. Command strips and mounting tape typically come off clean if removed properly using their designed release methods.
Can I use a razor blade to remove foam adhesive?
Not recommended. Razor blades cut into drywall and leave visible marks.
Use plastic scrapers instead — they’re effective without damaging the wall surface.
How long should I heat the foam before peeling?
Start with about a minute of heat for spray adhesive. You want the adhesive warm and pliable, not the foam melting.
Test a corner after heating — it should release with gentle pressure.
What’s the best adhesive remover for foam residue?
Goo Gone citrus-based remover is a standard choice. Apply it and wait a few minutes for it to penetrate.
Then scrape with a plastic tool and repeat for stubborn spots.

