
Finding your DJ controller behaving erratically mid-gig from accumulation of microscopic dust, oils, and grime over many intense performances is every DJ’s nightmare.
Learning the proper techniques and cleaning solutions to dismantle, scrub, dissolve, and flush away contaminants from intricate components can fully revive your gear.
Let’s dive into the key steps and tools needed to comprehensively clean buttons, faders, jog wheels, and all surfaces of your DJ controller.
How to Clean DJ Controller

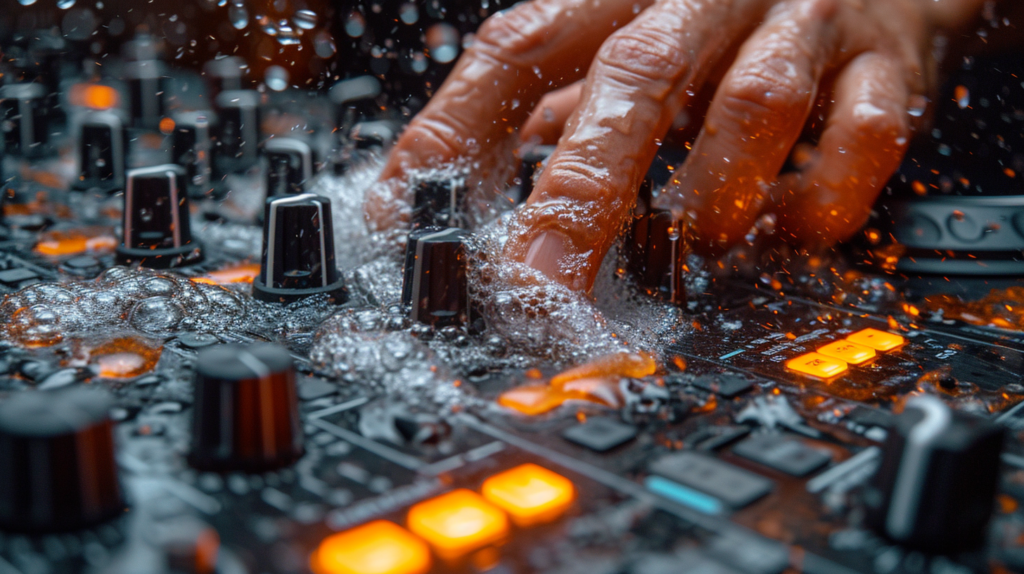
To thoroughly clean a DJ controller, gather microfiber cloths, isopropyl alcohol, cotton swabs, compressed air, a soft brush, and distilled water. Use the microfiber cloths to dust the overall shell. Scrub buttons and knobs with alcohol-dampened cotton swabs. Blast compressed air under faders to dislodge debris. Gently scrub jog wheels with a damp brush. Dry all areas completely. This full cleaning process will remove contaminants and restore sensitivity. Now let’s explore the steps more in-depth.
Gather Your Cleaning Supplies

You will need a variety of supplies to thoroughly clean all areas of your DJ controller. Having these supplies on hand will allow you to efficiently work through the cleaning process.
First, you should gather microfiber cloths. Microfiber cloths are extremely effective at trapping and removing dust, dirt, and debris from electronics without causing scratches. They are gentle enough to use on delicate surfaces. You will utilize the microfiber cloths for an overall wipe down of your controller shell to remove built up contaminants.
In addition to microfiber cloths, you should obtain cotton swabs. The cotton swabs play an integral role in scrubbing tight spaces that are prone to grime accumulation such as around buttons and knobs. Dampened with cleaning solutions, you can precisely target small gaps and crevices.
Isopropyl alcohol is another key ingredient in DJ controller cleaning. Combined with cotton swabs, isopropyl alcohol lifts and dissolves sticky substances and residue. It evaporates quickly without leaving behind moisture that could damage circuits. You will directly apply isopropyl alcohol to swabs to dissolve built up gunk on buttons, knobs, and faders.
Compressed air is extremely useful for dislodging debris in hard to reach areas inside your controller. Dust and pet hair can gather under faders over time. Short bursts of compressed air can effectively blast out these particles for a deeper clean. Just be sure not to tilt the can while spraying as escaping liquids could damage your gear.
For scrubbing the jog wheels on turntables, you will need a soft brush. The bristles must be gentle enough to not cause scuffs. Dampening the brush with a small amount of distilled water allows you to lift dirt and oils from the jog wheel grooves with a gentle circular scrubbing motion.
Finally, have lint-free cloths on hand for drying areas after cleaning. Avoid paper towels or other cloths that could leave behind fibers. Thoroughly drying your controller prevents any standing moisture that could impact functioning.
With all of these cleaning supplies assembled before you start, you will be fully equipped to tackle even the dirtiest DJ gear.
Dust the Controller Surface

Before tackling the intricacies of buttons, knobs, and jog wheels, begin by removing built up dust and debris from the surface of your DJ controller. Over time, dust gradually settles into every exposed crevice. Addressing overall surface level grim first makDJ controllers contain many buttons and knobses the rest of the cleaning much simpler.
Take your microfiber cloth and gently wipe down the entire top half of your controller. Apply light pressure and sweep across knobs, edges, and flat expanses equally. The microfibers will attract and trap dust and dirt particles without simply pushing them around. Cover every section methodically without missing any areas.
Pay particularly close attention when wiping down faders and the zones surrounding buttons. These ares experience heavier hand contact and tend to show grime sooner. Remove all visible debris before moving deeper into the equipment.
Once the top half appears clean, flip your controller over to address the bottom side if it is exposed. Though users do not regularly handle underside areas, dust still manages to collect. Eliminate any visible contaminants with the microfiber cloth to start fresh before disassembling pieces.
With the external shell now dust-free, you can shift focus to dislodging grime from the intricate components that make direct contact with users’ hands. Continually removing the newly revealed dust will prevent spreading particles to already cleaned zones.
Clean Buttons and Knobs

DJ controllers contain many buttons and knobs which manage key functions but also attract dirt, grease, and decayed lubricants in their crevices with heavy use. To restore responsiveness, thoroughly cleanse every button and knob using isopropyl alcohol applied with cotton swabs.
Start by wiping down the area surrounding each button with a cotton swab dampened with isopropyl alcohol. Gently scrub to cut through and dissolve stuck on residues. Once the exterior shine is restored, press and hold individual buttons while scrubbing the edges for complete penetration of the alcohol into hidden crevices. The isopropyl alcohol will lift and erase built up gunk inside. Release pressure and let the button fully extend to access the underside as well.
Continue this process button by button across mixer sections, jog wheels, cue controls, play and pause, pitch adjusters, pad modes, and any other interfaces. Check side panels and rear interfaces too. Be extremely thorough and meticulous, taking the necessary time to revive each button fully.
Shift next to the various knobs on your DJ controller such as channel EQs and filter knobs. Gripping knobs tightly, rotate back and forth while scrubbing across the edges around the posts with cotton swabs and isopropyl alcohol. The twisting action helps dislodge debris. Remove knobs completely if possible to clean where they connect and conceal grime.
Eliminate every trace of contamination from both buttons and knobs for renewed sensitivity and performance. If any liquid penetrates deeper inside, allow extended drying time before reconnecting power.
Blast Faders with Compressed Air

Sliding faders gradually collect an immense amount of microscopic dust and dirt inside with routine motion. You will need to utilize compressed air to flush out these minuscule particles for smooth gliding and save faders from Scratch City.
Always read instructions before using compressed air to prevent accidentally spraying liquids. Tilt the can upright and only use brief bursts focused under the adjustable caps of the faders. Too much air pressure could damage the sensitive mechanisms so proceed cautiously.
An initial few blasts should reveal a dust plume indicating thorough internal cleansing. But continue short quick sprays across the full hidden underside of each fader to ensure complete waste removal.
With the internals blown clean, wipe down the top caps and entire exposed area with isopropyl alcohol and cotton swabs to dissolve any remaining debris. Faders should feel silky smooth at this point. However, seeking professional cleaning or replacement is recommended if faders feel too loose or gritty still.
Scrub the Jog Wheels
As the most handled components on DJ controllers, jog wheels require special cleaning attention. Oil, sweat, lubricants, and grime become embedded in the grooves of the wheel’s grip tape-like texture. A wet brush scrub accompanied by compressed air blasting will lift and capture all traces.
Dampen a soft brush with distilled water and gently move across the wheel surface applying light downward pressure. Slowly progress with a swirling circular motion to loosen debris lodged inside each crevice. Avoid excessive water that could leak inside.
Use an isopropyl alcohol wipe to transition across the wheel when necessary to dissolve sticky buildup. But the distilled water does the majority of the cleaning work. Cover every millimeter of the wheel for best results.
Finish by utilizing compressed air again to evacuate lifted contaminants from the scrubbing. Blow forcefully from multiple angles to ensures no particles remain trapped.
Important cautions when cleaning jog wheels include avoiding submerging completely in water or letting moisture reach sensitive electronics underneath. Carefully dry wheels completely with a lint-free cloth after deep cleaning as well.
Check All Connections

With the components utilized most frequently by DJs now revived to a like-new condition, completing connections checks will wrap up your controller cleaning. Inspect every cable input and output zone for any missed debris that could impede critical audio or power transfers.
Use compressed air flows first to dislodge obvious specks near connection points like headphone jacks, RCA outs, microphone plugs, AC adapters, and USB ports. Then cotton swab these access points with isopropyl alcohol to dissolve residue buildup and restore surface shine. Be extra thorough around headphone ports which attract ear pad grime.
Check cable plugs themselves as well for corrosion, wearing down, or grime coatings that lower connectivity. Clean gently with alcohol and a toothbrush if needed. It is ideal to replace damaged cables for reliability.
And examine the power switch, ensuring full cleanliness and ideal function for safe power cycling each use. Power issues can slowly develop into complete failures.
By comprehensively addressing every external and internal zone, connection, and component, you can successfully revitalize your DJ controller to optimum operational capacities through methodical cleaning procedures. Expect heightened responsiveness and enjoyment mixing music once again.
Conclusion
Properly cleaning your DJ controller is imperative for optimal performance and longevity. By methodically addressing dust buildup, sticky buttons, dirty jog wheels, and debris inside faders, you can restore sensitivity and enjoy smooth mixes once again. Be sure to use the right supplies and take precautions around moisture near electronics. With routine, thorough cleaning, your controller can stay in prime condition for years to come.