
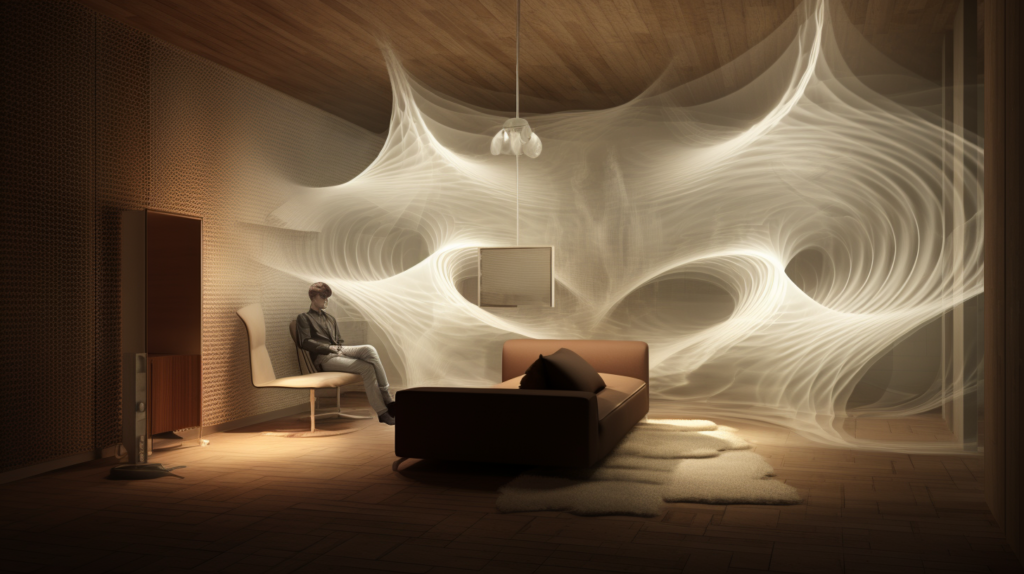
The constant drone of traffic outside your window. The thumping bass from your neighbor’s late night parties. Sound pollution is the scourge of modern living.
But what if you could create an oasis of silence right in your own home?
Building a room within a room is the most effective way to soundproof a space, blocking outside noise for peace and privacy. By constructing new walls decoupled from existing structure and using specialized insulating materials, you can customize an ideal inner sanctum.
Let’s dive in to the step-by-step process for how to build your own soundproof room within a room.
What Is A Room Within A Room?
A room within a room refers to building a new room inside an existing room. You essentially construct a separate new room within the boundaries of the current room.
This is done by building new walls inside the existing walls, leaving a small gap between the new and old walls.
Typically a gap of 4 to 6 inches is left between the new inner walls and the existing outer walls. This gap is important as it decouples the new walls from the home’s existing structure.
Decoupling prevents noise and vibrations from transferring through shared structural elements.
The air cavity that you create between the walls acts as an insulator against noise by blocking and absorbing sound. Sound waves lose energy passing through the air gap, reducing transmission to the new inner room.
Constructing a room within a room allows you to customize and control everything about the new interior space. You can shape it to your exact size requirements.
The materials and finishes can be selected specifically for soundproofing performance.
Why Build A Room Within A Room?

Constructing a room within an existing room is one of the most effective ways to thoroughly soundproof a room. It allows you to leverage specialized soundproofing materials and techniques to block outside noise.
This contains unwanted noise in the new inner room, preventing it from entering from noisy adjacent spaces. The new walls, insulation, and other additions work together to isolate sound in the inner sanctum you create.
There are several reasons you may want to soundproof a room in your home. One example is creating a home music studio.
It is crucial to prevent sound from bleeding out of the studio into the rest of the home.
Likewise, you want to block external noises from interfering with recording sessions. Even a home office benefits from reduced distractions and privacy that soundproofing provides.
Home theaters are also commonly soundproofed to contain movie and game noise. Reducing noise transfer between bedrooms and living spaces may be desired.
Soundproofing also helps block outdoor noise from roads, trains, or aircraft.
Overall, building a room within a room gives you complete control over sound transmission in and out of the inner space. It is a robust solution that provides superior noise isolation using specialized construction techniques.
The room within a room method is the gold standard for residential soundproofing.
Step 1: Build The Frame
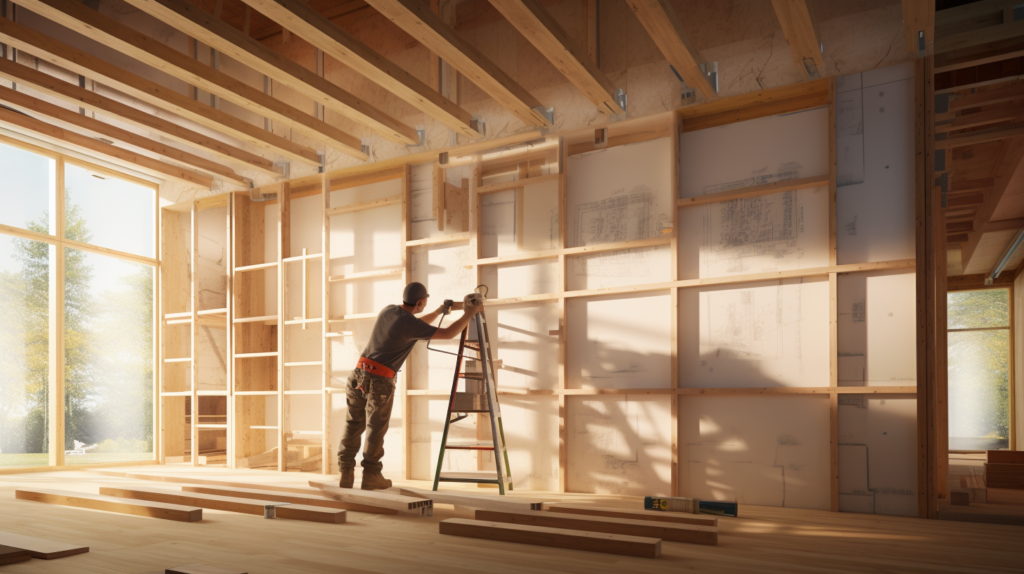
The first step is to construct the frame for the new interior walls that will comprise your soundproofed inner room. Start by measuring out where you want to locate the new walls.
Leave a gap of 4 to 6 inches between the planned inner walls and the existing outer room boundaries.
Build a wooden frame for the new walls using vertical 2×4 studs secured to horizontal ceiling and floor tracks. Typical 16 inch on center spacing can be used between each vertical stud.
For extra density, consider spacing studs 12 inches on center or even staggering them unevenly.
Higher stud density is beneficial as it provides more mass to block sound transmission. Screw the vertical studs securely into the top and bottom tracks to create a sturdy new frame.
The bottom track should be anchored into the floor if possible.
Make sure the new frame is perfectly plumb and square. Check for any twisting or misalignment issues. Use shims if needed to correct the alignment.
You want the new stud wall to be constructed precisely to enable proper soundproofing and finishing.
The frame should be detached from existing walls and NOT share any structural elements like sole plates. Isolate top and bottom plates with acoustical caulk.
The goal is to build an independent free-floating frame inside the room.
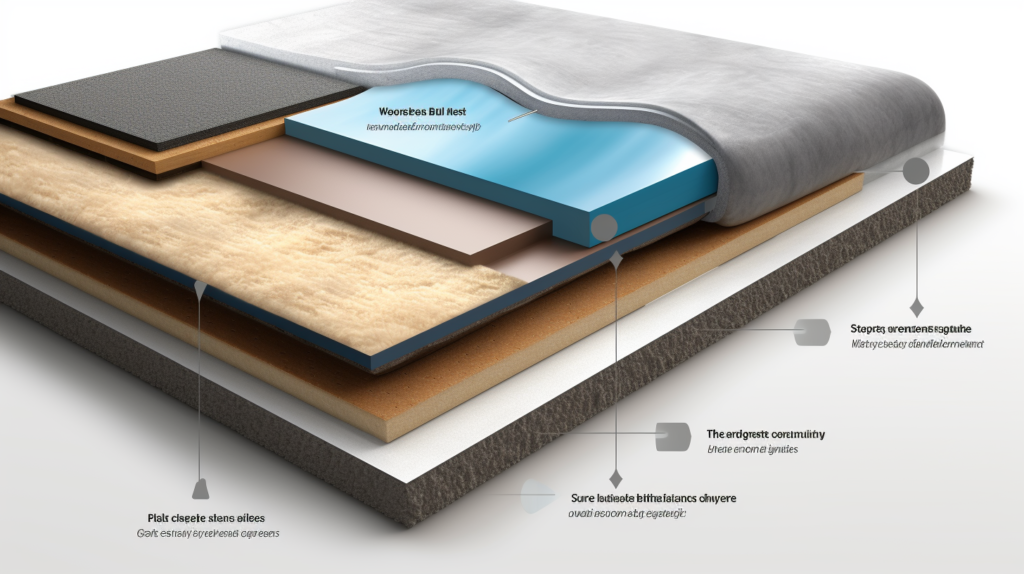
Step 2: Add Soundproofing Insulation
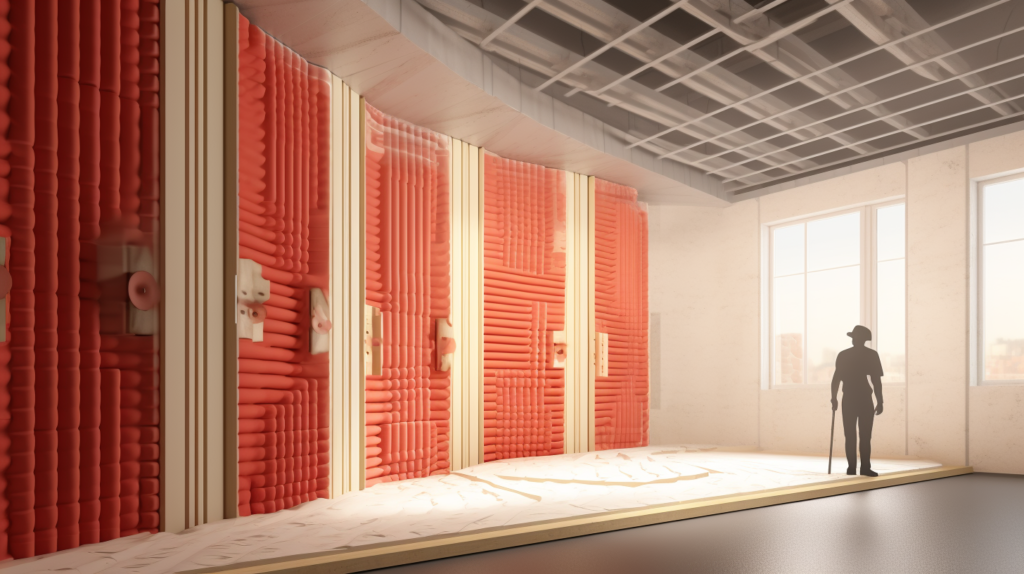
After constructing the inner room’s frame, the next step is to insulate the wall cavities with specialized soundproofing insulation. There are several types of insulation well suited to blocking noise.
Fiberglass and mineral wool are two common options. Spray foam or cellulose insulation also works. The key is choosing a type rated for sound dampening.
The insulation will serve to dampen noise by absorbing sound energy rather than transmitting it through the cavity. Completely packing insulation into the stud bays is crucial.
Gaps will allow noise to propagate through the walls.
Aim to install insulation at the highest density possible. For 2×4 framed walls, use insulation with an R-13 rating or higher.
The higher the density, the better for inhibiting airborne noise transfer.
Pack and compress the insulation thoroughly within the stud cavities. Be sure to extend insulation fully into all corners so there are no voids or gaps.
Any airspaces will compromise soundproofing.
In addition to the wall cavities, also insulate the ceiling and floor cavities of the inner room. Apply the same techniques, using dense, sound-absorbing insulation to prevent noise infiltration from above and below.
Step 3: Install Resilient Channels
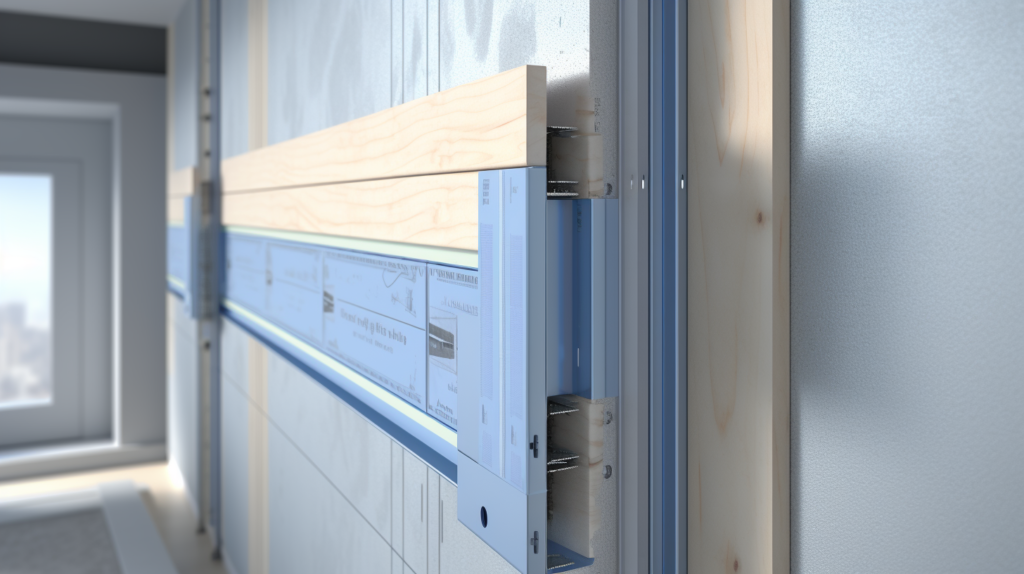
Resilient channels are a specialized component frequently used when constructing soundproof walls. They are metal horizontal furring strips that get screwed across wall studs prior to drywall installation.
When properly installed, these channels effectively decouple the drywall from the wall studs. Decoupling is the separation of structural elements so vibrations are not transferred between them.
Resilient channels create a floating layer that prevents stud vibrations from reaching the drywall. This hinders noise transmission as sound energy remains isolated in the stud cavity.
Channels typically come in 25 gauge galvanized steel. They should be placed horizontally 16 inches on center across each stud.
Make sure channels are secured neatly to the stud face and are not warped or contacting each other.
Do not overdrive the screws as this can create stiffness and transmit vibration. Use drywall screws recommended for resilient channel installation.
Improper screw size or spacing can compromise decoupling.
Proper channel spacing and isolation is imperative to achieve maximum noise reduction performance. Take care during drywall installation to only screw sheets into the channels themselves.
Do not screw through the channels into the studs behind.
Maintaining proper clearance behind the channels is also important so the drywall can fully contact the flange surface. Shimming may be needed if studs are warped.
Resilient channels become less effective if there are any air gaps.
Step 4: Mount Drywall

For optimal sound blocking, the room within a room’s walls should utilize multiple layers of drywall. Drywall mass helps impede noise transmission.
Staggering seams between drywall sheets and layers also improves performance.
A typical wall assembly would be two layers of half-inch drywall on each side of the frame. Stagger the seams so that no seams line up between layers or on opposite sides.
Apply acoustic caulk between layers to seal edges and gaps.
Screw the drywall sheets into the resilient channels only – not directly into the studs. This maintains the decoupled wall system for preventing vibration transfer.
Consider using sound damping clips to further decouple boards.
Double drywall on ceilings and exterior walls also helps block noise. Carefully countersink screws and avoid overdriving.
Use paper joint tape for strength and acoustic integrity.
An alternative to double drywall that provides enhanced noise reduction is using QuietRock panels. These specialized boards feature viscoelastic polymers that dampen vibration and sound energy.
They can be used alongside regular drywall for optimal results.
Step 5: Install Floating Floor

Impact noise transmitting through the floor is another potential source of unwanted sound that should be addressed. An effective solution is installing a floating floor system over acoustic underlayment.
First, roll out a quality acoustic underlayment product over the existing flooring surface. This underlayment goes underneath the finished floor to provide sound insulation and damping.
Popular brands of acoustic underlayment include QuietWalk, Serenity Mat, and FloorMuffer. These provide excellent padding to reduce floor noise.
Next, install your finished floor utilizing a floating floor system. This means the floor floats above the underlayment, not directly contacting the subfloor.
Use systems that click or lock together without glue or nails.
Leave a perimeter gap of 1/4 inch around the edges and under doorways. Baseboards, quarter round, or threshold covers will conceal these gaps after.
Leaving a perimeter gap prevents flanking noise through the subfloor.
Hard surface flooring such as laminate, engineered hardwood, vinyl plank, and tile work well with floating floor installation. Carpet can also be installed over underlayment using tack strips to keep it in place, not adhesive.
Step 6: Add Suspended Ceiling
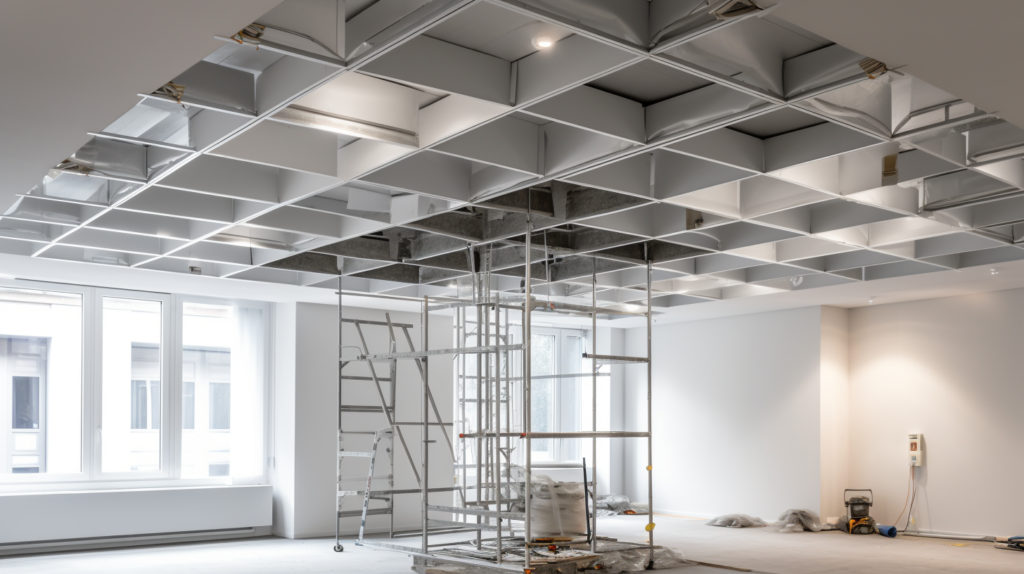
Adding a suspended or drop ceiling is an impactful way to prevent noise infiltration from above or adjacent rooms. This involves installing a secondary ceiling below the existing one, creating an air gap in between.
A suspended metal grid work is anchored to the original ceiling using ceiling wire. Acoustical ceiling tiles are then set into the frame. This creates space for sound insulation.
Soft tiles also help absorb noises within the room.
Ideally acoustic tiles with an NRC (Noise Reduction Coefficient) rating of 0.70 or higher will be used so the ceiling absorbs sound efficiently. Perimeter trim seals the edges for better acoustic performance.
The ceiling air cavity blocks and dampens noises.
For maximized results, use channels or strips to decouple the grid from the main ceiling above. This prevents vibration transmission down through the metal grid work.
Suspended ceilings are highly effective but involve more extensive installation.
Carefully measure and lay out the ceiling grid so tiles fit neatly. Leave room for lighting, vents, or other fixtures. Seal thoroughly around fixtures and perimeter with acoustical caulk.
Maintaining the acoustic integrity of the ceiling is key.
Step 7: Finish Flooring
The final flooring finish should be selected to help absorb impact noise and footsteps. Carpet is a great acoustic option, using a premium density underpad.
Underpad isolates the carpet and provides cushioning.
High-quality carpet and pad significantly reduce noise transmission through the floor. Use the thickest, densest carpet and pad within your budget constraints.
Install tack strips around the perimeter to hold the carpet down over the underpad.
Other flooring choices that provide noise absorption include cork, bamboo, rubber, and vinyl flooring. Choose products featuring an attached cork or foam backing for underfoot sound absorption.
Avoid hard surface materials not conducive to noise damping.
Proper flooring selection makes a big difference in reducing footfall noise. Combine soft, resilient flooring with your floating floor assembly for optimal impact sound insulation.
The flooring finish should complement the other soundproofing steps.
Step 8: Seal All Gaps

The final step once construction is complete is sealing any remaining air gaps for soundproofing integrity. Use acoustic caulk to seal all cracks, joints, corners, edges, and gaps. Look for openings at ceilings, walls, floors, doors, windows, and trim areas.
Pay particular attention to fully caulking the perimeter seal between interior room walls and the ceiling and floor. Gaps here compromise acoustic performance by allowing flanking transmission.
Window and door frames should also be sealed airtight.
Acoustic sealants like Green Glue remain flexible over time. Look for paintable caulk to match your finishes. Backer rod helps fill larger gaps before caulking.
Take care to smooth caulk for an invisible seal.
Weatherstripping doors and windows helps block sound leakage around openings. Outlet gaskets seal off sockets.
Ventilation gaps will need to be addressed – cover duct openings or install sound dampening duct silencers.
Meticulously caulking and sealing any holes, penetrations, openings, or paths sound could use to enter or escape the room is imperative for realizing the sound isolation goals of your room within a room project. Take time to do this finishing step properly.
Step 9: Add Interior Acoustic Panels
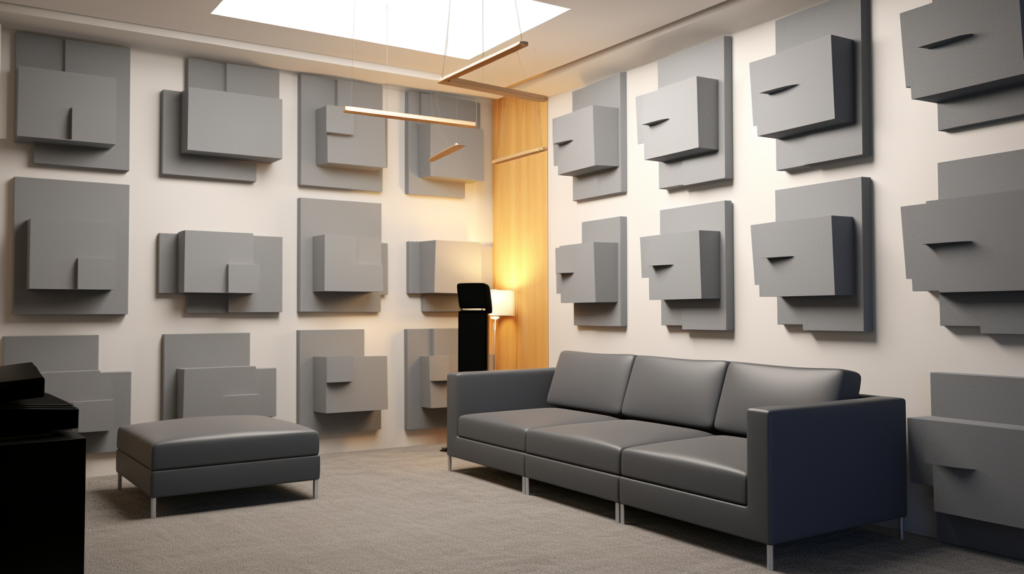
Once the room is fully soundproofed, interior acoustic wall panels can be installed to improve sound quality within the space. Panels help absorb echoes, reverberation, and standing waves.
This allows for clearer, cleaner sound.
Strategically place acoustic panels at various reflection points throughout the room. Pay particular attention to room corners, as corners often create amplified noise concentrations.
Spread panels out to distribute absorption evenly.
Polyester fiber panels work well for broadband sound absorption. Can also install acoustic foam or fabric wrapped fiberglass panels.
Bass traps in corners are particularly helpful for absorbing low frequency noises.
Combine absorption panels with your specialized soundproofing constructions to optimize both noise isolation from outside the room and interior sound quality within the room. This completes your acoustic oasis free of distractions.
Conclusion
Constructing a room within a room takes planning, precision, and quality materials to execute properly. But the effort pays off with a space fully customized for soundproofing.
Follow each step carefully to build robust noise isolation using proven techniques like decoupling, insulation, and mass. Pay attention to detail in sealing gaps and edges.
The final result will be a peaceful oasis, blocking unwanted noise and enhancing sound quality. With some diligent work, you can create the ultimate sound sanctuary right in your own home using the room within a room method.