How To Hang Bass Traps In Corners — Every Mounting Method Explained
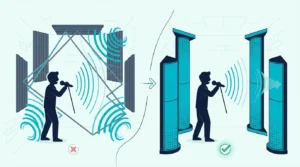
How to hang bass traps in corners depends on the trap type and your wall situation, but the method matters less than getting the trap into the corner in the first place — a bass trap sitting on the floor in a corner outperforms a perfectly mounted panel on a flat wall every time.
Corner mounting concentrates your bass trap where low-frequency pressure is highest. The mounting hardware just needs to hold the trap securely at the right angle — straddling the corner at roughly 45 degrees with an air gap behind it for maximum absorption.
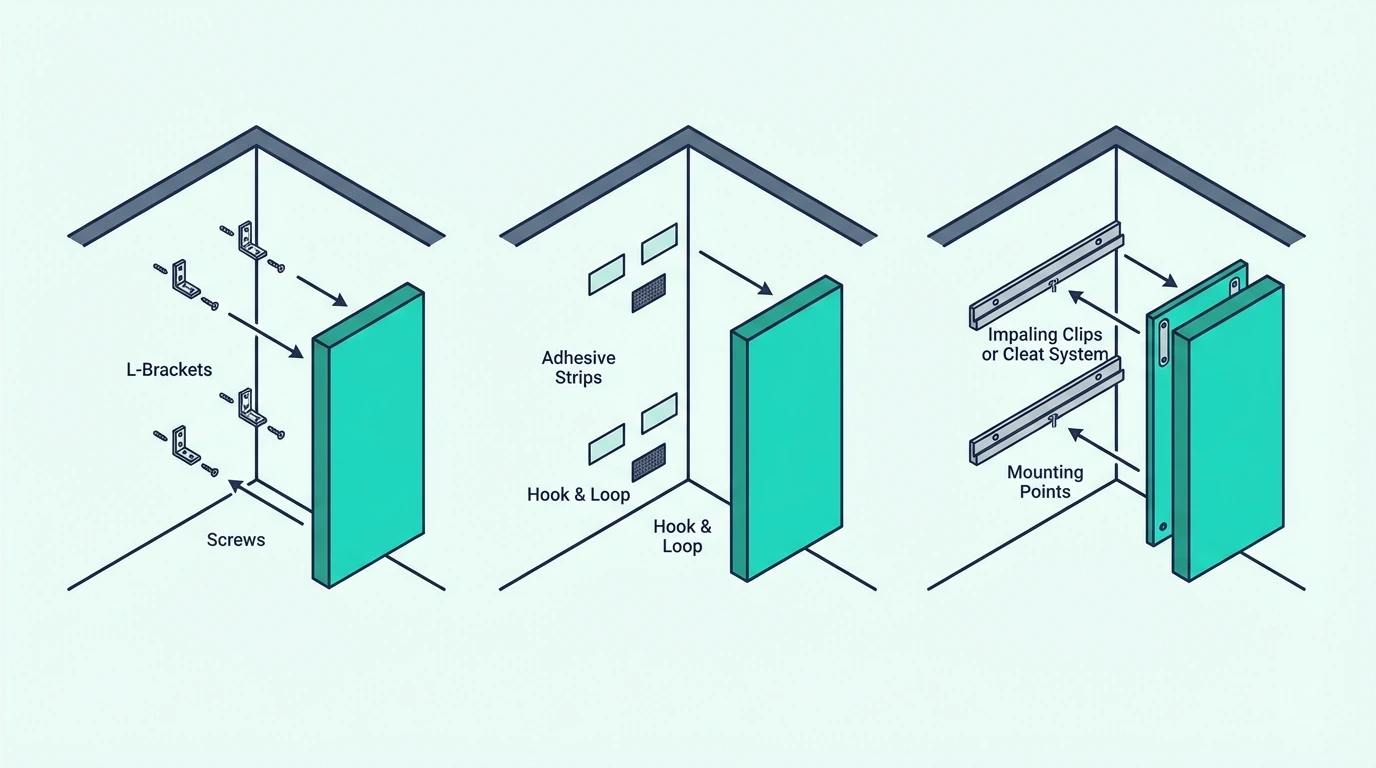
Most people overthink the installation and underthink the placement. A few Command strips or L-brackets get the job done for foam traps, while heavier fiberglass panels need French cleats or wire hanging systems.
Below, you’ll find step-by-step instructions for every common mounting method — corner straddling, wall mounting, foam attachment, damage-free options, and when simply setting traps on the ground works fine.
Hang bass traps in corners by straddling them at a 45-degree angle across the corner, creating an air gap behind the panel. Use French cleats or wire for heavy fiberglass/mineral wool panels, adhesive spray or Command strips for foam traps, and impaling clips for panels with fabric wrapping. Floor-to-ceiling installation catches the most bass energy, but even partial-height traps in corners make a significant difference.
How To Hang Bass Traps In Corners
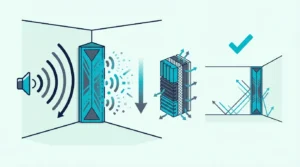
Hanging bass traps in corners means bridging the trap across two walls so it sits at an angle with open space behind it. This straddling position puts the absorptive material where bass pressure peaks while the air gap behind the panel extends its effective depth.
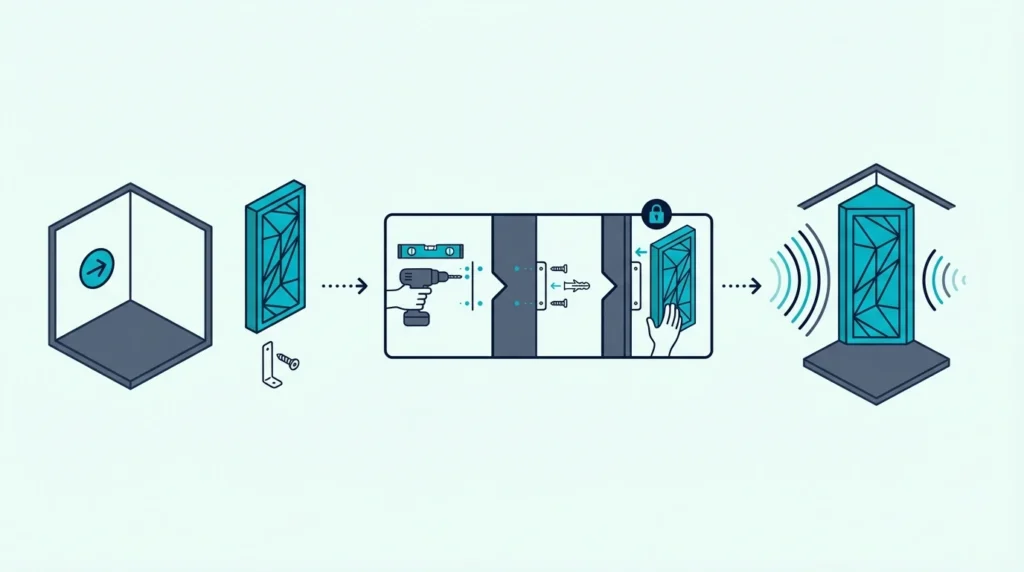
The simplest approach: screw a small L-bracket or angle bracket into each wall near the top of where the trap will sit, then rest the trap on the brackets. For floor-to-ceiling installations, brackets at the top prevent tipping while the floor supports the weight.
For lighter foam traps like the 4 Pack Bass Traps for Ceiling Corner, adhesive alone holds them in place because they weigh almost nothing. Heavier rigid fiberglass panels (4-8 lbs each) need mechanical fasteners.
4 Pack Bass Traps for Ceiling Corner
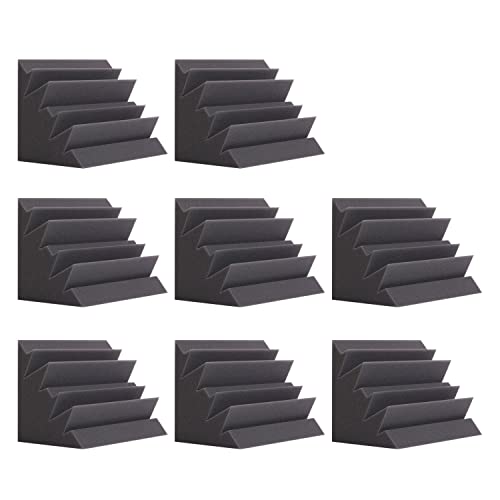
The TroyStudio Bass Traps 24 Pack offers maximum corner coverage for larger rooms.
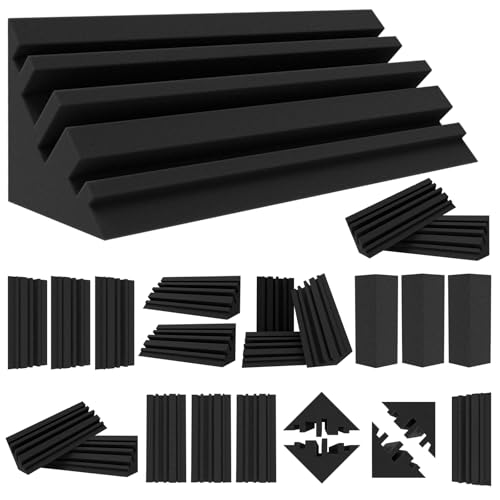
TroyStudio Bass Traps 24 Pack
Straddling vs Flush Corner Mounting
Straddling means the trap bridges across the corner at an angle, touching both walls at the edges with a triangular air gap behind it. This is the preferred method because the air gap increases low-frequency absorption — a 4-inch panel with a 6-inch air gap behind it absorbs as deep as an 8-10 inch panel mounted flush.
Flush mounting presses the trap flat against one wall in the corner, which saves space but sacrifices the air gap benefit. Use flush mounting only when the room is too narrow for straddled traps or when treating wall-ceiling edges where straddling isn’t practical.
The air gap behind a straddled trap depends on the panel width and corner angle. A 24-inch wide panel straddled across a 90-degree corner creates roughly 8.5 inches of air gap at the deepest point — enough to significantly extend bass absorption depth.
How To Mount Bass Traps On Walls
Wall-mounted bass traps use the same hardware as heavy picture frames and shelving, scaled up for panel weight. The right method depends on your trap’s weight and your wall type.
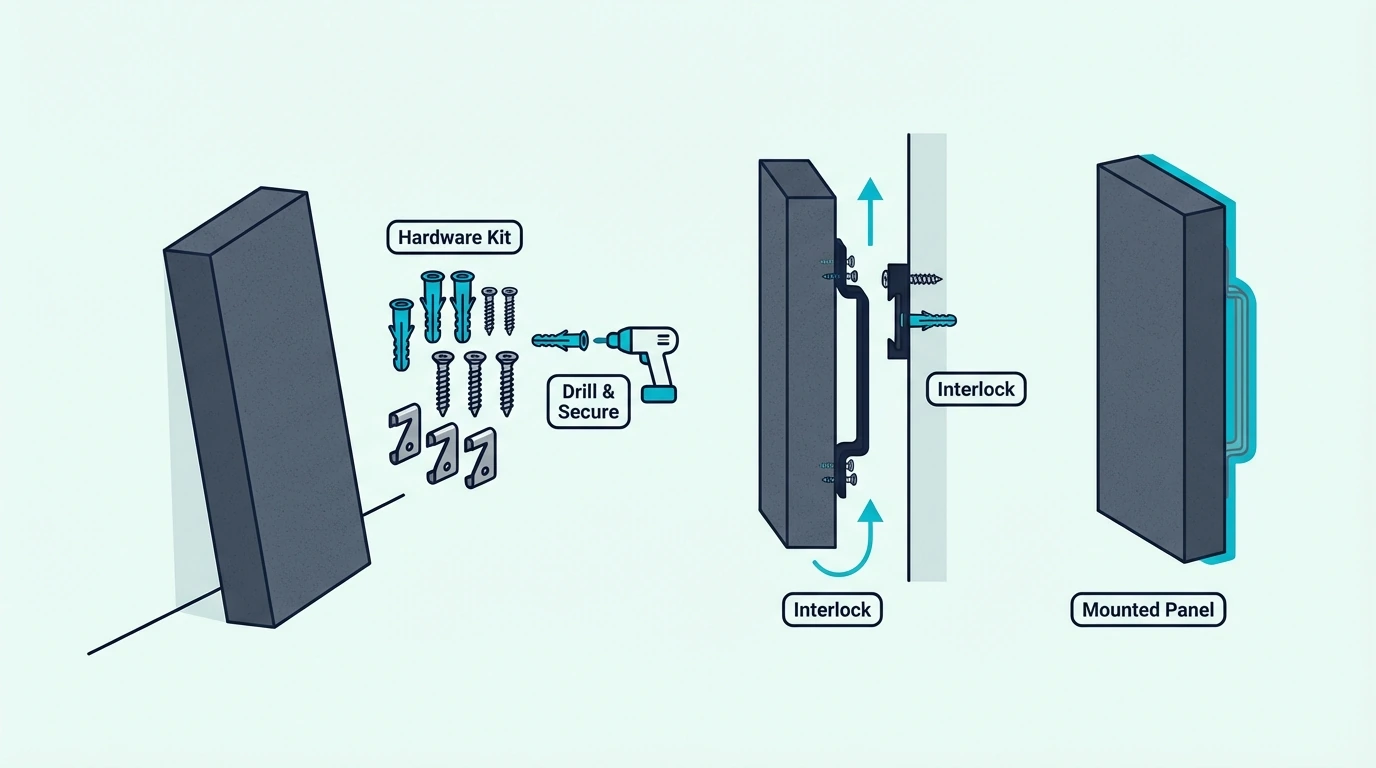
French cleats are the gold standard for heavy panels (5+ lbs) — screw one half of the cleat to the wall (into studs), the other half to the back of the trap frame. The interlocking angle makes hanging easy, supports significant weight, and lets you remove and reposition traps without new holes.
Wire hanging systems use two D-ring hangers on the trap’s frame connected by picture wire, hung from a wall screw or hook. This works for medium-weight panels (3-8 lbs) and allows slight angle adjustment after hanging.
Impaling clips (Z-clips) mount to the wall with screws, and the trap pushes onto the sharp points that grip the panel material. These work well for fabric-wrapped fiberglass panels and hold firmly without a frame.
Mounting Without Damaging Walls
For renters or anyone avoiding wall damage, several options exist that skip screws entirely.
Command strips (heavy-duty, rated for 12-16 lbs per set) hold lightweight panels securely and remove cleanly. Use multiple strips per panel — at least four for a 2×4 foot panel — and follow the weight rating carefully.
Tension poles (floor-to-ceiling spring-loaded poles) let you clip or strap panels at any height without touching the walls. Shower curtain tension rods work for lightweight foam, while heavy-duty studio poles handle rigid panels.
Freestanding frames built from 2×4 lumber create a portable structure that leans into the corner and holds panels at the correct angle without any wall contact. This option works especially well for DIY bass traps where you’re already building a custom solution.
How To Attach 6-Inch Bass Traps
Six-inch thick bass traps are heavier than standard 2-4 inch panels and need more robust mounting. A single 6-inch rigid fiberglass panel (24×48 inches) weighs 6-10 lbs depending on the insulation density.
French cleats are the best option for 6-inch traps because they handle the weight easily and distribute the load across the cleat length. Mount the wall cleat into studs (not just drywall anchors) for panels over 8 lbs.
For corner installations, an L-bracket approach works well: screw a metal L-bracket into each wall near the top, then rest the thick panel across both brackets. Add a small retaining bracket or cord at the top to prevent the panel from tipping forward.
Get Studio Tips Weekly
Join 5,000+ creators getting acoustic treatment advice every week.
No spam. Unsubscribe anytime.How To Hang Foam Bass Traps
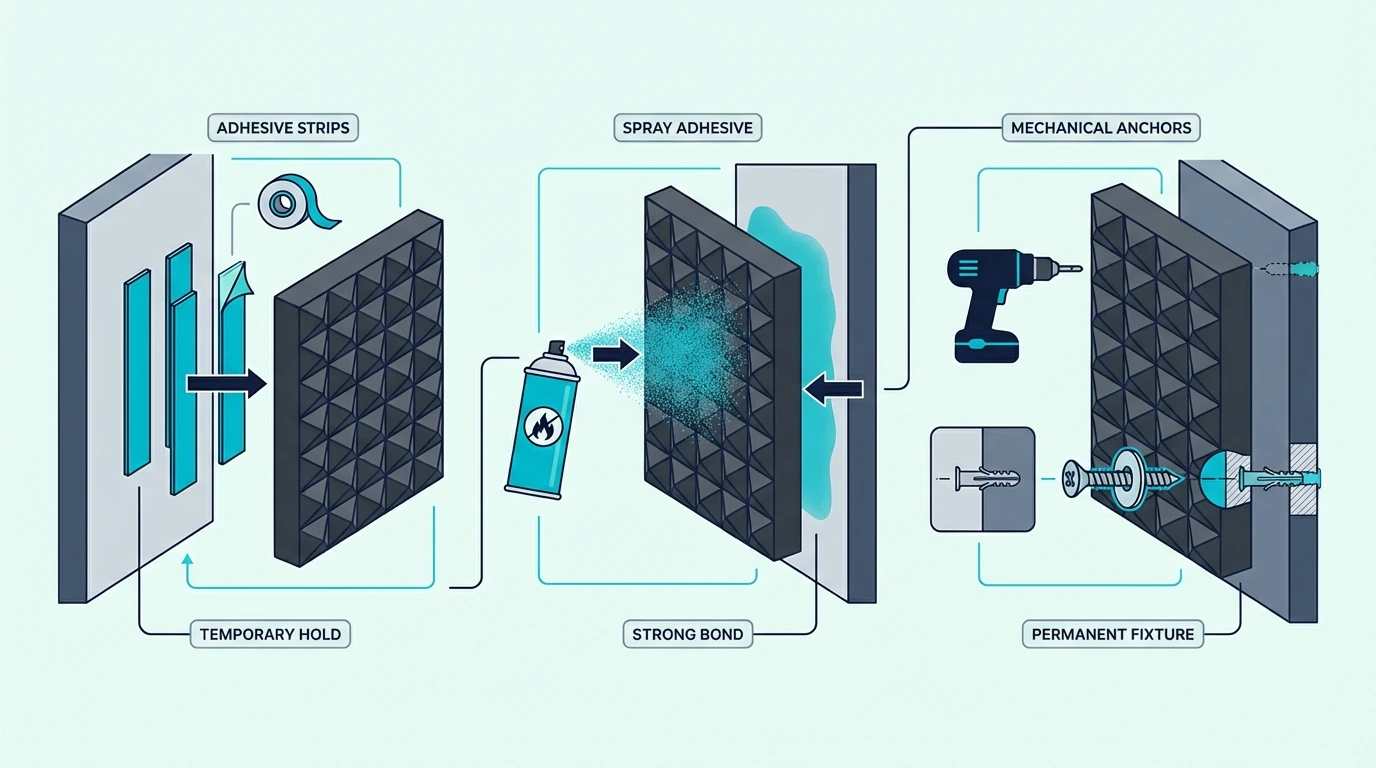
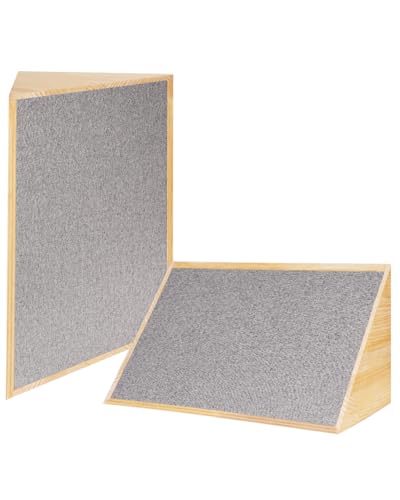
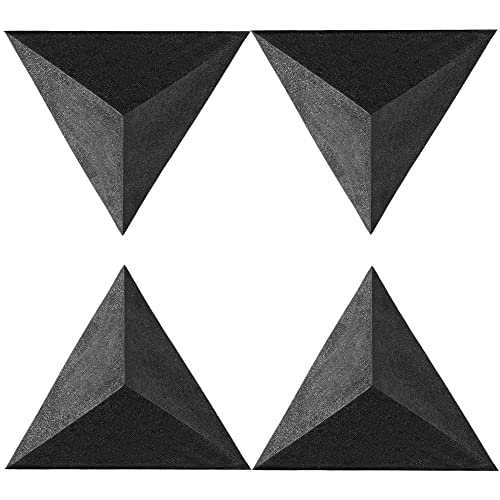
Foam bass traps are the easiest to install because they’re lightweight — typically under 2 lbs per piece. The 8 Pack Bass Traps Acoustic Foam Corner and similar foam wedges can be mounted with adhesive alone. For heavier premium traps requiring mechanical mounting, the 2 Pack Wooden Acoustic Bass Traps provide professional-grade absorption.
8 Pack Bass Traps Acoustic Foam Corner
Adhesive spray (3M Super 77 or similar) bonds foam directly to the wall or ceiling surface — apply spray to both the wall and the foam back, wait 30 seconds for it to get tacky, then press firmly. The bond is strong but will damage paint when removed.
Command strips (medium weight) work for foam traps and remove cleanly — stick strips to the flat back surfaces of the foam and press against the wall. For triangular corner traps, place strips on both faces that contact the walls.
T-pins or pushpins work for foam mounted on drywall or drop ceilings — push pins through the foam into the wall surface. The method is quick and damage-minimal but doesn’t hold well on smooth or hard surfaces.
Avoid heavy mounting hardware on foam — screws and brackets can tear through the soft material. If the foam won’t hold with adhesive or pins, attach it to a thin backer board (1/4-inch MDF or cardboard) first, then mount the board.
Can You Just Set Bass Traps On The Ground?
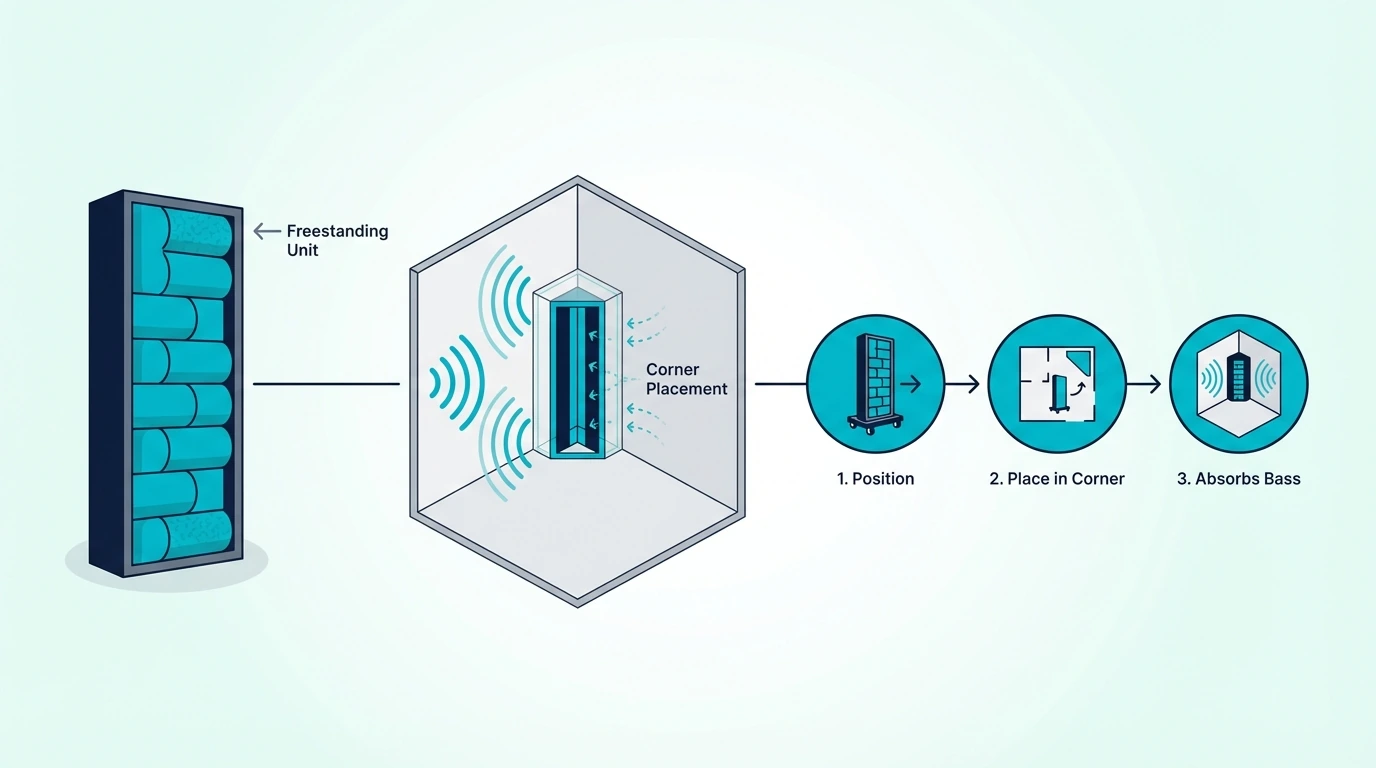
Setting bass traps directly on the floor in corners works and is the fastest possible installation method. Floor placement puts the trap at the tri-corner junction where two walls meet the floor — one of the highest pressure zones in the room.
Freestanding placement is ideal for: – Superchunk traps (stacked triangular insulation) that fill the entire corner from floor up – Temporary setups where you’re testing how many traps you need before committing to permanent installation – Rental spaces where wall mounting isn’t allowed
The limitation is height coverage — a 4-foot freestanding trap treats the lower half of the corner but misses the upper tri-corners and wall-ceiling edges. For home studios where floor-standing is the only option, lean panels into the corner at a slight angle and stack them as high as practical.
Freestanding traps can tip forward, especially in corners with smooth walls. A small furniture bracket or cord connecting the top of the trap to a wall screw keeps it stable without requiring the full weight-bearing hardware of a wall-mounted installation.
Do Corner Bass Traps Need To Be Floor To Ceiling?
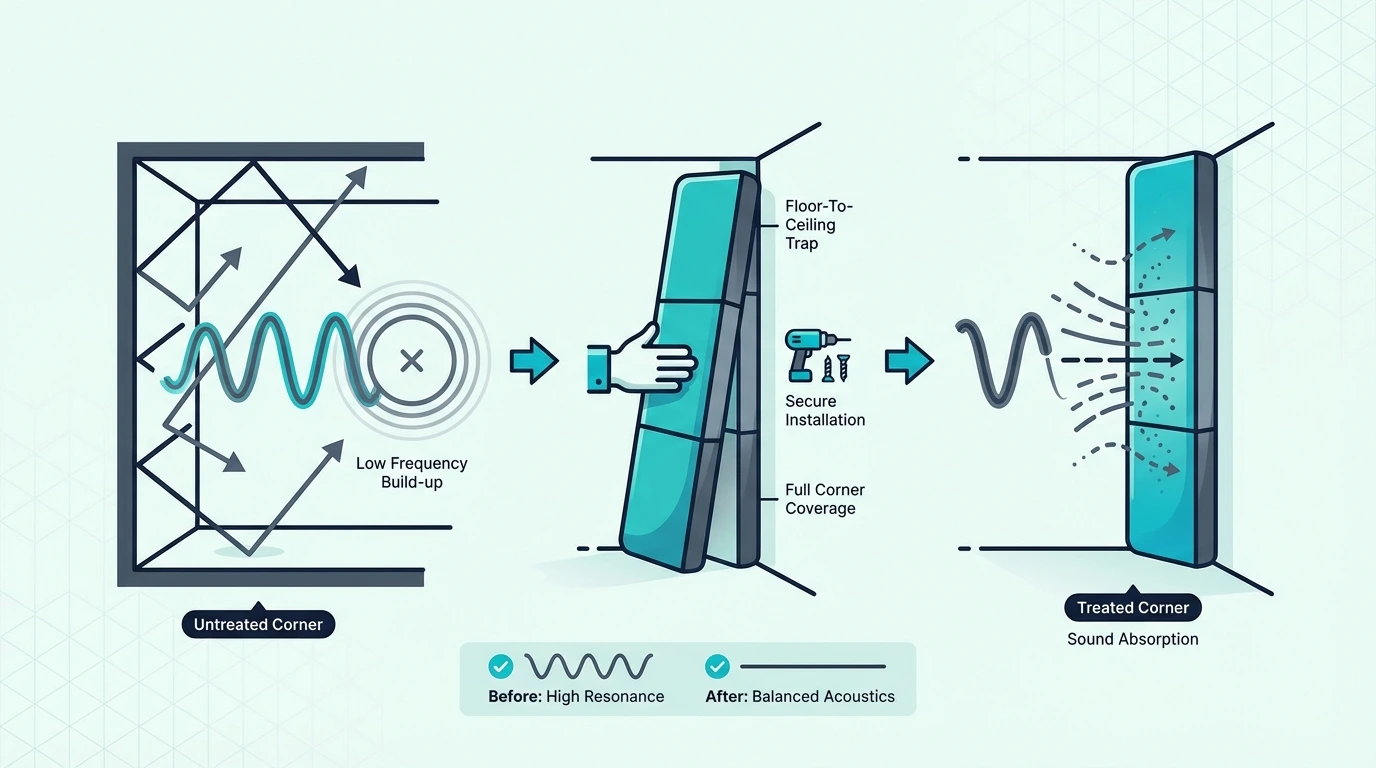
Floor-to-ceiling bass traps deliver the best results because they intercept every room mode at that corner position. Different frequencies have their pressure maxima at different heights, and a full-height trap catches all of them.
Partial-height traps still help — a 4-foot panel in the corner absorbs significantly more bass than no treatment. The improvement from zero traps to partial traps is much larger than the improvement from partial to full-height.
If you can only do partial height, prioritize the top of the corner (ceiling junction) over the middle of the wall. The tri-corner where two walls meet the ceiling concentrates more bass energy than the mid-wall region.
For small rooms with 8-foot ceilings, two 4-foot panels stacked vertically achieve full coverage without requiring a single panel tall enough to reach floor to ceiling. Stack them with the seam at mid-height and the top panel touching the ceiling.
The Bottom Line
Mounting bass traps in corners uses the same basic hardware you’d use for shelves and heavy pictures — French cleats for heavy panels, adhesive for foam, and Command strips for damage-free installation. The method matters less than getting the trap into the corner with an air gap behind it.
Begin at the front wall corners, mount traps floor-to-ceiling when possible, and straddle them at an angle across the corner rather than flush against one wall. Even the simplest installation — foam wedges pressed into corners with adhesive spray — delivers meaningful bass improvement the moment it goes up.
Frequently Asked Questions
Should I put bass traps in every corner?
Every corner is ideal, but front wall corners give the biggest return on investment. Start with four traps covering the front corners (two upper, two lower tri-corners), then add rear corners and ceiling edges as budget allows.
How to mount Auralex bass traps?
Auralex LENRD bass traps come with adhesive tabs or can be mounted using Auralex’s Tubetak Pro liquid adhesive applied to the flat back surfaces. Press the LENRD into the corner with the curved face pointing into the room and hold for 30 seconds — for damage-free mounting, use heavy-duty Command strips on the flat contact surfaces instead.
Where to install corner bass traps?
Install corner bass traps at the tri-corners first — where two walls meet the floor or ceiling. Front wall corners behind your monitors are the highest priority, followed by rear wall corners, then wall-ceiling edges along the sides of the room.