
Do you cringe at the echoes or muddled sound in your studio, office, or other enclosed spaces? Acoustic treatment doesn’t have to cost a fortune.
This guide covers straightforward DIY acoustic treatment methods for dramatically improving room sound on a budget.
Let’s dive into identifying and addressing different sound problems cheaply using common household items.
Identify Problem Areas Causing Sound Issues
When attempting to acoustically treat a room, it’s important to first identify specific problem areas that are causing unwanted sound reverberation or echo.
One easy way to do this is to simply stand in the center of the room and make some noise, like clapping or speaking loudly.
Pay attention to the surfaces where the sound seems to reflect back louder or more echoed.
This indicates potential acoustic problem spots.
You can also experiment with placing a large rug or acoustic panel temporarily in various areas as you test to pinpoint specific problem locations.
Identifying localized sound issues before installing any permanent acoustic treatments allows you to strategically target the areas that need it most.
This saves time, effort, and money compared to just evenly distributing panels around the entire room.
Be sure to listen closely and zero in on spots where the sound lingers, echoes, seems louder, or gets muddy.
Common problem areas include bare parallel walls or large flat surfaces.
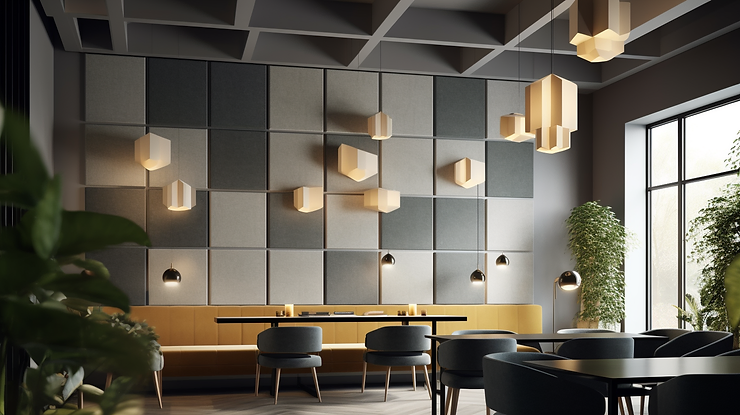
Absorb Sound with Do-it-yourself Acoustic Panels

One of the most effective and affordable ways to treat sound issues in a room is to install your own homemade acoustic panels.
These can be easily created using rigid insulation or rigid fiberglass boards, which absorb and disperse sound instead of purely reflecting it.
Here’s how to make your own:
First, determine how many panels you need and cut rigid insulation boards or rigid fiberglass boards to your desired panel size.
These will serve as the core sound-absorbing layer. Then, construct simple wood frames using 1×2 or 1×3 pine boards cut to size and screwed together at the corners.
These frames will hold the insulation or fiberglass boards. Make sure the inner frame dimensions match the cut boards.
Next, use adhesive, staples, or screws to affix the rigid boards securely into each frame.
For a cleaner look, stretch fabric over the frame and use staples to firmly wrap the fabric edges to the rear of the frame.
Acoustic transparent fabrics like burlap work best, but any fabric can help protect the boards while still allowing sound to pass through.
Finally, mount the finished panels at ear level on walls where you identified problems.
Pay special attention to placing panels across from each other spanning the room’s width for maximum absorption. Concentrate placement near listening areas.
Group multiple panels strategically to surround sound speakers or instruments as needed.
Covering 25-30% of wall space with absorption is ideal in most rooms.
Stop Bass with Thick, Dense Materials
While acoustic panels made from rigid insulation or fiberglass boards work well at absorbing mids and highs, thick and dense materials are required to effectively absorb lower bass frequencies.
Materials like packing blankets, thick quilts and blankets, acoustic rubber, memory foam mattress toppers, or mass loaded vinyl layered on walls can help absorb troublesome low-end frequencies.
Additionally, creating corner bass traps in problem room corners helps catch, absorb, and break up troublesome low frequency buildups.
These bass traps can consist of stacked rigid insulation or fiberglass boards, or other thick dense materials, floor to ceiling in room corners.
The greater the thickness, the better bass absorption. Dense materials mounted to walls via wooden frames also increases thickness for better low-end control.
For serious bass problems, super-chunk style bass traps, made from many rigid fiberglass boards glued together edge-to-edge and covered in rigid frames mounted floor to ceiling in corners, may be required.
However all of the above options using common household items work surprisingly well to tame bass issues.
Focus placement of dense absorption materials in corners, along low walls, by windows or vents, under risers, or wherever else you hear boomy bass buildup.
Diffuse Sound with Scattering Techniques
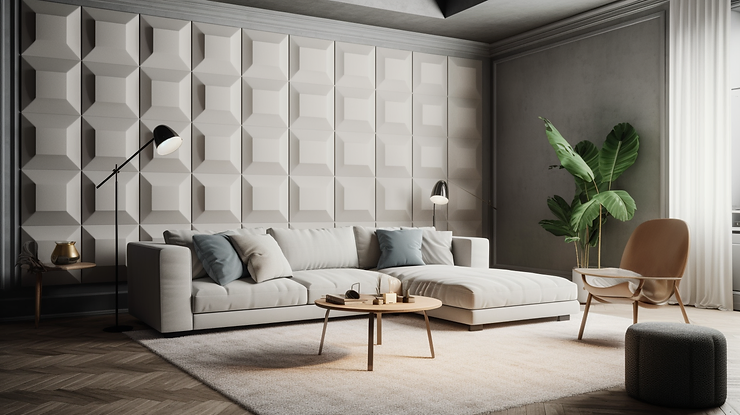
In addition to absorbing problematic sounds using panels and dense materials, diffusing or scattering sound is also helpful to treat rooms with echo, flutter echo, or an uneven reverb quality.
Diffusion works by breaking up and redirecting concentrated sound rather than purely absorbing it. This is achieved using uneven surfaces, angles, or depths.
Common household items make great affordable DIY diffusers. Simply hang laundry, tapestries, quilts, flags, or mesh scrims unevenly on walls for natural diffusion.
You can also arrange assorted sizes of picture frames, wall shelves, square wood trim pieces, or CDs in chaotic patterns on problematic walls. 3D wall art pieces, small mounted square wood blocks in rows, corrugated plastic sheets, and other uneven surfaces also help scatter sound.
Place these diffusers wherever sound seems to echo or concentrate too narrowly, or wherever a dead-end reflective surface causes a flutter echo effect between parallel walls or corners.
Diffusion helps complement absorption treatments by evening out the room’s overall sound. Balancing absorption and diffusion allows for warm, clear room sound
Rely on absorption for controlling loudness or boominess, and diffusion to liven up “dead” spaces.
Be Strategic in Acoustic Placement for Effectiveness
When sound treating your room, aim to cover approximately 25-30% of your total wall and ceiling space with acoustic absorption and diffusion.
Any less and treatments lose effectiveness. Any more can deaden the room too much. Place treatments strategically, not evenly. Focus on identified problem spots first.
Mount absorption panels at ear height on walls, starting with the first reflection points across from your speakers/mix position, then surrounding your listening position/desk, then cover parallel walls causing flutter echo.
For recording spaces, also treat behind microphones and instruments. Cover reflective floors/ceilings with large area rugs and acoustic foam as possible.
Use thicker dense materials stacked floor-to-ceiling for bass control wherever boomy low-end is apparent. Scatter diffusers among your absorption panels for added natural room sound.
Follow this strategic placement focused on problems over blanket treatments, and you can achieve excellent sound control even with DIY treatments made from household materials.
Some studios may still require additional professional bass traps or other specialized acoustic treatments on top of DIY panels to achieve perfect sound.
But following these guidelines maximizes what you can do yourself on a budget before needing to bring in contractors for pricier solutions.
Get creative with absorption and diffusion approaches customized to your space.
Conclusion
Treating room acoustics on a budget takes some creativity and strategic thinking, but can make a dramatic difference in sound quality.
Start by identifying specific acoustic problems, then leverage affordable absorption and diffusion techniques using household items to address issues step-by-step.
Balancing panels, bass traps, and diffusers allows you to customize treatments based on your space.
While additional professional help may still be needed for perfection, this DIY approach optimizes improvements possible without expensive contractors.
Now you can cost-effectively turn even difficult rooms into great sounding spaces.