How to Choose a MIDI Controller – The Decision Framework That Prevents Buyer Regret

How to choose a MIDI controller comes down to matching three variables to your workflow: key count, control type (keys vs pads vs knobs), and your primary DAW — but most buyers fixate on specs instead of asking how they actually make music, which leads to controllers that sit unused after the first week.
The mistake is caused by treating MIDI controller shopping like a specs comparison when it should be a workflow audit. A producer who makes beats on a laptop needs a completely different controller than a pianist who records classical repertoire, and no single “best” controller serves both.
This guide replaces the typical feature comparison with a decision framework based on how you create. Answer four questions about your workflow, and the right controller category becomes obvious — then you pick the specific model that fits your budget.
Below you will find the four decision questions that narrow your options, followed by specific controller recommendations for each workflow type and a breakdown of which features matter and which are marketing fluff.
Choose a MIDI controller by answering four questions: Do you need keys, pads, or both? How many keys fit your playing style (25, 49, 61, or 88)? Which DAW do you use? What is your budget? Beat makers should prioritize pads alongside keys. Pianists should prioritize key count and action quality. Budget producers should start with an all-in-one under a hundred dollars.
Do You Need Keys, Pads, or Both on Your MIDI Controller

The first decision eliminates entire product categories from your search. Controllers come in three formats, and each serves a fundamentally different production style.
Keys-Only Controllers
Keys-only controllers provide piano-style input with pitch bend, modulation wheels, and sometimes transport controls. No pads, no knobs, no faders. The focus is entirely on playing notes with the best possible key feel.
Choose keys-only if you primarily play melodies, chord progressions, and piano parts. The M-AUDIO Keystation 49 MK3 represents this category — 49 full-size keys with transport controls at a hundred nine dollars.
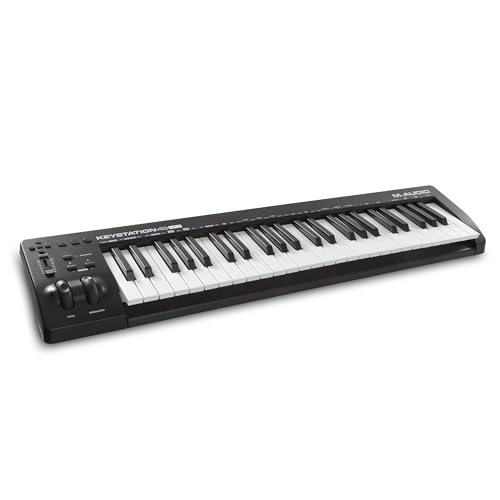
M-AUDIO Keystation 49 MK3
All-In-One Controllers (Keys + Pads + Knobs)
All-in-one controllers pack keys, drum pads, assignable knobs, and sometimes arpeggiators into a single compact unit. The key count is usually 25 (mini size), and the emphasis is on versatility rather than key feel.
Choose all-in-one if you make beats, program synths, AND play melodies — all within the same production session. The Akai Professional MPK Mini MK3 is the benchmark all-in-one — keys, pads, knobs, and software for ninety-nine dollars.
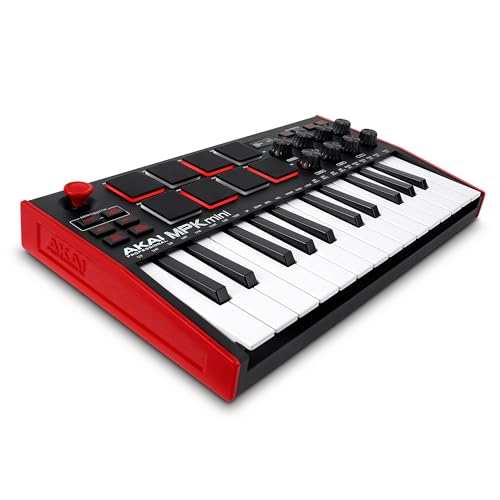
Akai Professional MPK Mini MK3
Pad-Only Controllers
Pad-only controllers (Akai MPC, Novation Launchpad) provide velocity-sensitive pads for finger drumming, clip launching, and sample triggering with zero keyboard keys. These serve beat makers and live performers who input notes through pads exclusively.
Choose pad-only if your production centers on beats, samples, and clip-based arrangement rather than played melodies. Most pad-only producers pair a dedicated pad unit with a budget keyboard for the occasional melody.
How Many Keys Do You Need on a MIDI Controller
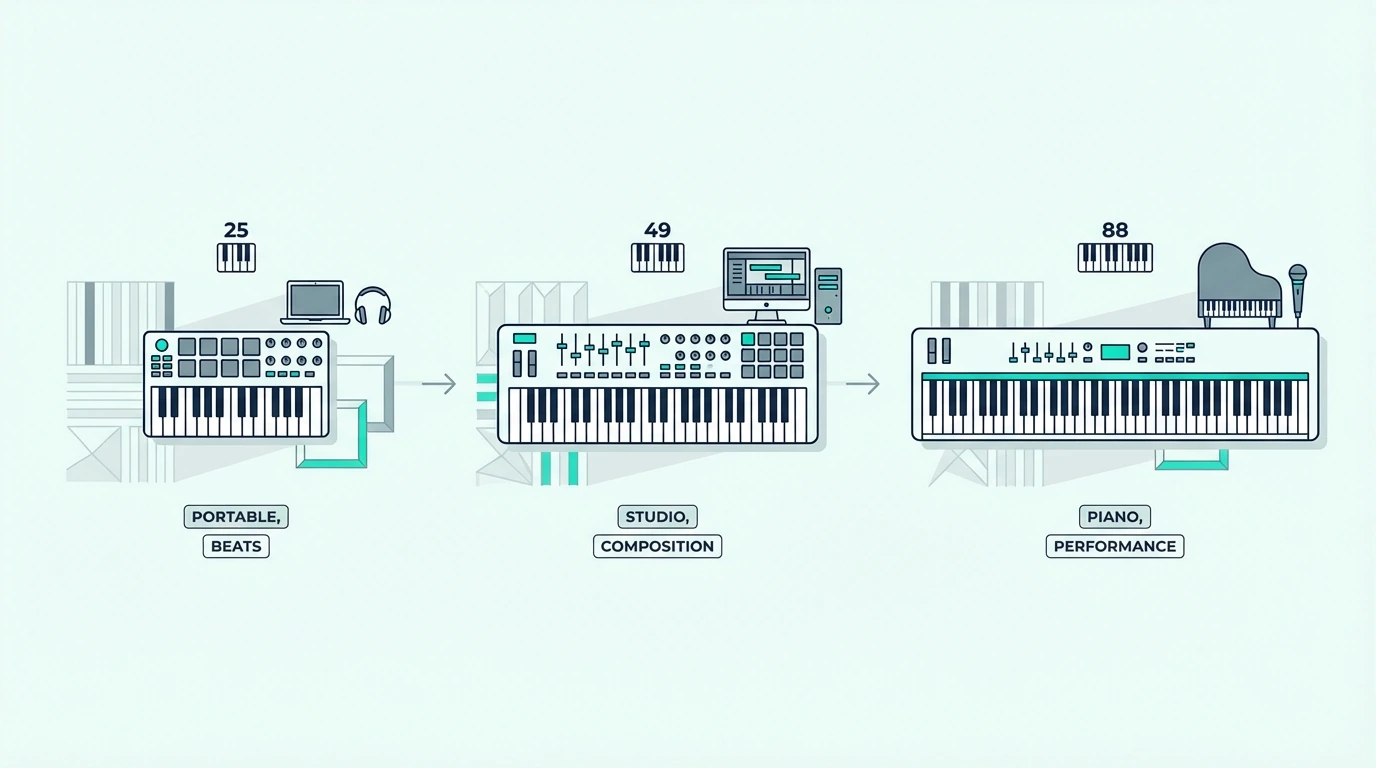
If you decided you need keys (either keys-only or all-in-one), the next question is range. Key count determines what you can play comfortably without reaching for octave buttons.
25 Keys (Two Octaves)
Twenty-five keys handle one-handed melodies, bass lines, synth leads, and basic chord stabs. Beat makers and electronic producers who primarily use pads for rhythmic input rarely need more. The compact size fits beside a laptop without dominating desk space.
25-key controllers range from forty to one hundred twenty dollars, with the most popular options (MPK Mini MK3, Novation FLkey Mini) falling around a hundred dollars.
49 Keys (Four Octaves)
Forty-nine keys let you play two-handed chord progressions, bass-with-melody combinations, and most piano literature without octave shifting. This is the sweet spot for producers who play keys as their primary input method.
49-key controllers range from eighty to one hundred fifty dollars, with the M-AUDIO Keystation 49 MK3 and Nektar SE49 representing the best value options.
61 Keys (Five Octaves)
Sixty-one keys add an extra octave for wide voicings, split keyboard zones, and orchestral keyswitch layouts alongside playable range. Serious keyboardists and composers who need more range than 49 keys but less footprint than 88 choose this size.
61-key controllers start around two hundred dollars, with the Novation Launchkey 61 MK4 being the standout option at three hundred thirty dollars with pads and faders included.
88 Keys (Full Range)
Eighty-eight keys cover the complete piano range — essential for classical repertoire, film scoring with orchestral Expression Maps, and any playing that requires simultaneous access to both extremes of the keyboard.
88-key controllers range from three hundred to five hundred dollars. Measure your desk before committing — the four-foot footprint demands dedicated space.
Get Studio Tips Weekly
Join 5,000+ creators getting acoustic treatment advice every week.
No spam. Unsubscribe anytime.Does Your DAW Affect Which MIDI Controller to Buy
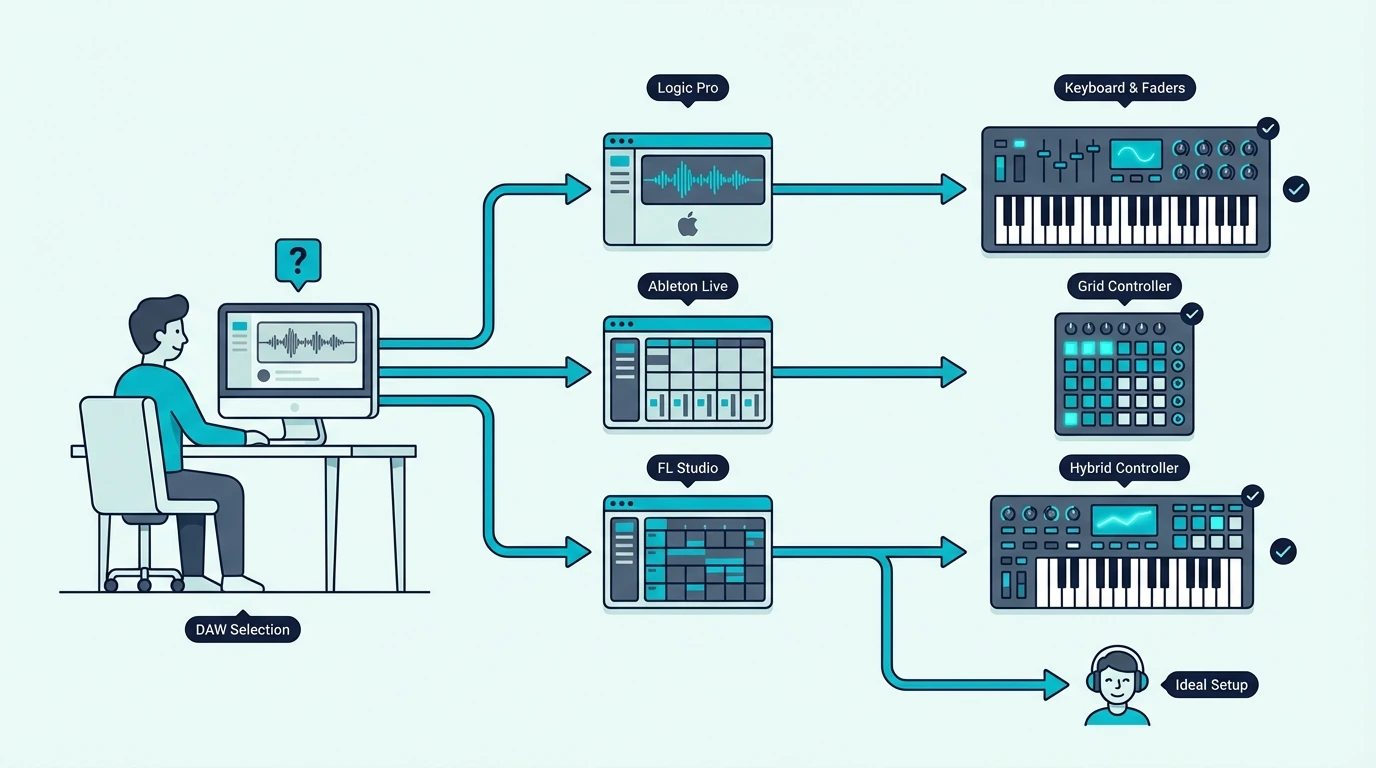
Your DAW determines which controllers offer native integration that saves setup time. Generic controllers work with every DAW through MIDI learn, but native integration auto-maps pads, knobs, and faders without configuration.
The matching is straightforward. FL Studio users get native integration from the Novation FLkey series. Ableton users get it from the Novation Launchkey series. Logic Pro users get it from the Launchkey series and Apple’s own integration. GarageBand users get plug-and-play with every controller.
If you switch between DAWs or use Cubase, Cakewalk, or another platform, choose a controller with open MIDI mapping (like the Akai MPK series) rather than one locked to a specific DAW’s integration protocol.
How Much Should You Spend on a MIDI Controller
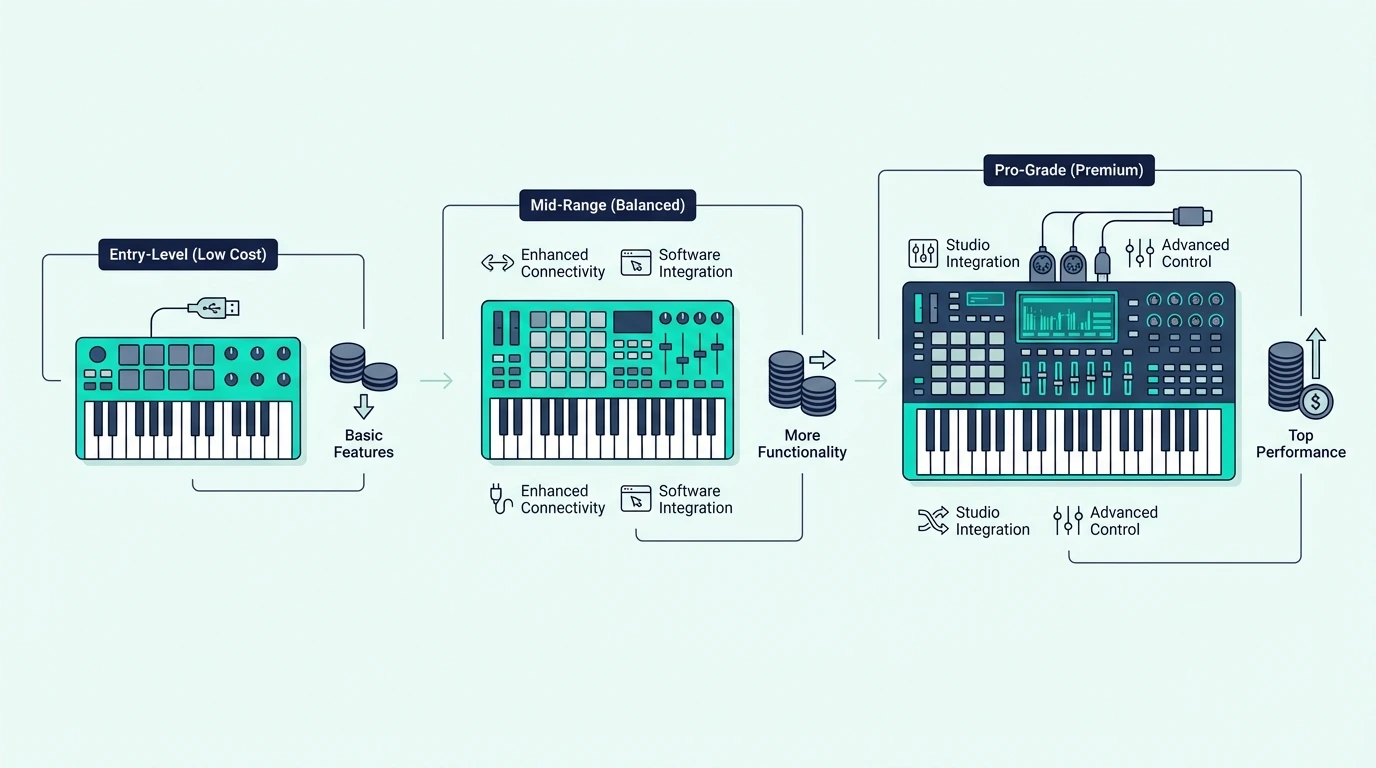
MIDI controllers cluster into clear price tiers, and understanding what each tier delivers prevents overspending on features you will not use.
Under 50 Dollars
Keys-only controllers with 25-32 mini keys and velocity sensitivity. No pads, no knobs, no bundled software in most cases. The midiplus AKM320 and Nektar SE25 represent this tier. Ideal for testing whether MIDI production fits your creative goals before investing more.
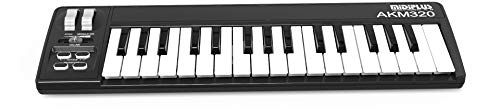
midiplus AKM320
80 to 120 Dollars
The most competitive bracket. All-in-one controllers with pads, knobs, and bundled software (MPK Mini MK3 at ninety-nine dollars) alongside 49-key keyboards with transport controls (Keystation 49 MK3 at a hundred nine dollars). This tier covers everything most producers need.
200 to 350 Dollars
Premium controllers with semi-weighted keys, aftertouch, faders, and deep DAW integration. The Novation Launchkey 61 MK4 at three hundred thirty dollars and M-AUDIO Keystation 88 MK3 at three hundred dollars define this tier. These controllers serve serious producers and performing musicians.
400 Dollars And Above
Fully weighted hammer-action controllers (Yamaha P71 at four hundred thirty dollars) and premium production keyboards. This tier targets pianists who need authentic piano feel alongside MIDI functionality. Most producers never need to spend this much.
Which MIDI Controller Is Right for Your Workflow
Here is the simplified decision path based on the four questions above.
Beat maker who needs portability → 25-key all-in-one with pads (MPK Mini MK3, ninety-nine dollars). This covers keys, beats, and knob control in one compact package.
Producer who plays two-handed parts → 49-key keyboard (Keystation 49 MK3, a hundred nine dollars). Full-size keys with enough range for chord progressions and melodies.
Pianist who practices AND produces → Weighted 88-key controller (Yamaha P71, four hundred thirty dollars) for practice, plus an MPK Mini for production. Two controllers beats one compromise.
Complete beginner unsure what they need → MPK Mini MK3 at ninety-nine dollars. It covers every workflow type and the bundled software gets you producing immediately. Upgrade to a specialized controller only after you discover which production style you gravitate toward.
Budget-constrained beginner → midiplus AKM320 at under forty dollars. Test whether MIDI production fits your creative goals with minimal financial risk. Upgrade when the limitations motivate you.
The Bottom Line
Choosing a MIDI controller is a workflow decision, not a specs decision. Answer the four questions — keys vs pads, key count, DAW, and budget — and the right controller category becomes obvious. Then pick the specific model within that category that fits your price range.
Most producers end up with the Akai MPK Mini MK3 (all-in-one at ninety-nine dollars) or the M-AUDIO Keystation 49 MK3 (keys-only at a hundred nine dollars). Those two controllers cover the vast majority of production workflows at accessible price points.
Frequently Asked Questions
What is the most important feature in a MIDI controller?
Key count and control type (keys, pads, knobs) matter most because they determine what you can physically do with the controller. Velocity sensitivity is non-negotiable — never buy a controller without it. Everything else (aftertouch, transport controls, DAW integration) is useful but secondary.
Should I buy a cheap controller to start?
Yes — a forty-dollar controller lets you test whether MIDI production fits your creative process with minimal financial risk. If the limitations frustrate you after a few months, that frustration tells you exactly what to prioritize in your upgrade. Starting expensive risks buying features you never use.
Do I need a controller that matches my DAW?
No — every MIDI controller works with every DAW at a basic level. DAW-specific controllers (FLkey for FL Studio, Launchkey for Ableton) add convenience through native integration, but generic controllers work perfectly through MIDI learn. Choose DAW-specific only if the time savings justify the price premium.
How do I know when to upgrade my MIDI controller?
Upgrade when a specific limitation consistently interrupts your workflow. Constantly shifting octaves means you need more keys. Missing velocity dynamics means you need a real controller instead of a computer keyboard. Needing pads for beats means you need an all-in-one or a dedicated pad unit. Never upgrade based on features — upgrade based on friction you actually experience.