How To Soundproof Drain Pipes (What Works And What Doesn’t) [2026]

How to soundproof drain pipes sounds like a simple wrap job, but the right fix depends on whether the noise is coming off the pipe wall, jumping into the framing, or both.

If every flush, shower drain, or sink discharge seems to run through the wall beside your bed, the problem gets so disruptive because a lightweight drain stack can radiate water noise and send vibration straight into the framing at the same time.

The good news is that you can often make the noise much less intrusive if you treat the loudest accessible section first instead of chasing the whole plumbing system at once.

This guide shows how to tell whether wrap, isolation, open-wall cavity treatment, or a boxed chase is the smarter first move.

Quick Takeaway

How to soundproof drain pipes depends first on access and second on noise type. If the pipe is exposed, start with a waterproof self-adhesive butyl damping mat and vibration isolation at the mounts; if the wall is already open, add insulation around the treated pipe; if the pipe is buried in a finished wall, expect wall work or more modest gains.

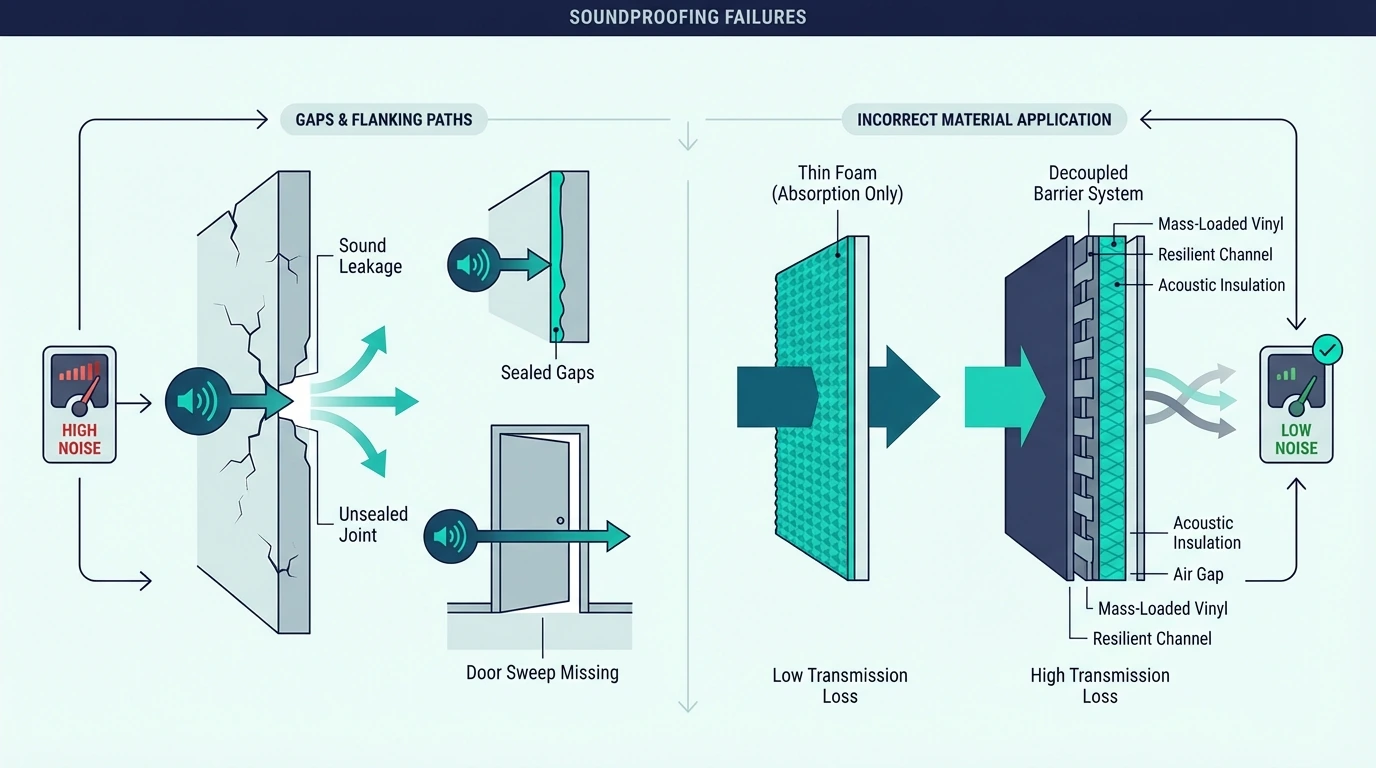
Drain-Pipe Noise Starts With The Real Leak Path

Overview of soundproofing noisy drain pipes

Drain-pipe noise feels random until you separate pipe-wall noise from framing vibration.

That first distinction tells you whether the fix should start on the pipe itself, at the mounts, or inside the wall cavity.

Falling Water Creates Turbulence, Impact, And Vibration

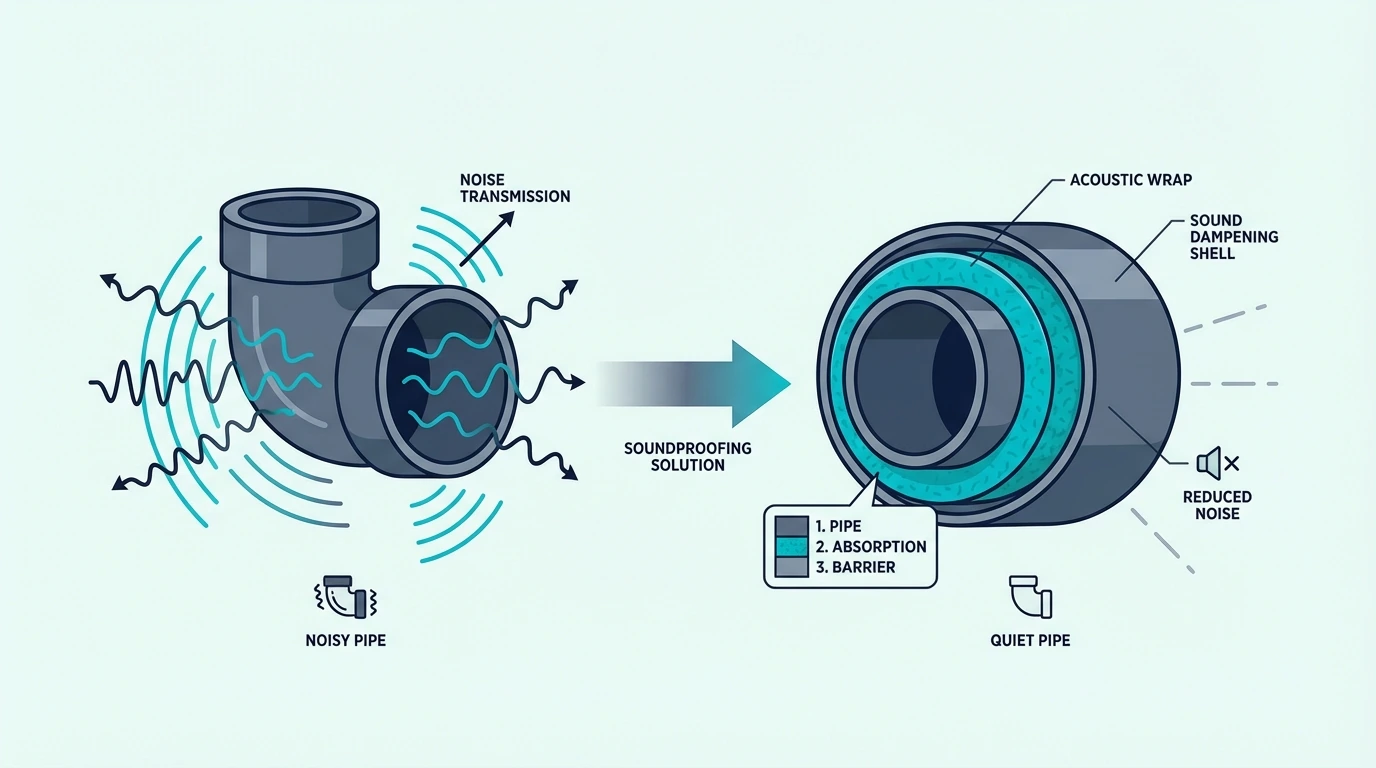
Drain pipes are noisy because falling water creates turbulence, impact, and vibration inside the pipe. Every time water hits a bend, a branch connection, or the bottom of a stack, it generates energy that the pipe wall radiates into the room.

The problem gets worse when the pipe is rigidly mounted to framing. Hard contact at studs, joists, blocking, or hangers can turn the wall or ceiling into a speaker for the pipe noise, which is why the sound often feels farther from the bathroom than it really is.

PVC Radiates More Noise Than Heavier Pipe Materials

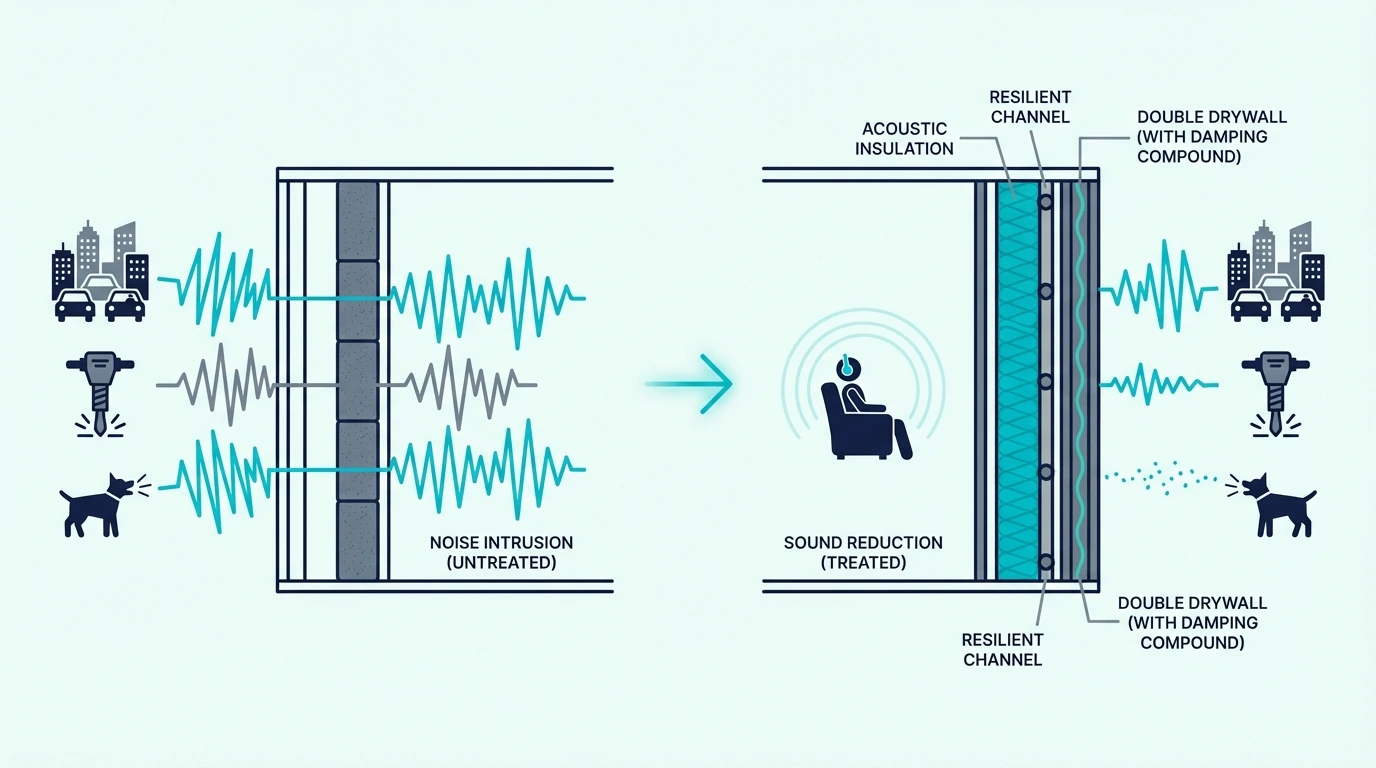
PVC is lighter and thinner than cast iron, so it vibrates more easily under the same water flow. A cast-iron stack damps sound with its own mass, while a PVC stack tends to ring, flex, and radiate more of that energy outward.

Many older homes with cast-iron stacks are quieter than newer homes with PVC even when the newer house is better insulated elsewhere. Pipe material is one of the biggest contributors to drain noise, and it is one of the hardest parts of the system to change after the house is finished.

Access Sets The Ceiling On Improvement

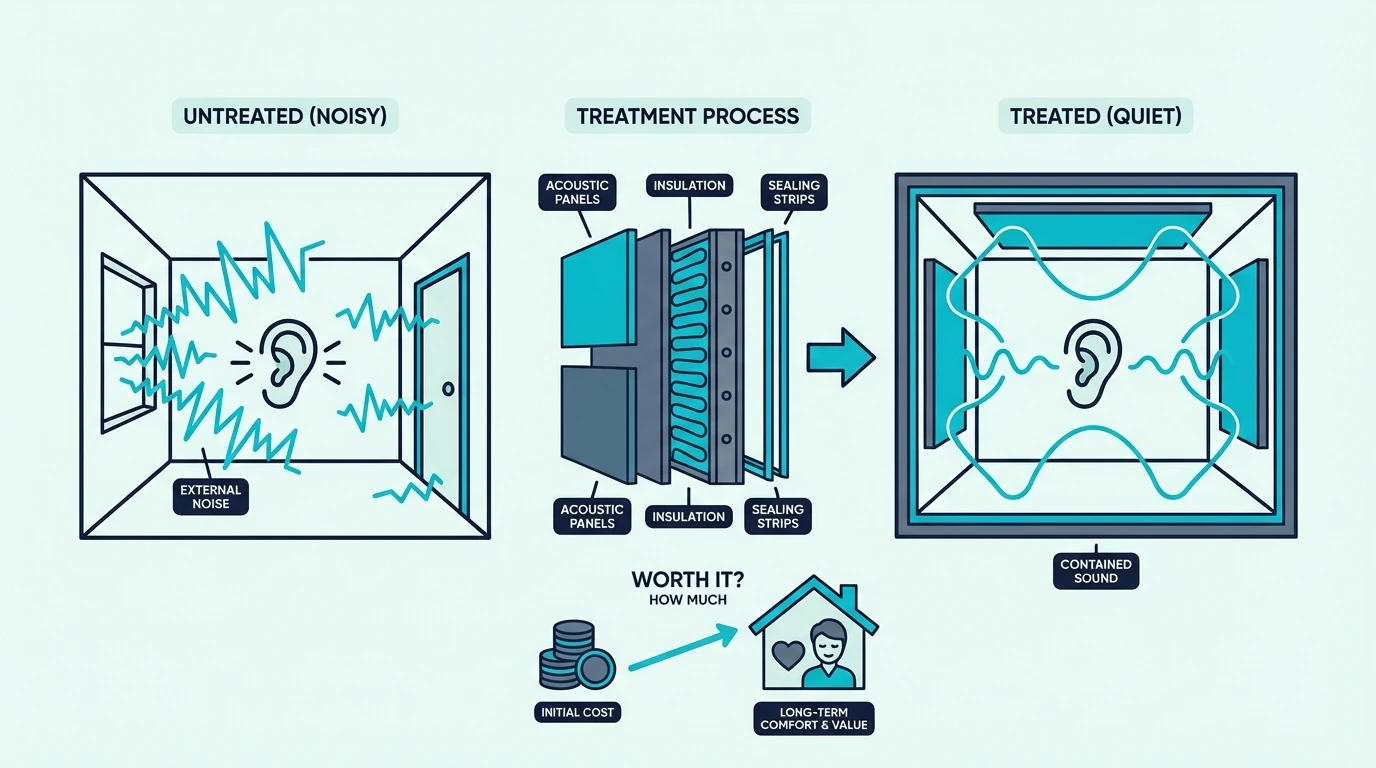
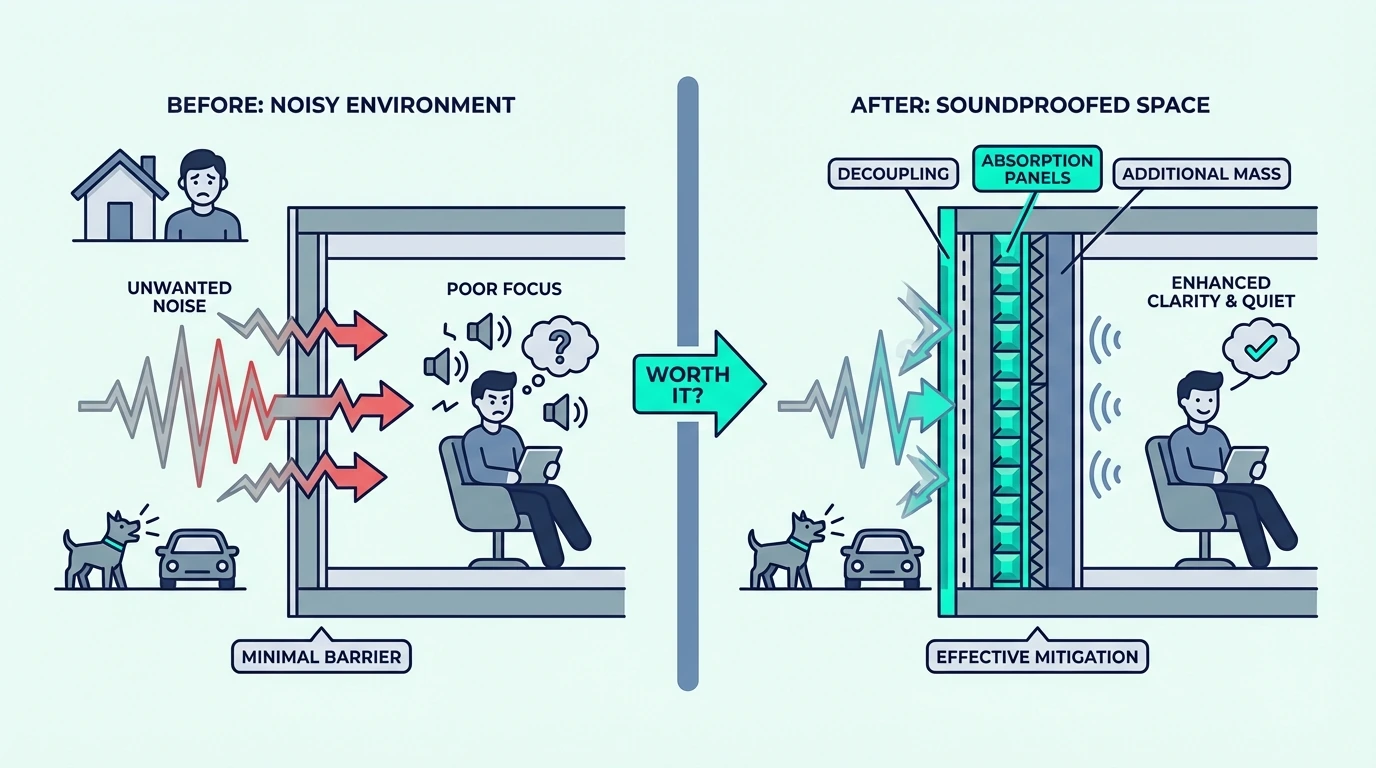
Wrapping and isolating drain pipes can make a noticeable difference, often enough to take a flush from “clearly audible through the wall” to “barely noticeable during normal activity.” That is not total silence, but it is a real quality-of-life improvement in bedrooms, offices, and media rooms near a waste stack.

The improvement depends heavily on access. Exposed pipes in basements, crawl spaces, and open chases are straightforward to treat, but pipes buried in finished walls usually force you into some level of wall work, which is why soundproofing an existing wall often becomes part of the same project.

Quieting A Drain Pipe Takes More Than Wrap Alone

Solutions for reducing drain pipe noise

Once you know where the noise is escaping, the treatment order becomes much easier to prioritize.

Most successful drain-pipe projects combine source treatment on the pipe with separation from the surrounding structure, then add an enclosure only when access and layout justify it.

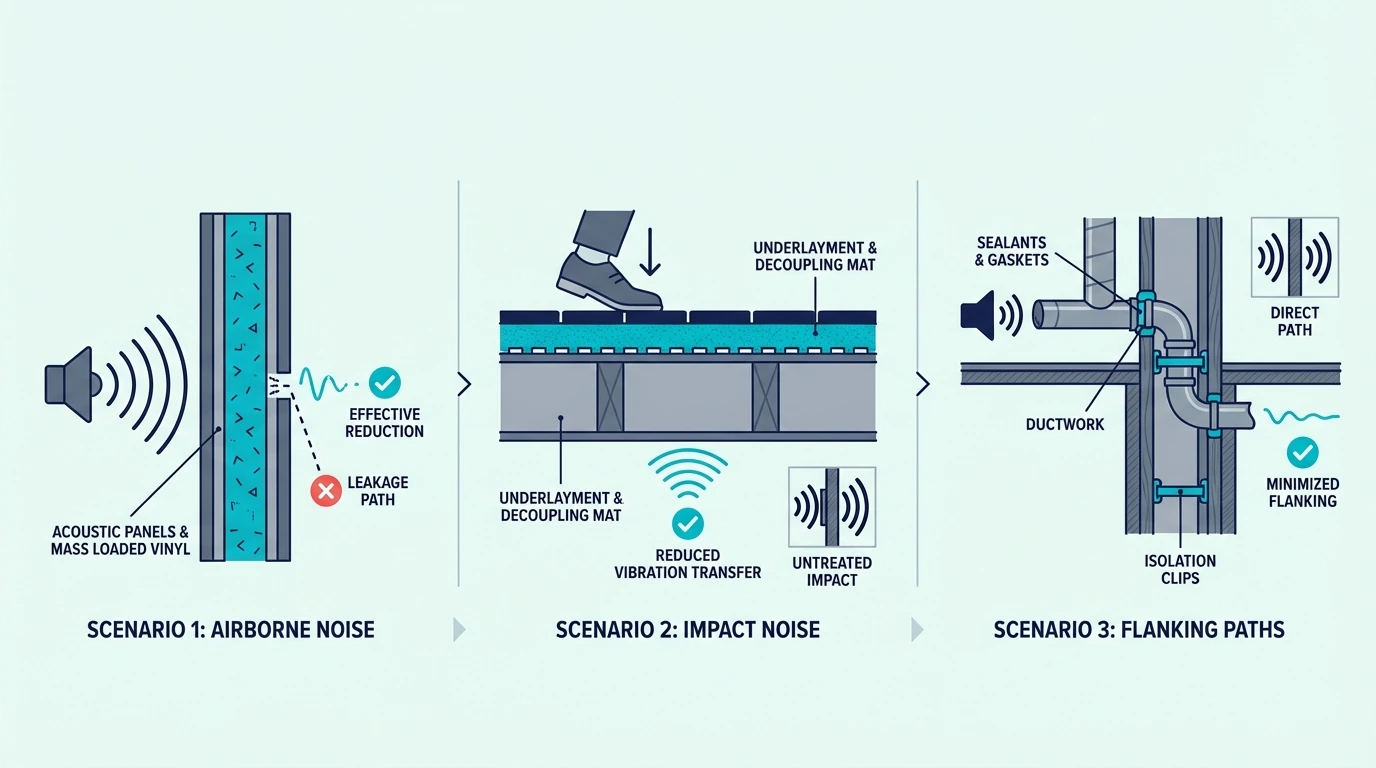
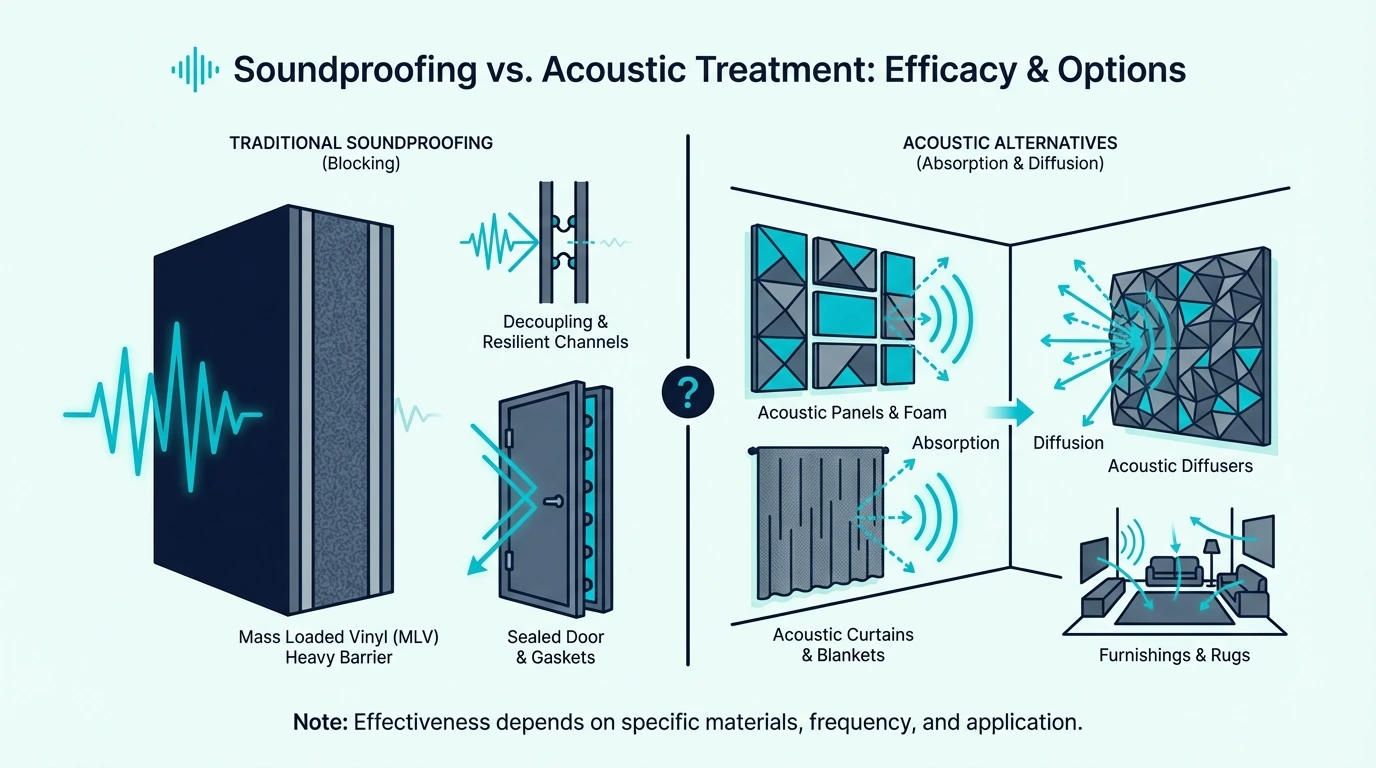
Direct Damping Helps When The Pipe Wall Is The Loud Part

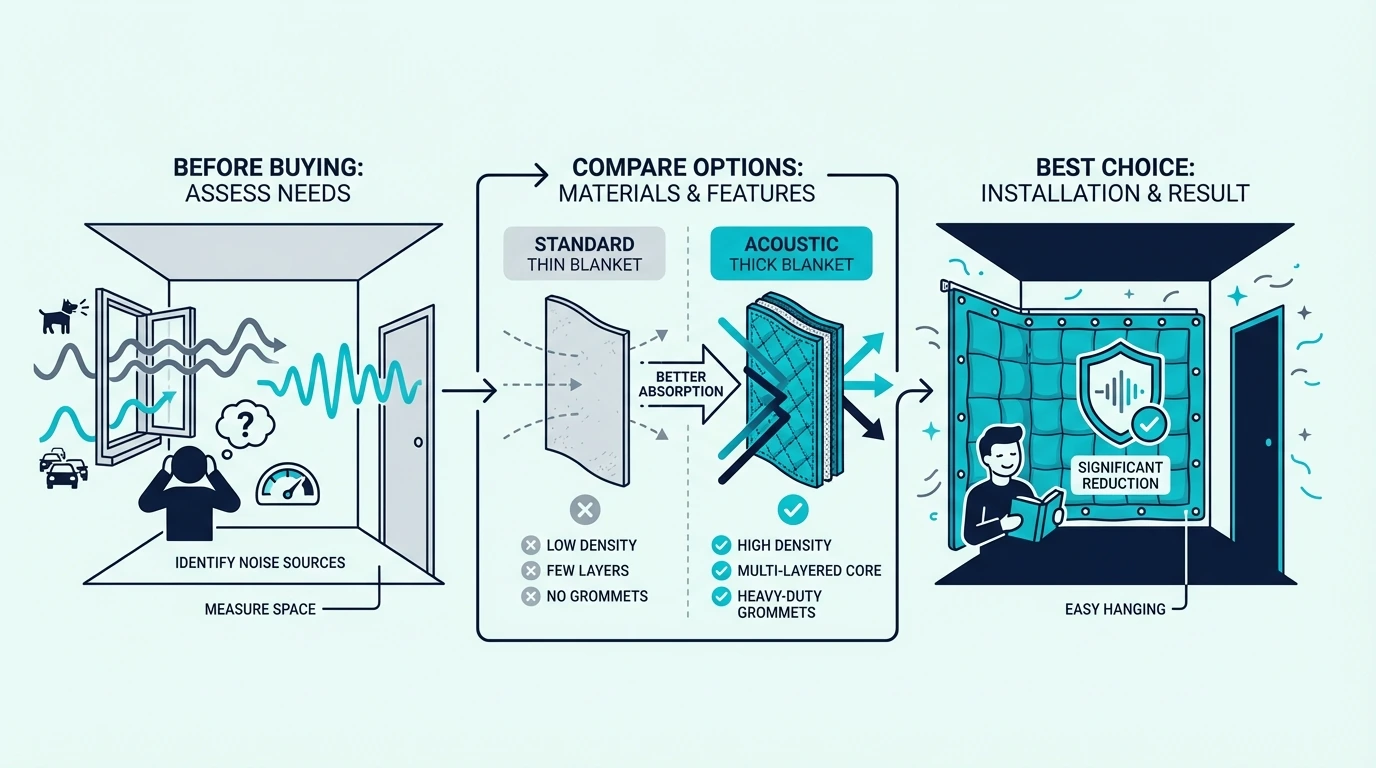
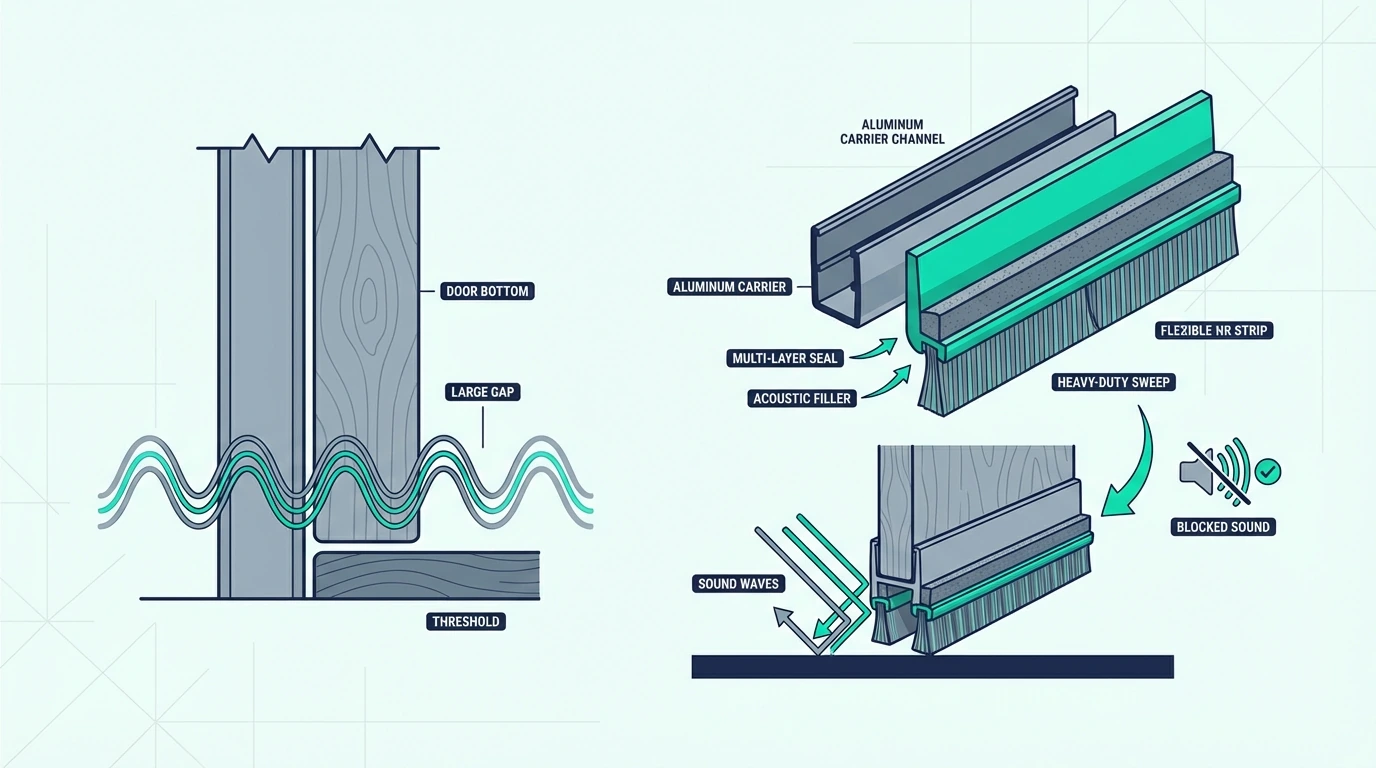
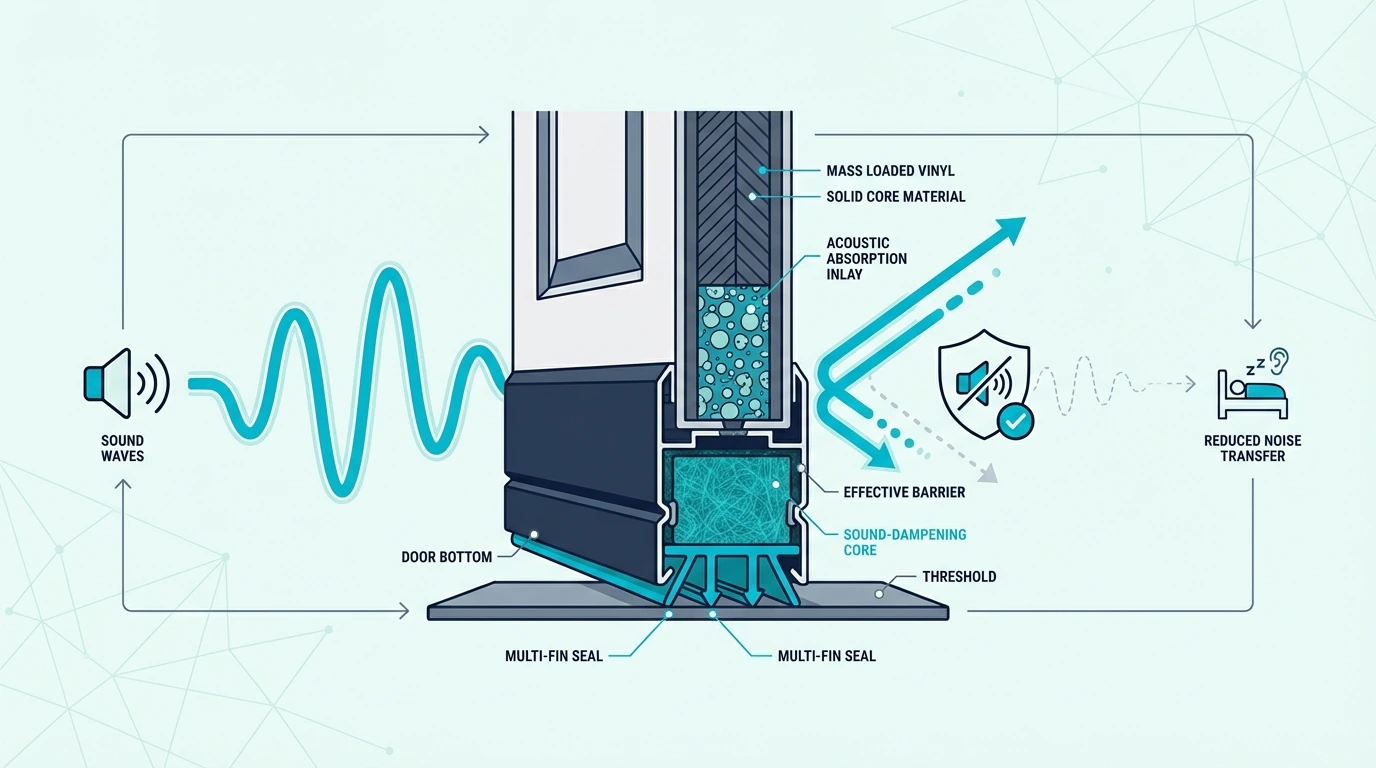
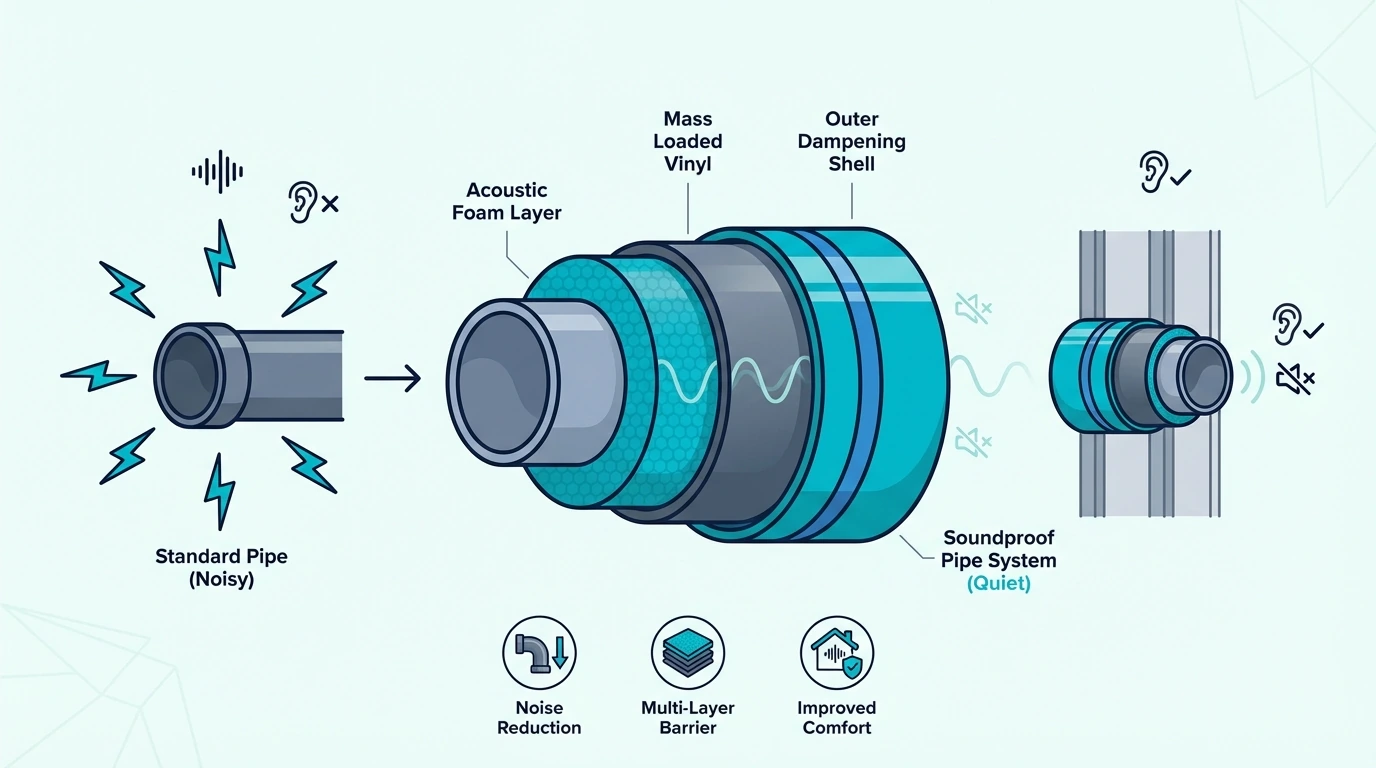
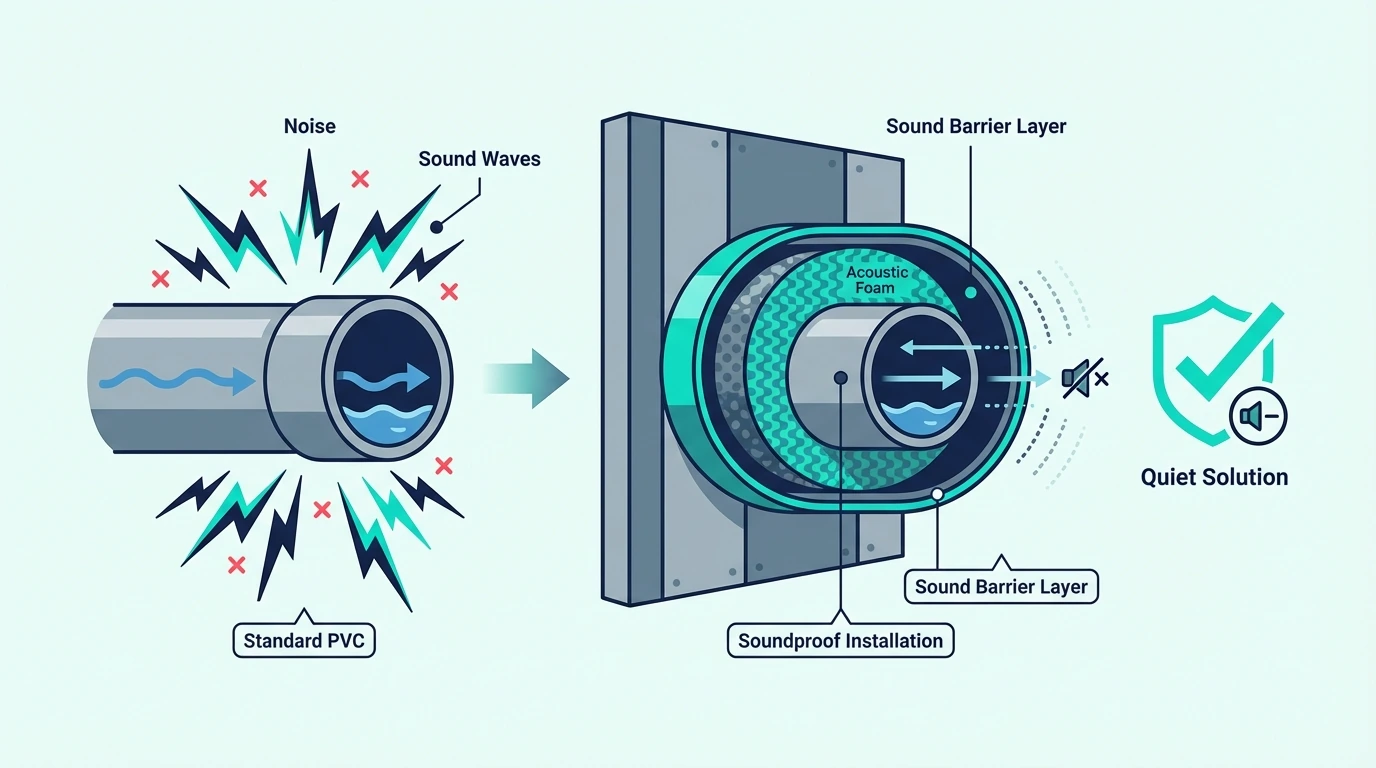
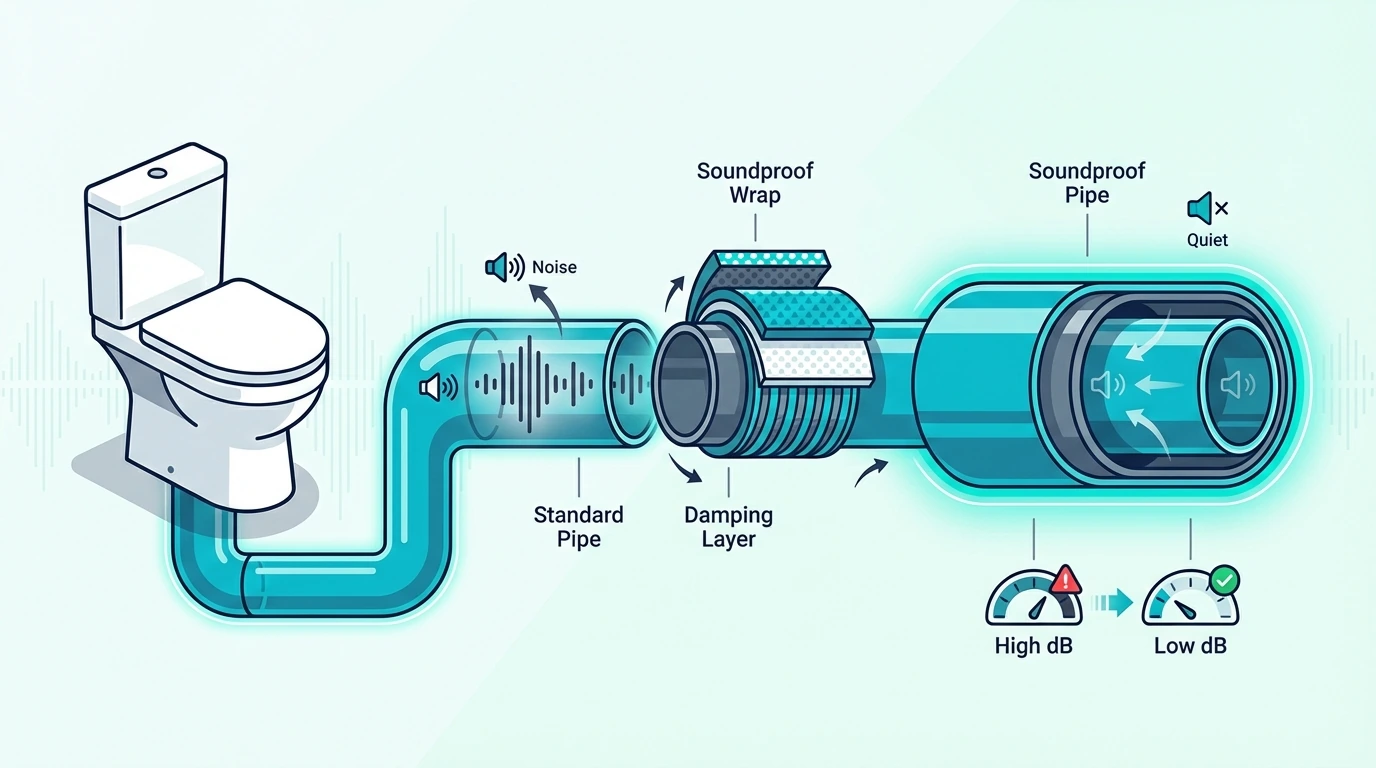
Wrapping helps most when the noise is a clear rushing, splashing, or flushing sound coming off the pipe itself. On exposed PVC, a waterproof self-adhesive butyl damping mat is often the most practical first layer because it adds mass, damps vibration, and tolerates humid utility-room conditions better than loose or fibrous materials.

A product like KILMAT 80 mil 36 sqft Car Sound Deadening Mat works well because the butyl layer sticks directly to the pipe and damps the shell itself. Treat the noisiest accessible section first, especially bends, branch connections, and the vertical stack section closest to the room you care about.

Direct-on-pipe damping is not a complete solution if the pipe is still hard-strapped to framing and rattling through the structure. It works best as one layer in a larger fix rather than as a magic one-step cure.

Isolation Matters More When Framing Starts Carrying The Noise

Isolation matters more when the noise you hear is a low rumble, vibration, or resonance rather than a sharp splash. That kind of noise is structure-borne, which means the framing is carrying and amplifying the vibration after the pipe creates it.

The fix is to break rigid contact at the mounts using rubber-lined clamps, resilient hangers, or isolation pads instead of bare metal straps driven tight against wood. Every contact point is a possible transmission bridge, so even replacing a few bad supports near the noisiest section can help more than adding more wrap farther away.

This is the same decoupling principle behind soundproofing a ceiling and soundproofing between floors. The goal is always to break the rigid connection so vibration cannot move from the source into the room shell.

A Boxed Chase Works Best As The Final Layer

Boxing in the pipe makes sense when the stack is exposed in a basement, utility room, garage, or service chase and you want one more barrier between the pipe and the room. It is most useful after wrapping and isolating the pipe, not before.

The enclosure works by adding mass and preserving an air gap around the treated pipe.

If you are lining the inside faces of that chase rather than just wrapping the pipe, a flexible barrier like Soundsulate Next Generation 1 lb. Mass Loaded Vinyl makes more sense than thin decorative layers because it adds real limp mass to the enclosure.

Before you close the chase, even the same KILMAT 80 mil 36 sqft Car Sound Deadening Mat can help by damping the pipe first and stopping thin access panels from becoming resonant. The drywall or plywood chase then becomes a secondary barrier rather than the first line of defense.

The tradeoff is access and serviceability. If you box in a stack, plan an access panel anywhere future plumbing work is likely.

PVC Stacks Need A More Targeted Upgrade Order

Soundproofing PVC drain pipes

PVC gets most of the complaints because it starts with less mass and less built-in damping than cast iron.

That means the same categories still apply, but the order matters more because you are trying to control a lighter, more resonant pipe from the start.

PVC Amplifies Water Noise Because It Rings Easily

PVC amplifies noise because it is lightweight, rigid, and resonant. Its thin walls vibrate easily when water hits them, and the system tends to ring more than a heavier cast-iron stack.

That combination makes PVC the worst common drain material for noise even though it is cheap and easy to install. In most newer homes, the goal is not changing all the pipe material but treating the loudest sections intelligently.

The Best PVC Fixes Start At The Loudest Accessible Section

The strongest PVC strategy is to treat the noisiest accessible stack section first, then address the supports, then address the cavity if it is open. That order usually gives you more real improvement than spreading effort thinly across the whole plumbing run.

On exposed PVC, a butyl product like KILMAT 80 mil 36 sqft Car Sound Deadening Mat makes more sense than a loose wrap when the pipe may see humidity or condensation. If the wall or ceiling is already open, then add batt insulation around the treated pipe before you close it back up so the cavity is not left empty.

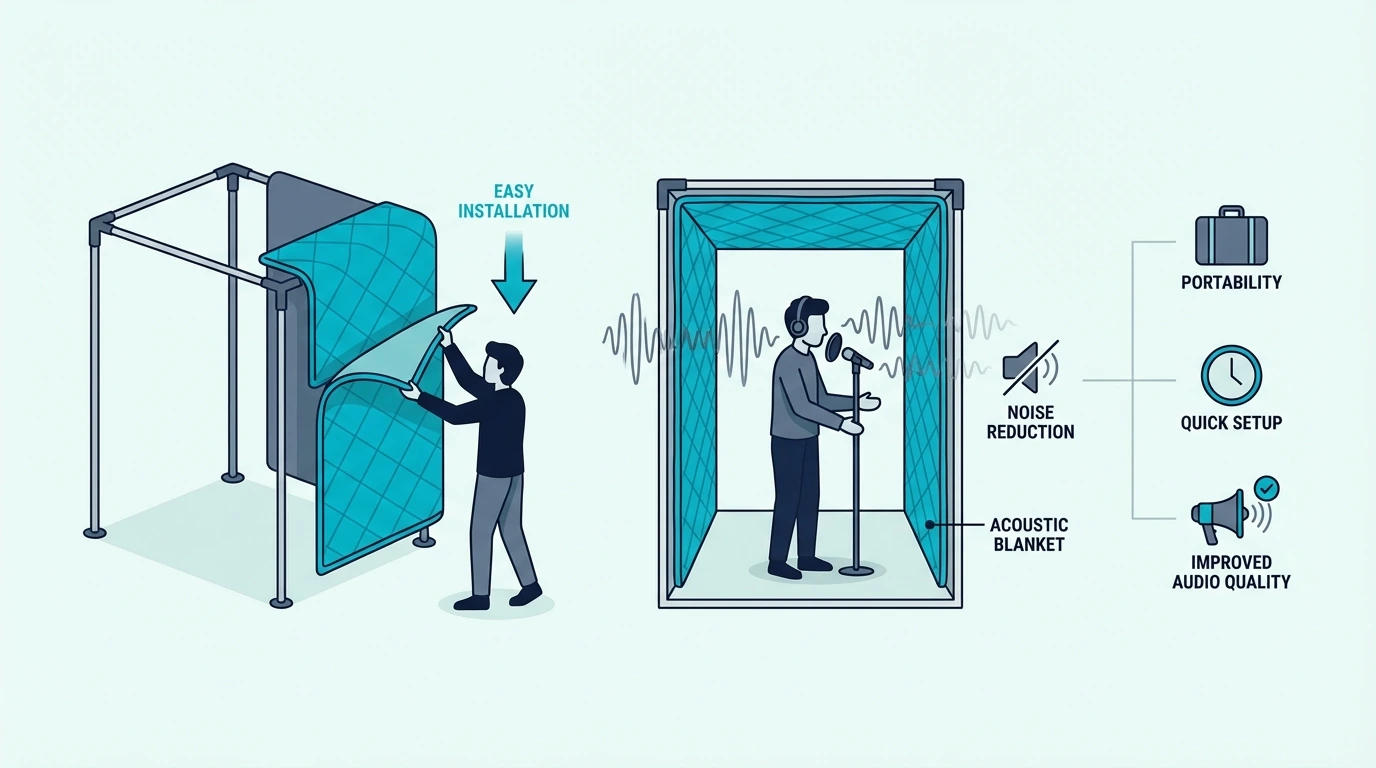
For temporary testing around an exposed stack or an unfinished utility room, a heavy movable barrier like the VEVOR Sound Dampening Blanket can tell you quickly whether adding another barrier around that section is worth the effort.

If the wall is closed, focus on the exposed portions you can actually reach instead of assuming cavity insulation alone will fix the problem. PVC complaints are usually won or lost at the waste stack, the bends, and the hard contact points nearest the room.

Lightweight Add-Ons Barely Change The Outcome

Thin foam pipe insulation sold for freeze protection does almost nothing for sound because it is too light to add meaningful mass. It can help with condensation and maybe a tiny amount of damping, but it will not make a drain stack noticeably quiet.

Acoustic caulk around penetrations helps with air sealing, but it does not solve the pipe noise by itself. Spray foam packed tightly around the pipe is also not a substitute for proper wrap, isolation, or cavity treatment.

Toilet And Waste-Stack Noise Tells You Where To Start

Reducing toilet drain pipe noise

Toilet and waste-stack noise is where the problem becomes impossible to ignore because the event is sudden, loud, and often happens at night.

It also gives you the clearest clue about priority, because the loudest flush usually points straight to the section of stack that deserves attention first.

Toilet Flushes Create A Concentrated Burst Of Pipe And Framing Noise

Toilet flush noise is so noticeable because the event is abrupt and high energy. Water drops through the waste stack quickly, hits bends and fittings hard, and creates both pipe-wall noise and structural vibration in one burst.

If that stack shares a wall cavity with a bedroom, the sound can seem like it is happening inside the room. The pipe, framing, and drywall are all mechanically connected, so the flush energy travels through all three.

Nighttime Complaints Usually Point To The Bedroom-Side Stack

Nighttime pipe noise feels worse because the background sound level drops and the flush stands out more. The highest-value fix is usually the vertical waste stack section nearest the bedroom, because that is where the water falls farthest and creates the most noticeable combination of rush and impact noise.

If you can only treat one section, prioritize that stack where it passes through or beside the quiet room. Damping and isolating that one area usually produces more improvement than treating a less critical section farther away.

Pros Make Sense When Access Or Scope Stops Being Simple

Call a professional when the noisy section is buried in a finished wall you do not want to open, when multiple fixtures feed the same stack, or when the bad mounts are inaccessible. A plumber can also tell you whether replacing a short section with cast iron is realistic, though that usually makes sense only during a larger renovation.

You should also call a contractor if you want a proper boxed chase around the stack, because that can involve framing, drywall, access panels, and fire-stopping details. For broader room-noise issues beyond just the plumbing, compare this page with soundproofing a wall, soundproofing a bathroom, soundproofing an apartment, and the broader soundproofing hub so the pipe fix stays in proportion to the rest of the room.

The Bottom Line

How to soundproof drain pipes gets simpler once you treat it like an access and leak-path problem instead of a generic wrap job.

If the pipe wall is the loud part, damp the loudest accessible section first.

If the framing is carrying the rumble, fix the rigid mounts next.

If the wall is already open, add insulation before you close it.

If the pipe is buried in a finished wall, expect the ceiling on improvement to be lower unless you are willing to open the wall or build a better chase.

For most homes, the best first target is the waste stack nearest the bedroom or other quiet room, because that is where a single fix usually produces the clearest relief. Use that same access-first logic when you compare the problem against the broader soundproofing hub, because the right upgrade is always the one that matches the real path and the real access you have.

Frequently Asked Questions

How to reduce drain noise?

Reduce drain noise by treating the noisiest accessible section first with a waterproof self-adhesive butyl damping mat, then breaking rigid contact at the mounts, then adding cavity insulation if the wall is open. That combination addresses the pipe wall, the framing path, and the wall cavity together.

How to make PVC pipe quieter?

Make PVC pipe quieter by damping the pipe with a self-adhesive butyl mat, replacing rigid supports with isolated hangers or clamps, and insulating the surrounding cavity if you already have access. PVC is noisy because it is light and resonant, so the most effective fixes are the ones that add damping, mass, and less rigid contact.

How to cheaply sound proof?

The cheapest meaningful improvement is usually treating one accessible problem section instead of the whole system. Dampen the loudest exposed stack section and improve the worst rigid mounts first, because that often gives better value than spreading small fixes everywhere.

How to block out 100% of noise?

Blocking 100% of drain-pipe noise is not realistic because the plumbing is integrated into the structure and usually hidden inside walls or floors. The practical goal is to reduce the noise enough that it no longer disrupts sleep, work, or conversation, which is achievable in many homes with the right access and treatment order.

How To Soundproof A Metal Roof (What Works And What Doesn’t)

How to soundproof metal roof assemblies matters most when the rain, hail, and wind noise inside the house is loud enough to disrupt sleep or conversation, but only if you understand that the metal itself is rarely the real problem.

Many metal roof owners feel frustrated because the roof itself is not the problem.

The problem is usually the assembly underneath it — the underlayment, insulation, decking, and ceiling layers that determine how much sound actually reaches the living space.

The better way to approach metal roof noise is to treat it as an assembly problem rather than a surface problem. Once you understand which layer is missing or underperforming, the right fix becomes much clearer and you stop wasting time on coatings or patches that barely change the result.

Start with why some metal roofs are louder than others, then move through which fixes actually work, how to reduce rain noise specifically, and when the smarter upgrade is inside the house rather than on the roof itself.

This guide makes that order practical so you can decide whether the next real upgrade belongs in the roof assembly, the attic, or the ceiling below.

Quick Takeaway

How to soundproof a metal roof depends on whether the noise is from rain impact, wind vibration, or a thin roof assembly. The strongest fixes target the layers under the metal — underlayment, insulation, and ceiling — rather than the metal surface itself. A properly built assembly can make a metal roof as quiet as any other roofing type.

Metal-Roof Noise Starts With The Assembly Underneath

Overview of soundproofing a metal roof

The smartest first step is understanding why some metal roofs are noisier than others.

Thin Assemblies Make Metal Roofs Sound Loud

Metal roofs sound noisy when the assembly underneath is thin or incomplete. A metal panel installed directly over purlins with no solid decking, no underlayment, and minimal insulation will transmit every rain impact and wind gust straight into the living space because there is nothing to absorb or dampen the energy before it reaches the ceiling.

A metal roof installed over solid sheathing with proper underlayment and insulation can be just as quiet as asphalt shingles. The difference is not the metal itself — it is what sits between the metal and the room below.

Rain, Wind, And Resonance Do Not Behave The Same Way

Rain noise is the most common complaint, followed by hail, wind, and general resonance or drumming from the panels. Each type responds to different treatments.

Rain and hail noise respond best to mass and damping in the roof assembly — heavier underlayment, solid decking, and thicker insulation all help. Wind noise and panel vibration respond better to fastener tightening, structural support, and eliminating loose connections that allow the metal to flex.

Realistic Improvement Depends On The Starting Assembly

A properly built metal roof assembly can reduce interior noise to the point where rain is barely audible during normal activity. That is not total silence, but it is a dramatic improvement from the “tin can” sound that poorly assembled metal roofs produce.

The key is managing expectations based on the starting condition. A bare metal panel over purlins with no decking will need more work than a metal roof over plywood with existing but thin insulation.

The closer the assembly already is to a complete build, the less work and cost the improvement requires.

Roof-Side Fixes Work Best When The Assembly Is Already Open

Methods for reducing noise from a metal roof

Yes, but the best answer depends on when you have access to the assembly. If the roof is already being replaced, roof-side layers like decking and underlayment matter most.

If the roof is staying in place, the biggest wins usually shift to insulation, ceiling mass, and leak control from inside.

Underlayment Matters Most During Re-Roofing

Underlayment makes the biggest difference when a re-roof is already on the table or when the existing assembly has thin decking and very little damping below the metal. In that situation, the layer directly under the panels is one of the cleanest places to reduce impact noise before it enters the structure.

For an existing roof, that usually means waiting for planned replacement work rather than trying to retrofit from inside the house. A roofing underlayment like DuPont Roof Protector Roofing Underlayment fits that moment because it adds both weather protection and a meaningful damping layer without pretending to be a standalone miracle fix.

Insulation And Ceiling Layers Matter More When The Roof Stays Put

Insulation and interior layers matter more when the roof itself is staying in place and the cavity below is the obvious weak point. That is common when the roof deck is acceptable but the attic is underinsulated, the ceiling is light, or the cavity is mostly empty.

Spray foam is one of the strongest options because it bonds to the underside of the roof deck, fills irregular voids, and adds both insulation and damping in one step. When the cavity is already accessible and you want a more conventional assembly upgrade, a batt product like AFB Acoustical Fire Batts is a strong default because it improves the part of the assembly that is actually letting the sound through.

Once the cavity is improved, the ceiling layer itself becomes the next limiter. A heavier ceiling with proper drywall, sealed joints, and no gaps will block more sound than a thin or incomplete ceiling, which is the same logic behind soundproofing a ceiling and best soundproofing material when the roof-side work is not the first place you want to spend money.

Thin Coatings Do Not Replace Missing Assembly Layers

Rubberized coatings, sound-deadening paints, and thin foam strips are the most commonly overpromised metal roof noise solutions. They can help a little with surface resonance, but they do not replace missing decking, underlayment, insulation, or ceiling mass.

The reason is physics. Metal roof noise is an assembly problem, not a surface problem, so the biggest gains come from improving the layers underneath the metal rather than brushing on one more thin coating and hoping it changes the whole path.

Rain Noise Gets Loudest When The Roof Can Flex And Resonate

Reducing rain noise on a metal roof

Rain noise is the most specific and most solvable metal roof complaint for most homeowners.

Flat Panels And Missing Decking Amplify Rain Noise

Flat or low-profile panels sound louder than standing-seam or corrugated profiles because the flat surface acts like a drum head. Longer unsupported spans between purlins or rafters also amplify the sound because the metal flexes more under impact.

The absence of solid sheathing is the single biggest amplifier. A metal panel directly over purlins with air space underneath resonates much more than one over a solid plywood or OSB deck with underlayment.

Loose Fasteners Turn Impact Noise Into Rattling Noise

Loose fasteners allow the metal to vibrate independently of the structure, which creates rattling, ticking, and drumming sounds that would not exist if the panel were tightly secured. Over time, thermal expansion and contraction can loosen fasteners, especially exposed-fastener systems.

Checking and tightening roof fasteners is one of the cheapest and most overlooked fixes for metal roof noise. If the noise includes a rattling or ticking component that changes with wind or temperature, loose fasteners are the most likely cause and the easiest to address.

Interior Retrofits Help Until The Roof Build Itself Becomes The Limit

A retrofit from inside — adding insulation, improving the ceiling, and sealing air paths — is usually enough when the roof deck is already solid and the main issue is thin insulation or an incomplete ceiling assembly.

A bigger rebuild is worth considering when the roof has no solid decking, the underlayment is missing or degraded, or the noise is severe enough that interior fixes alone cannot bring it down to an acceptable level. That usually means the next re-roofing project should include proper decking, underlayment, and assembly improvements rather than just replacing the metal panels.

Interior Fixes Matter Most When Roof Access Is Off The Table

Interior soundproofing for metal roof noise

If you cannot or do not want to open the roof itself, the interior becomes the next best target. The right move depends on whether you have an accessible attic, a direct-to-rafter ceiling, or a flat and shallow assembly with very little cavity depth.

Ceiling-Side Work Usually Beats Guessing At The Roof Surface

Focus on the ceiling or attic side first if you have accessible space above the rooms below. Adding insulation at the attic floor or the underside of the roof deck is usually easier and less expensive than modifying the roof from outside, and it addresses the path the sound actually takes before it reaches the living space.

If the ceiling is attached directly to the rafters with no attic space, the options are more limited and the ceiling build matters more. Adding a second layer of drywall with a damping compound between layers is one approach, and using resilient channels or isolation clips to decouple the ceiling from the rafters is another, which is the same assembly logic used in soundproofing between floors when structure-borne vibration is part of the problem.

For the ceiling layer itself, adding mass with a barrier material like Trademark Soundproofing Mass Loaded Vinyl between the existing ceiling and a new drywall layer can make a significant difference when the current ceiling is thin.

Flat And Low-Slope Roofs Leave Less Room For Error

Flat and low-slope metal roofs are harder to treat from inside because the ceiling is often close to the roof deck and the available cavity depth is limited. In those cases, spray foam applied to the underside of the roof deck is usually the most practical option because it fills the shallow space with both insulation and damping.

If spray foam is not an option, the fallback is usually improving the ceiling below and sealing every visible gap with Acoustical Caulk (29 oz) around the perimeter, light penetrations, and duct openings so the limited assembly does not leak even more noise.

Professional Help Matters Once Roofing And Moisture Details Intersect

Call a professional when the noise is severe, the roof deck condition is unknown, or when you want spray foam insulation applied safely. Roofing and insulation work involve moisture management, ventilation, and structural considerations that are easy to get wrong without experience.

You should also call a professional if you plan to re-roof and want the new assembly designed for noise performance from the start. A roofing contractor who understands acoustic assemblies can specify the right combination of decking, underlayment, and fastening to make the new roof significantly quieter than the old one, especially when the roof noise is overlapping with broader how to soundproof a room problems elsewhere in the house.

The Bottom Line

How to soundproof a metal roof gets much clearer once you treat the assembly underneath rather than the metal surface on top.

If the roof is already being replaced, start with decking and underlayment upgrades while the assembly is open.

If the roof is staying in place, start from the attic or ceiling side with insulation, mass, and leak control.

If the roof has no solid decking or the noise is still severe after the interior upgrades, save the real money for a better roof rebuild instead of chasing thin coatings and surface patches.

If you are also dealing with noise through walls, windows, or floors, compare this page with soundproofing a wall, soundproofing windows, best insulation for soundproofing, and the broader soundproofing hub so the roof fix stays in proportion to the rest of the house.

Frequently Asked Questions

How to reduce the sound of a metal roof?

The most effective way to reduce metal roof sound is to improve the assembly underneath: add solid decking if missing, install proper underlayment, fill the attic or cavity with insulation, and seal any gaps in the ceiling. These layers absorb and dampen sound before it reaches the living space.

What materials block high frequency sound?

Dense, heavy materials like mass loaded vinyl, multiple layers of drywall, and closed-cell insulation are the most effective at blocking high-frequency sound. For metal roofs specifically, solid decking with rubberized underlayment is the most relevant high-frequency barrier.

Is it worth sound deadening roof?

Yes, sound deadening a metal roof is worth it when the noise is disruptive enough to affect sleep, conversation, or comfort inside the home. The improvement from a properly treated assembly is dramatic and long-lasting, especially compared with the ongoing frustration of living under a noisy roof.

Is Soundproofing Worth It? (What It Costs And When It Pays Off)

Is soundproofing worth it depends on what the noise is costing you and which tier of fix the room actually needs. A cheap sealing test, a targeted window upgrade, and a full wall-and-ceiling rebuild can all be “worth it,” but not for the same kind of problem.

That is where most bad decisions start. People either underbuy for a serious sleep-or-privacy problem or overbuy for a room that only needed a clear diagnosis and one targeted fix.

The value question gets easier once you stop treating soundproofing as one category. Mild, occasional irritation belongs in a different budget class than recurring neighbor noise, traffic-heavy bedrooms, or rooms that are hurting work and concentration every day.

The right way to judge the spend is to follow the decision in order: first measure how much the noise disrupts daily life, then match it to the cheapest tier with a real chance of solving the weak point, and only then decide whether deeper construction money is justified.

Start with the size of the disruption, then the scenarios where lighter fixes pay off, and finally the point where bigger construction costs do or do not make sense.

Quick Takeaway

Is soundproofing worth it? Yes, when the noise is frequent, the weak point is identifiable, and the improvement matters to sleep, work, privacy, or daily comfort. Cheap diagnosis-first fixes are often worth it fast, but thousand-dollar builds are only worth it when the problem is severe enough and the room is being treated at the real leak path.

Soundproofing Pays Off When The Disruption Is Real And The Path Is Clear

Overview of when soundproofing is worth it

The shortest honest answer is still yes, but only when the room problem is strong enough and specific enough to deserve the spend.

Situation Typical first spend Usually worth it? Why
Leaky bedroom door or window About $16 to $125 Yes Cheap first win for sleep, focus, and comfort
Street noise through one obvious window About $45 to $800+ Often yes Targeted window upgrades can change a room fast
Shared-wall neighbor voices About $100 to $1,500+ Often yes Daily disruption with one likely path is a strong ROI case
Mild occasional noise About $0 to $50 Usually not beyond diagnosis The ceiling on improvement is often too small to justify bigger spend
Bass or structural impact noise About $1,000 to $4,000+ Sometimes Harder problem, higher cost, and more realistic limits needed
Room with several weak paths and no diagnosis Diagnose first Depends Wrong first spend wastes money more than almost any other mistake

Value Starts With The Part Of Life The Noise Keeps Damaging

Worth it means the room gets quiet enough to improve the part of life you actually care about. That might be sleep, focus, privacy, recording quality, or simply feeling less stressed by noise every day.

That is different from chasing total silence. Most home soundproofing projects feel worth it long before they get anywhere close to a studio-grade result.

Frequent And Predictable Noise Creates The Strongest ROI Case

Once “worth it” is defined that way, the best candidates become easier to spot.

It is usually worth it when the noise is frequent, the source is predictable, and the same weak point keeps showing up. Bedrooms facing traffic, shared walls with noisy neighbors, and home offices with constant interruptions are the clearest examples.

It is also worth it when the fix is cheaper than the ongoing cost of doing nothing. Losing sleep, struggling to work, or thinking about moving because of noise usually makes even a moderate upgrade look far more reasonable.

Mild Or Vague Problems Rarely Deserve Big Money

The opposite pattern matters just as much.

It is usually not worth it when the noise is mild, occasional, or hard to notice unless you listen for it. In that situation, a big spend often buys a subtle result that feels smaller than the invoice.

It is also not worth it when expectations are unrealistic from the start. If the goal is perfect silence from bass, footsteps, or an old building on a tiny budget, the project can still help, but the return often feels weak compared with the money and effort involved.

The Spend Feels Worth It Only When The Budget Matches The Noise Tier

Scenarios where soundproofing pays off

That is why cost should be read as layers of commitment rather than one giant number.

Each spend tier buys a different kind of answer, and the cheapest tier is often worth it precisely because it tells you whether the room deserves more money at all.

Cheap Diagnostic Fixes Often Deliver The Best First Return

This is where many worth-it projects begin. A roll of 33 Ft Gray Self-Adhesive Soundproofing Weather Stripping costs little, but it can tell you immediately whether the room is failing at the door or window perimeter.

Add a temporary test layer like US Cargo Control Sound Dampening Blanket, and you can often test a room for well under $100. That tier is usually worth it because it reduces guesswork before you commit to real build money.

Mid-Range Upgrades Win When One Surface Is Clearly The Main Offender

If the cheap tier points to a specific opening or barrier, the next dollars usually become much easier to justify.

Mid-range soundproofing usually lives in the low hundreds rather than the thousands. That includes stronger door sealing, better window treatment, one upgraded opening, or an added-mass layer like Trademark Soundproofing Mass Loaded Vinyl used in the right assembly.

This tier feels worth it when one door, one window, or one wall is clearly the main offender. That is why readers often need to compare this page with soundproof windows cost, soundproofing a door, and soundproofing a wall instead of treating every room like a full renovation.

Full Construction Only Pays Off When The Problem Is Severe Enough

That logic changes again once the project crosses into building work.

Full construction starts when you open assemblies, add new drywall, work on ceilings, or build for stronger isolation instead of lighter comfort upgrades. At that point, the budget can move from the high hundreds into the thousands quickly, especially when labor or multiple surfaces are involved.

That level of spend only feels worth it when the room problem is serious enough to justify it. If you are comparing major work, use soundproof room cost, soundproofing a ceiling, and how to soundproof a room together so the decision is based on real scope instead of hope.

Soundproofing Loses Its Value Fast When The Tradeoffs Get Ignored

Disadvantages and limits of soundproofing projects

The project can still be worth it and still come with real costs beyond the invoice.

Those tradeoffs are where a rational upgrade turns into a regret purchase if the problem was never diagnosed properly.

Cost And Disruption Rise Together Once You Leave The Light-Fix Tier

The moment the project moves past sealing and removable layers, cost and disruption rise together. Doors, inserts, added wall layers, ceiling work, and contractor labor all raise the total while also making the room messier, slower, and harder to use during the work.

Serious builds can also steal space and flexibility. New wall layers, clips, channels, and heavier assemblies improve performance, but they also take inches, time, and installation care that light fixes never demand.

Every Untreated Weak Path Can Undercut The Money You Spent

That is why partial upgrades need realistic expectations.

Because sound follows the weakest remaining path. A better wall can still be bypassed by the ceiling, the window, the door, the floor, or a leaky vent, which is why one upgraded surface does not automatically transform the whole room.

That is also why bad expectations destroy perceived value. If the goal is complete silence from a partial upgrade, even a solid improvement can feel disappointing.

ROI Feels Weak When The Room Never Needed That Much Spend

This is the pattern behind most disappointment.

The return feels weak when the noise was never severe enough to justify the spend in the first place. It also feels weak when the treatment attacked the wrong path or when the budget was too small for the type of noise involved.

Bass and structural impact noise are the clearest example. They can still be worth treating, but they usually require more mass, better isolation, and a bigger budget than simple speech or traffic problems, so small-product expectations create the wrong ROI math from the start.

Realistic Improvement Matters More Than The Fantasy Of Total Silence

How much soundproofing costs by project type

Once tradeoffs are clear, the real question becomes outcome.

If the likely result is big enough to change daily life, the spend feels smarter. If the likely result is tiny, it does not.

Light Upgrades Can Be Worth It Without Being Dramatic

Light upgrades usually deliver modest but noticeable gains. Sealing, blankets, better door closure, and targeted opening fixes often land in the rough range of a few decibels, which is enough to take the edge off moderate noise and make sleep or focus easier.

That is why low-cost fixes can be so worth it. They do not need to create silence to create relief.

Serious Builds Pay Off Only When The Assembly Gets Stronger As A System

The bigger gains arrive only when the build quality actually matches the budget.

Serious builds can deliver a much larger shift when the assembly is actually strengthened. Open-wall work with proper mass, sealed joints, and cavity fill like AFB Mineral Wool Insulation and the right barrier layers can make speech far less intrusive and turn a stressful room into a usable one.

That said, the bigger result depends on the whole build being right. A stronger assembly usually beats a pile of random accessories, but only if the real path has been identified first.

Total Soundproofing Is The Wrong Benchmark For Most Homes

That is the mindset shift that usually makes the whole article click.

Because 100% soundproofing is not the benchmark most homes actually need. A bedroom does not need studio isolation to be worth fixing, and a home office does not need perfect silence to become workable again.

The better benchmark is “quiet enough for the intended use.” Once the noise drops below the level where it ruins sleep, focus, calls, or relaxation, the project has already started paying off.

The Best Decision Comes From Buying The Next Right Tier, Not The Biggest One

Decision guide for whether soundproofing is worth it

At that point the final decision framework is simple.

The cleanest call comes from matching the room problem to the cheapest tier that has a real chance of solving it, then stopping when the room becomes usable enough for its purpose.

Diagnosis Should Always Come Before Bigger Spend

Always start there. Walk the room, listen at the door, window, wall, ceiling, and any vent or gap, then spend first where the noise is loudest or leakiest.

If the cheap first step changes the room, that tells you where the next dollar belongs. If it changes nothing, that is also valuable, because it keeps you from doubling down on the wrong path.

Many Rooms Become Worth Fixing Long Before They Become Truly Soundproof

That is where many people can save themselves a lot of money.

Noise reduction is good enough when the goal is comfort, not isolation. If the room becomes quiet enough to sleep, work, or relax without constant interruption, then the project is already worth it even if outside noise is not fully gone.

That is why many rooms should stop at the targeted-upgrade stage. Not every problem needs a construction budget, and not every room needs to be treated like a studio.

A Professional Makes Sense When The Room Stops Behaving Like A Simple Opening Problem

The line usually appears when DIY logic stops giving clear answers.

Call a professional when the room has multiple likely paths, the DIY fixes have plateaued, or the problem clearly involves structure rather than just openings. That matters most on ceilings, bass-heavy problems, and projects where failure would waste a lot more money than a diagnosis visit.

If you are near that line, compare your situation with soundproofing an apartment, soundproofing windows, and the broader soundproofing hub so you can decide whether you are still in targeted-fix territory or already in full-build territory.

The Bottom Line

Is soundproofing worth it when the room problem is clear, the disruption matters, and the budget matches the real weak point.

It is most worth it when the result improves sleep, focus, privacy, or daily comfort often enough that you feel the benefit every day.

It is least worth it when the noise is mild, the expectations are unrealistic, or the first dollars go to the wrong surface. Start with diagnosis, move up in tiers, and use the cost guides for rooms and windows before turning a fixable problem into an oversized project.

Frequently Asked Questions

How to block out 100% of noise?

Blocking 100% of noise usually requires a room-within-a-room style build with full sealing, mass, and isolation on every relevant surface. For most homes, the smarter target is meaningful reduction rather than total silence.

Does rockwool soundproof?

Rockwool helps with soundproofing when it is used inside a wall or ceiling assembly because it improves the cavity part of the build. It is helpful, but it is not a standalone surface fix.

Is soundproofing worth it for home?

It is worth it for home when the noise is frequent enough to affect sleep, work, privacy, or comfort and the fix can be targeted to the real path. It is much less worth it when the noise is mild or the plan is based on guesswork.

Can you completely soundproof a room?

You can get very close only with a serious high-cost build, and even then perfect isolation is rarely practical in a normal home. Most worthwhile projects aim for the room to feel calm and usable, not mathematically perfect.

Does Soundproofing Work (And When Does It Actually Make A Difference)

Does soundproofing work? Yes, but only when the method matches the path the noise is actually using in the room.

That is why so many people buy a “soundproof” product, put it on the wrong surface, and still hear the same neighbor, traffic, or TV noise because the real leak is still the door, window, wall, floor, or ceiling.

Get that diagnosis right and soundproofing can reduce outside noise, reduce sound leakage, and make a room meaningfully quieter without pretending a light fix will create total silence.

Below, you’ll see what “working” really means, which noise types respond best, why soundproofing fails, when lighter noise reduction is enough, and how to decide whether a real upgrade is worth it.

Quick Takeaway

Does soundproofing work? Yes, but only when the fix matches the noise type and the real weak point. Soundproofing works both ways because stronger barriers resist sound entering and leaving, but the result depends on whether you are treating the door, window, wall, floor, or ceiling that is actually leaking the noise.

What “Working” Really Means in Soundproofing

Overview of when soundproofing works

Now that the short answer is on the table, the first step is defining what “work” should mean in a normal home, apartment, or studio room.

Realistic expectations vs total silence

Working means a noticeable reduction in unwanted noise, not total silence. Even strong professional builds are judged by how much they reduce and control sound, not by whether they erase every last trace of it.

For most home situations, success means the noise drops enough to stop dominating the room. That might mean neighbor voices turn into a faint murmur, traffic becomes background sound, or your own TV and music stop carrying so clearly into the next room.

Soundproofing also works both ways because the same barrier resists sound traveling in either direction. A better-sealed window reduces outside noise entering the room, and that same stronger window also helps keep your own sound from leaking out.

Which noise types respond best

That realistic-reduction mindset also depends on the type of noise. Mid-frequency and high-frequency sounds are the easiest to reduce. That includes voices, TV audio, office noise, and a lot of everyday neighborhood sound.

Air leakage is the next big factor. If the problem is mainly a hollow door, a leaky window, or perimeter gaps, better sealing can make a noticeable difference surprisingly quickly.

Impact and structure-borne noise are harder because they use the building itself as the path. Footsteps, furniture movement, kick drums, and mechanical vibration often require floor, ceiling, or assembly changes rather than one simple wall product.

Bass is hardest of all. Low-frequency sound carries more energy, travels farther, and needs much more mass and isolation than speech or TV noise.

Why people think soundproofing fails

Even with the right noise type, disappointment is common — and almost always traces back to diagnosis, not physics. Most soundproofing failures happen because the buyer treated the wrong thing. Foam on a wall will not stop neighbor noise if the real problem is transmission through the wall assembly or leakage around the door.

The other common reason is weak-link thinking. If you improve one surface and leave the weakest opening untouched, the noise simply bypasses the upgraded surface and keeps using the easier path.

Expectation is the third problem. Many buyers are really asking for near-total silence from a light upgrade, when their room actually needs more mass, better sealing, and sometimes deeper construction than they planned for.

Where Soundproofing Delivers Real Results

Scenarios where soundproofing makes a difference

Once you stop treating soundproofing like one universal trick, the cases where it works well become much easier to spot. It works best when the noise path is clear and the fix actually strengthens that part of the room.

Walls

Wall soundproofing works well when the wall is truly the path that is leaking the noise. Shared walls between apartments, condos, offices, and bedrooms are the most common example because the partition is often too light for the sound it is trying to resist.

That is where more mass and damping start to matter. A damping layer like Green Glue Noiseproofing Compound between drywall layers can make a real difference because it helps the wall absorb vibration instead of passing as much of it through.

Wall work disappoints when it is partial, leaky, or applied to the wrong side of the problem. For a deeper wall-specific breakdown, how to soundproof a wall covers the full upgrade path.

Floors and ceilings

The same mass-and-sealing logic applies between levels, but floors and ceilings need a more honest diagnosis because they deal with both airborne sound and impact transfer. Voices and TV noise between levels behave differently from footsteps, dropped objects, and structure-borne vibration.

That is why cavity fill, decoupling, and floor-side softening each solve different parts of the problem. Dense insulation like AFB Acoustical Fire Batts helps inside an assembly, while underlayments, clips, and channels address different floor or ceiling paths.

That is why soundproofing a ceiling and soundproofing a floor usually become separate projects in practice instead of one generic “between floors” fix.

Doors and windows

Walls, floors, and ceilings get the most attention, but doors and windows are often the best first test because they are usually the weakest barriers in the room. If a hollow door or leaky window is doing most of the damage, fixing that opening can outperform a heavier wall upgrade that leaves the weak point untouched.

This is also the clearest example of soundproofing working both ways. A tighter door or window helps block outside noise coming in and your own sound going out because the barrier itself is stronger and more airtight.

For perimeter leaks, a product like 33 Ft Self-Adhesive Soundproofing Weather Stripping is a practical first move because it targets the opening directly instead of assuming the wall is already the problem.

If you want the full opening-specific path, compare soundproofing a door and soundproofing windows before jumping into broader wall work.

Why Soundproofing Fails: The Three Most Common Mistakes

Common reasons soundproofing fails

Most soundproofing disappointments come from predictable mistakes rather than from the idea itself failing. The concept usually holds up; the diagnosis usually does not.

Treating absorption as if it were blocking

The most expensive mistake is buying the wrong category entirely. Acoustic foam is designed to absorb reflections inside a room, not to block sound transmission through a wall. It helps echo and harshness inside the room far more than it helps sound crossing the shell.

This is the single biggest reason people think soundproofing does not work. They buy a treatment product for a transmission problem, then conclude the whole category is fake when the neighbor noise barely changes.

If you need the clean distinction on that boundary, compare your expectations against do soundproof panels work. The difference between treatment and real barrier performance is the heart of the confusion.

Leaving gaps that bypass the upgrade

Even when the right category of product is chosen, small leaks can undo big investments. Sound follows the path of least resistance, just like air. A small leak around trim, a frame, or an outlet can undermine a much heavier upgrade nearby because the noise keeps choosing the easier opening.

That is why sealing matters as much as people say it does. A heavier but leaky assembly often underperforms a lighter one that is actually tight at the edges and joints.

That is where a flexible sealer like Acoustical Caulk (29 oz) matters. It is not glamorous, but it is one of the clearest examples of why real soundproofing depends on airtightness as much as weight.

Underestimating bass

Sealing and mass handle most mid-and-high-frequency noise, but bass exposes the limits of lighter builds. Bass is hard to stop because low-frequency waves are long, energetic, and much better at moving walls, floors, and ceilings. That is why many projects succeed on speech and still disappoint on subwoofers, traffic rumble, or music with deep low end.

When you are already upgrading a wall or ceiling assembly, a real mass layer like Trademark Soundproofing Mass Loaded Vinyl belongs in the conversation because it addresses the barrier side of the problem, not just the room-acoustics side.

Bass is also where expectations need the biggest correction. If the room is light and the source is powerful, soundproofing may still work, but the level of build required may be much higher than the buyer originally expected.

When Lighter Noise Reduction Is Enough

Alternatives when soundproofing is not practical

Not every noise problem needs a full construction-grade answer. Sometimes the right move is not “more soundproofing,” but a lighter form of noise reduction that solves the real comfort problem well enough.

Comfort vs isolation

Noise reduction is good enough when the goal is comfort rather than isolation. If you want better sleep, easier focus, or a calmer room without eliminating every sound, lighter upgrades can often do enough to make daily life better.

This is where curtains, sweeps, sealing, and other weak-point improvements start to make sense. A product like RYB HOME Soundproof Divider Curtain belongs here because it is honest about being a lighter step rather than a full shell upgrade.

Treatment as a complement, not a substitute

That comfort-level approach sometimes overlaps with acoustic treatment. Acoustic treatment is useful when the quality of sound inside the room matters more than blocking sound through the room shell. That includes podcasting, recording, video calls, and rooms that sound too harsh or echoey even when outside noise is not the main problem.

But treatment is not a substitute for soundproofing. It changes reflections, reverb, and internal clarity without doing much to strengthen the barrier between you and the noise source.

That is why treatment can be valuable and still fail the soundproofing test. If the real complaint is what is coming through the wall or window, you still have to improve the barrier.

When real soundproofing becomes necessary

If lighter fixes and treatment still leave the noise dominating the room, the problem has outgrown accessories. Invest in real soundproofing when the noise is persistent, severe, and clearly coming through a specific path that lighter fixes cannot solve. Shared walls with noisy neighbors, bedrooms facing busy roads, and rooms that need true isolation are the clearest examples.

The threshold is simple: if you already tightened the obvious leaks and the noise is still affecting sleep, work, recording, or daily comfort, then the next step is probably real soundproofing instead of more small accessories.

Deciding Whether Soundproofing Is Worth the Investment

Cost and payoff of soundproofing a room

At this point the decision becomes practical rather than theoretical. The real question is not “does soundproofing work in general?” but “will the right upgrade make enough difference in this specific room to justify the cost and effort?”

Start with the weakest barrier

Start with the weakest barrier in the room. In many cases that is the door, then the window, then the wall or ceiling path behind them.

That order matters because removing the worst bottleneck usually changes the result more than spreading a little money across every surface. A small first win also tells you whether the room is mostly leaky or fundamentally too light.

For a budget-conscious test, 33 Ft Self-Adhesive Soundproofing Weather Stripping is often the clearest first move because it tests the opening before you commit to bigger work.

How much improvement you actually need

Fixing the weakest barrier sets the baseline, but the next question is how much improvement matters. Most people notice a meaningful change at around a 5–10 dB reduction. That may sound small on paper, but it feels substantial in real life once an intrusive noise drops into the background.

The important part is that this kind of improvement usually comes from properly treating the main weak point, not from adding a little bit of everything everywhere. One real upgrade often beats five partial ones.

When to call a professional

If DIY fixes have delivered some improvement but not enough, the next step may be professional diagnosis. Call a professional when the noise is severe, the structure is clearly involved, or your DIY attempts have not delivered enough improvement. That is also the right move for home studios, media rooms, and any project where “noticeably quieter” is not a high enough standard.

Professionals matter most when the room needs measured diagnosis rather than guesswork. If the problem may involve multiple paths, compare your situation against soundproofing an apartment and best soundproofing material so you can judge whether you are still in DIY territory or already in assembly territory.

The Bottom Line

Does soundproofing work? Yes, soundproofing works when the method matches the noise type, the weak point is identified correctly, and the barrier is actually strengthened.

It works both ways, but it only feels convincing when the room stops leaking through the path that was really doing the damage.

That is why some projects feel dramatic and others feel fake. Foam will not stop transmission, sealing alone will not solve bass, and one treated surface will not overcome a still-open weak link somewhere else.

But when you match the fix to the real path, soundproofing can make a room meaningfully quieter and absolutely worth the effort.

If you are deciding where to start, compare this page with how to soundproof a room and best insulation for soundproofing so you can choose the right level of upgrade before you buy the wrong one.

Frequently Asked Questions

Does soundproofing a room actually work?

Yes, soundproofing a room actually works when the treatment matches the noise type and covers the main weak points. Most failures happen because the wrong method was used or because gaps and untreated surfaces let sound bypass the upgraded area.

Does rockwool soundproof?

Rockwool helps with soundproofing when it is used inside a wall, floor, or ceiling assembly because it adds useful density and absorption in the cavity. It is not a standalone fix, but it improves a stronger assembly when it is paired with real mass and sealing.

How to block out 100% of noise?

Blocking 100% of noise is not realistic with any single consumer product or light retrofit. The closest result requires a fully sealed room with mass, decoupling, and stronger assemblies on every relevant surface, so most projects aim for meaningful reduction rather than total silence.

Best Soundproof Blankets (What Works And What To Skip)

Best soundproof blankets are usually the ones that add enough mass and coverage to make a real difference, but only if you use them in situations where a blanket can actually help rather than expecting them to replace heavier soundproofing work.

That is why results vary so much. A heavy grommeted blanket hung properly over a door or window can reduce noise noticeably, while a thin moving blanket draped loosely over a wall will barely change the sound at all. The difference comes down to weight, coverage, seal quality, and whether the blanket is treating the right weak point.

The smarter way to shop is to match the blanket to the specific use case first. Once you know whether you need a door barrier, a window layer, a studio absorption panel, or a temporary test before committing to a bigger upgrade, the right product becomes much easier to find.

Below, you’ll see which soundproof blankets actually work, what separates a useful pick from a waste of money, how to hang them for the best result, and when blankets are not the right tool for the job.

Quick Takeaway

Best soundproof blankets help most when hung over doors, windows, or thin barriers where they add mass and absorption to a specific weak point. They are not a substitute for wall-level soundproofing, but they are one of the most practical temporary and renter-friendly noise reduction tools available when used correctly.

Before You Buy: What Blankets Can and Cannot Do

What to know before buying soundproof blankets

Before you compare products, you need to understand what blankets can realistically do and where they fall short.

Real impact vs marketing claims

Sound blankets work by adding mass and absorption to a surface, which reduces the amount of sound that passes through or reflects off that surface. The heavier and denser the blanket, the more effective it is.

The important distinction is between sound absorption and sound blocking. Blankets are better at absorbing mid and high frequencies than they are at blocking low-frequency bass or heavy noise. That means they can make speech, TV sound, and general room noise noticeably quieter, but they will not stop loud bass, construction impact, or severe traffic noise on their own.

Where blankets beat permanent upgrades

That limited blocking ability comes with a real advantage: portability, reversibility, and speed. You can hang one in minutes, move it to a different room, take it with you when you move, and remove it without leaving any damage behind.

That makes them ideal for renters, temporary setups, testing whether a specific barrier matters before committing to permanent work, and situations where the landlord will not allow modifications. They are also useful in recording and podcasting setups where you need flexible absorption that can be repositioned depending on the session.

Who benefits most

Those strengths point to a specific buyer profile. Blankets are best for renters who cannot modify walls, home recorders who need flexible absorption, and anyone who wants to test whether covering a door, window, or thin wall section makes enough of a difference before investing in heavier solutions like best soundproof interior doors or best soundproof window inserts.

That is the real filter for the rest of this page. Once you know the weak point you are covering, the blanket category stops feeling random and starts narrowing quickly.

The Best Soundproof Blankets by Use Case

Best soundproof blanket product picks

Once you narrow the category, the best picks separate by use case: general-purpose blankets, door-specific barriers, window coverage, budget options, compact openings, and studio-grade absorption layers.

That matters because the wrong size or shape can make a good blanket feel disappointing. A strong blanket for a full door opening is not automatically the right blanket for a narrow booth entrance or a small recording corner.

Best Overall Soundproof Blanket

For the strongest all-around sound dampening blanket, US Cargo Control Extra Large Sound Dampening Blanket is the best overall pick because it combines size, weight, grommets, and a strong review history into one product that fits the widest range of use cases.

It stands out because it covers a full door or large window in a single blanket, which matters more than most buyers expect. Gaps around the edges of a blanket reduce its effectiveness the same way gaps around a door seal do, so a blanket that covers the full opening in one piece performs better than two smaller blankets with a seam in the middle.

Best Soundproof Blanket For Doors

For door-specific coverage, Large Sound Dampening Blanket 2-Pack is the strongest door-focused option because the two-pack lets you cover both sides of the same door or treat two doors in one purchase.

Door coverage is the single most common and most effective use of sound blankets. If you are going to buy one product from this page, a door blanket is almost always the highest-impact starting point because doors are usually the weakest barrier in any room.

Best Soundproof Blanket For Windows

If the weak point is glass rather than a door slab, the buying logic shifts a bit. For bedroom windows, patio-door glass, and other openings that do not need a giant 96 × 80 panel, 2 Pcs Large Sound Dampening Blanket 80 × 72 is the cleaner window-specific option because the size is easier to manage while still staying inside the true sound blanket category.

It makes the most sense when the weak point is glass rather than a full-height wall section, and when you want coverage that hangs neatly instead of bunching at the sill or pooling on the floor.

Best Budget Soundproof Blanket

If you are still testing the idea rather than buying for the longest-term setup, price starts to matter more than refinement. For the lowest-cost entry into sound blanket coverage, VEVOR Sound Dampening Blanket is the best budget pick because it gives you a full-size grommeted blanket at the lowest price point in this category.

This is the right pick when you want to test whether a blanket makes enough of a difference before spending more. If it works, you can upgrade to a heavier option later. If it does not, you have confirmed that the problem needs a different solution without wasting a large budget.

Best Soundproof Blanket For Small Openings

Oversized blankets stop making sense once the opening gets narrow. For apartment entry doors, booth entrances, closet doors, or other tighter spaces, Soundproof Blanket Sound Deadening 48 × 78 is the better fit because it gives you a true blanket-style barrier for tighter spaces without the extra fabric and weight of an oversized panel.

That makes it useful when a full-size blanket would overlap trim too much, bunch at the floor, or feel excessive for a small doorway that only needs targeted coverage.

Best Blanket For Studio Or Recording Setups

Recording setups are different again because the goal is usually flexible absorption around a smaller working area, not covering the biggest opening in the room. For home recording and podcasting, Boxer Studio Sound Dampening Blanket is the most useful studio pick because it is easier to hang and reposition in compact recording spaces than a huge industrial blanket.

In a studio context, blankets work best for broad wall and door coverage while a smaller blanket handles a booth corner, desk-side surface, or temporary reflection zone near the microphone. That approach stays inside the blanket category instead of drifting into products that solve a different problem entirely.

Choosing the Right Blanket: Weight, Size, and Mounting

How to choose soundproof blankets

The roundup matters, but the better buying decision comes from matching the blanket to the specific problem you are trying to solve.

Weight, size, and material priority

Size matters most because a blanket that does not cover the full opening leaves gaps that let sound through. Weight matters second because heavier blankets block and absorb more sound. Material matters for durability and whether the blanket can be washed, hung with grommets, or folded for storage.

Moving blankets as a cheaper alternative

If dedicated sound blankets feel expensive, moving blankets are worth considering first. Standard moving blankets can help, but they are usually thinner and lighter than purpose-built sound blankets. A heavy quilted moving blanket will perform better than a thin one, but even the best moving blanket is typically lighter than a dedicated sound dampening blanket designed for noise control.

If you already own moving blankets, they are worth testing before buying something new. If they make a noticeable difference, a heavier purpose-built blanket will make an even bigger one.

Hanging and mounting for best results

The best mounting method is one that keeps the blanket flat against the opening with minimal gaps around the edges. A sturdy curtain rod through the grommets works for doors and windows. Heavy-duty hooks or command strips work for wall mounting. The key is full coverage and tight edges, not just draping the blanket loosely over the area.

When Blankets Are Not the Right Tool

Alternatives to soundproof blankets

Blankets are not always the right tool. Knowing when to skip them saves money and frustration.

Neighbor noise through a wall

Blankets will not block significant wall-transmitted noise because walls require mass, decoupling, and air-sealing that fabric cannot provide. If the main complaint is neighbor noise through a shared wall, best soundproofing panels and best soundproof foam are closer to what you need, and even those have limits compared with proper wall treatment.

When window or door coverage falls short

Even when the blanket targets the right surface, it may not be enough. If blankets over the window or door are not enough, the next step is usually a purpose-built insert or a heavier door.

A large full-opening blanket like US Cargo Control Extra Large Sound Dampening Blanket is still the best way to confirm the opening is really the weak point first. After that, Best soundproof curtains and best door sweep for soundproofing can complement blankets, and best soundproof windows for home covers the tier above when the glass path is the real bottleneck.

When blankets are still worth buying anyway

Despite those limits, blankets are still worth buying when you need a fast, reversible, and affordable way to test whether covering a specific surface reduces the noise enough to matter.

If you want the cheapest full-size proof-of-concept, VEVOR Sound Dampening Blanket is the easy first move. Even if it does not solve the problem completely, blankets are one of the best diagnostic tools available because they let you confirm the weak point before spending on a permanent fix.

The Bottom Line

Best soundproof blankets work by adding mass and absorption to a specific weak point, and they perform best when hung over doors, windows, or thin barriers with full coverage and tight edges. They are not a replacement for wall-level soundproofing, but they are one of the most practical and flexible noise reduction tools available for renters, temporary setups, and diagnostic testing.

For most buyers, the right first step is a single full-size grommeted blanket over the noisiest opening. If that makes a meaningful difference, you know the weak point and can either keep the blanket or upgrade to a heavier permanent solution. If it does not help, you have saved yourself from spending more on a problem that needs a different approach entirely.

Compare this page with the broader soundproofing hub so the blanket decision stays in proportion to the rest of the room.

Frequently Asked Questions

How to block out 100% of noise?

Blocking 100% of noise is not realistic with any single product. The closest you can get requires a fully sealed room with mass, decoupling, and absorption on every surface. Blankets help reduce noise but cannot eliminate it completely.

What blankets reduce sound?

The blankets that reduce sound most effectively are heavy, dense, and large enough to cover the full opening or surface. Purpose-built sound dampening blankets with grommets perform better than standard moving blankets because they are heavier and designed for noise control.

What is the cheapest way to reduce noise through walls?

The cheapest way to reduce noise through walls is to seal every air gap first, then add mass or absorption where you can. Blankets can help on thin walls as a temporary layer, but real wall noise usually requires heavier treatment like mass loaded vinyl or additional drywall layers.

How Much Do Soundproof Windows Cost? (Real Scenario Math By Window Type)

How much do soundproof windows cost depends less on the phrase “soundproof window” and more on which weakness you are paying to fix, but that is exactly why the price range feels so chaotic at first. Sealing a rattly frame, adding a secondary layer, and replacing the whole unit live in completely different budget tiers.

That is why buyers overspend so easily. Window noise can come from loose sash seals, thin glass, or a room that is also leaking through the wall around the opening, and those problems do not deserve the same budget.

The smart move is to buy the cheapest tier that actually changes the weak point. That means treating sealing, curtains, inserts, and replacement as steps in a decision ladder rather than one giant price category.

Start with the method, then test a standard window, then scale the math up for bigger openings and multi-window rooms. That order keeps you from paying replacement money for a leak-control problem or cheap-fix money for a glass-transmission problem.

Quick Takeaway

A standard 36 × 48 window costs about $45 to seal, about $125 with sealing plus heavy curtains, about $155 to $265+ for a DIY acrylic-style insert build, about $300 to $800+ for a professional custom insert, and about $500 to $1,500+ for full replacement. Large windows and multi-window rooms climb fast because panel size, frame condition, and installation complexity change the math more than most buyers expect.

The Fastest Cost Scenarios Make Sense Only After You See The Tiers

Comparison of soundproof window cost tiers

If you want the fastest answer first, this table shows the most common window scopes and what each one usually costs before labor unless noted.

Scenario What you are actually buying Practical total
One standard window, leak-control only Weatherstripping + acoustical caulk About $45
One standard window, daylight-friendly renter setup Sealing + heavy curtains About $125
One standard window, removable diagnostic layer Sealing + heavy blanket test About $85
One standard window, DIY insert Acrylic-style secondary panel + seals + hardware About $155 to $265+
One standard window, professional custom insert Measured secondary glazing panel About $300 to $800+
One standard window, full replacement Laminated or acoustic replacement window installed About $500 to $1,500+
One large picture window, DIY insert Larger acrylic-style panel + seals + hardware About $225 to $455+
Three standard windows in one room Sealing + three curtain sets About $330

Window Soundproofing Cost Starts With The Method, Not The Buzzword

Overview of soundproof window costs

If you start with products instead of methods, every price range looks random.

In reality, cost follows the kind of upgrade you are buying, and that tells you what level of noise problem each tier is built to handle.

Each Cost Tier Solves A Different Window Problem

Method What you are actually buying Practical spend Best when
Air-leak control weatherstripping plus acoustical caulk About $16 to $45 per window Air movement, rattles, or obvious frame leakage are the main issue
Curtain tier Sealing plus heavy curtains About $96 to $205 depending on size You want a renter-friendly step that still preserves daylight and daily use
Diagnostic blackout layer Sealing plus a removable blanket test layer About $56 to $85+ You want to test whether more mass over the opening helps before paying for an insert
DIY insert Acrylic or polycarbonate secondary panel, mounting hardware, and seals About $155 to $455+ The frame is decent and you want a stronger daylight-preserving step without full replacement
Professional custom insert Measured secondary glazing panel About $300 to $1,200+ You want a better fit, cleaner finish, and less trial-and-error than DIY
Full replacement New laminated or acoustic-rated unit with labor About $500 to $2,500+ The existing window is old, weak, or already due for replacement

Size And Frame Condition Change The Budget Faster Than Most People Expect

Once those method tiers are clear, the next question is why the numbers spread so widely.

Window size changes the math immediately because a larger opening needs more curtain coverage, a larger custom panel, or a more expensive replacement unit. Daylight-preserving inserts also cost more than blackout-style test layers because the panel itself has to stay rigid, clear, and well-fitted.

Frame condition matters almost as much as size. If the sash, trim, or frame is loose, out of square, or worn out, a custom insert or replacement gets more expensive because the opening itself is less cooperative.

The Budgets Below Work Best When You Read Them As Buying Tiers

That is also why the math below is organized the way it is.

The seal, curtain, blanket, and blackout-panel tiers below use real current product prices and full retail units. That means the totals reflect what you actually spend at checkout, not a prorated number that ignores leftover material.

The acrylic-insert and replacement tiers use realistic market ranges because those costs are usually custom-measured, local-supplier, or contractor-priced rather than simple Amazon-cart purchases. For the broader method guide behind these numbers, compare this page with soundproofing windows and quieting a room from outside noise.

One Standard Window Shows Where Each Spending Tier Actually Starts

Comparison of soundproof window cost tiers

Now the math gets practical.

A standard 36 × 48 bedroom or home-office window is the easiest place to see where each tier really lands, and it is also where buyers most often overshoot into replacement when they really needed a smaller step first.

Leak-Control Is The Cheapest Real Upgrade On A Standard Window

One standard opening usually needs one roll of weatherstripping and one tube of acoustical caulk if the frame and trim are the real weak points.

Material Product Qty Needed Unit Price Line Total
Sash and frame sealing 33 Ft Gray Self-Adhesive Soundproofing Weather Stripping 1 roll $15.99 $15.99
Frame and trim joints Acoustical Caulk (29 oz) 1 tube $29.14 $29.14
Total $45.13

If air movement, rattles, or obvious sash leaks drop immediately, this is the highest-ROI first step. If traffic still dominates after sealing, the glass path is still the bigger problem.

Curtains Become The First Honest Daylight-Preserving Step

If that first sealing pass helps but does not go far enough, the next question is whether you want modest improvement without rebuilding the opening.

If you need a better result without rebuilding the opening, sealing plus one pair of heavy curtains is the first honest daylight-preserving tier.

Material Product Qty Needed Unit Price Line Total
Sash and frame sealing 33 Ft Gray Self-Adhesive Soundproofing Weather Stripping 1 roll $15.99 $15.99
Frame and trim joints Acoustical Caulk (29 oz) 1 tube $29.14 $29.14
Window coverage RYB HOME Soundproof Curtains 1 pair $79.95 $79.95
Total $125.08

This tier is strongest for moderate street noise, reflective harshness, and older windows that still leak a bit after sealing. If you are in a rental, this is usually the cleaner next step than jumping immediately to full replacement, which is why it pairs naturally with apartment soundproofing decisions.

Inserts And Replacement Only Make Sense After The Small Tiers Stall

Once curtains are not enough, you are no longer comparing accessories. You are comparing two more serious paths that try to change how the opening itself behaves.

Once curtains are not enough, the next decision is whether you want a removable insert or a full replacement.

Option What you are actually buying Practical spend Best when
DIY acrylic-style insert Cut-to-size clear panel, mounting hardware, weatherstripping, and optional caulk About $155 to $265+ You want daylight, a tighter air gap, and a frame that is still in decent shape
Professional custom insert Measured secondary glazing panel About $300 to $800+ You want a cleaner finish and less trial-and-error than DIY
Full replacement New laminated or acoustic-rated unit with installation About $500 to $1,500+ The existing window is old, thin, or already due for replacement

If you only want a fast diagnostic before paying for an insert, a removable blanket over the opening keeps the test around $85 total. That is useful when you want to confirm that more mass over the glass changes the result before you buy a custom panel.

Large And Street-Facing Windows Push You Up The Ladder Faster

Installation costs for soundproof windows

What looks affordable on one standard window gets more serious once the opening becomes wide, tall, or constantly exposed to traffic noise.

Bigger openings need more coverage, a stiffer panel, and a better fit if you want the extra spend to translate into real noise reduction.

A Large 48 × 60 Window Changes The Math Quickly

For a large picture window, the seal-only tier barely changes, but every daylight-preserving solution above that gets more expensive because the opening is wider and taller.

Option What you are buying Practical total
Seal only 1 weatherstripping roll + 1 caulk tube About $45.13
Seal + curtain coverage 1 weatherstripping roll + 1 caulk tube + 2 curtain pairs About $205.03
DIY acrylic-style insert Larger clear panel + hardware + seals About $225 to $455+
Professional custom insert Measured secondary glazing About $600 to $1,200+
Full replacement Laminated or acoustic unit installed About $1,000 to $2,500+

Bigger Glass Forces Better Materials And Tighter Fit

That jump is not just contractor markup.

Large daylight-preserving panels cost more because the sheet has to stay rigid across a bigger span, and the mounting method has to stay tight without sagging or rattling. Curtain coverage also doubles fast because one standard pair rarely spans a large picture window properly.

Replacement quotes climb for the same reason, then rise again if the unit is on an upper floor or needs trim and frame correction. That is why large-window buyers often feel the jump from “cheap fix” to “serious project” more sharply than buyers with one small bedroom window.

Persistent Street Noise Usually Means The Glass Path Is Still Winning

That is the moment when more cheap accessories start to lose their value.

If sealing and the curtain tier still leave clear traffic, aircraft, or construction noise, the glass path is still the bottleneck. At that point the smarter comparison is between a real insert and replacement, not between more small accessories.

That is also the stage where it helps to compare the rest of the room. If the wall beside the window is just as weak, the budget may need to be split between the opening and the existing wall instead of spent on the glass alone.

Multi-Window Rooms Reward Smarter Scaling, Not Automatic Overkill

Low-cost alternatives to full soundproof window replacement

Once the room has several windows, the question stops being about one opening and starts being about how materials and labor scale across the whole wall.

That is where some tiers get more efficient while others still explode quickly.

Three Standard Windows Show Where Scaling Helps And Where It Hurts

This is a realistic street-facing bedroom, living room, or home office example where one noisy wall has multiple openings.

Option Materials Project total
Leak-control only 2 weatherstripping rolls + 2 caulk tubes About $90.26
Leak-control + three curtain pairs 2 weatherstripping rolls + 2 caulk tubes + 3 curtain pairs About $330.11
DIY acrylic-style inserts for all three 3 clear panels + hardware + 2 weatherstripping rolls + 2 caulk tubes About $420 to $750+
Professional custom inserts for all three 3 measured inserts About $900 to $2,400+
Full replacement for all three 3 installed units About $1,500 to $4,500+

Shared Materials Improve The Small Tiers More Than The Big Ones

This is where multi-window budgeting finally gets a little friendlier.

Seal materials spread more efficiently across several openings, which is why the per-window cost on weatherstripping and caulk drops once you stop pricing one window in isolation. DIY insert projects can also improve per-window because the same tools, hardware strategy, and installation learning curve get reused.

Replacement only gets more efficient when the windows are similar enough for one crew to template and install them in one pass. If every opening is a different size or the frames need repair, the scale benefit falls quickly.

Some Rooms Need A Broader Budget Than Windows Alone

That is the part multi-window quotes can hide.

If the door, wall, or ceiling is obviously just as noisy as the window, no window budget will solve the whole room by itself. That is when it helps to compare the opening against soundproofing a wall or a broader room soundproofing cost plan before you overspend on the glass alone.

Lower Window Cost Comes From Better Diagnosis, Not Cheaper Tricks

Low-cost alternatives to full soundproof window replacement

At this point the pattern should be clear: the cheapest smart budget is usually a diagnostic budget first.

That first spend tells you whether the frame, the glass, or the broader room is really driving the problem before you move into a much more expensive tier.

The Best Cheap Fixes Tell You Something Useful Fast

Sealing air leaks is still the first move because it is cheap and it often tells you immediately whether the frame was the real failure point. Heavy curtains are the next honest step when you want a renter-friendly improvement that still preserves normal daylight use.

If you want a stronger temporary test, a removable blanket or blackout-style panel can tell you whether more mass over the opening changes the room enough to justify a real insert. A roll of Trademark Soundproofing Mass Loaded Vinyl makes more sense as a blackout plug or night-use panel than as a normal daylight-preserving insert.

The Worst Cheap Fixes Add Almost Nothing That Matters

That diagnostic mindset also makes it easier to ignore the usual hype.

Thin plastic film, bubble wrap, egg cartons, and lightweight foam stuck to the glass are still the most common waste-of-money fixes. They do not add meaningful mass, create a serious secondary layer, or deal with the real leakage paths around the frame.

That is why window cost guides should separate treatment from isolation. If the glass is still the bottleneck after sealing, the answer is usually a better insert or replacement, not another decorative add-on from the cheap-fix aisle.

Better Insert Money Wins When The Cheaper Tests Already Failed

That is the tipping point buyers should actually save for.

Save up when sealing and a temporary test layer still leave the window clearly noisy, especially if you need daylight, daily usability, and more than a modest improvement. That is also the point where better insert money usually beats stacking multiple weak accessories.

If the room also leaks through other surfaces, keep the budget in proportion by comparing the window plan against cheap room fixes and the best soundproof curtains. The cheapest fix that matches the real weak point is still the right first move.

The Bottom Line

How much do soundproof windows cost depends on the weakness you are actually paying to fix. One standard window can cost about $45 to seal, about $125 with sealing plus curtains, about $155 to $265+ for a DIY insert, about $300 to $800+ for a custom insert, or about $500 to $1,500+ for full replacement.

The right order is to diagnose first, then climb the spending ladder in tiers. Start with leaks, test whether more coverage or mass actually helps, and only step into insert or replacement money once the current tier has clearly hit its limit.

Frequently Asked Questions

How Much Does It Cost To Soundproof One Window?

One standard window usually costs about $45 for leak control, about $85 with a temporary blanket test, about $125 with sealing plus heavy curtains, about $155 to $265+ for a DIY insert, or about $500 to $1,500+ for replacement.

Is $100 Enough To Soundproof A Window?

Usually yes for sealing and a temporary diagnostic layer, but not for a true daylight-preserving insert or replacement. That budget is best used to confirm whether the frame leak or the glass path is the bigger problem.

Are Soundproof Windows Worth It?

They are worth it when the window is clearly the weak point and the room still stays noisy after basic sealing. If the wall, door, or ceiling is just as weak, the best return may come from splitting the budget across the whole room instead of buying a premium window solution first.

Can You Soundproof Windows Without Replacing Them?

Yes. Sealing, heavy curtains, removable test layers, and secondary inserts can all reduce noise without replacing the window.

Replacement is most justified when the unit itself is thin, old, loose, or still clearly underperforming after the smaller steps.

How To Soundproof A Vent (What Works And What Doesn’t)

How to soundproof a vent is one of those questions that sounds simple, but only if you have never tried it. A vent is an intentional hole in an otherwise solid wall or ceiling, so it can behave like a shortcut for noise unless you treat the duct path as carefully as the rest of the room.

That is why so many vent soundproofing attempts fail. People tape foam over the grille, stuff insulation into the opening, or hang something heavy over the face, then wonder why the room is still noisy or why the HVAC system starts struggling.

The better approach is to treat the vent as a sound-leak path that still has to move air. Once you understand that constraint, the right fixes become much clearer and you stop wasting time on methods that either block airflow dangerously or barely reduce noise at all.

Below, you will learn why vents carry so much sound, how to separate voice transfer from mechanical noise and rattling, which vent-specific fixes actually work without killing airflow, and which common mistakes to avoid before you spend money on the wrong solution.

Quick Takeaway

How to soundproof a vent depends on whether the problem is voice transfer through shared ducts, mechanical HVAC noise, turbulence, or a loose vibrating grille. The safest and most effective fixes usually treat the duct path, grille fit, or equipment side of the system rather than simply covering the opening, and they always preserve enough airflow to keep the HVAC system healthy.

Vent Soundproofing Starts With The Air Path, Not The Grille

How sound travels through vents and ducts

Once you accept that a vent is an opening that still has to breathe, the logic of the problem becomes much clearer.

The first job is understanding why this one opening can undo so much of the surrounding room.

Vents Leak Noise Because They Bypass The Barrier

Vents create a direct air path between rooms. Sound waves follow that path the same way air does, which means a vent opening can transmit speech, music, and equipment noise almost as if there were no wall at all.

This is the same reason soundproofing a door matters so much. Any opening in an otherwise solid barrier becomes the weak link, and vents are often the weakest link in the entire room because the duct runs straight through the wall or ceiling cavity.

The problem is worse for return-air vents because they tend to be larger and connect to a common plenum. A single return duct can act as a bridge between every room on the same system, which is why apartment dwellers and condo owners often hear conversations from units they did not even know shared ductwork.

The First Diagnostic Split Is Transfer Noise Versus Mechanical Noise

Before you fix anything, figure out which problem you actually have. Voice transfer through shared ducts is a different problem from fan noise, rattling sheet metal, or airflow turbulence at the grille.

Turn the HVAC system off and listen. If the noise continues, the issue is sound traveling through the duct path from another room.

If it stops, the problem is mechanical, and the fix is usually closer to the air handler, fan, damper, or duct layout rather than the decorative vent cover.

This diagnostic step saves more money than any single product purchase. Many people buy vent covers, foam inserts, or random duct-wrap materials before they know what the actual noise source is, and that almost always leads to wasted spending and unchanged results.

Vent Work Is Different Because The Opening Has To Stay Open

The biggest difference is that you cannot seal a vent the way you seal a wall. Soundproofing a wall works by adding mass, decoupling layers, damping vibration, and closing every gap.

Vent soundproofing has to manage those same principles while still letting air pass through, and that constraint changes every product choice you make.

That is also why generic soundproofing advice often fails when applied to vents. What works on a solid surface does not automatically work on an opening that needs to stay open, and what helps a rattling vent cover is not always what helps voices traveling through a shared return.

The same logic applies when you compare vent work to soundproofing a floor or soundproofing an existing wall. Those projects focus on upgrading a closed barrier.

Vent work is fundamentally different because the weak point is an air path, so the goal is to make that path less direct, less leaky, and less resonant without turning it into a blockage.

Safe Vent Fixes Reduce Sound Without Choking Airflow

Safe duct liner and silencer compared with blocking a vent

That requirement changes the fix order immediately.

In vent work, the wrong shortcut can reduce airflow faster than it reduces noise.

The Best First Fixes Usually Work Inside The Duct Path

The most effective airflow-safe approaches work inside the duct path rather than only on the face of the grille. These include acoustic duct liners, inline silencers, cross-talk attenuators, and sound mazes that force the air to travel a longer path before reaching the room.

An acoustic liner inside the duct is usually the cleanest way to absorb some of the sound energy moving down the run. If you do not have access for a true liner, a dense barrier such as TroyStudio High Density Mass Loaded Vinyl can help by adding mass to a short vent box or accessible duct section so the sheet metal does not transmit as much sound.

Replacing a standard stamped-metal grille with a thicker, gasketed vent cover can also help. It will not stop all transfer, but it can reduce edge leakage and stop a thin grille from buzzing under strong airflow.

Blocking The Opening Is Where Safe Fixes Turn Into Bad Ones

Never seal a vent completely with tape, plastic sheeting, or solid foam blocks. Closing a supply or return vent changes the pressure balance in the HVAC system, which can cause the equipment to work harder, increase energy costs, and eventually damage the system.

Stuffing a vent with loose insulation is another common mistake. It restricts airflow unpredictably, can shed fibers into the air stream, and rarely reduces sound as much as people expect because the material is not dense enough to block the frequencies that matter most.

You should also avoid hanging a loose heavy flap, magnetic cover, or improvised panel over the opening during normal HVAC use. Those ideas sometimes seem logical because they add mass, but if the piece can vibrate under airflow it can create its own humming or “booming” noise while still failing to solve the deeper duct-path problem.

Sometimes The Real Solution Is Deeper In The System

Sometimes the vent is not the real problem. If you share ductwork with a neighbor or another room and the noise is loud enough to hear clearly, the issue may be that the duct run is too short, too straight, or too poorly isolated to attenuate sound before it reaches your space.

In that case, the better fix is deeper in the system: adding a longer duct run, inserting an inline silencer or cross-talk attenuator, building a dead-vent style transfer box, or rerouting the duct so it does not connect two noise-sensitive rooms with a direct path. That kind of work usually requires an HVAC professional, but it solves the root cause instead of masking it at the grille.

Voice Transfer Problems Usually Mean The Duct Path Is Too Direct

Reducing voices traveling through a vent

Voice transfer through vents is one of the most common complaints in apartments, condos, and multi-room homes where ductwork connects spaces that should be private.

Shared Ducts Can Function Like Speaking Tubes

Shared ducts act like speaking tubes. When two rooms connect to the same trunk line with short branch runs, speech can travel from one room to the other with very little loss.

The shorter and straighter the duct path, the worse the privacy problem becomes.

This is especially common in older buildings and apartments where the HVAC layout was designed for efficiency rather than acoustic separation. It also shows up in home offices, bedrooms, and media rooms that share a return-air path with a noisier part of the house, which is why soundproofing an apartment and soundproofing a bedroom often lead back to the vent as the weak link.

If you are dealing with this in a rental, the vent path is one of the hardest problems to solve without landlord cooperation because the most effective fixes require access to the duct interior. Temporary measures like adding a dense blanket such as US Cargo Control Sound Dampening Blanket over the wall area around the vent can reduce some transfer as a short-term test, but it is not a substitute for treating the duct path itself.

Sound Mazes Work By Making The Path Longer And Less Direct

A sound maze is a baffle system inside the duct or transfer box that forces air to travel a longer, more indirect path before reaching the room. The idea is simple: sound waves lose energy every time they bounce off a surface, so adding more turns and absorptive surfaces inside the path reduces transmission without fully blocking airflow.

You can build a basic sound maze by lining the inside of a short duct section or transfer box with acoustic material and adding offset baffles that create a zigzag path. The longer and more indirect the path, the more sound it sheds before reaching the grille.

The trade-off is that every baffle adds some airflow resistance. A well-designed maze balances attenuation against static pressure drop so the HVAC system can still move the rated volume of air.

If you are not comfortable calculating that balance, a prefabricated inline silencer is usually the safer choice because it is already engineered for a specific duct size and airflow rate.

For DIY builders, the most common approach is a plywood box lined with acoustic material that connects between the vent and the main duct run. Two or three offset baffles inside the box create the zigzag path.

The box should be sized so the total open cross-section is at least as large as the original duct to avoid choking airflow. Even a basic two-baffle maze can noticeably reduce speech transfer, especially when the path is long enough and the lining is good at absorbing the mid-frequency range where voice clarity sits.

Liners And Silencers Make Sense When The Path Needs Real Attenuation

Duct liners make sense when you have access to the inside of the duct and the noise is moderate. They work best on shorter runs where you can treat the first few feet of duct near the vent opening or inside a transfer box.

Inline silencers and cross-talk attenuators make sense when the noise is louder, the duct run is longer, or you need a more engineered solution. Commercial silencers are designed to attenuate specific frequency ranges while maintaining rated airflow, and they are the standard approach in studios, equipment rooms, and other spaces where both quiet and ventilation are non-negotiable.

For the duct walls or vent box themselves, a heavier-grade barrier like Trademark Soundproofing Mass Loaded Vinyl can make sense because it adds real mass to the assembly rather than relying on lightweight foam that barely affects low-frequency transmission.

Mechanical Vent Noise Needs A Different Fix Than Voice Transfer

Reducing HVAC noise through vent soundproofing

If the noise stops when the HVAC system is off, you are no longer solving a privacy path.

You are solving equipment noise, airflow noise, resonance, or bad hardware.

Airflow Noise Usually Means Velocity Or Restriction Problems

Fan noise and airflow turbulence are the most common mechanical causes of vent noise. A system that is undersized, running too fast, or pushing air through restrictive ductwork will create audible turbulence at every vent in the path.

The first check is whether the noise is worse at specific vents. If it is, the issue may be a poorly sized duct, a sharp bend, a restrictive filter, or a damper that is partially closed and creating turbulence.

Fixing the restriction is usually more effective than adding material to the vent itself.

If the problem is general fan noise throughout the system, the fix is usually closer to the air handler. Adding vibration isolation to the unit, replacing a worn fan motor, correcting blower speed, or installing an inline silencer between the air handler and the first trunk line can reduce noise at every vent downstream.

If the noise is a strong whoosh rather than a transferred voice, think airflow first. Lower velocity, smoother duct geometry, and better vibration control usually outperform any attempt to make the vent cover itself heavier.

Rattles Often Come From Loose Trim, Not Failed Soundproofing

Rattling vent covers are one of the easiest problems to fix and one of the most commonly misdiagnosed. Before you spend money on soundproofing products, check whether the grille is loose, the screws are missing, the damper blade is vibrating, or the duct connection behind the grille has separated.

Tightening the grille, adding a thin gasket between the grille and the wall with soundproofing weather stripping, and securing any loose duct joints with foil tape can eliminate rattling noise completely. This is a five-minute fix that many people skip because they assume the problem is more complicated than it actually is.

If the metal boot or trim leaves visible cracks around the opening, a bead of acoustical caulk around that perimeter can stop extra leakage without sealing the vent face itself.

If the metal itself is ringing, the problem may be resonance rather than leakage. In that case, a better-mounted grille, a small amount of damping on the vibrating metal, or lower airflow velocity is usually more effective than simply trying to hang more weight on the cover.

HVAC Pros Matter When The System Layout Needs To Change

Call a professional when the noise is coming from the equipment itself, when you suspect pressure imbalance across the system, or when the duct layout needs to be modified. HVAC systems are designed as balanced pressure networks, and changing duct sizes, adding baffles, or rerouting runs without understanding the system can create new problems.

You should also call a professional if you want an inline silencer installed correctly or if the duct run between two rooms needs to be extended to improve acoustic separation. These are not difficult jobs for an experienced technician, but they are easy to get wrong without the right tools and system knowledge.

Most Vent Mistakes Come From Treating The Face Instead Of The Path

Common mistakes when trying to soundproof a vent

Most vent soundproofing failures come from the same small set of bad ideas that keep circulating online.

Sealing The Vent Usually Creates A New Problem Faster Than It Solves The Old One

Sealing a vent changes the pressure balance in the HVAC system. Every supply and return vent is part of a designed airflow network, and closing one forces the system to compensate elsewhere.

That can increase noise at other vents, reduce system efficiency, and in some cases void equipment warranties.

Removing a vent entirely is even worse because it eliminates the controlled air path and can create condensation problems, temperature imbalances, and code violations depending on the building. The right approach is always to reduce sound transfer through the vent while keeping it functional.

The Grille Is Only The Last Few Inches Of The Problem

Because the vent cover is just the exit point, not the path. Sound travels through the duct behind the cover, and a thicker, heavier, or more absorptive grille only addresses the last few inches of a path that may run many feet through the wall or ceiling.

That is why the most effective vent treatments work inside the duct itself. A properly lined run, cross-talk attenuator, or sound maze inside the duct will outperform any amount of foam stuck to the outside of the grille because it addresses the transmission path rather than the exit point.

Diagnosis Should Always Choose The First Fix

Start by diagnosing the actual problem. Turn off the HVAC system and listen.

Check whether the noise is voice transfer, mechanical noise, turbulence, resonance, or some mix of those. Then match the fix to the diagnosis.

If the issue is voice transfer, focus on the duct path: liners, baffles, a sound maze, or a cross-talk attenuator. If the issue is mechanical, focus on the equipment and airflow: vibration isolation, fan repair, damper correction, or inline silencing.

If the issue is rattling or ringing metal, fix the hardware, fit, and vibration first before spending on anything else.

That diagnostic step is the same logic that applies across the broader soundproofing hub. The best fix is always the one that matches the real weak point, not the one that sounds most impressive in a product listing.

The Bottom Line

How to soundproof a vent comes down to understanding that vents are open paths in otherwise solid barriers, and the fix has to work inside that path without killing airflow. The strongest results come from treating the duct itself with liners, baffles, dead-vent style boxes, or silencers rather than just covering the grille.

For most people, the right first step is diagnosis: figure out whether the problem is voice transfer, mechanical noise, turbulence, or a loose vent, then match the fix to what you actually find. That approach saves money, avoids HVAC damage, and delivers real noise reduction instead of the false confidence that comes from taping foam over an opening and hoping for the best.

If you have already treated the vent and the room is still noisy, step back and check whether other openings are now the weak link. Doors, windows, and thin wall sections can all become the dominant leak path once the vent is handled, which is exactly why the broader how soundproofing works logic matters: the quietest room is always limited by its weakest barrier, and fixing one path just makes the next-weakest path more obvious.

If you are working on a broader room upgrade, compare this page with soundproofing a ceiling, soundproofing windows, best soundproofing panels, best soundproofing material, and best soundproof curtains so the vent fix stays in proportion to the rest of the room. If the room also has a noisy floor path, best soundproof underlayment for hardwood floors covers the other major transmission route that often overlaps with vent complaints in multi-story buildings.

Frequently Asked Questions

How do I stop hearing voices through my vents?

You stop hearing voices through vents by treating the duct path between the rooms, not just the grille. Adding a sound maze, duct liner, cross-talk attenuator, or more indirect duct path so speech loses energy before reaching your room are the most effective approaches.

Can my neighbors hear me through the vents?

Yes, if you share ductwork with a neighboring unit, sound can travel through the ducts in both directions. The shorter and straighter the shared duct run, the more clearly voices and other sounds carry between spaces.

Can I tape cardboard over my vent?

You should not tape cardboard or any solid material over a vent because it blocks airflow and changes the pressure balance in the HVAC system. That can increase noise at other vents, reduce system efficiency, and potentially damage the equipment over time.

If you want a quick test to see how much sound the vent is contributing, hold the cardboard temporarily while someone makes noise in the other room, but never leave it sealed during normal everyday HVAC operation.

Best Soundproof Underlayment For Hardwood Floors (What Works And What To Skip)

Best soundproof underlayment for hardwood floors is usually the one that cuts footfall and impact noise the most, but only if it also matches your subfloor, moisture conditions, and installation method.

That is why this category gets confusing fast. Many buyers spend on a “soundproof” underlayment that looks convincing on paper, then end up with a floor that still sounds hollow, travels too much impact noise, or fails the install they were planning.

The better way to shop is to stay hardwood-first from the beginning. You want a layer that helps with impact noise, supports the type of wood floor you are installing, and fits the real problem in the room instead of promising full soundproofing by itself.

Below, you’ll see what underlayment can realistically do, which material types make the most sense under hardwood, which products are worth buying, and when the smarter upgrade is outside the underlayment layer entirely.

Quick Takeaway

The best soundproof underlayment for hardwood floors helps most with footsteps, impact noise, and the hollow feel hard floors can create. For most buyers, the strongest picks are denser underlayments that suit hardwood installs, while thin bargain foam works best only when your expectations stay modest and the floor assembly itself is already in decent shape.

Before You Buy: What Underlayment Can and Cannot Do Under Hardwood

What to know before buying soundproof underlayment for hardwood

Before you compare products, you need to be clear about what problem the underlayment is actually solving.

Impact noise vs airborne noise

Underlayment helps most with impact noise. That means footsteps, chair movement, dropped objects, and the hard slap that travels through wood floors and into the room below.

It can help a little with airborne noise too, but that is not where it shines. If your main complaint is loud voices, TV sound, or bass transfer, the wider floor-ceiling assembly matters more than the underlayment alone, which is why it helps to compare this page with the broader soundproofing hub and adjacent upgrades like best soundproof interior doors before you overspend on the wrong layer.

Why hardwood raises the bar

That impact-noise focus becomes even more important under hardwood, because hardwood gives you less forgiveness because the surface is rigid and reflective. Small differences in density, cushioning, and subfloor fit are easier to hear under wood than under carpet or thicker floating finishes.

That is also why hardwood buyers should be more skeptical of cheap foam than buyers installing softer floor systems. A weak underlayment can leave the floor sounding clicky or hollow even when the product description sounds impressive.

The specs that actually matter

With hardwood’s rigidity in mind, the comparison specs shift too. Start with density, material type, and installation compatibility.

For hardwood, those factors usually matter more than marketing language alone.

It also helps to treat IIC-style claims carefully. Good competitors make the same point: ratings depend on the full assembly, so a product that performs well in one test build may not deliver the same result over your exact joists, subfloor, ceiling, or finish floor.

Underlayment Materials: Rubber, Cork, Foam, and Combination

Material types for soundproof hardwood underlayment

Now that the goal is clearer, the next question is which material type actually fits hardwood best.

Rubber vs cork

Rubber usually wins when the main goal is stronger impact-noise control. It is denser, handles load better over time, and makes the most sense in upstairs rooms, condos, and other hardwood installs where footsteps are the real complaint.

Cork still has real value. It is more appealing to buyers who want a natural material, some thermal comfort, and solid everyday sound reduction without jumping straight to a heavier rubber-first build.

Foam as the lighter-duty option

Rubber and cork both add real density, but foam remains the most common underlayment material. Foam can be good enough when the room is not especially demanding, the floor is floating or engineered, and you mainly want to reduce the hollow sound underfoot.

It is usually the easiest path for buyers who want a lighter, simpler, and less expensive layer.

The catch is that foam is easy to overrate. If you are trying to tame a loud upstairs hardwood floor, it usually makes more sense to compare foam honestly against denser options instead of assuming any “acoustic” foam roll will solve the problem.

Combination underlayments with moisture barriers

Combination products make sense when the buyer needs two things at once: practical moisture management and better sound control than thin bargain padding can offer. That is especially relevant over concrete or in rooms where the floor manufacturer wants a specific underlayment profile.

This is also where hardwood decisions overlap with other room upgrades. If your room still has weak windows, doors, or wall leakage, compare the wider plan with best soundproof windows for home, best soundproof interior doors, and best door sweep for soundproofing so the floor layer is not doing all the work alone.

The Best Soundproof Underlayments for Hardwood Floors

Best soundproof underlayment picks for hardwood floors

Once you narrow the category, the best picks become easier to separate. The right choice depends less on hype and more on whether you want the best all-around hardwood fit, the lowest-cost acceptable option, or the strongest noise-control upgrade you can realistically install.

The important guardrail here is staying inside the underlayment category first. If the floor clearly needs ceiling-cavity work, added mass, or a deeper assembly fix, that is the next stage of the plan rather than the underlayment pick itself.

Best Overall Underlayment For Hardwood Floors

For the broadest mix of hardwood compatibility, sound control, and real-world convenience, FloorMuffler Ultra Seal Underlayment 300SF is the strongest all-around pick in this set.

It stands out because it is easy to position for real hardwood buyers. It works when you need one underlayment that feels more serious than bargain foam, still stays practical to install, and does not force every buyer into a thick premium build right away.

Best Budget Underlayment

If you want a simpler value option for floating laminate or engineered-wood style installs, ROBERTS Black Jack Underlayment 100 sq. ft. Roll makes the most sense.

This is the honest budget choice, not the miracle choice. It works when you want a recognizable hardwood underlayment with published sound-control intent, but you are not trying to force a mid-priced foam product into a heavy-duty condo or multi-family noise problem.

It is also the kind of pick that makes more sense in smaller rooms than across a whole demanding upper floor. That keeps the budget logic realistic instead of stretching a lighter underlayment into a job it was never built to handle.

Best Premium Underlayment For Maximum Noise Control

When noise reduction matters more than price, IncStores 10mm Thick AcoustiCORK RC1000 Rubber and Cork Flooring Underlayment is the premium pick to look at first.

This is the kind of product that fits tougher upstairs hardwood complaints, stricter buyer expectations, and projects where a denser layer is worth the extra cost. It also matches the hardwood-first logic from the SERP better than trying to sell thin convenience foam as the answer to every footfall problem.

Best Underlayment For Upstairs Hardwood Floors

For upstairs rooms, the smartest move is usually to start with the densest hardwood-compatible option you can justify and then check whether the assembly below is still limiting the result. In practice, that usually means leaning toward the premium rubber-cork route first rather than assuming a lighter pad will be enough.

That keeps the recommendation anchored to actual underlayment instead of drifting into a different part of the build. If the premium underlayment route still leaves the floor too loud, that is the sign to move beyond underlayment and look at ceiling-side or cavity-side upgrades.

At that point, a product like AFB Mineral Wool Insulation Batts can help you test whether softening the source side changes the result enough to justify bigger work, but it belongs in the next assembly step rather than in the underlayment layer itself.

Choosing the Right Underlayment for Your Floor

How to choose soundproof underlayment for hardwood floors

The roundup matters, but the better buying decision comes from matching the product to the floor build you actually have.

How your installation method changes the choice

Yes, sometimes dramatically. Floating engineered systems give you more underlayment freedom than nail-down solid hardwood, and some products that look perfect on paper become less useful once the install method is fixed.

That is why convenience picks are not automatically the best picks. A product can look great in a listing and still be the wrong choice if the hardwood manufacturer, installer, or subfloor conditions point you toward a denser or more specific underlayment profile.

Thickness: when more helps and when it hurts

Once the install method is settled, thickness becomes the next filter. Thicker is not automatically better.

You want enough density and cushioning to help impact noise, but not so much bulk that you create fit issues, door clearance problems, or an underlayment/floor combination the manufacturer does not support.

For many buyers, the smarter question is not “what is the thickest product?” but “what is the thickest product my hardwood install can actually use well?” That is the same mindset that keeps buyers from overspending on the wrong material in pages like best soundproof foam or best soundproofing panels, where the use case matters as much as the product itself.

When underlayment alone falls short

Even with the right thickness and material, underlayment is not enough when the real bottleneck is the assembly, not the finish layer. If severe airborne transfer, joist-path vibration, or a weak ceiling below is driving the complaint, even a good underlayment may feel underwhelming.

That is where added mass or a broader rebuild becomes the smarter spend. For a lighter added-mass step during floor work, TroyStudio Mass Loaded Vinyl Sound Proof Barrier is the cleaner supporting option.

If you already know the problem is bigger than the underlayment layer, Trademark Soundproofing Mass Loaded Vinyl 1 lb for Wall Sound Control is the better example of what buyers graduate to when they move beyond a simple underlayment fix.

That larger perspective also helps keep expectations realistic. If the room still leaks badly after the floor work, compare the weak points against best soundproof curtains or nearby openings and barriers before blaming the underlayment for a problem it was never designed to solve by itself.

The Bottom Line

Best soundproof underlayment for hardwood floors comes down to honest expectations and the right material match. If you want the safest all-around buy, start with a hardwood-compatible underlayment that gives you real impact-noise control and practical installation flexibility instead of chasing the biggest marketing claim.

For most buyers, that means using a denser underlayment for tougher upstairs noise, keeping budget foam in proportion to lighter jobs, and remembering that severe sound complaints often point to the full floor-ceiling build rather than the underlayment alone. When you shop that way, you are much more likely to buy once instead of redoing the floor because the first “soundproof” layer was never the right fit.

Frequently Asked Questions

How do you soundproof hardwood floors?

You soundproof hardwood floors best by targeting impact noise first, then checking whether the subfloor, ceiling below, or joist path is still limiting the result. Underlayment helps most during flooring work, but major noise problems often need a wider assembly upgrade.

What underlay reduces noise?

The underlay that reduces noise best under hardwood is usually a denser product such as rubber, rubber-cork, or a stronger acoustic underlayment made for wood floors. Thin foam can still help, but it is usually the lighter-duty option.

What underlayment has the highest IIC rating?

The highest IIC number on paper is not automatically the best real-world product because the full test assembly changes the result. A denser hardwood-compatible underlayment usually performs better for demanding installs, but you should compare the assembly logic, not just one isolated claim.

Should you put underlayment under hardwood floors?

You should use underlayment under many hardwood floors when the installation method allows it and when moisture control, floor feel, or impact-noise reduction matter. The exact answer depends on whether the floor is floating, engineered, glued, or nail-down and what the manufacturer requires.

Best Door Sweep For Soundproofing (What To Buy And What To Skip)

Best door sweep for soundproofing is usually the one that closes the bottom gap well enough to matter without creating new fit problems every time the door moves.

That is why buyers get mixed results. A cheap draft stopper may cut airflow, but sound follows weak points more aggressively than most people expect, and a leaky door frame can make a decent sweep feel underwhelming.

The good news is that a door sweep can still be a smart upgrade when the bottom gap is the main leak. You just need to match the sweep style to the size of the gap, the floor condition, and the rest of the door assembly instead of assuming every under-door product works the same way.

Below, you’ll see which door sweep styles are worth buying, which products fit different gap problems, when a sweep is not enough, and how to keep a good sweep from being wasted on a weak door setup.

Quick Takeaway

The best door sweep for soundproofing helps most when the under-door gap is the real weak point and the rest of the door already fits reasonably well. Brush and rubber-style sweeps can help more than soft draft blockers, but the best overall result usually comes from combining bottom-gap control with perimeter sealing and a door that is not too light or too warped to seal well.

Before You Buy: When a Door Sweep Actually Helps

What to check before buying a door sweep for soundproofing

Now that the core answer is clear, the smartest first step is making sure the bottom gap is actually the problem you are trying to solve.

The real impact of a door sweep

A sweep can reduce noise by closing the gap under the door, but it will not make a hollow, poorly sealed door behave like a heavier acoustic assembly.

That is why this article should connect directly with best soundproof interior doors and the broader soundproofing hub. A sweep solves one leak path, not every leak path in the opening.

When the bottom gap is the real weak point

That limited scope means a sweep helps most when the bottom gap is genuinely the main leak. You can usually tell when you see light under the door, feel airflow, or hear voices strongest at floor level. In those cases, a sweep can be one of the fastest low-cost upgrades in the whole room.

When a sweep is not enough on its own

Even with the bottom gap sealed, a sweep falls short when the door slab is hollow, the jamb leaks badly, or the room has other obvious weak points such as loose perimeter gaps, weak windows, or an unusually thin wall. That is why a sweep often works best as one part of a wider plan that may also include best soundproof interior doors, best soundproof windows for home, and best soundproof curtains depending on the room.

Best Overall Door Sweep For Soundproofing

Best overall door sweep for soundproofing

Once you know a sweep is worth trying, the best overall pick is usually the one that gives a decent seal without being overly fussy to live with every day.

Why This Is The Best Overall Pick

For most interior doors, Door Sweep Brush, Draught Excluder Door Draft Insulation Seal Strip Silicone Seal is the strongest all-around choice in this product set because it fits the most common use case: a normal room door that leaks at the bottom and needs a cleaner, more durable everyday fix than a soft blocker.

Who Should Buy It

Buy it if your door already fits fairly well at the sides and top, the floor line is not wildly uneven, and you want a sweep that improves noise reduction without making the door feel clumsy or overbuilt.

That gap-check from the previous section matters here. If you see light under the door and the rest of the frame is reasonably tight, this is the product that matches that situation best.

Best Door Sweep For Large Gaps

Door sweep option for large door gaps

The overall pick above works well for standard gaps, but some doors sit higher off the floor than a slim brush can reach. When the gap is visibly oversized, you need a product built for that problem specifically.

Why This Pick Works Better For Bigger Bottom Leaks

For larger floor-line leakage, MAXTID Under Door Draft Stopper for Bottom of Doors makes more sense because it is designed for the kind of bottom-gap problem that smaller or stiffer sweeps may fail to cover well.

When To Skip It

Skip it if the gap is small and the bigger issue is really the side or head seal. In that situation, you may get more value from tightening the frame or improving the wider interior door setup or your broader soundproofing plan instead of forcing a bulkier bottom fix.

The light-under-the-door test from earlier helps here too. If the light is thin and even, the overall pick is probably the better fit. Save this one for gaps you can clearly see from across the room.

Best Budget Door Sweep

Budget door sweep for reducing sound leaks

Not every door needs the cleanest or most engineered bottom seal. Sometimes the right move is a cheap, honest improvement that closes an obvious gap without pretending to be a full acoustic upgrade.

Why This Is The Best Budget Pick

HomeProtect Door Draft Stopper 36 Inch Under Door Draft Blocker Door Sweep is the best budget choice here because it is inexpensive, straightforward, and useful when you want to confirm that the door bottom is worth addressing before spending more money.

What To Expect From A Budget Sweep

Expect a noticeable improvement when the floor-line leak is obvious, but not a miracle. Budget sweeps make the most sense when you’re trying to reduce nuisance noise, speech leakage, and drafts — not build a studio-style room door.

Compared to the overall pick, you’re trading some durability and seal tightness for lower cost and easier commitment. That’s a fair trade when you’re still figuring out whether the bottom gap is really the main problem.

Best Companion Seal If A Door Sweep Is Not Enough

Companion door seal used with a soundproofing door sweep

A good door sweep can still disappoint if the sides and top of the door frame stay open. That is why the strongest buyers do not look at the bottom seal in isolation.

Why This Matters More Than Many Buyers Expect

The mistake that ruins most sweep upgrades is simple: fixing the bottom while leaving the jambs and head of the door frame leaky. Sound doesn’t care which edge is sealed — it finds whatever gap is left.

That’s why 33 Ft Gray Self-Adhesive Soundproofing Weather Stripping for Doors and Windows is the most important companion pick on this page. It covers the sides and top that your sweep can’t reach.

If your perimeter gaps are narrower and you want a tighter compression-style option around the jamb, Black Rubber Weather Stripping Door Seal Strip is the cleaner fit. Either way, the point is the same: a sweep plus perimeter sealing outperforms a sweep alone almost every time.

When To Buy This Before Another Sweep

Buy this before chasing a second bottom product if the door already has some bottom control but still leaks around the perimeter. That is often the difference between a small upgrade and a door that finally feels tighter overall.

Choosing the Right Sweep for Your Door

How to choose a door sweep for soundproofing

Now that the main product types are clear, the smarter buying question is which sweep style actually matches your door instead of just looking strongest in a listing photo.

Sweep types compared

Brush, rubber, silicone, and automatic door bottoms all solve the same problem differently. Basic fabric or foam blockers are usually the weakest for soundproofing, while tighter rubber, silicone, or automatic-style bottoms are generally better when noise reduction matters more than simple draft control.

Automatic door bottoms are often the strongest premium category because they drop against the threshold only when the door closes. That can help them keep more consistent positive pressure without dragging constantly across an uneven floor. A hardware-style option like Automatic Door Seal – Exterior Door Seal Bottom Strip Sweep makes the most sense when you want a premium upgrade instead of another temporary blocker.

Measuring the gap correctly

Once you know the sweep type, the next step is measuring. Check the width of the slab, the height of the bottom gap, and how even the gap stays across the full door bottom. A sweep that is too small leaves leaks, while one that is too aggressive can drag, wear out faster, or feel annoying in everyday use.

Installation difficulty

With the right size confirmed, installation method becomes the last filter. Adhesive products are easier for renters and quick tests. Screw-mounted or more structured bottom seals usually take more effort, but they often feel more stable over time.

If you want a lower-cost middle ground between a soft blocker and premium hardware, Door Draft Stopper with Brush Reduce Noise, 39 Inch Rubber Door Sweep Breeze Blocker is a sensible value pick because it stays focused on bottom-gap control without jumping straight to a more expensive automatic assembly. If you’re working on a heavier room upgrade, compare your door plan against best soundproofing material and best soundproofing panels so you keep the sweep decision in proportion to the rest of the room.

Pairing a Sweep with Other Door Seals

Pairing a door sweep with seals for better soundproofing

By this point, the biggest buying mistake is easy to see: a door sweep works best when the rest of the door is capable of supporting it.

Jamb seals matter almost as much

That companion seal section above made the case for perimeter coverage, and this is where it plays out in practice. The frame around the door leaks just as easily as the bottom.

Sound doesn’t respect the line between the sweep’s job and the frame’s job. A great sweep on a poor frame can still leave the room feeling noisy — which is why pairing the two is almost always worth the small extra cost.

Hollow or leaky door slabs

Even with the bottom and perimeter sealed, a hollow-core slab remains a weak barrier. The slab itself transmits sound that no sweep or weatherstrip can stop.

That’s where best soundproof interior doors becomes the more important next step than obsessing over one more bottom seal. If the slab is the bottleneck, upgrading seals won’t change the result.

If you want a temporary test before replacing the slab, US Cargo Control 96 x 80 in Extra Large Sound Dampening Blanket with Grommets can help confirm whether extra door mass changes the result enough to justify bigger work.

When a sweep is still the best first step

Despite those limitations, a door sweep is still the best first upgrade when the gap is obvious, the slab is decent, and you want the fastest low-cost way to reduce one of the most common leak paths.

It’s also a smart diagnostic step. If the sweep noticeably helps, the bottom gap was real. If it doesn’t, you’ve confirmed the problem is the slab, the frame, or something else entirely — and you’ve only spent ten to fifteen dollars finding out.

The Bottom Line

Best door sweep for soundproofing depends less on marketing language and more on whether it matches your real bottom-gap problem. The right sweep can reduce noise and drafts at the threshold, but it works best when the rest of the door is already reasonably solid and the frame is not leaking everywhere else.

For most buyers, the best path is simple: fix the bottom gap honestly, add perimeter sealing if needed, and avoid expecting a soft draft blocker to perform like a full acoustic door system. If the room still leaks badly after that, step back and check whether the next weak link is the broader soundproofing setup, the wider wall, or the nearby window rather than the sweep itself.

Frequently Asked Questions

Does a door sweep reduce noise?

Yes, a door sweep can reduce noise when the under-door gap is one of the main leak paths. It helps most when the rest of the door already fits fairly well and the sweep makes real contact where sound was escaping.

Do soundproof door seals work?

Yes, door seals work when they close air gaps around the opening, because sound leaks through those same weak points. The best results usually come from combining a bottom sweep with perimeter seals instead of treating either one as a complete fix on its own.

What blocks out the most noise?

The strongest noise reduction usually comes from a heavier door, tighter perimeter sealing, better bottom-gap control, and a stronger surrounding wall or opening. A sweep helps, but it is one part of a larger soundproofing system.

What can I put on a door to soundproof it?

You can add a better sweep, perimeter weatherstripping, and in some cases a heavier temporary layer or a better door slab. The right answer depends on whether the main weakness is the bottom gap, the frame, or the door itself.

How To Make A Soundproof Booth (DIY Booths, Privacy Pods, And When To Buy Instead)

How to make a soundproof booth can work, but only if you first separate three very different ideas. Below, you’ll see how a DIY recording booth, a heavier isolation booth, and a modern office phone booth or privacy pod solve very different problems.

That confusion is why people build a cramped blanket box when they really need private calls, or buy a sleek booth expecting it to stop bass, traffic, or a noisy room outside.

The good news is that you can get a much better result when you match the booth to the job. A privacy pod can reduce distractions and speech spill for calls, a blanket or closet booth can improve vocals, and a framed booth can reduce more leakage when it is built like a real shell.

Below, you’ll see which booth type fits which problem, when buying a phone booth is smarter than building, which materials actually matter, and when you should soundproof the room instead.

Quick Takeaway

The best soundproof booth choice depends on whether you are trying to protect calls, improve recordings, or contain louder sound. If you mainly need a private place for calls or meetings, a modern office booth or privacy pod is often smarter than a DIY build; if you mainly need better mic sound, a blanket or closet booth may be enough; if you need real isolation in or out of the booth, you need mass, sealing, a better door, and planned ventilation.

If your booth situation is… Best first move Usually enough when… Escalate when…
Open office calls, Zooms, or private conversations Buy a privacy pod or office phone booth You need calmer speech privacy and focus, not full studio isolation Hallway noise, structure noise, or confidentiality demands are still too high
Home office with no spare room for calls Compare a small privacy booth against fixing the room first The main problem is moderate distractions and speech privacy Street noise, kids, or a weak window and door are still dominating
Voiceover, podcasting, or streaming in a fairly quiet room Start with a light booth or room treatment Reflections are the main problem Outside noise or sound leakage matter more than tone
Closet booth for singing or content creation Upgrade the closet only if the door and gaps can be controlled You need a better vocal environment more than deep isolation The booth is still leaking badly or sounding boxy and hot
Loud practice, amps, or serious sound containment Skip the tiny booth mindset and think shell first Rarely enough with light materials You actually need room-level soundproofing or a room-within-a-room
Renter-safe portable setup Use a blanket booth only for lighter-duty recording Portability and low cost matter most You expect it to stop major sound transfer

Choose The Booth Type Before You Buy Anything

Home soundproof booth setup

The first decision is not what material to buy.

It is whether you need a booth for speech privacy, recording quality, or actual isolation.

Privacy Pods Fit Calls Better Than DIY Builds

If the job is private calls, video meetings, telehealth sessions, focused work, or short one-person conversations, a prefabricated phone booth or privacy pod is often the cleaner answer. That is especially true in open offices, coworking spaces, and home offices where you need a room-like pocket without remodeling the whole space.

This is the part older booth articles often miss. Modern soundproof booths now include sleek office pods and meeting booths that are designed more for speech privacy and usability than for full music-studio isolation.

Recording Booths Solve A Different Problem

If you are recording vocals, podcasting, streaming, or doing voiceover, the main problem may be reflections around the mic rather than major sound transfer through the building. In that case, a booth can help even if it behaves more like controlled acoustic treatment than a true isolated room.

This topic overlaps with how to soundproof a room and how to soundproof a room for music. Sometimes the better move is improving the room around the mic instead of squeezing yourself into a tiny box.

Some Noise Problems Are Bigger Than Any Booth

A booth is the wrong project when the real problem is a noisy house, a weak window, loud neighbors, bass transfer, or a whole room that leaks badly. A small enclosure will not reliably beat a bad shell outside it.

If that sounds like your problem, start with the room path first using soundproofing an apartment or soundproofing a wall before you assume a booth will rescue everything.

Office Booths Are Privacy Tools, Not Magic Shells

Materials used to build a soundproof booth

Office phone booths are real products now, but “soundproof” still needs translation. Most are better understood as privacy booths or acoustic pods, not magic isolation chambers.

Modern Pods Handle The Practical Problems Well

They create a more controlled speech environment for calls, one-person work, and short meetings. They also solve practical problems that DIY booths often miss, like ventilation, lighting, power, and a predictable door seal.

That makes them a strong fit when you want a person-focused enclosure more than a construction project. For calls and focused work, that can be a smarter solution than trying to retrofit a closet or build a hot little cube in the corner.

Their Limits Show Up When You Expect Full Isolation

Most privacy pods do not behave like a room-within-a-room build with heavy walls and extreme low-frequency control. They can reduce speech spill and distractions, but they are not the same thing as a studio shell designed to stop bass, structure-borne vibration, or a very noisy room outside.

Expectation-setting matters most here. A phone booth can be excellent for privacy and concentration while still falling short if you expect it to defeat traffic rumble, loud HVAC, or a badly leaking office around it.

Buying Wins When Usability Matters More Than Raw Shell Performance

Buy instead of build when speed, finish quality, portability, and predictable use matter more than custom shell performance. That usually means offices, leased spaces, home offices, and teams that need a booth for calls or meetings rather than loud music.

If that is your situation, compare the booth decision against how to soundproof an office. The right answer may be a privacy pod, a better room layout, or a few room-level upgrades instead of a DIY booth build.

Light DIY Booths Only Work For Honest Goals

Blanket booth option for temporary sound isolation

DIY booths still make sense, but only when the goal is honest. The lighter the build, the more it helps acoustics and convenience rather than true isolation.

Blanket Booths Help Reflection More Than Isolation

A blanket booth helps when you need a portable, low-cost enclosure that reduces reflections around a voice, narration mic, or light recording setup. It is useful when you want a drier sound and a little spill control without full construction.

A product like US Cargo Control Sound Dampening Blanket fits that use case well because it shows where a simple blanket enclosure earns its keep.

A closet booth is worth upgrading when you already have a usable space and the weak points are manageable. The door, perimeter gaps, reflections, and ventilation usually matter more than hanging random foam everywhere.

Closet projects succeed or fail on the boring details. If the closet has a hollow door or obvious leakage, the booth will still disappoint until you fix those weak links.

Framed Booths Start Acting Like Tiny Rooms

Build a framed booth when you need more than treatment and portability. If sound escaping the booth or entering the booth actually matters, the project has to behave more like a real enclosure with mass, damping, seals, and airflow.

That is the point where lightweight blanket logic stops being enough. If you need stronger isolation than a closet or blanket booth can deliver, the build gets closer to a tiny room project than a cheap hack.

Real Booth Builds Depend On Shell Physics

Build steps for a DIY soundproof booth

Once you commit to a real build, the priority order gets simpler. The shell, the door, the seals, and the airflow matter more than decorative treatment.

Mass, Damping, And Airtightness Do The Work

Mass, damping, and airtightness do the heavy lifting. A product like Soundsulate Next Generation 1 lb Mass Loaded Vinyl shows what a real mass layer looks like when the shell itself needs more weight.

If you are building double-layer walls, Green Glue Noiseproofing Compound makes sense because damping starts to matter once the booth acts like a layered wall assembly.

Interior Treatment Shapes Tone More Than Leakage

Interior absorption improves the sound inside the booth by reducing reflections, flutter, and harshness. It does not replace shell performance when the real problem is sound getting in or out.

Internal treatment should be treated separately from true soundproofing. Use guides like best soundproofing panels and best insulation for soundproofing with that distinction in mind.

Doors, Seals, And Airflow Decide Whether The Booth Works

The door usually decides whether a booth feels serious or flimsy. A weak door, sloppy overlap, or unplanned vent opening can erase much of the benefit of the heavier shell around it.

A product like 33 Ft Self-Adhesive Soundproofing Weather Stripping matters because isolation often fails at the seams before it fails at the wall panel.

That same weak-link logic is why soundproofing the door, soundproofing windows, and choosing the right soundproofing material stay relevant even in a booth project.

Common mistakes when building a soundproof booth

Once you know a DIY booth is the right path, build in weak-link order instead of buying random layers. That is the difference between a booth that is usable and one that becomes an abandoned hot box.

Step 1: Choose The Goal, Size, And Location First

Decide whether the booth is for speech privacy, recording tone, or real leakage reduction before you build anything. Then choose a size that lets you breathe, place the mic properly, and avoid making the inside unnaturally cramped.

Step 2: Build The Shell Around The Real Failure Points

Start with the frame, shell mass, door quality, and perimeter sealing before you worry about the interior finish. If the room around the booth is already weak, compare the plan against soundproofing a ceiling and soundproofing a floor so you do not ignore the bigger leak path.

Step 3: Test Airflow And Leaks Before You Finish The Inside

Ventilation is not optional, because a booth that is too hot, stuffy, or awkward will not get used. Test the door, seams, vent path, and outside-room leakage before you spend more on the final interior treatment.

What Booth Mistakes Ruin Results Fastest?

The biggest mistakes are expecting a light booth to deliver full isolation, building the booth too small, and using foam as a substitute for mass and sealing. Another common mistake is choosing a booth when the real fix should have happened in the room first.

If the room is already quiet and the problem is mostly reflections, treat the room instead of building a booth. If the room is noisy and leaky, fix the shell first instead of hiding inside a tiny enclosure.

The Bottom Line

How to make a soundproof booth gets much simpler once you answer one question first: is the booth for calls, for recording tone, or for real isolation?

If it is for calls and focused work, buying a privacy pod is often smarter than building.

If it is for vocals, podcasting, or voiceover, a light booth can be enough when the real target is reflections around the mic.

If you need real containment in or out of the booth, stop thinking blanket-first and start thinking shell-first.

That means mass, damping, sealing, a better door, and ventilation.

Use that decision rule before you spend on materials, because the wrong booth category wastes more money than the wrong blanket or wall layer ever will.

Frequently Asked Questions

How to make a soundproof booth at home?

Start by deciding whether you need a simple recording booth, a privacy booth for calls, or a heavier isolation booth. Then choose the smallest solution that fits the job, because many home setups need room fixes or a privacy pod more than a full DIY shell.

Are office phone booths really soundproof?

Most office phone booths are better described as privacy booths than absolute soundproof rooms. They can reduce speech spill and distractions well, but they do not usually replace a heavy studio-style isolated shell.

Is a blanket booth good enough?

A blanket booth is good enough when your main goal is reducing reflections and getting a cleaner voice recording in a quiet or moderately noisy room. It is usually not good enough when the goal is stopping major outside noise or keeping loud sound from escaping.

Is it cheaper to buy a privacy booth or build one?

DIY is usually cheaper on raw materials, but buying can be cheaper in time, finish quality, ventilation, portability, and predictability. If the booth is mainly for calls, meetings, or office privacy, a prefab booth often makes more sense than building from scratch.