
If you’re thinking of adding a garden shed, you likely want it to be a peaceful escape from the hustle and noise of everyday life.
But with loud neighbors, traffic, and other urban clamor, how do you ensure your backyard oasis is truly soundproof?
The solution lies in strategic design choices and noise-blocking construction methods. In this guide, we’ll dive deep into the key steps for building an acoustic sanctuary right in your own yard.
Let’s dive in and explore floorplans, materials, doors, windows, and finishes tailored to absorb or contain sound.
With mindful attention to soundproofing details, you can create a private retreat unaffected by external noise pollution.
Step 1: Thoroughly Plan the Layout and Positioning for Optimal Soundproofing
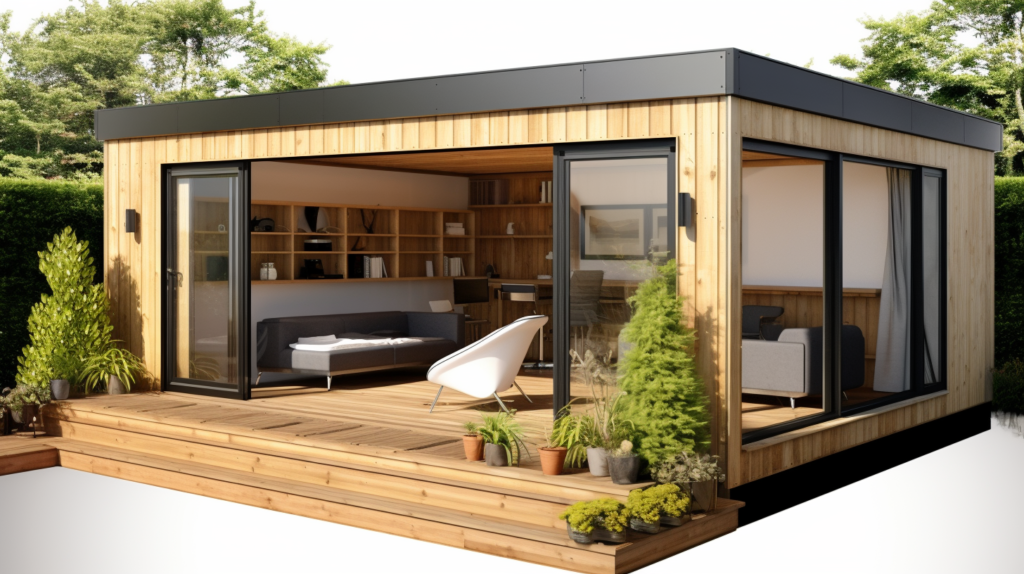
The first and most important step is taking ample time to carefully plan out the size, layout, orientation and positioning of the garden room for best soundproofing results.
Start by measuring the exact garden dimensions available for siting the structure. Sketch a scale outline of the area on graph paper, mapping existing hardscapes, plants and fixtures.
Then research recommended room sizes and proportions for sound isolation. A compact, approximately 15 x 20 foot dimension is ideal. Barrel shaped and irregular floorplans are preferable over perfectly square and rectangle forms which can create flutter echo.
Next, creatively sketch different room size and orientation options within your garden space. Don’t just default to placing it in the center. Determine if an off-center location along one edge could position it further from disruptive noise sources.
Consider angles that avoid harsh sun exposure through western windows and walls. Check for potential drainage issues if downspouts will overflow by doors.
Comparing a few layout alternatives will reveal the optimal positioning.
Also factor in proximity to noisy streets, loud neighbors, barking dogs, and other audible disruptions. Situating the structure tucked away in the most peaceful, tranquil garden spot will inherently make soundproofing easier.
Visit the site during different times of day to identify sources of noise pollution. Locating it on the opposite side of the property helps block such undesirable sounds.
Once you’ve determined the ideal size, proportions, orientation and location, draw detailed floorplans mapping the inner layout. Sketch walls, doors, windows, cabinetry, ventilation, and lighting layouts.
Visualize interior room flow and furnishings. Outline the intended design character and features.
This helps inform soundproofing strategies needed to harmoniously integrate acoustic isolation elements without compromising other goals. Adjust scale and spacing as required to accommodate materials like double entryways and thick insulated walls.
Order building materials and soundproofing supplies well in advance once the floorplan is finalized. Refer to the drawings to estimate required quantities of lumber, drywall, insulation, windows, ventilation and finishes.
Having everything on hand makes efficiently executing each construction step simpler.
Step 2: Build a Sound Dampening Exterior Structure
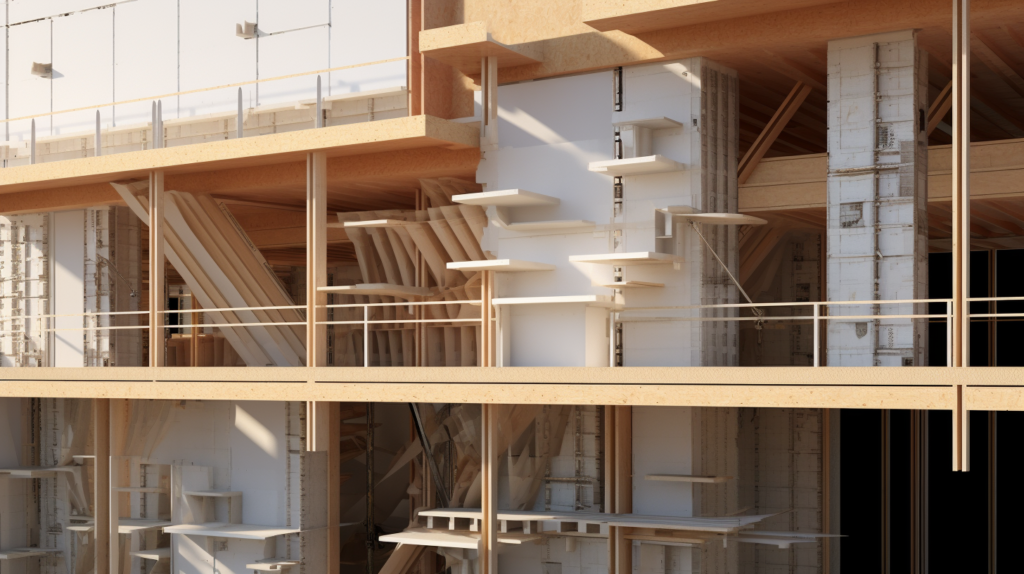
The exterior floor, walls, windows, doors, ceiling and roof establish the protective shell encasing the inner sound sanctuary. Dense, multi-layered construction with vibration-dampening materials provides the foundation for optimal acoustic isolation.
The floor must prevent noises like footfalls transmitting downward into the ground where they can radiate outward. Construct a plywood subfloor on foam underlayment atop compacted gravel or sand to cushion and decouple contact with the earth.
Or pour a concrete slab utilizing perimeter isolation strips to eliminate rigid connection with surrounding soil. Both options create a stable, neutral base for floor finishes.
Exterior walls require substantial mass and air voids to contain noise. Build double stud walls with staggered studs and sound-attenuating insulation like mineral wool in the cavity.
Alternate layers of rigid insulation boards, plywood or cement fiberboard. For one row, use thick concrete blocks or insulated concrete forms (ICFs) to add density.
The layered wall assembly presents tremendous soundstopping power.
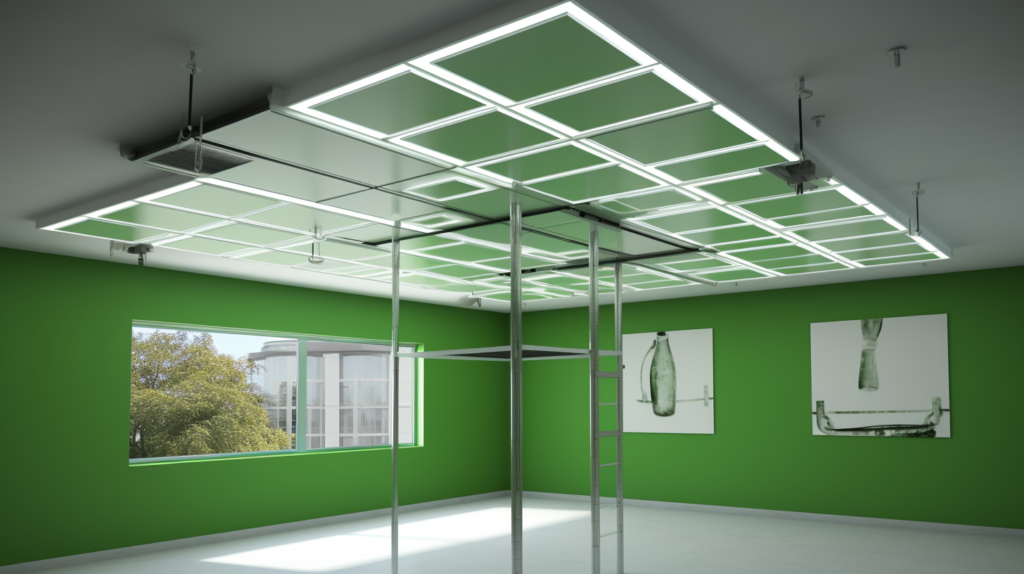
Follow similar principles for the ceiling using a suspended or floating system. Construct dense double ceilings with offset joists and noise-reducing insulation spacers.
Then hang multiple layers of drywall from resilient channels or wires to decouple from upper floors. The materials and air voids hinders noise transmission while avoiding rigid contact between ceiling and roof.
For the roof, look for soundproofing options like SIPs panels or layers of MDF atop house wrap. Use rubberized asphalt shingles to dampen rain noise. Pack insulation thoroughly between rafters and interior ceiling finishes to contain noise.
Every element performs together to create the protective acoustic envelope.
Step 3: Install High Performance Soundproof Doors and Windows
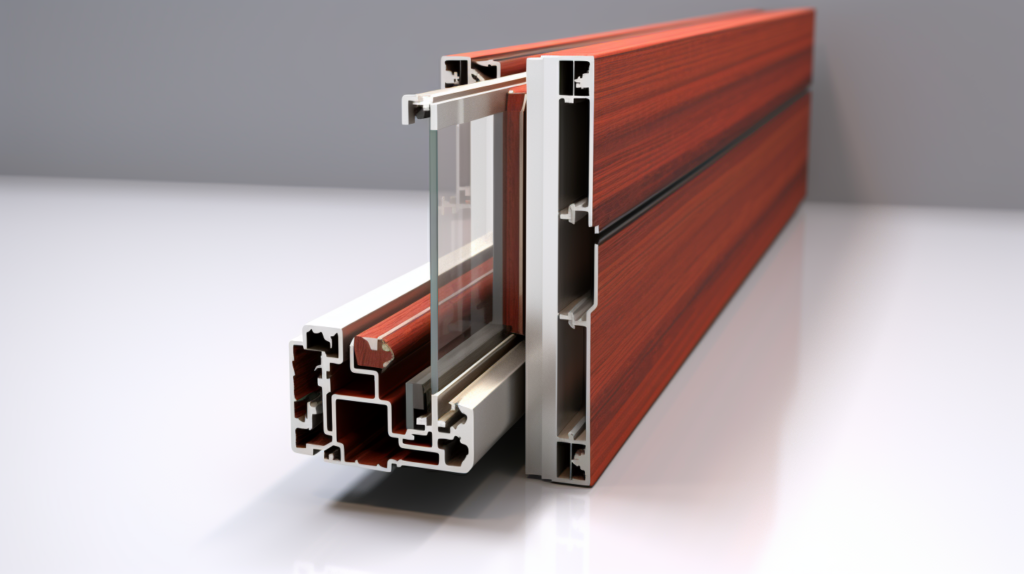
Doors and windows tend to be weak points that compromise sound isolation. Quality prefabricated models engineered specifically for acoustic insulation are essential.
Solid core wood doors 2 inches or thicker offer far better noise blocking than thin, hollow doors. Choose heavyweight models (over 5 lbs. per square foot) with overlapping weatherstripping, automatic door bottoms, high STC ratings, and well-fitted jambs.
All edges should seal tightly with no gaps when closed. The goal is eliminating sound leakage around the perimeter.
For windows, look for thick laminated glass with thermally broken frames, triple glazing, gas filled chambers, and properly engineered airspaces between panes. Casement and awning windows typically seal better than sliding or double hung models.
Ensure a tight fit and caulk thoroughly during installation for air tightness. Investing in custom sized soundproof windows designed for your openings is ideal if budget allows.
One small leak can undermine all construction efforts, so quality materials are worth the investment. Proper installation is also critical.
Step 4: Incorporate Soundproofing Materials and Techniques for Interior Walls
Now to construct the interior walls, choose specialized soundproofing drywall, resilient channels and staggered stud arrangements. Standard paper-faced drywall alone has minimal mass and noise blocking abilities.
Look for sound dampening drywall containing viscoelastic vinyl in between multiple gypsum boards for maximum effectiveness. Hang two or more layers with offset seams using acoustical caulk between sheets.
This sandwiches damping compound within the layers.
Alternatively, build double stud walls with sound absorbing insulation like rockwool in the cavity between. Use a combination of 5/8” and 1/2” drywall boards throughout for extra mass. Seal securely around outlets, vents, piping and trim with acoustical caulk.
Take time to properly incorporate these steps as you assemble the inner walls. The materials and technique choices make a big impact on performance.
Step 5: Install a Properly Decoupled and Isolated Ceiling
The ceiling should float independently from structure above using a suspended or decoupled system. One great approach is installing resilient channels perpendicular to the ceiling joists before hanging multiple sheets of drywall.
The channels create an air gap that prevents noise vibrating through.
Alternatively, construct a free-floating ceiling by securing drywall layers to wires, ropes, or a suspended grid. This completely detaches the ceiling to block overhead sounds.
Use acoustical clips or furring strips to create an air space. Apply Green Glue between drywall sheets for damping.
Careful perimeter caulking contained noises within the isolated ceiling cavity. Taking these steps prevents vibration transmission through the ceiling.
Step 6: Choose a Soundproof Subfloor and Floating Floor
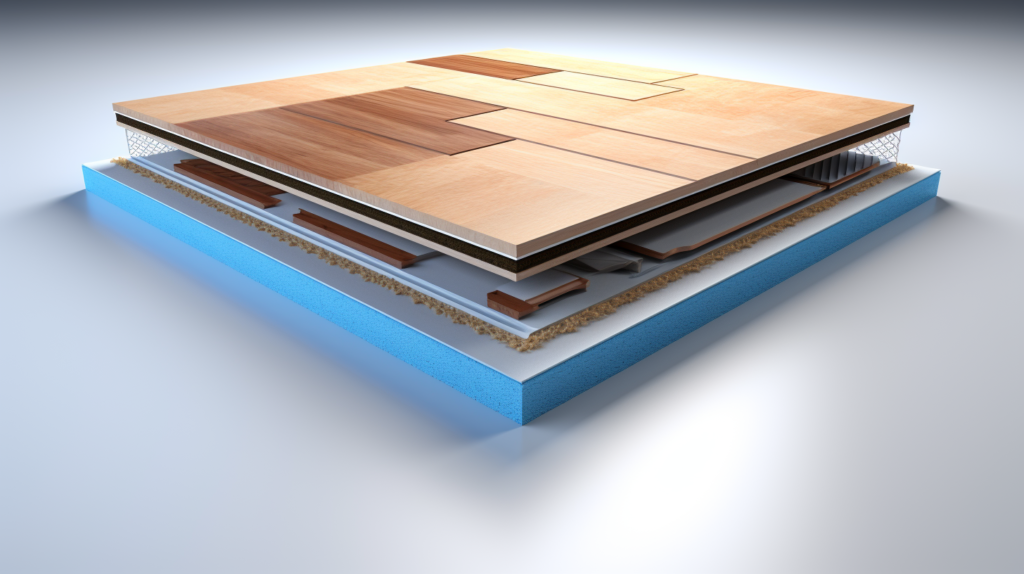
Hard flooring materials amplify contact noise and footfall vibrations as sound energy transmits directly downward.
To prevent this acoustic issue, first build the structural subfloor using either a floating concrete slab atop foam underlayment, or double layered plywood with sound absorbing material in between.
Then install a continuous foam underlayment layer rated for sound control. Many laminate, engineered wood and vinyl plank options now come with pre-attached underlayments for simplicity.
Top this base with your finished flooring, taking care to avoid rigidly bonding it to the structural subfloor beneath. This floating construction isolates impact sounds and footfalls for silence below.
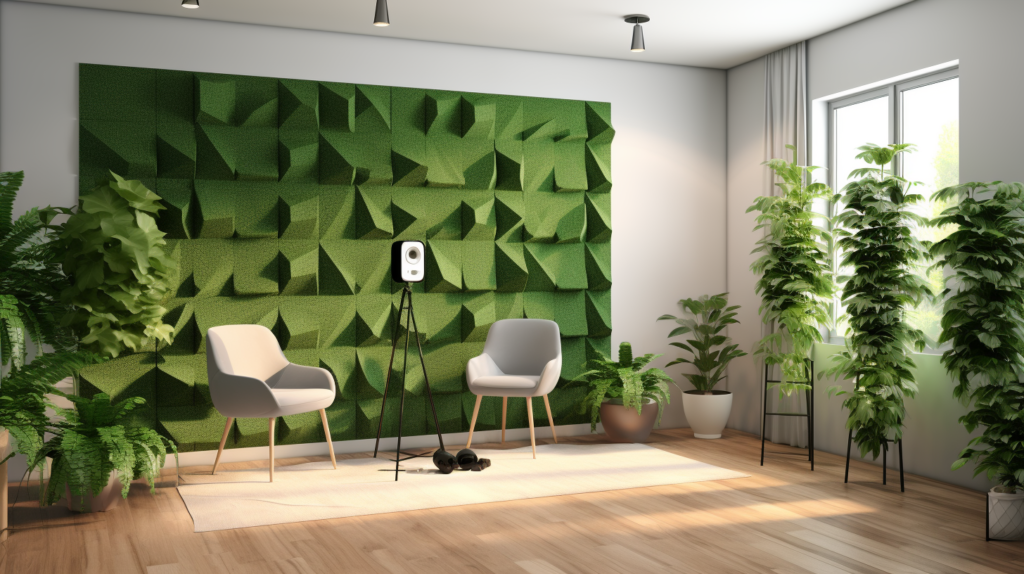
Step 7: Add Sound Diffusers and Absorbers for Interior Acoustics

Installing sound-absorbing and diffusing panels treats interior ambient noise, echoes and reverberation for a comfortable acoustic environment. Strategically place acoustic foam, fiberglass or felt panels on walls for broadband sound absorption.
Bass traps in corners help minimize problematic low frequency buildup. Diffusers with convoluted surfaces scatter sound evenly across the space.
Just 25-30% wall and ceiling coverage with a mix of absorptive and diffusing finishes significantly improves room acoustics. Focus application on the far end from entries, and areas where reverberation is excessive.
A blend of materials tuned to the precise dimensions and sound characteristics makes a perceptible positive impact on interior sound quality, without deadening the ambiance.
Step 8: Incorporate Silenced Ventilation Systems

Proper fresh air circulation is vital, but fans and ductwork often compromise isolation by allowing noise transmission. To prevent this, install low sone bathroom and kitchen fans with sound dampening features like insulated housings, quiet motors and flow-optimized blades.
Run ducting through acoustic insulation to contain noise. Where ducts penetrate walls, seal tightly with acoustical caulk.
Muffle outside vents by lining the duct with sound absorbing materials before it terminates at the vent hood. Keep duct runs short and straight.
Sized appropriately, quiet fans on low settings can provide sufficient fresh airflow without the noise downsides. This balance is ideal for both healthy air quality and soundproofing.
Step 9: Thoroughly Seal All Gaps, Cracks and Openings

Prevent sound leakage by methodically sealing any cracks, joints, openings and penetrations throughout the structure. Caulk thoroughly around windows and door frames where they meet exterior walls using acoustical sealant designed for maximum adhesion and flexibility.
Low expanding spray foam around plumbing, vents, lighting fixtures and other penetrations through walls seals gaps where air could pass through.
Meticulously seal all seams, overlaps and connections in exterior sheathing and siding materials to eliminate gaps in the building envelope. Look for overlooked openings throughout the construction process and seal them completely.
Leaving any holes or cracks compromises sound containment, so take time to do this right. The goal is making the building envelope 100% airtight.
Step 10: Incorporate a Sound Lock Vestibule Entryway
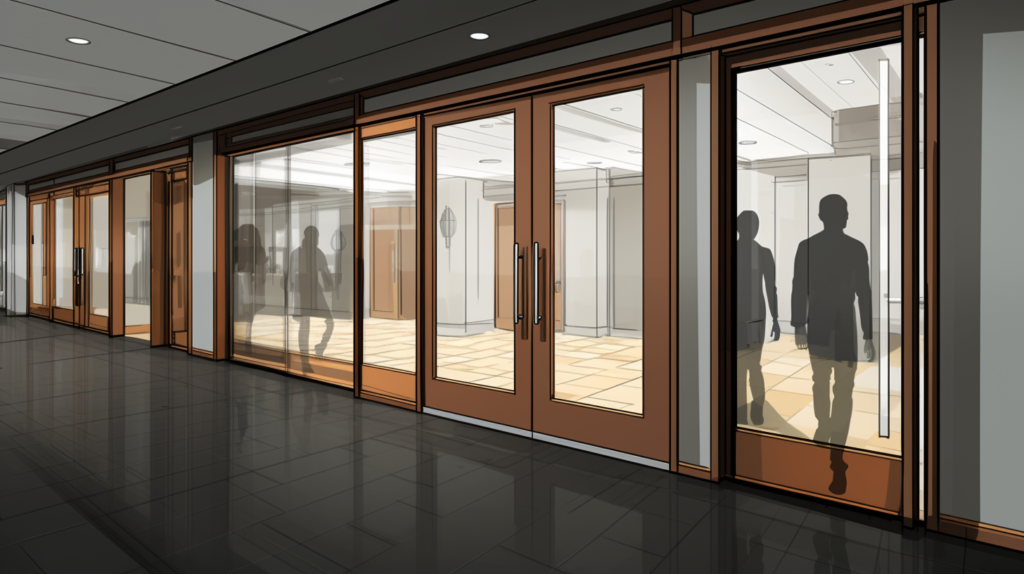
A double door entryway allows exiting or entering without compromising the acoustic isolation of the main room. The first exterior door leads into a small mudroom or landing area, isolated from the inner door.
As one door shuts, briefly containing the noise, the other can then open.
For best results, use solid core doors and allow at least 4 feet between them. Stagger the doors at an angle rather than directly across from each other. Install thresholds with complete perimeter seals, door sweeps and automatic bottoms.
Different flooring materials in each chamber prevent flanking. This simple buffer zone dramatically improves sound containment.
Step 11: Inspect All Construction for Hidden Sound Leaks

Before completing construction, rigorously inspect the entire structure searching for overlooked areas that could still allow noise transmission. Verify consistent caulking, perimeter sealing and insulation coverage throughout the building envelope.
Check for hidden cracks near windows and unfinished joints between dissimilar materials. These easily compromise sound containment.
Listen and feel for locations where vibration transfer or flanking may occur. Isolate and seal each sound leak one by one.
Make fixes wherever necessary using additional caulk, insulation, gasketing, or seals. Look along baseboards, drywall seams, vent and pipe penetrations. Scan for gaps around electrical fixtures and outlets.
Don’t assume soundproofing is complete until this exhaustive inspection process is finished.
Step 12: Acoustically Test and Fine Tune the Space
With construction complete, carefully test the sound isolation and make final tuning adjustments. Have an assistant make noise like loud music or talking outside, while you listen from within and rate audibility.
Also switch places, generating noise inside while they listen for leaks outside. Note any areas where sound proofing is insufficient.
Address weak spots by adding caulking, weatherstripping, insulation, or modifying problematic construction details.
For instance, you may need to replace hollow doors, add mass loaded vinyl on key walls, seal overlooked ceiling gaps, apply additional damping compounds, or install another layer of drywall in places.
Take the time to tweak and problem-solve until the desired noise reduction is perfected.
Conclusion
Creating an effective soundproof sanctuary requires dedicated planning, specialized construction techniques and the right materials. But with attention to isolating and containing sound through mindful design choices, you can enjoy a peaceful, undisturbed oasis.
Using these comprehensive guidelines to optimize acoustic isolation and interior sound quality, your private hideaway will become a treasured escape from a noisy world.
The investment into proper soundscaping is worthwhile for the benefits of relaxation and tranquility.