Is noise from nearby traffic, barking dogs, or your power tools disturbing your neighborhood and invading your shed? Soundproofing your shed can restore peace and quiet.
Adding insulation, resilient channels, weatherstripping and solid doors creates an acoustic barrier that prevents exterior noise from entering your shed and contains interior noise within it.
In this article, we will dive into the step-by-step process for soundproofing your shed walls, ceiling, floor, windows and doors. Let’s get started!
Why Soundproof Your Shed?
Adding soundproofing to your shed can provide several beneficial effects that make it a worthwhile project to undertake. By soundproofing the walls, ceiling, floor, windows and doors of your shed, you will reduce the amount of noise that can escape from the interior of the shed and potentially bother nearby neighbors. This is especially important if you plan to partake in noisy activities like woodworking, metal work or band practice inside the shed. The soundproofing materials will contain the noise within the shed interior space and prevent it from leaving the shed and intruding into your neighbor’s yards, porches, or homes. This can help maintain positive relationships with surrounding neighbors.
Another reason to add soundproofing to your shed is to prevent outside noises from entering into the interior of the shed. Common external noises like traffic on nearby streets, kids playing and yelling, dogs barking, loud music, construction projects, lawn mowers, leaf blowers, and more can easily penetrate into an untreated shed. By applying soundproofing techniques and materials, you create a quieter, more peaceful environment within the interior of the shed that helps block these annoying external sounds from infiltrating the space. This is especially useful if you want to use the shed interior for quiet hobbies and activities like reading books, meditation, listening to music, or creative projects that require concentration. The soundproofing prevents disruptive exterior noises from disturbing these types of activities.
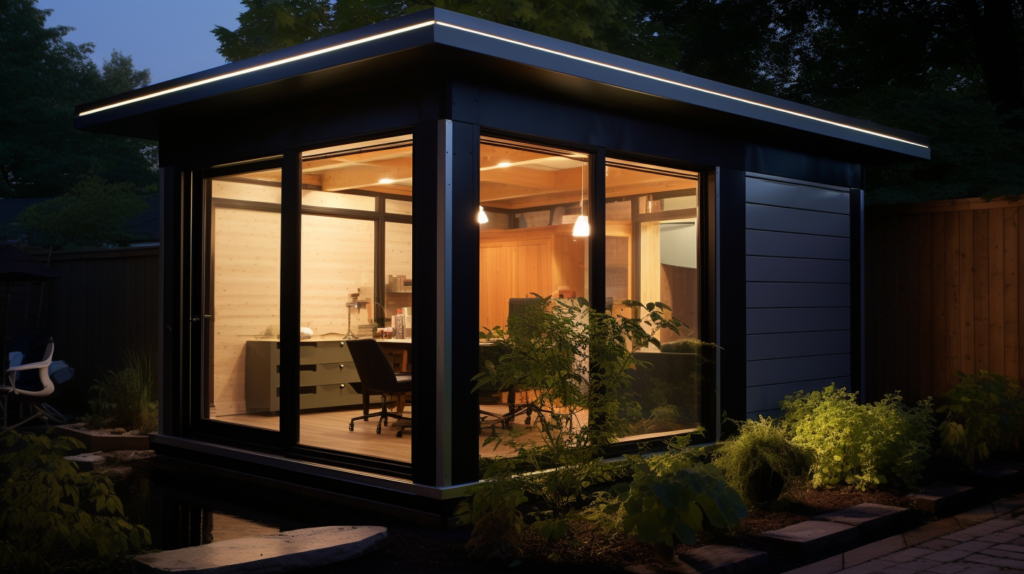
Finally, soundproofing can help you transform your basic storage shed into a focused creative space for musical hobbies like practicing and playing instruments, recording music, hosting jam sessions with friends, etc. Adding acoustic insulation and treatment allows you to play and record music, create audio/video content, sing, and more without worrying about bothering any nearby neighbors with the noise. Soundproofing creates an isolated, noise-controlled oasis that enhances focus and creativity for music and other arts.
Materials Needed for Soundproofing Your Shed
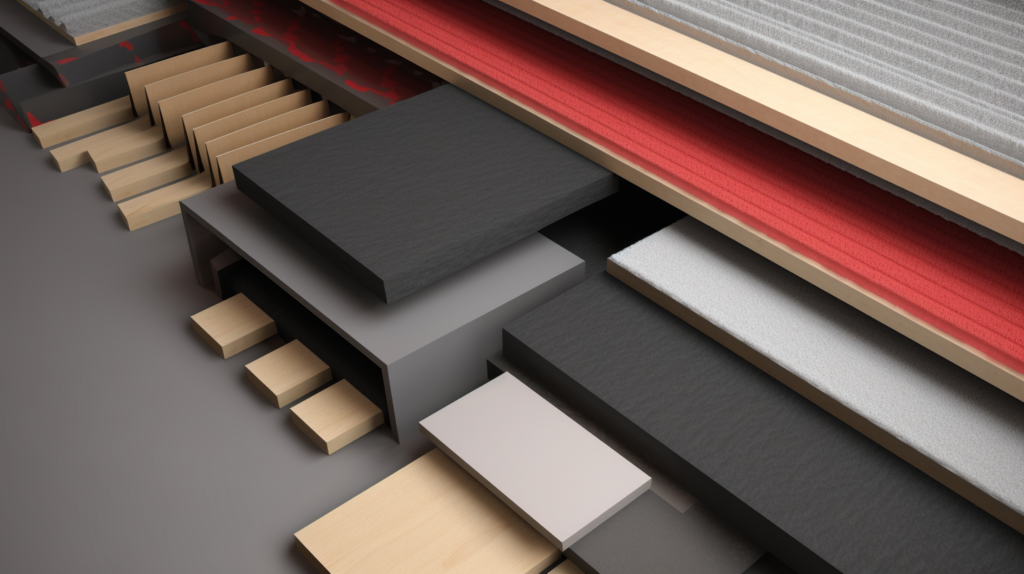
Completing an effective soundproofing treatment on your shed will require utilizing the proper materials that are designed to block, absorb, and minimize noise transmission. Here are some of the primary products and supplies you will need to soundproof your shed:
Mineral wool insulation or fiberglass insulation can be used to insulate the wall and ceiling cavities in your shed’s framing structure. The dense, sound-absorbing nature of mineral wool and fiberglass makes them effective at damping noise transfer through ceiling and wall surfaces by creating resistance. The insulation blocks audible sound waves from moving easily through the framing while also absorbing errant reverberating noise within the cavity spaces. This prevents both direct and indirect sound transmission.
Resilient channels are thin metal furring strips that are used during the drywall installation stage as part of a discontinuous construction technique. Attaching the drywall sheets to the resilient channel instead of directly screwing or nailing the drywall into the wall studs or ceiling joists decouples the drywall from the framing. This damping effect helps isolate and prevent vibrational noise transfer for better soundproofing performance. The channels create an air gap between the drywall and framing which resists noise transmission.
Multiple layers of drywall provide ideal mass loaded barriers for impeding sound waves from penetrating through the ceiling and walls. Normal drywall sheets can be used, or specialized soundproofing drywall that contains viscoelastic polymers sandwiched between two gypsum boards for greater density. Double drywall with offset seams is recommended for maximum noise blocking performance. The staggered seams prevent direct noise paths.
Acoustic caulk is flexible caulking designed for sealing cracks, gaps, and seams during soundproofing construction and drywall installation. Applying acoustic caulk around each layer of drywall seals air leaks that allow audible sound waves to pass through. Acoustic caulk remains flexible long-term and won’t shrink, crack, or pull away over time. This maintains the acoustic seal.
Mass loaded vinyl (MLV) is a thin flexible vinyl sheet that has integrated dense materials that add mass and weight. MLV acts as an acoustic barrier underlayment and is used to soundproof floors. The density blocks impact noise and footfall transfers from transmitting through the floor from above. MLV is often combined with floating flooring to “float” the floor above the subfloor rather than directly contacting it.
Cork underlayment is another viable option for creating a soundproofed floating floor above the wooden subfloor. Cork is a naturally porous and vibration-absorbing material that can be installed in sheets beneath laminate, engineered hardwood, or vinyl floating floors to reduce noise transfer.
Thick, piled rugs also assist with blocking floor noise transmission in areas where people will be walking or moving furniture. The density and piled height of plush rugs allows them to absorb and dissipate the impacts from footfalls. Area rugs are a good option for key sections of floor that experience more activity.
Solid core doors replace existing hollow core doors to provide greater density and sound blocking capabilities. Solid wood stave core doors and steel insulated doors perform best for soundproofing versus cardboard or foam core doors that have less mass. Solid core doors prevent noise transmission much better than lightweight hollow core doors.
Perimeter seals like door sweeps, door bottoms, astragals, jamb seals, and threshold seals prevent acoustic leaks and noise flanking around doors and doorways. High quality door sweeps fit snugly along the bottom edge of doors to seal the gap between the bottom of the door and the floor surface below when closed. Astragals attach to the meeting edges of double doors to close the gap between them. Weatherstripping ensures a tight acoustic seal across the tops, bottoms, and sides of doors when shut.
Changing out existing single pane windows with new double or triple pane window assemblies drastically reduces noise transmission through window glass. Multi-pane thermal windows with layered glass panes, hollow air gaps, and laminated glazing provide far superior soundproofing compared to single panes. The air gaps between panes create insulating buffers that resist noise penetration. Laminated layers dampen vibrations and structural sounds. Sealed, insulated air pockets within advanced window assemblies significantly reduce both airborne noises and impact/structural sounds.
If full window replacements are not feasible due to cost or logistics, there are still some temporary improvements that can be made. Special heavy duty window plugs are available that mount inside the window frame and inflate to completely fill the space. High density window plugs prevent noise flanking around the glass. Alternatively, window insulation inserts can be temporarily installed on the interior side of windows to create an additional glazing layer and absorb noise. While not as effective as new modern windows, these upgrades to existing windows can still provide respectable improvements in sound blocking.
1. Soundproof Walls in Your Shed
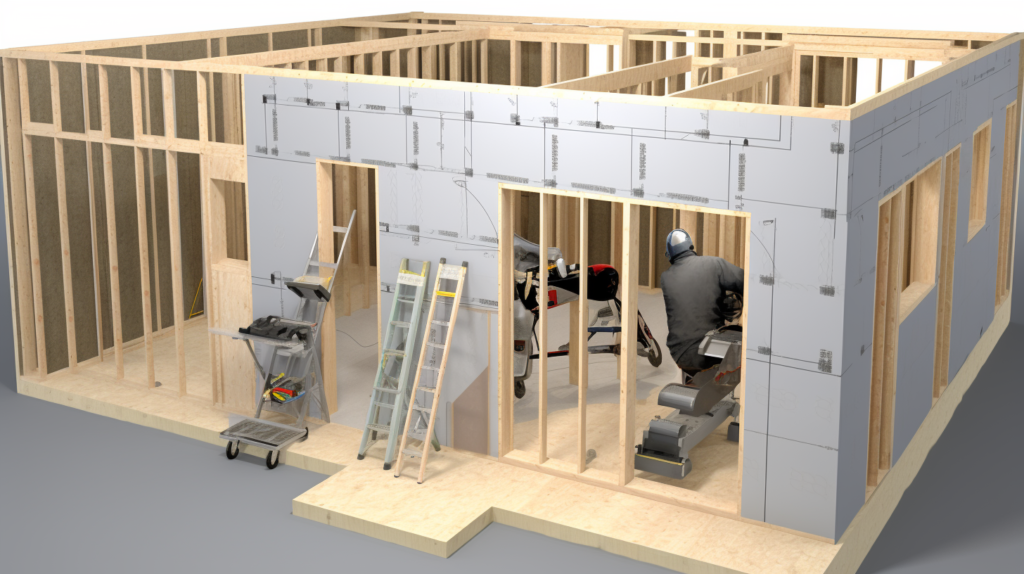
To properly soundproof the walls in your shed, you will first need to expose the wall structure so that sound-damping insulation can be installed within the wall cavities. This will require removing any existing drywall or wood paneling attached to the interior side of the walls so that you have access to the wall stud framing and cavity space. Use pry bars and hand tools to carefully remove the wall surface sheets while taking care not to damage the underlying wood studs or electrical wiring. Remove any old insulation if present.
Once the interior wall surfaces have been removed and the wall studs and cavities are fully exposed, the next step is to fill these open spaces with sound-attenuating mineral wool or fiberglass insulation. Be sure to pack the insulation fully into each cavity without excess compression. Light compression is ok, but avoid over-packing. The goal is to create friction and absorb errant airborne noise within the cavity space. This dampens sound reverberations and resonance. Acoustic insulation works best when it can trap, slow, and absorb vibrations within the wall structure.
With the wall cavities insulated, now resilient channels can be installed horizontally across the exposed wall studs. Use drywall screws to securely fasten the channels into the wood framing while maintaining space between the studs and channel. This creates isolation and essentially decouples the drywall from the studs for less mechanical noise transfer. When properly mounted, the resilient channels provide vibration damping and separation between the drywall and the wall framing.
The next stage is mounting the first layer of drywall onto the resilient channels rather than screwing it directly into the wall studs. Drywall screws work best for affixing the sheets to the channel strips. Be sure to offset all vertical drywall seams between different layers. After mounting the first layer, go back and apply flexible acoustic caulk between drywall sheets and surrounding materials to seal air gaps and leaks. Acoustic caulk will block sound flanking through cracks.
For optimal noise reduction, a second layer of drywall should be installed overtop the first layer. Be sure to offset the seams between the two layers so that no seams directly align. Applying acoustic caulk around the perimeter before mounting the second drywall layer creates a soundproof sandwich. The staggered double drywall technique contains noise within the mass and vibration resistance of the assembly rather than transmitting through. Careful sealing of marginal gaps with caulk contains the sound within the interior space. Combined, these steps result in effective acoustic isolation within the walls.
2. Soundproof Ceiling in Your Shed

Soundproofing the ceiling follows a very similar process as the walls:
The first step is to expose the ceiling framing by removing any existing drywall sheets or wood panels. Take care not to damage electrical wiring or plumbing runs that may be present above the ceiling. Once the ceiling joists and cavities are fully exposed, take the opportunity to inspect for level and make any necessary structural repairs. Blocking can also be added if needed to support resilient channels.
With unobstructed access to the ceiling cavity space, next pack sound-absorbing mineral wool or fiberglass insulation thoroughly between each ceiling joist bay. Compress lightly and fill completely to the top of the joists. This acoustic insulation will trap airborne noise and prevent it from reflecting back into the room. The insulation makes the cavity act as a noise dampener.
Run metal resilient channels perpendicular across the ceiling joists using drywall screws. Stagger adjacent channels to optimize coverage. The resilient channels provide isolation between the drywall and framing which will improve acoustic insulation. Make sure the channels mount to the undersides of the joists and do not directly contact the insulation.
The first layer of drywall can now be mounted to the resilient channels rather than screwing directly into the ceiling joists. Continue using drywall screws driven into the channels. Be sure to offset all drywall seams between layers and apply flexible acoustic caulk at each joint and along the perimeter top plate. This seals sound leaks.
Finish the ceiling by installing a second layer of drywall over the first, with seams offset from the first layer to break direct noise paths. Apply caulk between layers and around the perimeter for an airtight seal. The double drywall technique prevents noise transmission through the assembly thanks to the staggered mass, vibration isolation, and airtight construction.
With proper insulation between joists and multiple drywall layers isolation mounted on resilient channels, noise infiltration through the ceiling will be dramatically reduced. This keeps sound contained within the room below.
3. Soundproof Floor in Your Shed
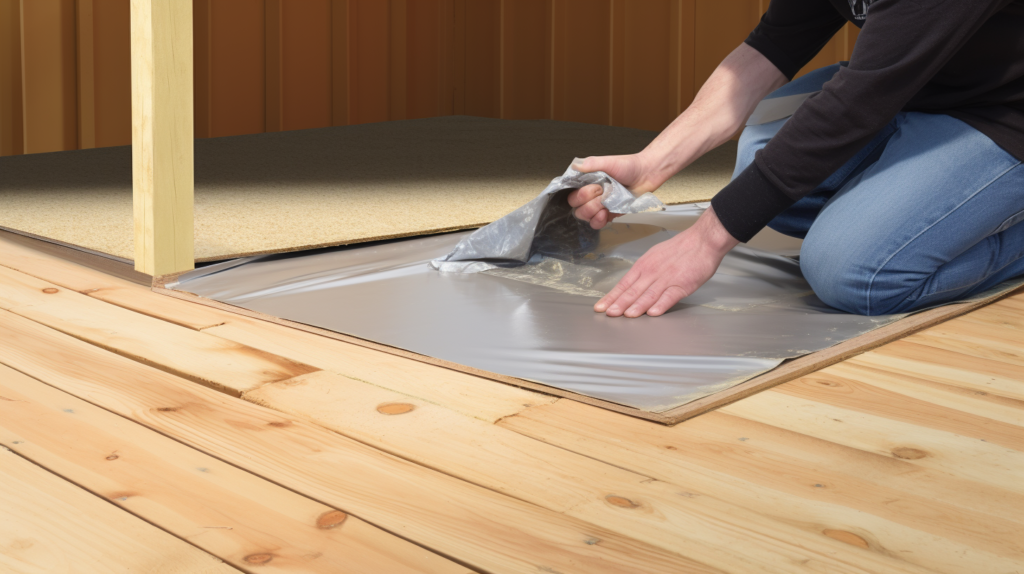
There are several effective techniques that can be used to soundproof the floor of your shed:
The first recommended step is to install a layer of mass loaded vinyl (MLV) or cork underlayment over the existing subfloor. MLV is a pliable vinyl sheet material with integrated dense mass fillers that make it act as an effective noise barrier. Unroll the MLV or cork sheets and use acoustic caulk to seal all seams and edges to create a continuous sound blocking layer. The dense, vibration-damping properties of MLV/cork will impede impact noises and airborne noise transfer through the floor from below.
Next, install your choice of laminate flooring, engineered hardwood, or vinyl plank floating floor over top of the MLV or cork underlay. The key is that the finish floor floats above the underlayment and does not make direct contact with the wood subfloor. Floating floors join together while remaining isolated from the base floor – do not glue or nail them down. The finish flooring rests on the acoustic insulation layer for vibration absorption. Gaps at seams and room edges can be covered with trim pieces.
In areas of the floor that experience heavier foot traffic, ensure the floor is covered with dense, plush piled rugs. These rugs will further absorb and dissipate noise from footsteps, chair sliding, etc. Focus rug placement in high use zones near doors, your workbench area, seating areas, or where movement occurs. Rugs add an extra layer of sound dampening.
For maximum soundproofing, install new carpet over the entire floor along with carpet padding before laying the floating floor. Carpet significantly increases sound absorption while the soft padding acts as another layer of acoustic insulation between flooring layers. With carpet or area rugs over acoustic underlay like MLV or cork, noise transfer through the floor will be dramatically reduced.
4. Soundproof Windows in Your Shed
One of the most effective ways to reduce noise penetration through windows is to replace existing single pane windows with new double or triple glazed window assemblies. Modern dual and triple pane windows incorporate various sound-blocking technologies to achieve superior acoustic insulation compared to traditional single panes:
Multiple glazing panes provide enhanced noise reduction thanks to the layered glass and the hollow, insulating air gaps separating each pane. Sound waves encounter multiple barriers as they attempt to pass through the window assembly. Improved laminated glazing uses plastic vinyl sandwiched between glass sheets for vibration dampening.
Well-sealed, insulated air pockets within the advanced window construction block both airborne noise and vibration transmission. And window frames are designed to isolate the glass panes and prevent vibration transfer to the surrounding walls. Combined, these improvements make new multi-pane windows far better at soundproofing than previous options.
If full window replacement is not feasible due to cost constraints or installation challenges, there are still some worthwhile upgrades that can be applied to improve existing single pane windows:
Carefully inspect all windows and window frames for any gaps, cracks, or holes where exterior noise can penetrate. Use high quality acoustic caulk to seal these openings and create an airtight barrier. Ensure caulk seals are continuous around each window assembly. Caulk helps eliminate sound flanking through leaks.
For large gaps, consider adding special window plugs that are mounted inside the window gap and inflated to completely fill the space. High density window plugs prevent noise penetration around the glass. Alternatively, acrylic window insulation inserts can be temporarily installed on the window interior to create an additional layer. While not as ideal as replacing the full window, these upgrades will provide moderate soundproofing improvements by sealing noise leaks.
5. Soundproof Doors in Your Shed
Solid core doors paired with full weatherstripping and door sweeps help prevent noise from moving through shed doorways:
Replace any existing hollow core doors with solid core doors made of dense, airtight materials such as laminated wood, insulated steel, or solid fiberglass. Solid wood stave core doors and welded heavy gauge steel doors provide superior soundproofing compared to lightweight foam or cardboard core doors that have minimal mass. Solid core doors act as effective noise barriers.
Ensure that all exterior doors have complete weatherstripping seals around the full perimeter to block sound leaks when closed. Quality door sweeps made of vinyl, brush fibers or felt will seal the gap between the bottom of the door and the floor surface or threshold below when shut. Sweeps prevent noise infiltration from below. Jamb seals and astragals further contain sound at vulnerable edges and gaps.
For maximum noise reduction, consider upgrading to specialty acoustic door options such as automatic door bottoms, thresholds, and double doors with astragals. Automatic door bottoms Drop down when the door is shut to seal the gap along flooring. Thresholds that transition from exterior to interior flooring also help stop noise transfer. Astragals can seal the gap between double doors by bridging the space between them along the center seam.
If you need to retain existing doors, adding mass will help improve sound blocking. Affix sheets of dense rubber or composite boards to doors to raise mass and dissipate vibration. Use acoustic caulk to fully seal any remaining gaps or cracks that could allow noise through. While not as effective as solid core doors, adding mass and insulation can still improve soundproofing.
Properly sealed doors with sufficient mass, coupled with complete weatherstripping, are crucial for maintaining acoustic isolation within your shed’s interior and preventing noise intrusion from outside. Investing in quality doors and seals is an important component of shed soundproofing.
Conclusion
Completing a full soundproofing treatment on your storage shed, work space, or hobby studio takes effort but delivers major acoustic and noise blocking benefits. By insulating walls, ceilings, and floors while also sealing all cracks, gaps, and openings with caulk and weatherstripping, external noises are prevented from entering the interior space. Sound generated inside the shed is contained within the room. Effective soundproofing requires using the right combination of materials like MLV, resilient channels, multiple drywall layers, solid doors, and sealants. Installing these specialized soundproofing products according to best practices results in optimal noise control.
With an upgraded soundproofed shed, you can work on projects and engage in fun hobbies without annoying the neighbors. Your space is also insulated from outside clatter and commotion. Follow the soundproofing guidelines covered in this article before getting started on your own project. While the process takes time and careful execution, the end result is a peaceful, secluded oasis detached from the exterior world. Whether you need a quiet workspace, music studio, or hobby room, a soundproofed shed provides the perfect getaway right in your own backyard. Reclaim your space from noise and enjoy all the benefits that come with better acoustics.