
Whether it’s noisy pipes, footsteps from above, or loud kids in the next room, sound can easily penetrate and echo throughout basement spaces.
But you don’t have to suffer through amplification and disturbances in your underground refuge.
With the right soundproofing techniques, even challenging basement environments can become peaceful personal sanctuaries.
This article will provide a comprehensive guide to effectively soundproofing basement walls, ceilings, doors, and floors while also managing noise reflections and adding critical acoustic treatment.
From containing exterior noise infiltration to dampening interior echoes, precise planning and quality materials are key for basement soundproofing success.
So let’s dive in to the step-by-step process of creating acoustic comfort below ground.
1. Soundproofing Basement Walls
Wall soundproofing is critical for preventing outside noise infiltration and containing interior sounds within the basement.
Thorough acoustic treatment will block disturbances from traffic, construction, or upper floor footsteps from interfering with your activities below.
Locate all perimeter wall studs so you can access the cavity behind the drywall. This allows you to insulate effectively and decouple the new wall surface.
Carefully measure and mark stud centers at 16 inch intervals prior to cutting any drywall. Use a stud finder tool to detect framing locations where possible.
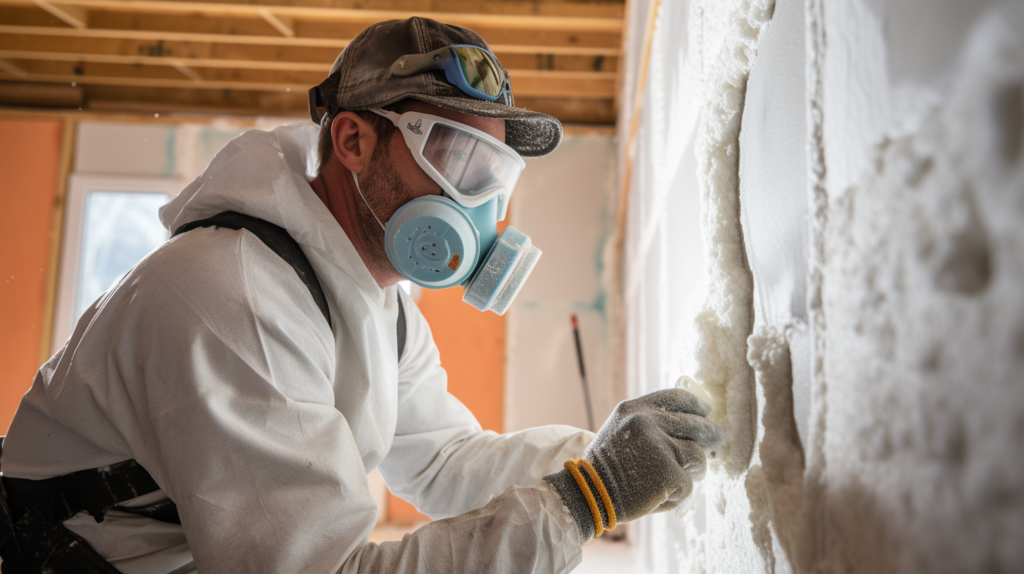
Don safety goggles and a ventilator mask before cutting drywall to minimize dust inhalation. Use a sharp utility knife to cut through the paper coating and score the gypsum core.
Make multiple passes until the board section is fully cut through. Removing drywall sections exposes the studs and any existing insulation.
Clear old batt insulation from stud cavities if present. Then use unfaced mineral wool insulation like Roxul Soundproofing Rock Wool to pack each bay.
The dense, noise-dampening material prevents sound transfer much better than traditional fiberglass. Compress the wool lightly while installing to eliminate gaps where noise can still pass through.
Cut pieces to accurately fit each stud cavity for maximum coverage and effectiveness. Seal edges with a quality acoustic caulk like Green Glue Noiseproofing Sealant.
Next, fasten resilient channels made from hat-shaped 25 gauge galvanized steel horizontally across the exposed wall studs.
Resilient channels provide isolation by creating a decoupled wall surface separated from the framing. Use 1 5/8 inch wide channels spaced 16 inches on center.
Attach each channel securely into the studs using 1 5/8 inch coarse thread drywall screws. Drill pilot holes and position screws in the stud center to avoid contact with the outer wall surface.
Mount a layer of 5/8 inch thick drywall sheets over the resilient channels using drywall screws long enough to penetrate the studs.
Use Green Glue Noiseproofing Sealant between panel edges and seams for maximum acoustic isolation. The sealed double drywall buildup yields an STC rating of 45-50, blocking considerable airborne noise.
Finish seams and corners with fiberglass mesh tape embedded in lightweight joint compound. Take care to also seal edges around electrical boxes, ducts and piping penetrations with acoustic caulk.
What If Your Basement Wall Cavities Cannot Be Exposed?
If removing sections of existing drywall is not feasible, you can still perform high-quality soundproofing by installing new furring strips over the wall surface.
Apply a heavy bead of Green Glue noiseproofing compound along 1×3 inch wooden furring strips. Press each strip firmly in place spaced 16 inches apart vertically.
The viscoelastic glue layer acts as a noise dampener and isolator.
In addition to adhesive, use 2 inch drywall screws to mechanically fasten furring strips to the underlying wall framing.
Stagger the screw placement at 24 inches horizontally to avoid weak points.
The combined application of construction adhesive and fasteners creates a sound isolation break while securely anchoring the new channels.
Fill the furring strip channels with Roxul insulation cut to size. Pack tightly with no gaps or compression for maximum noise absorption.
Next, fasten hat-shaped resilient channels horizontally over the insulation filled furring strips using the same 16 inch on center spacing.
The channels create an additional decoupled layer prior to drywall installation.
Apply 5/8 inch drywall over the resilient channels, using drywall screws long enough to penetrate through to the wall framing.
Follow perimeter edges with acoustic sealant before driving screws to contain flanking noise. Use Green Glue between panel seams for optimal sound isolation.
Finish drywall surfaces as described previously, taking care to maintain the sound barrier integrity around penetrations.
The seqenced laminated buildup results in a lightweight yet highly effective soundproofed wall assembly.
With diligent installation and the recommended materials, noise transfer can be reduced by STC 50 or more.
The wall cavity insulation absorbs airborne noises while isolation channels and sealant minimize flanking around edges.
This greatly enhances sound containment between basement rooms as well as reducing exterior noise infiltration.
Going For Maximum Noise Isolation Of Ceiling
For maximum isolation, incorporate soundproofing principles into each layer as the wall is built up.
Starting from the existing wall framing, use acoustic damping adhesive like QuietGlue Pro between drywall and studs.
This “tacky” compound fills gaps, adding mass and vibration absorption. Apply in a continuous bead that runs vertically down each stud bay prior to installing insulation.
The next layer of mineral wool insulation acts as a natural sound absorber while reducing cavity resonance.
High-density Roxul Safe’n’Sound or Comfortboard 80 work well to dampen noise. Cut insulation to precisely fit each stud bay for seamless coverage.
Around perimeter edges, use Roxul Soundstop putty or tacky sealant to fill any cracks before adding drywall.
Over the insulation, resilient channels suspended from the framing provide isolation.
Stagger channel seams between stud bays and fasten securely into framing with acoustical sealant applied along the flange edges.
Then coat drywall panels with QuietGlue Pro sealant prior to mounting over channels. The viscoelastic layer bonds sheets together while damping resonance.
Use two layers of 5/8 inch drywall for optimal mass loaded noise blockage. Apply Green Glue sealant between panel seams and perimeter edges.
Screw off the outer layer with drywall isolation clips to prevent mechanical linkage with the channels or framing.
A high grade construction adhesive used sparingly can substitute for clips. Seal all fastener dimples and finishing materials with acoustical caulk.
The combination of staggered studs, damping glue, dense insulation, resilient channels and mass-loaded double drywall adds up to maximum sound containment.
When installed correctly using these recommended products, the specially designed wall can achieve STC levels over 60.
That translates to outstanding noise reduction from external sources or between interior rooms.
2. Soundproofing Basement Ceiling

Preventing noise transfer from upper floors is a key goal when soundproofing a basement ceiling.
Impact sounds like footsteps and dropped objects can easily transmit without proper acoustic treatment.
A suspended ceiling system made from wooden studs provides superior sound isolation compared to direct attachment methods.
Choose 2×4 inch lumber with a lightweight bracing pattern to construct the new ceiling framework.
Measure and cut studs to span the room, spacing 16 inches on center.
Stagger seams between adjacent studs and anchor to the existing ceiling joists above using 3 inch coarse thread drywall screws. Make sure fasteners penetrate the joists at least 1 1/2 inches for a secure mount.
Before installing drywall, fill the open cavities between each stud bay with Roxul Safe’n’Sound insulation.
The semi-rigid mineral wool boards come in easy to install 3 foot wide rolls. Friction fit pieces to eliminate any gaps where air pockets could form.
For maximum noise absorption, fill the entire cavity depth without compressing the material. Use Roxul’s Soundstop sealant to patch cracks or seams if needed.
Cut 5/8 inch drywall sheets to fit snugly within the 2×4 wood stud ceiling framework.
Use a laser level or straightedge to score panels accurately for a seamless ceiling surface. Hoist panels into place and drive 1 5/8 inch drywall screws into the studs and perimeter joists using a screw gun.
Stagger screw rows for increased holding power. Apply Green Glue acoustical sealant at every butt seam and junction before finishing.
For optimal noise isolation, integrate dampening techniques into each interface as the ceiling is constructed.
Start by applying a layer of QuietGlue Pro between the existing ceiling joists and new wooden studs. Run a continuous serpentine bead prior to mounting the framework.
This creates a resilient break that absorbs vibrations.
Use acoustical sealant when anchoring the new studs as well. Apply a bead of Green Glue soundproofing compound along the top and bottom edges of studs before screwing into ceiling joists.
This seals and dampens the mechanical connection points that could transmit noise. Stagger the placement of fasteners to avoid rigid contact transfer.
The next key area is packing insulation into cavities thoroughly. Use Roxul Safe’n’Sound semi-rigid batts or dense Soundproofing Rock Wool.
Cut pieces to fit each bay precisely with no gaps or compression. Around edges, fill cracks with non-hardening Roxul Soundstop sealant before installing drywall. This minimizes flanking noise leaks.
Apply adhesive backed Mass Loaded Vinyl (MLV) sheets to the ceiling before attaching drywall for extra density and damping. Use 1/8” MLV aligned carefully at joints to cover the entire surface.
Then install two layers of 5/8” drywall using Green Glue between sheets to mass load the ceiling. Hold outer layers in place with drywall isolation clips.
Finally, seal all fasteners and finished edges with acoustical caulk.
The combination of vibration isolating glue, dense insulation, MLV mass loading, double drywall, and resilient mounting provides maximum noise reduction from above.
Proper installation is key, but this ceiling buildup can achieve STC ratings over 60 when done correctly.
3. Soundproofing Basement Door
Doors are one of the most vulnerable areas for noise leakage into and out of a room. Luckily, sealing gaps and adding mass can significantly improve acoustic performance.
Follow these guidelines for soundproofing existing and new doors.
For existing doors, start by weatherstripping the frame perimeter to close gaps that allow air and noise transmission.
Measure each side and cut adhesive-backed foam or vinyl strips to length. Remove any bulging edges or unevenness on the door that could interfere with sealing.
Apply sweep strips starting on the hinge side for full contact.
Install an automatic door bottom on the bottom edge using the manufacturer’s template and hardware. Choose an exterior grade model rated for soundproofing.
The seal drops down when the door closes and retracts when opened. Make sure to maximize the sweep length by trimming the door if needed.
Seal any cracks, holes or openings in the door itself with acoustic caulk. Carefully cut rigid mineral wool insulation panels to fit and glue in place where the door has been weakened.
This maintains integrity. Finally, lubricate hinges and tighten screws to prevent squeaking movement.
For new doors, choose solid wood or insulated steel models rated for sound transmission loss. Look for quality seals and sweeps integrated into the design.
Ensure a tight fit in the jamb, trimming if necessary, and use long screws into studs for stability. Apply foam tape or silicone caulk sealant around the entire perimeter before casing installation.
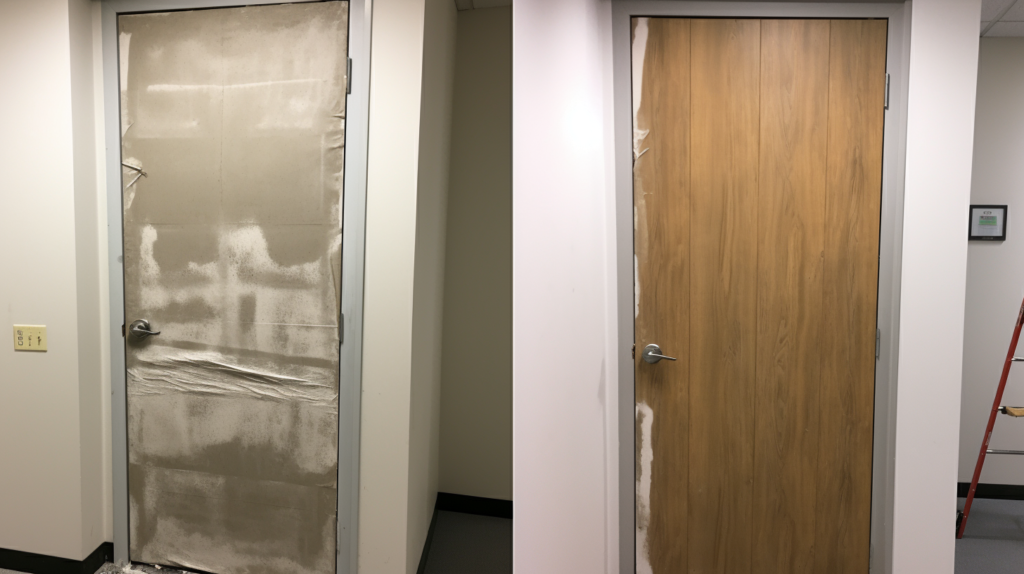
Upgrading Hollow Core Doors
Hollow core doors can be upgraded using self-adhesive soundproofing panels from weighted, dense nitrile butadiene rubber.
These mass-loaded damping sheets add significant density to the door, improving noise-blocking capabilities.
Simply cut panels to size and apply over the entire door face, aligning the edges seamlessly. Use a J-roller to create a tight bond across the full surface area.
The high-mass rubber layer helps contain sounds without adding unnecessary thickness. Follow the manufacturer’s installation instructions for maximum acoustic performance.
4. Soundproofing Basement Floors
Basement floors need not be soundproof since there will be no people underneath the basement.
Although full soundproofing may not be needed, controlling noise amplification from hard floor surfaces is important in basement spaces.
Exposed concrete readily reflects noise, causing bothersome echoes and loud reverberation. Thankfully, there are effective solutions to tame excessive reflections.
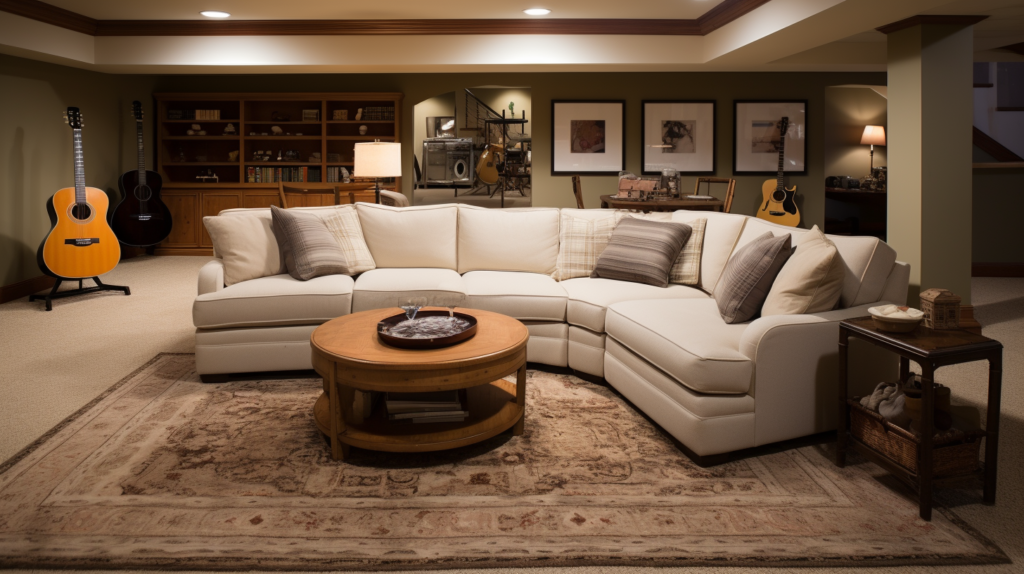
Area carpets and rugs are ideal for absorbing mid and high frequency sounds in frequently used spaces like lounges or theaters.
Prioritize coverage in zones where speech, music, or media playback occurs. For best results, use large rugs extending well beyond the boundaries of the primary furnishings.
Plan carpet dimensions and layout to cover 30% or more of the open floor space in problem areas.
Choose thick, dense carpet piles for optimal sound damping rather than low profile types which offer little absorption.
Install high quality carpet padding for additional cushioning and noise reduction. Softer surfaces diffuse reflected sound, preventing an uncontrolled ricochet effect that amplifies loudness.
Upholstered furniture, curtains and other soft treatments also help minimize reverberation.
Position couches, chairs, and cabinets away from bare walls to avoid causing reflections. Break up large empty sections by staggering room layouts.
Floating furniture isolates vibrations while the soft coverings absorb noise.
If carpeting the entire space is not practical, use area rugs strategically in the most problematic zones. Focus on high-traffic paths and spaces where people congregate.
For large open areas, break up the hard surfaces into smaller sections that are easier to treat.
Install carpet tiles selectively in frequently used zones instead of full sheets.
This allows easier replacement and reconfiguration down the road. Just be sure to use premium acoustic tiles with cushioned backing, not hard commercial grade that will reflect noise.
Floating floors are another option to decouple footfall noise from the bare slab. Build up layers starting with dense foam underlayment.
Add plywood over top, using adhesive and isolator clips to prevent contact with the subfloor. Finish by installing laminate, engineered wood or vinyl planks. The floating structure dampens impact sounds.
Incorporating floor coverings with different depths, densities and materials prevents specific pitches from amplifying uncontrollably.
Varying the treatments avoids harmonic resonance. Softer, thicker rugs can be combined with low pile carpets and padded furnishings.
Proper floor planning also considers how furnishings interact with open areas. Avoid large parallel hard surfaces or unfortunate positioning that creates flutter echoes and shrill resonances.
Evaluate furniture placement and make adjustments to disperse noise properly.
5. Adding Acoustic Treatment After Soundproofing

Adding acoustic panels helps control noise in open basement spaces. The panels absorb sound instead of letting it reflect repeatedly off the hard surfaces, which can cause echoes and amplification issues.
Use the general rule of thumb of covering at least 30% of the basement’s total wall and ceiling area with panels.
Focus placement in areas where sound control is most needed, such as near speakers or in problematic corners. Distribute panels evenly across larger surfaces to disperse reflections.
Mount panels with an air gap off walls and ceilings for better sound diffusion. Introduce angled corners and vary panel spacing to improve multi-directional absorption.
Combine panels with specialized acoustic treatments to handle a broader frequency range.
Properly placed acoustic panels reduce excessive reverberation and loudness caused by untreated room geometry.
This creates a more controlled, comfortable auditory environment for media, conversation, or relaxation in basement recreational spaces.
Conclusion
With diligent acoustic planning and quality materials, it is possible to transform even challenging basement spaces into peaceful sanctuaries.
Carefully soundproofing the walls, ceiling, and doors contains noises from the outside world, while managing floor reflections and adding acoustic treatments prevent internal noises from becoming overwhelming.
The comprehensive techniques outlined above, when precisely executed, create basements ideal for music, home theaters, conversation, or just tranquil relaxation away from urban clamor.
Meticulous soundproofing allows these underground rooms to reach their full potential as versatile living areas and entertainment spaces.