
If your power tools, machinery, and shop projects are disrupting your family or neighbors, it may be time to finally tackle that workshop soundproofing project you’ve been putting off.
Soundproofing a workshop thoroughly can be challenging, but is very doable with careful planning, the right materials, and comprehensive noise reduction techniques.
In this guide, let’s dive into the key steps for how to effectively soundproof a workshop space.
Assess the Workshop and Identify Problem Areas

When you are planning to soundproof a workshop, the very first step is to carefully assess the entire space to identify any problem areas that will need soundproofing treatment.
Take some time to closely inspect all of the windows, doors, walls, ceilings, and flooring within the workshop to find where noise is leaking in or out.
Look for any cracks, gaps, holes, or openings that are compromising the acoustic isolation of the space.
Consider when noise issues arise, and what specific loud noises you are trying to block, whether it is power tools, machinery, music, voices, or other disruptive sounds.
Think about the possible sound transmission paths, both airborne and structure-borne, and how noise may be traveling between the workshop and adjoining areas like a home, garage or other building spaces.
Gaining a thorough understanding of the weak points acoustically within the workshop will help determine the best approaches and materials to use for effective soundproofing.
Start by drawing a detailed floor plan sketch of the workshop layout to document the locations of doors, windows, interior walls, and equipment.
Note which of these adjoin other occupied spaces where limiting sound transfer is desirable.
Then do an inspection, checking thoroughly around each doorway, window, electrical outlet, ventilation opening and wall seam for gaps where air and noise can leak through.
Use a decibel meter app on your smartphone to register general ambient noise levels within the workshop during typical work activities.
This will give you a baseline to compare against after installing soundproofing treatments. Pay extra attention to the sound isolation of shared floors, ceilings and walls bordering other rooms or units.
Moving methodically around the perimeter then interior, meticulously listen for and document any notable noise infiltration or sound leakage issues to address.
Choose the Right Soundproofing Materials

There is a wide variety of specialized soundproofing materials and products designed to block, absorb or isolate different noise frequencies.
Carefully choosing the right options for your particular needs and budget will make a significant difference in how effectively the workshop space can be acoustically treated.
Here is an overview of the main categories and types of soundproofing materials to consider utilizing:
Mass Loaded Vinyl (MLV) – This dense, heavy vinyl sheeting contains inorganic fillers that help make it very effective at reducing airborne noise transmission.
The limp loaded vinyl mass acts as a barrier that prevents noise from penetrating through walls, ceilings, and floors. MLV improves sound isolation by adding mass which blocks sound vibration transfer.
It also has noise dampening properties. This versatile product is most commonly used as acoustic underlayment beneath flooring.
Acoustic Caulk & Sealants – Specialized caulking and sealants are formulated to seal up any cracks, gaps, or openings that allow noise transmission between adjoining spaces.
Acoustical sealant is designed specifically to block sound leakage.
Effective options like Green Glue Noiseproofing Sealant can substantially reduce noise transfer by completely sealing gaps in wallboard and around wall perimeters, electrical outlets, windows, and doors.
Filling these holes with acoustic caulking prevents flanking of airborne noise through overlooked openings.
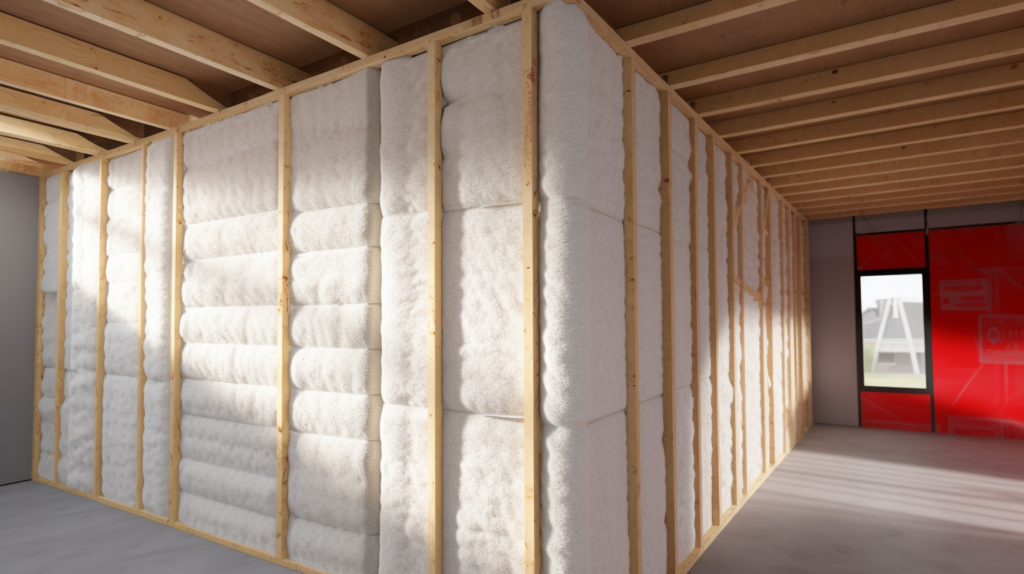
Sound Insulation – Insulation materials like mineral wool, fiberglass and cellulose work by absorbing noise to dampen it rather than reflecting it back into a space.
Installing sound absorbing insulation in wall, ceiling and floor cavities reduces reverberation and effectively blocks sound transmission through the assembly.
The noise absorbed by the insulation minimizes echoing while also improving the acoustic isolation between rooms.
Noise Damping Compounds – These viscoelastic polymer-based products reduce vibration and therefore noise levels when applied to surfaces like sheet metal.
The thick, heavy, vinyl-like damping compounds change the natural resonant frequency of materials to diminish noise caused by vibration.
This makes them helpful for blocking structure-borne noise from ductwork, pipes, machinery, appliances and more. Dynamat and Green Glue are well-known brands of noise damping compounds.
Acoustic Panels – Acoustic panels come in various materials but most commonly use high-density, rigid fiberglass or mineral wool covered in fabric.
The panels are designed to effectively absorb, rather than reflect sound, reducing reverberation and echo within a room.
Panels attenuate noise by trapping acoustical energy rather than bouncing it back into the space.
Absorptive options like fabric wrapped fiberglass panels work best to control excessive reverberation and absorb unwanted noise in echoey spaces.
Soundproof the Doors and Windows
Doors and windows tend to be weak spots when trying to soundproof a room or building.
This is because they often have gaps around their perimeters allowing sound leakage, and they typically have less mass than the surrounding wall assemblies.
Fortunately, there are several effective techniques that can be used to significantly reduce noise transmission through doors and windows:
1. Install Solid Core Doors
Solid wood or steel core doors work exceptionally well at blocking noise thanks to their higher density, weight, and rigid construction.
Replacing any existing hollow core doors with solid core doors will greatly improve sound isolation.
The solid mass combined with acoustical seals around the perimeters of the doors prevent unwanted sound transmission much better than hollow or poorly fitted doors.
For workshop spaces requiring noise control, choose solid core doors whenever possible.
2. Install Weatherstrip Gaps
Ensure that all doors and windows are fully weatherstripped using high quality products designed to properly compress and seal.
Acoustic rated weatherstripping improves noise reduction significantly by eliminating sound leakage through cracks and gaps around the frames.
Compression seals like triple-finned vinyl stops limit air passage while also blocking drafts. Proper weatherstripping is one of the simplest and most cost effective soundproofing techniques.
3. Add Door Bottoms
Installing threshold door bottom sweeps on exterior doors seals the small but important gap between the bottom of the door and floor surface.
This door sweep blocks sound from traveling under the doorway while also preventing outside air infiltration through the crack.
For maximum effectiveness, choose a door bottom sweep with a thick contact point and sturdy sealing fins or brush material.
4. Consider Storm Doors & Windows
Adding an extra glass pane layer with the installation of a storm door or storm window increases mass and creates an additional air gap between layers, both of which improve noise reduction.
This second barrier on doors and windows can further dampen loud exterior noises from infiltrating interior spaces.
Storm windows are also very helpful for sealing air leaks around aging primary windows.
5. Use Acoustic Window Inserts
Retrofit acoustic window inserts made of acrylic plastic sheeting are a DIY-friendly option for adding noise reduction improvements to existing windows without needing to do full replacements.
The clear inserts are mounted into window frames to sandwich extra layers that increase sound blocking mass and damping.
They create added air chambers and density that improves the glass panes’ noise insulation capacity.
6. Replace Windows
For new construction or whole window replacement projects, choose well-insulated, multi-pane windows with laminated glass to achieve significant noise reduction and the best acoustical performance.
The improved air tightness, multiple glass layers, larger air gaps, and increased glazing mass work together to block unwanted exterior noise far better than standard single pane windows.
This upgrade may be worthwhile if reducing workshop noise transmission is a priority.
Add Sound Dampening to Walls and Ceiling
Improving the acoustical insulation and sound transmission loss performance through interior ceilings and walls requires modifications like adding mass or absorbent materials. Noise control can be enhanced by:
1. Insulate Wall Cavities
Filling wall and ceiling cavities with sound absorbing insulation like rockwool, cotton or fiberglass batts reduces airborne sound transmission through the cavity.
The insulation materials work by absorbing and trapping sound energy rather than reflecting it back into the space.
Proper installation of insulation with the correct depth and consistent coverage is key to achieving maximum noise dampening effectiveness.
2. Double Up Drywall
Adding a second layer of drywall using staggered seams between layers, acoustic sealant around edges, and sound isolation clips works to substantially increase soundproofing.
The double drywall assembly with offset studs gains mass and eliminates stiffness and resonance issues that amplify sound. An additional two layers can make a dramatic difference in noise reduction.
3. Eliminate Flanking Noise
Be diligent about sealing all penetrations including electrical boxes and openings around pipes with acoustical caulk or sealant.
Small cracks and holes in the wall surfaces can transmit noise even through layers of insulation and drywall.
Everything must be thoroughly sealed airtight for maximum effectiveness since any weak spot undermines the integrity of the assembly’s noise containment.
Treat the Floors
Floor assemblies can easily transmit noise like footsteps, dropping items, rolling chairs, and furniture scraping to below spaces. Here are some recommended options for controlling floor noise:
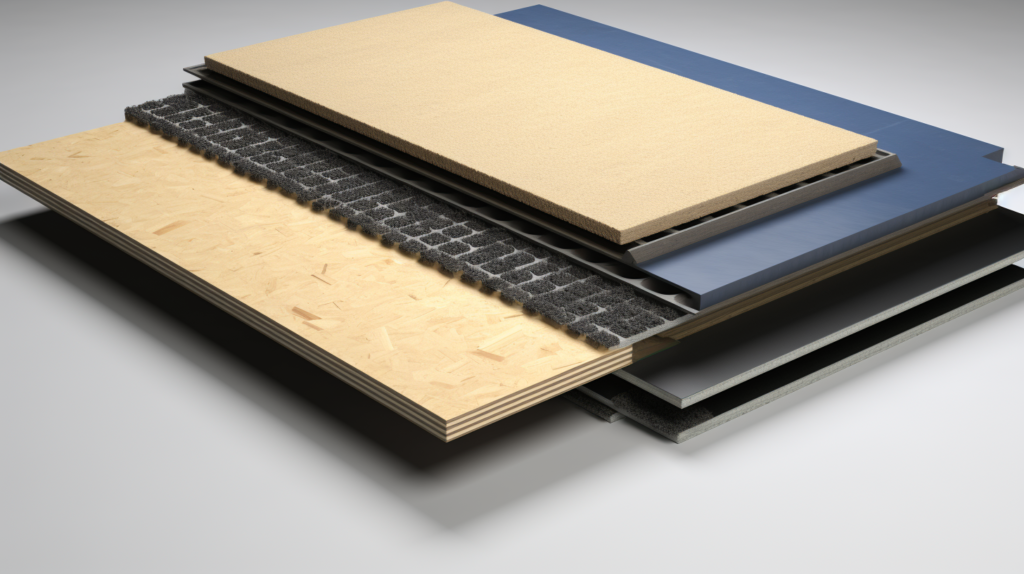
1. Install Acoustic Underlayment
Use a quality acoustic underlayment product like mass loaded vinyl, cork, or recycled rubber beneath the floor’s surface finish material.
Floating floors over a good underlayment will be decoupled from the subfloor which greatly reduces transmitted impact noises and airborne sound transfer to below rooms.
2. Use Carpet
Carpet can be an effective impact noise absorber, especially when installed wall-to-wall and with a thick, high-quality padded underlay.
The fiber material and cushioning pad insulate rooms from footfall noise and other impact sounds like walking. Carpet straightforwardly helps dampen impact noises through the floor.
3. Consider Area Rugs
Placing down area rugs and Runners provides impact noise absorption in key high traffic areas where footsteps, moving furniture, rolling chairs and other impact noises occur.
Using a quality rug pad underneath improves the rugs’ acoustic performance. Rugs are a cost-effective way to reduce impact noises in select spots as needed.
4. Choose Floating Floors
Floating laminate, luxury vinyl plank, and other floating floor systems are designed to be decoupled from the subfloor.
They isolate and dampen vibrations rather than transfer noise to below rooms. Floating floors install over foam underlayment without being nailed or glued to the existing floor.
This reduces mechanical transmission of noise through the floor assembly.
5. Seal Perimeter Edges
Don’t forget to seal the perimeter edges of the finished floor with acoustic caulking. Gaps around the floor’s edges, corners, and penetrations allow noise to flank through the layers.
A continuous bead of acoustical sealant around the entire perimeter helps contain transferred noise.
Consider Upgrading Equipment

The various machinery, power tools, appliances and other equipment commonly used in home and commercial workshops can generate high noise levels.
Here are some recommended ways to reduce the amount of noise produced by equipment:
1. Purchase Quieter Models
When replacing aging or outdated equipment, search for tools, appliances and machines specifically marketed as low-noise, silent, or quiet models.
Models incorporating noise reduction technology like sound dampening enclosures and vibration isolators typically produce less ambient noise during operation.
2. Maintain Equipment
Keep all workshop tools, appliances, and machinery properly maintained, lubricated, and running smoothly.
Poor maintenance often increases operating noises like squeaking, grinding, rattling and whirring. Tighten any loose fasteners that can buzz or rattle against parts.
Fix issues before they escalate and become more disruptive.
3. Buy Vibration Isolation Pads
Installing foam or rubber anti-vibration pads underneath noisy equipment like air compressors, dust collectors, and generators will help isolate and dampen structure-borne vibration noises being transferred into the floor and walls.
This reduces mechanical transmission of disruptive low-frequency noise.
4. Adjust Operational Habits
Making some simple adjustments like closing doors, operating noisy tools for shorter durations, taking frequent breaks, or only scheduling noisy tasks during daylight hours can help reduce disturbances.
Improving work habits to minimize and contain noise benefits neighbors as well as your own comfort.
Conclusion
Soundproofing a workshop effectively requires a multi-pronged approach, assessing problem areas, using the right materials, treating doors, windows, walls, ceilings, floors, and equipment.
With diligent effort addressing all potential noise leakage points and paths, you can achieve noticeable acoustic improvements.
The investment will provide a more comfortable and productive work environment.