
Do your home studio recordings suffer from distracting flutter echoes and muddy low end?
Do you struggle balancing acoustic treatment with interior design aesthetics?
If you want professional studio sound without compromising visual appeal, strategic acoustic panel placement is key.
This comprehensive guide will teach you ideal acoustic panel positioning to control reflections, resonance, and decay in your home studio.
Let’s dive into acoustic panel placement techniques for trapping flutter echoes, bass buildup, and early reflections while seamlessly blending panels into your existing home aesthetics.
What Are The Best Places To Install Acoustic Panels For Reducing Flutter Echoes?
Flutter echoes occur when soundwaves reflect rapidly between two parallel, rigid surfaces like walls or the ceiling.
This causes a repetitive stuttering echo effect that muddies room sound.
Acoustic panels, such as those explained in our guide on acoustic panel placement, absorb the sound instead of letting it bounce back and forth.
How Do I Identify The Key Parallel Surfaces Causing Flutter Echo In My Room?
Locate parallel walls, ceilings, corners, and other reflective surfaces in your space. If you clap loudly and hear rapid stuttering echoes, those are prime spots causing the issue.
First, place broadband absorption panels at the reflection points on those parallel surfaces.
Thicker 2-4 inch panels work better to absorb mid and high-frequency flutter echoes, as detailed in How Thick Should Acoustic Panels Be?
Where Should I Prioritize Placing Acoustic Panels To Stop Rear Wall Flutter Echoes?
Place absorption panels on the rear wall, especially directly behind the mix position listening chair to stop first reflection flutter echoes.
Sound from the speakers will reflect off the rear wall first before hitting your ears, so absorbing those initial reflections is critical.
Cover as much of the rear wall with 2-4 inch acoustic panels as possible, spaced 2-4 inches from the actual wall surface.
How Do Corner Bass Traps Help Absorb Low-End Flutter Echoes?
Corner placement offers enhanced absorption thanks to two joining surfaces.
Triangle-shaped corner traps rated for low frequencies effectively absorb flutter echoes and bass buildup occurring where walls and ceiling meet.
The two joining rigid surfaces compound low end when soundwaves bounce back and forth between them.
Thick corner traps absorb those problematic low frequency reflections.
To learn more about corner bass traps, refer to The Complete Guide to Acoustic Treatment.
Where Should I Add Diffuser Panels To Improve Flutter Echo Issues?
Diffusion prevents focused beaming of sound between parallel walls by scattering sound in multiple directions instead of letting it harshly reflect back and forth.
Diffusers combined with absorption give a balanced response.
Strategically place diffuser panels on any large parallel empty surfaces like bare side walls or ceilings experiencing flutter echoes.
For a deeper dive into diffusers, check out Acoustic Panels vs Sound Diffuser.
What Are The Best Corner Positions For Bass Traps To Stop Unwanted Low-End Buildup?
Low frequency buildup causes rooms to sound boomy and muddy.
Placing thick bass traps in corners where walls meet absorbs and controls unchecked bass.
Corners are prime locations for bass traps because three joining wall surfaces meet, intensifying and amplifying low frequencies.
Discover the importance of bass traps in Do Acoustic Panels Block Sound And Keep Sound Out?
Why Are Floor-To-Ceiling Corner Bass Traps Effective In Controlling Low End?
Corners create hotspots where bass intensity spikes due to the three joining surfaces compounding the low frequency energy.
The thickness of bass traps is important for absorbing lower frequencies.
Install at least 4-inch thick corner traps floor-to-ceiling in every room corner, focusing first on corners that have sound sources like speakers or instruments nearby.
The greater density and thickness will fully absorb intensified low end in corner hotspots.
For more insights, see Where To Place Acoustic Panels In Home Studios.
Should I Install Bass Traps In Wall-To-Ceiling And Wall-To-Floor Corners Too?
Absolutely. Don’t neglect bass traps where walls meet the floor and ceiling.
These vertical corner junctions also concentrate and intensify problematic low frequencies similar to wall-wall connections.
Dedicated dense corner bass traps in any vertical corners will provide full low frequency absorption coverage for your room.
Combine wall-wall, wall-floor, and wall-ceiling bass traps.
Guidance on this can be found in How To Install Acoustic Panels On Walls, Ceilings and Windows.
How Do I Smooth Out The Remaining Bass Frequencies In My Room?
Once you treat the most intense low frequency room mode spikes in the building corners with thick bass traps, add general broadband absorption panels like 2-inch polyfiber or mineral wool panels across larger midfield wall sections.
This helps balance out and normalize the decay timing of the remaining low end in the room for a tighter, controlled bottom end.
Spreading wall coverage smooths the spaces between trapped corners.
Learn more about the effectiveness of acoustic panels in Do Acoustic Panels Make A Difference?
For more information on acoustic panels and their placement, consider exploring these additional resources for specific situations:
What Acoustic Treatment Should I Use When Building A Vocal Booth?
A portable vocal booth isolates the singer from the live room for clean, reflection-free takes. Lining a booth with sound absorption contains the vocal signal inside and prevents bleed into open mics. Acoustic panels rated for maximum sound absorption will block external noise effectively.
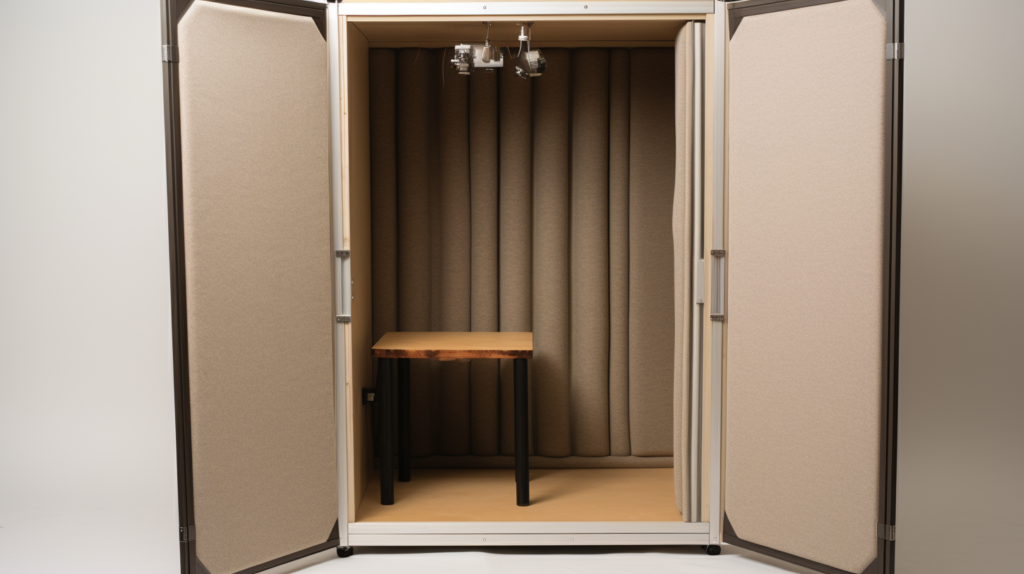
How Can I Build A Simple Frame For My Portable Vocal Booth?
Construct a hinged movable acoustic panel frame from rigid materials like finished plywood or PVC to fit around a standard microphone and pop filter size.
Use hinges to make one panel the entryway. Affix high-density 6 lb rigid fiberglass or rockwool acoustic panels rated for superior blocking of sound transmission to the interior sides of the frame surrounding the vocalist. Avoid air gaps in corners.
What Optional Additions Help Improve My Portable Vocal Booth?
Consider including a monitor screen for visual connection with producers in the control room and a headphone feed for cue mixes.
Overhead lighting on the frame illuminates written lyrics sheets.
Make your portable vocal booth design collapsible using hinges so it can break down for easy storage when not actively being used for tracking sessions.
How Can I Build A Permanent Isolation Booth For Vocals?
For a more permanent dedicated space, construct a room-within-a-room vocal isolation booth attached to your existing control room.
Build a wall with window between the live room and control room. Then build a second interior wall with acoustic treatment to create a sealed vocal booth on the live room side.
This design fully isolates the singer from headphone bleed or cues coming through the glass window for pristine vocal takes with no ambient noise.
Use dense soundproofing materials like double drywall and insulation.
Where Should I Place Acoustic Panels To Address Early Reflection Points?
Early reflections cause phase cancellation issues and tonal coloration as sound reaches your ears slightly after the direct sound from monitors or speakers.
Absorbing first order early reflection points with panels prevents this distortion.
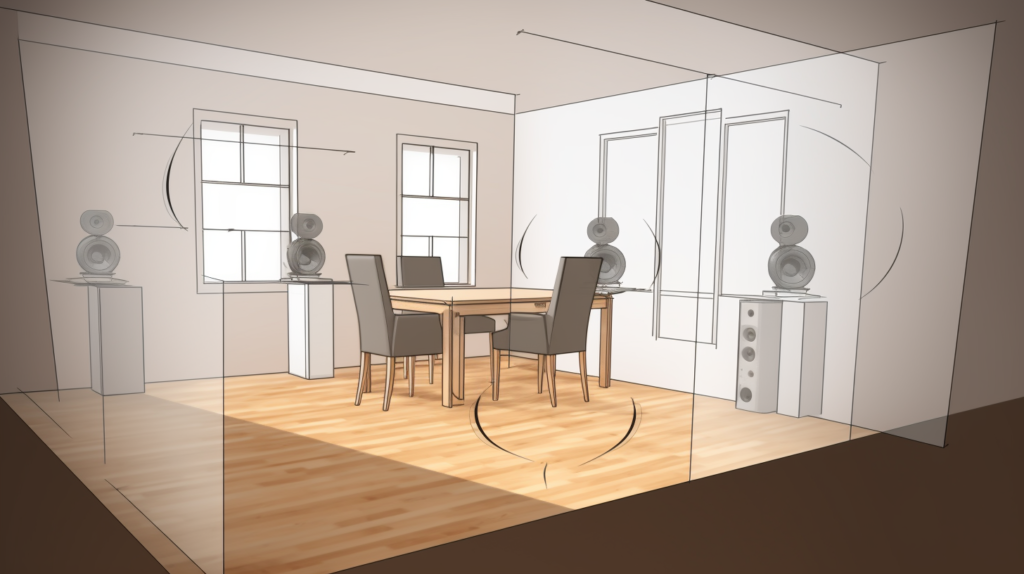
How Do I Locate The Key Early Reflection Points In My Room?
Map reflections by moving a speaker monitor around your listening position while playing pink noise to audibly locate offending early reflections on surrounding surfaces.
Also draw imaginary lines on a scale plan between speakers and predicted first reflection zones around your mix position to pre-treat those spots before installing your studio gear and monitors.
Why Should I Place Acoustic Panels At Side Wall Early Reflection Points?
Side walls commonly cause early reflections due to their proximity to monitors, which skews the intended stereo imaging.
The first reflections are only slightly delayed from the direct sound but still cause issues.
Floor-to-ceiling broadband absorption panels placed at the predicted first reflection points beside monitors on the side walls will help clear up phantom center issues and deliver a more accurate stereo image.
What Early Reflection Points Should I Treat On The Room Ceiling?
Don’t forget the ceiling above the mixing position, as this will also cause detrimental early reflections colored by the ceiling surface to rain down on the mix position.
Install acoustic absorption panels on the ceiling at theprimary reflection point directly above the engineer’s head and listening sweet spot. This will prevent early coloration from above.
How Do I Properly Balance The Decay Time In My Home Studio Using Acoustic Panels?
If some room surfaces have longer reverb decay times than others, it can create an unbalanced sound.
Equalizing the decay times across all frequencies provides a natural sounding professional acoustic environment.
What Is The First Step In Balancing An Uneven Decay Time In My Room?
Start by carefully measuring the existing reverberation decay time in multiple positions around your room using measurement software like Room EQ Wizard or a basic decibel meter app on your phone.
Take readings at your mix position, corners, and the center of the room. Make specific notes on any bass, mid-range, or high frequencies exhibiting longer than ideal decay times.
This gives you target zones to treat.
Where Should I Add Acoustic Treatment To Shorten Excess Decay Times?
With problem decay frequency ranges and room locations identified, add acoustic absorption treatments like broadband 2-4 inch panels and low-end 4-6 inch thick corner bass traps specifically to those areas showing excessive decay times.
Incrementally add more panels and traps until the decay time decreases and normalizes to the same ideal length across all surfaces and frequencies. Combine absorption placement with careful listening checks.
How Do I Maintain A Natural Balance Of Liveness And Decay When Treating The Room?
While generous acoustic treatment is needed to balance decay times, avoid making your studio space too dead sounding.
Maintain some natural ambience by dispersing panels evenly across many surfaces which helps balance decay.
Also combine absorptive panels with purposefully placed diffuser panels to scatter sound in addition to absorption.
Diffusion prevents an overly dry or muted environment. Use diffusers on the rear wall, ceiling, and corners to taste.
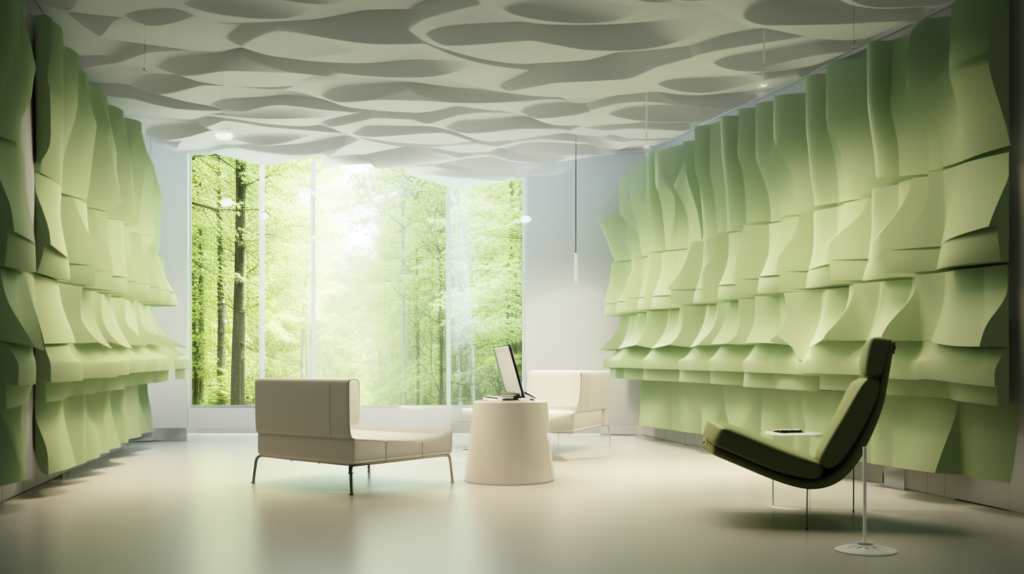
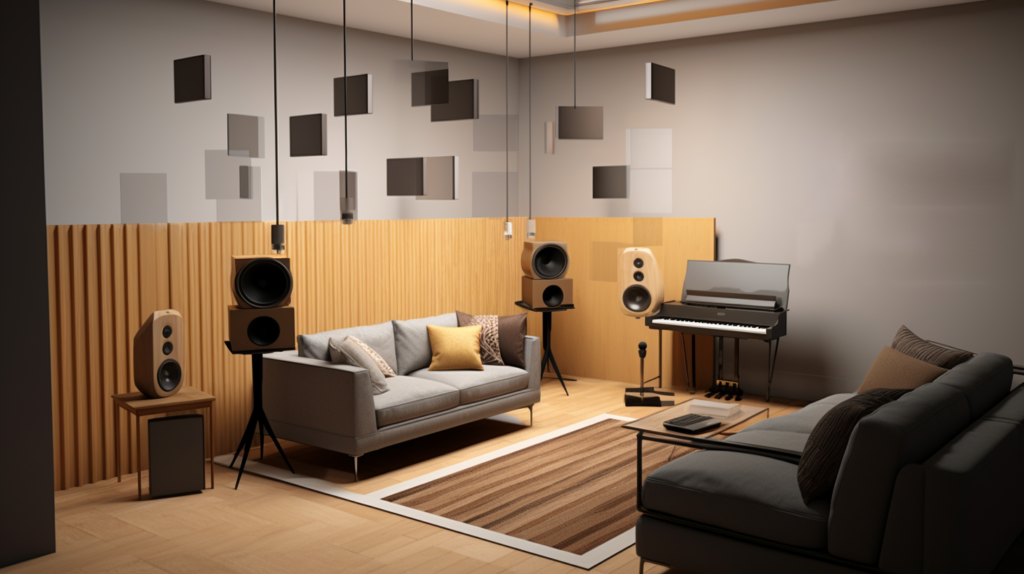
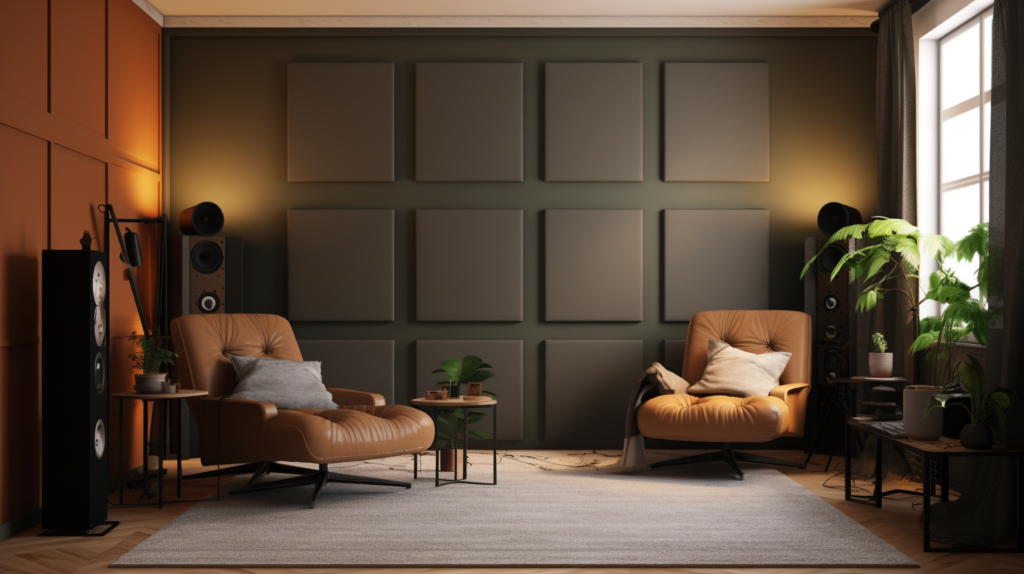
What Are Some Tips For Visually Integrating Acoustic Panels With My Room Decor?
With smart planning and creative solutions, you can install acoustic panels to achieve great studio sound while complementing your interior design vision. Panels don’t have to be an eyesore.
How Should I Arrange Acoustic Panels On The Walls For A Cohesive Look?
Cluster square or rectangle panels near each other on walls in intentional groupings, similar to how you would arrange wall art or paintings.
Mount panels partially off the wall surface with clips to add depth and visual interest.
Extend panel edges only partially behind existing wall-mounted objects like pictures, shelves or TVs for a layered integrated look.
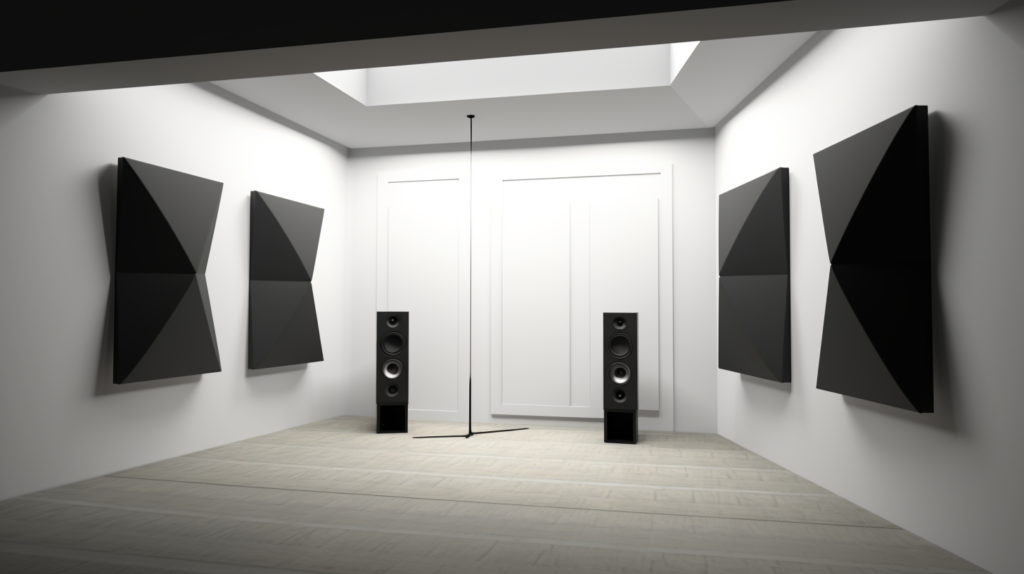
What Acoustic Panel Frame Colors And Finishes Best Match Different Room Decor?
Choose acoustic panel frame materials and finishes that closely coordinate with existing wood, metal, plastic, or painted color elements in your room for a cohesive feel.
For a simple yet effective solution, paint your panel frames the exact wall color for the panels to subtly blend into the background. If your room has cool grays and chrome, select similarly toned frame colors.
How Can I Discreetly Conceal Acoustic Panels Around The Room?
Hide panels out of eyesight behind furniture, room dividers, or curtains and inside storage cupboards and closets. Tuck smaller panels into bookshelves.
Use thick custom panels as wood column covers or wall edges.
Panel behind wall tapestries or art. Let function dictate form by creatively camouflaging panels for acoustic benefits without messing up your intended visual decor style.
Conclusion
Strategically installing acoustic panels using these professional techniques lets you achieve superb studio sound quality without intrusive aesthetics.
Follow this guide to optimally place absorption, traps, booths, and diffusion based on your room layout and audio needs.
With smart planning and precise positioning, your home recordings will finally sound as clear, detailed and balanced as a commercial facility.