
Do your podcast recordings sound more like you’re at a crowded café than a professional studio? Learn how to transform any room into an acoustically optimized podcasting paradise.
Properly soundproofing a dedicated podcasting room with insulation, noise barriers and acoustic treatment is essential for achieving broadcast-quality audio free of echo and exterior noise.
From floor to ceiling and everything in between, this comprehensive guide breaks down the key steps for soundproofing and tuning a room specifically for podcasting. Let’s dive in…
Why Soundproof a Room for Podcasting?

Podcasting has exploded in popularity as a medium for sharing ideas, stories, and conversations with a global audience. But producing a professional-grade podcast requires quality audio free of disruptive background noise and distortion. Recording in an untreated room can introduce all sorts of sonic issues like echo, ambient sounds, and interruptions. Soundproofing provides a solution by sealing out external noises while optimizing the interior acoustics.
Creating an ideal listening environment should be a top priority for any podcaster. Clean, studio-quality audio draws listeners in and keeps them engaged. Background chatter, barking dogs, traffic noise, and other distractions can undermine the listening experience. Soundproofing eliminates these problems so your podcast audio is clear and consumable.
A soundproof room offers many benefits for podcasters:
- It removes background noise and echo that can muddy up the recording. When sound hits hard, flat surfaces, it creates reverberation as soundwaves reflect back. This produces distracting echo that makes your voice sound distant and hollow. Soundproofing introduces absorption materials to prevent this problem.
- You’ll achieve more professional-sounding results. Podcast listeners expect a certain high caliber of audio without excessive ambient noise or echo. A soundproof space gives you the ability to meet these standards and compete with top-tier podcasts.
- It provides more control over sound quality. With soundproofing, you can finely tune the acoustics of the room to achieve your ideal voice sound. The space won’t add its own signature reverb or noise. This allows precision calibration for the best audio.
- Recording sessions won’t be interrupted by outside noises. Dogs barking, doors slamming, HVAC systems, and other noises can force you to stop and re-record portions that are ruined by the sounds. Soundproofing forms a barrier to prevent unwanted sounds from intruding.
- You can record anytime without disturbing housemates, family, and neighbors. Containing the sound prevents it from bothering others so you can record late at night or during nap time and not cause a disruption.
- It allows creating a comfortable and tailored recording environment. Add sound dampening materials, specialized acoustic treatment, isolation shields, and other noise-reducing gear to optimize the space for your needs.
1. Soundproof the Walls
Walls deserve significant attention when soundproofing a podcasting room because they provide the perimeter barrier and commonly transmit the most noise. Stopping sound infiltration through walls should be a top priority. Here are the key steps:
If possible, expose the wall studs by removing any existing drywall or paneling. This allows access to insulate the wall cavities and install sound isolation materials. Take time to remove trim, electrical covers, and other finishes to get right down to the bare structural framing.
Fill the wall stud cavities with sound absorbing insulation like mineral wool or fiberglass. The insulation acts as a dense buffer that dampens noise vibrations rather than letting them transmit through the wall framing. Pack the insulation thoroughly to leave no gaps or air pockets.
Install resilient channels horizontally across the wall studs. Resilient channels are long, thin metal strips with a zig-zag shape. Mounting drywall on these channels de-couples it from the wall framing. This prevents vibration transmission and noise transfer through the actual wall studs. Follow manufacturer spacing recommendations for channel installation.
Reinstall drywall over the resilient channels, or use soundproof drywall like QuietRock for maximum density. Staggering the drywall seams from row to row reduces potential sound leakage points. Applying Green Glue noiseproofing compound between layers of drywall can double its sound blocking capacity.
Seal all edges and gaps meticulously with acoustical caulk. Look for any cracks, openings, or joints around outlets, windows, trim, and corners. Filling these with caulk provides an airtight seal that prevents sound infiltration. The goal is making the assembly as void-free as possible.
If removing all the existing drywall isn’t feasible, you can still achieve very effective soundproofing by installing new stud walls in front of the existing ones to create a double-stud partition. Sandwich layers of insulation and noise damping materials between the old and new wall.
Applying these steps diligently results in robust soundproofed walls that prevent noise transference and leakage. Be sure to follow best practices for installation of insulation, channels, and drywall. Inspect for cracks or potential air gaps and thoroughly seal them. This creates an effective perimeter sound barrier for your podcasting room.
2. Soundproof the Ceiling

Ceilings need the same soundproofing treatment as walls, since they also provide a critical component of the room’s noise containment zone. Noise coming from above can be very intrusive and problematic. Here are the main steps to soundproof existing ceilings:
Expose the ceiling joists by removing any existing drywall or ceiling finishes. This provides access to install insulation between the joists and allows mounting the resilient channels. Take time to remove texture, lighting, or any other ceiling elements that are in place.
Install soundproofing insulation like Roxul Safe’n’Sound tightly between the ceiling joists. Dense packing of insulation forms an effective noise barrier. Use metal retaining clips to hold insulation in place so it doesn’t sag over time.
Mount resilient channels perpendicular to the joists using screws. These channels will hold the drywall and prevent any contact between it and the joists. Following manufacturer spacing guidelines for channel placement.
Reinstall drywall ceiling to the resilient channels, using screws at recommended intervals. For extra density, apply Green Glue between layers of drywall for a laminated, noise reducing sandwich. Stagger the drywall seams between rows.
Seal all joints and gaps with acoustical caulk. Trace the perimeter edges, corners, and penetrations to find any potential air leakage points and seal them completely. The goal is an airtight envelope.
For existing ceilings without accessible joists, build a new dropped ceiling below the current one. Sandwich soundproofing materials between the two ceiling layers. Then install channels, double drywall, and seal thoroughly.
Properly soundproofing overhead surfaces keeps noise from transmitting down into the podcast recording space from upstairs. Be meticulous in sealing leakage paths.
3. Soundproof the Floor
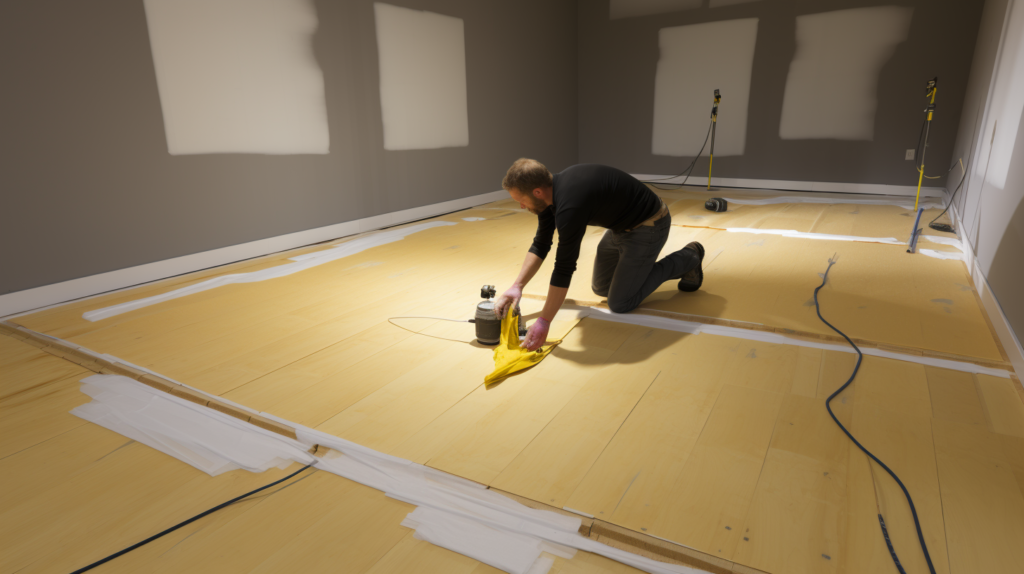
Floors require special treatment to keep impact sounds like footfalls and dropped items from intruding into the space. Try these tips for soundproofing existing floors:
First, seal any cracks or crevices in the floor with caulk or floor patch compound. This ensures noise isn’t entering through gaps in the substrate.
Install mass loaded vinyl (MLV) underlayment over the floor. MLV is a thin, flexible vinyl material loaded with dense minerals that block sound transmission through the floor. Unroll overlapping sheets and tape the seams.
Build a “floating” floor over the MLV underlay by laying plywood sheets loosely over high-density foam pads. The foam isolators decouple the floor from the subfloor below. Avoid mechanically attaching the floating floor.
Finish the floor with carpet, laminate flooring, or other soft surface materials. Carpet absorbs noise while laminates don’t transmit noise vibrations readily. Both are quiet options.
Use the thickest, heaviest carpet possible, installed wall-to-wall if feasible. High-density carpet with thick padding helps absorb footfall noise most effectively.
Place large area rugs in high foot traffic zones and furniture locations. Rugs provide additional padding to further reduce noise from footsteps and furniture shifting.
For concrete floors, seal cracks then build up a floating floor system over acoustic underlay. Isolate and decouple for maximum sound reduction.
Applying these floor soundproofing methods keeps distracting footfall noise out of the space so you can podcast without thumping footsteps and creaking from below.
4. Soundproof the Windows
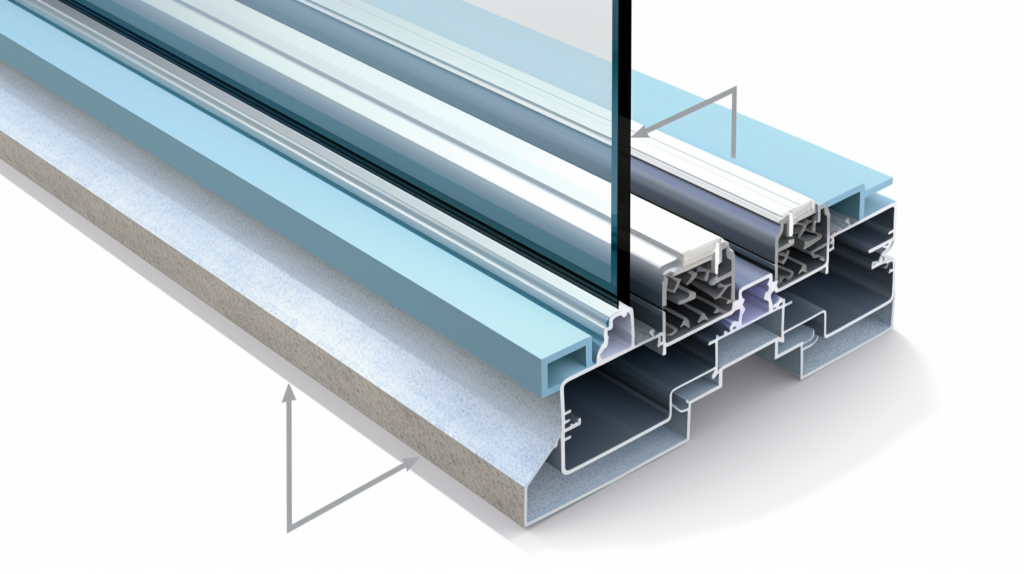
Even small windows can transmit significant noise due to the density differential between glass and wall. Follow these steps to soundproof existing windows:
Replace single pane windows with double or triple pane, if possible. Multi-layer glazing provides better sound obstruction. Laminated glass works best for blocking noise.
Seal cracks, gaps, and leaks around windows meticulously using acoustical caulk. Look closely at the interfaces around sashes and frames and seal thoroughly.
Install substantial soundproof curtains in layers, slightly overlapping the window frames. The more layered and dense the curtain material, the more sound absorption it provides.
Cover windows with acoustic panels rated for sound blocking. Solid foam or glass fiber panels mounted over windows can achieve noise reduction similar to acoustic drywall.
If new windows aren’t possible, use interior or exterior window inserts. These solid transparent panels create an additional glazing layer and prevent sound intrusion.
With well-sealed and treated windows, external noise won’t cause distracting rattles and vibrations inside the podcasting room. Follow these tips for making existing windows “quieter.”
5. Soundproof the Doors
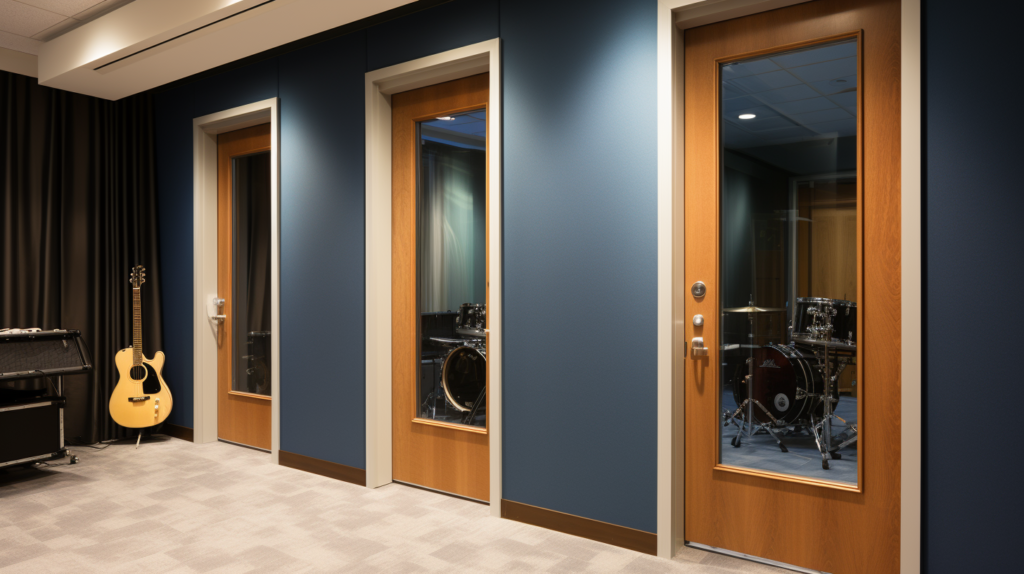
Doors always represent major gaps in room soundproofing and require special attention. Replace hollow core doors with solid core wood or metal doors to provide density and sealing. Here are some other door soundproofing strategies:
Weatherstrip thoroughly around the door frame and threshold with high quality, dense sealing materials on all sides. This seals the gap between door and jamb.
Install door bottom sweeps or gaskets on the bottom edge for a tight acoustic seal around the entire perimeter.
Make sure the door fits very tightly within the frame when closed. sand or plane the door edges to reduce clearance and achieve a gap-free fit.
Use glue-on door gaskets and drop bottom seals to seal all four door edges from noise leakage.
Upgrade to a specialized acoustic door slab with high Sound Transmission Class (STC) rating. These block more noise than standard solid doors.
Install thick high-density acoustic door panels like Solidcore’s Noise-lock system to augment regular door slabs.
Proper sealing is key to effective door soundproofing. Follow best practices to eliminate leakage gaps and contain sound.
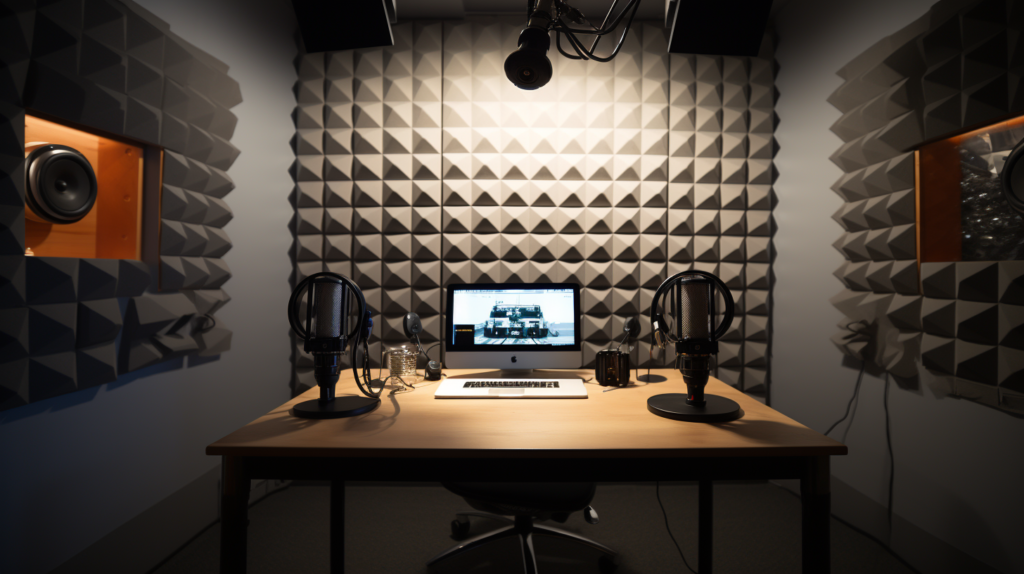
6: Add Acoustic Treatment
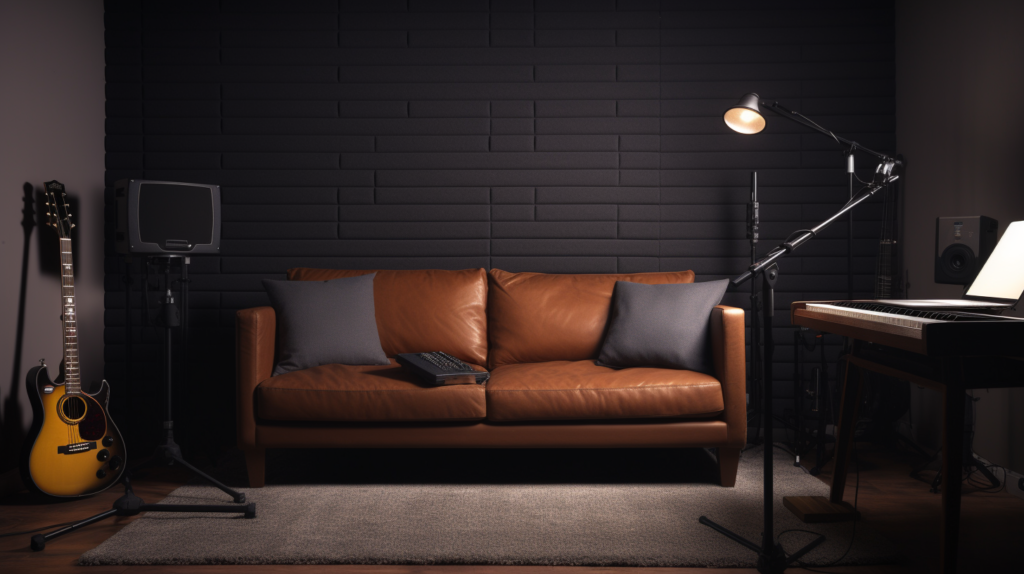
In addition to blocking external noise from entering, the podcast recording space needs internal acoustic treatment to combat reverb and echo and provide a clean, optimized listening environment.
Install acoustic foam wall and ceiling panels with sound-absorbing fill material. Strategically place panels to dampen early reflections and flutter echo.
Add bass trap panels in room corners to absorb low frequency buildup. Corner bass traps prevent problematic “boomy” resonances.
Diffuse mid-high frequencies with geometric diffuser panels to scatter sound reflections. Diffusion blends sound evenly throughout the room.
For maximum broadband absorption, cover floors with thick broadloom carpet and large area rugs. Carpeting helps absorb noise within the room.
Consider a suspended acoustical tile dropped ceiling which absorbs sound energy instead of reflecting it. Tiles come in various soundproofing ratings.
Careful acoustic treatment placement targeting primary reflection points and modal resonances yields studio-quality sound, devoid of distracting reverb and echo.
7. Test and Make Adjustments

After completing the soundproofing and acoustic treatment process, critically test the room by recording and playing back audio. Listen closely to isolate any remaining noise or echo issues. Troubleshoot with these tips:
If you hear echo or excessive reverb, add additional absorption panels and bass traps. First target highly reflective surfaces and address primary reflection points.
Detect air leakage issues by listening for whistling noises or rushing air. Seal these infiltration points with caulk or weatherstripping.
Isolate and dampen mechanical noise like computer fans with acoustic isolation pads. Prevent structure-borne vibration transmission.
Adjust placement of acoustic panels or other treatments to tune the space. For instance, move panels closer to sound sources to absorb more energy.
Conduct more soundproofing tests and iteratively adjust until noise control and acoustic treatment resolve all identifiable issues. Refine until studio-level sound is achieved.
Careful testing and post-adjustment produces professional caliber sound. Keep refining until the environment meets all sonic needs.
Conclusion
Creating a perfectly soundproofed space tailored to podcasting requires a methodical approach. Prioritize sealing exterior noise sources completely by treating walls, ceilings, floors, windows and doors. Compliment this sound isolation with interior acoustic treatments like absorbers, diffusers, and bass traps. The combination results in a recording environment with clear, distortion-free sound that enables podcasters to produce their best work. Investing the effort into proper soundproofing and acoustic optimization pays off through noticeably better audio quality, higher production value, and improved listener engagement. With a soundproofed room customized to a podcaster’s needs, it’s possible to achieve truly professional caliber podcast audio.