How To Improve Bass Traps — 5 Upgrades That Make Your Existing Treatment Work Harder

How to improve bass traps is a question that assumes you need to buy new ones — but most bass traps already in your room are underperforming because of how they are installed, not because of what they are made of. Small changes to positioning, air gaps, and density can double or triple the low-frequency absorption of the same panels you already own.
The frustrating reality is that bass traps installed flat against walls or with insufficient thickness absorb mostly mids and highs while barely touching the bass frequencies they are supposed to target. This leaves room modes largely untreated even in rooms that look fully covered with acoustic treatment.
The good news is that every upgrade in this guide works with existing panels — you do not need to replace anything. Moving a panel from a flat wall into a corner, adding an air gap behind it, or stacking a second layer of insulation costs little or nothing and produces measurable improvements you can hear immediately.
Below, you will find five specific upgrades ranked by impact, the physics behind why each one works, whether bass traps actually increase bass (they do not), and answers to the most common questions about improving bass trap performance.
The fastest way to improve bass traps is to add an air gap behind them (even 2-4 inches extends absorption to lower frequencies) and move them into corners where bass pressure is 2-4x higher than flat walls. These two changes alone can double your low-frequency absorption without buying any new panels.
How To Improve Bass Trap Performance
Improving bass trap performance comes down to five variables you can control: air gap depth, panel thickness, material density, placement position, and coverage area. Each variable independently affects how much bass energy your traps absorb, and optimizing even one of them produces an audible difference.
The upgrades below are ranked by impact-per-effort — the first two (air gaps and placement) cost nothing and produce the biggest improvements, while the later upgrades (thickness and density) require purchasing additional materials but extend performance even further into the low-frequency range.
Before making any changes, identify your worst bass problems first. Use a measurement microphone and Room EQ Wizard (free software) to see which frequencies have the biggest peaks and nulls in your room — this tells you exactly which frequencies your bass traps need to absorb and helps you prioritize upgrades that target those specific problems.
Add An Air Gap Behind Your Bass Traps
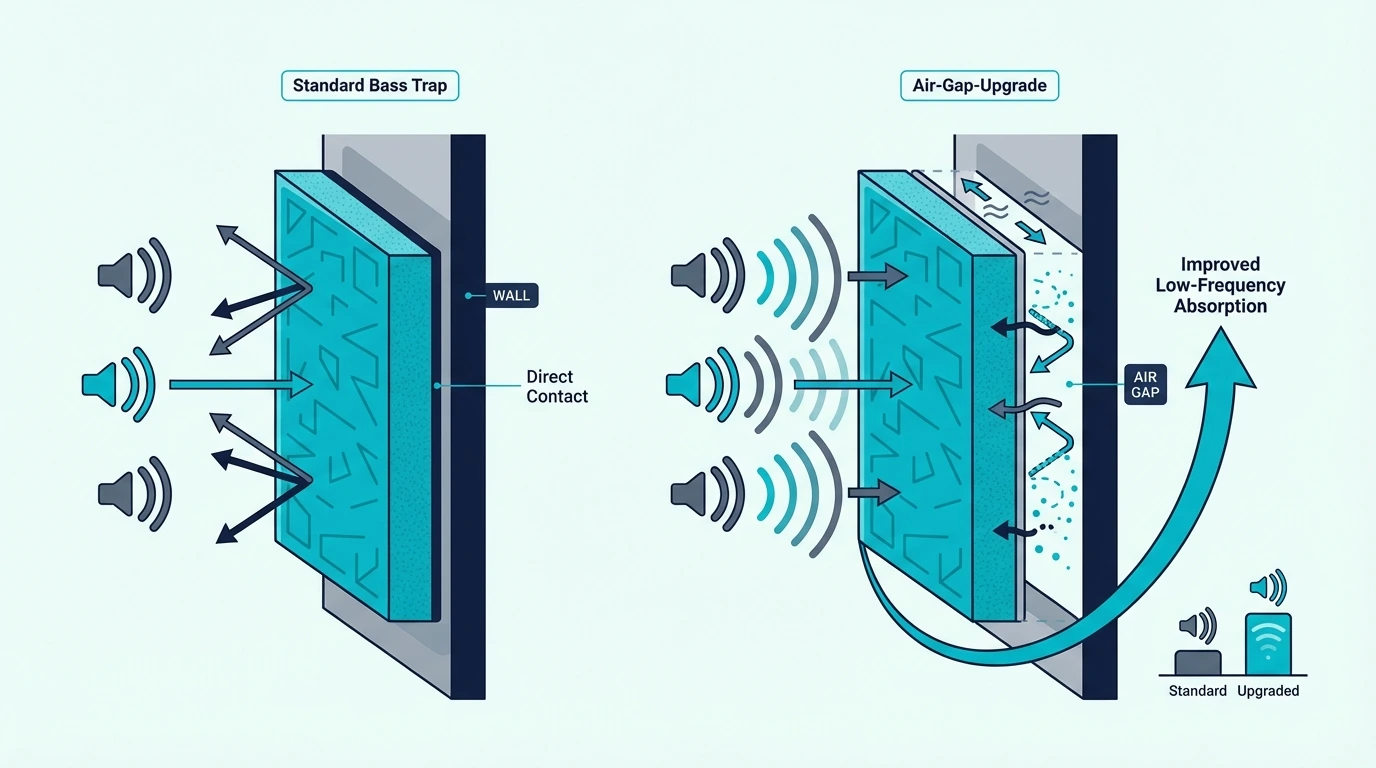
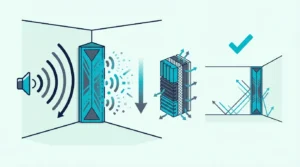
Adding an air gap behind your bass traps is the single most impactful upgrade you can make because sound absorption happens where air particle velocity is highest, and for low frequencies, the velocity peak occurs at a distance from the wall boundary, not at the wall itself.
A bass trap mounted flush against a wall sits in a pressure maximum (high pressure, low velocity) for bass frequencies. The absorber needs particle velocity to convert sound energy into heat, so flush mounting wastes the trap’s potential at the frequencies where you need it most.
Pulling the trap just 2-4 inches off the wall moves part of the absorber into a higher-velocity zone, dramatically increasing its bass absorption. A 4-inch mineral wool panel with a 4-inch air gap absorbs nearly as much at 125 Hz as an 8-inch solid panel — you effectively double the absorptive depth using nothing but empty space.
How Much Air Gap Is Enough?
A 2-inch air gap provides a noticeable improvement at frequencies above 200 Hz and some benefit at 125 Hz. This is the minimum worth implementing if space is tight.
A 4-inch air gap is the sweet spot for most rooms — it extends meaningful absorption down to 100-125 Hz without consuming excessive floor space. For home studios and listening rooms, this is the most practical target.
Beyond 6 inches, you hit diminishing returns for porous absorbers — each extra inch contributes less than the previous one. If you need absorption below 80 Hz, consider a Helmholtz resonator or membrane bass trap instead of piling on more air gap.
The simplest way to add an air gap is to mount your panels on Z-clips, French cleats, or simple wooden spacer blocks attached to the wall. For corner-straddled panels, angling the panel at 45 degrees across the corner creates the air gap automatically — the triangular space behind the panel provides 8-12 inches of effective depth.
Get Studio Tips Weekly
Join 5,000+ creators getting acoustic treatment advice every week.
No spam. Unsubscribe anytime.Increase Bass Trap Thickness
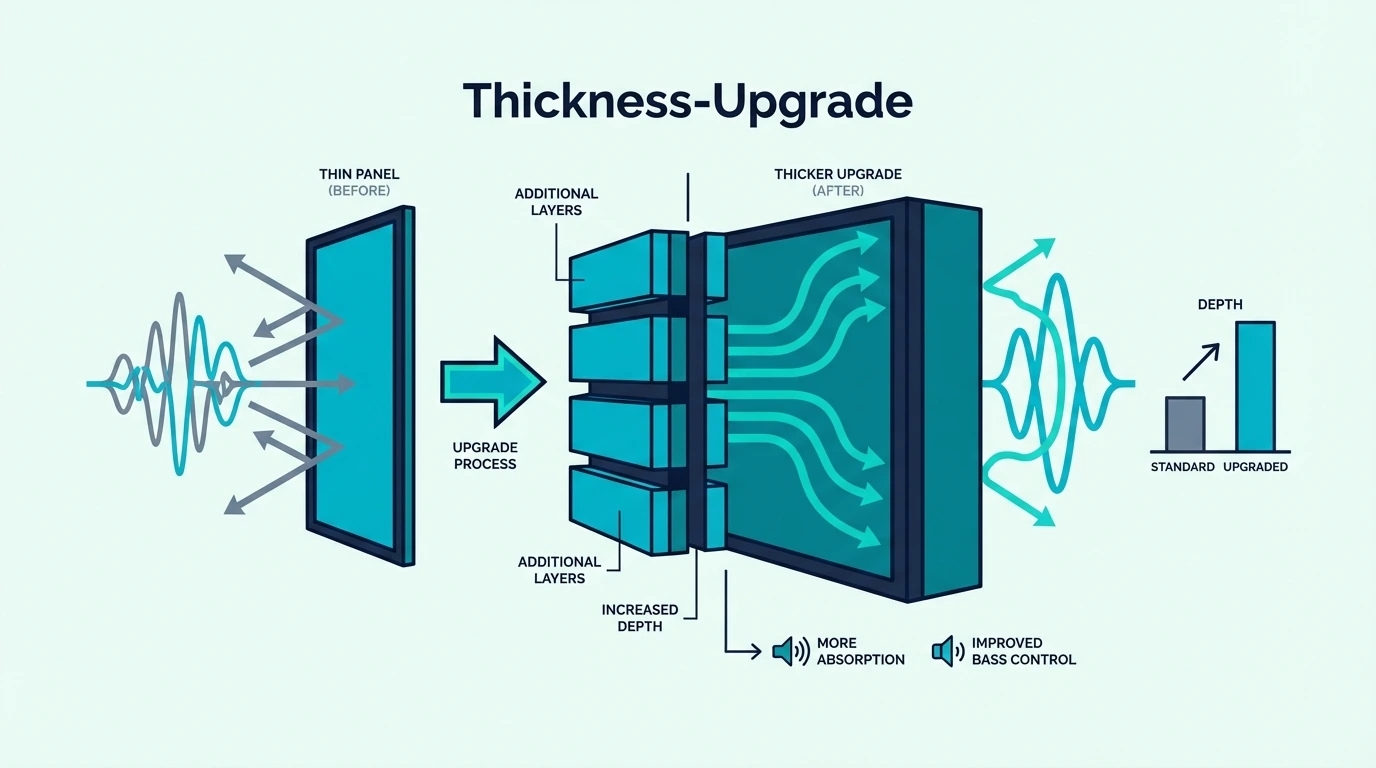
After optimizing air gaps, the next biggest improvement is increasing the thickness of your bass traps. Every doubling of thickness extends the effective absorption range down by roughly one octave — a 2-inch panel absorbs well above 500 Hz, a 4-inch panel reaches 250 Hz, and a 6-inch panel extends to around 160 Hz.
The easiest way to increase thickness is to stack panels — if you currently have 2-inch panels, adding a second 2-inch batt directly behind the first one gives you a 4-inch panel without any new framing or construction. Use the same insulation material for the added layer, or upgrade the rear layer to a denser material for even better performance.
For DIY builders, switching from 2-inch to 4-inch batts in existing frames is often possible by simply removing the back panel, inserting the thicker material, and reattaching. If the frame depth does not accommodate the thicker batt, add a 2-inch batt behind the existing 2-inch batt and let it extend beyond the frame — the rear layer does not need to be contained within the frame to function.
Stacking works because sound waves do not care about frame boundaries — they interact with the total depth of absorptive material regardless of whether it is one continuous piece or multiple layers pressed together. There is no meaningful acoustic penalty for using layered construction versus a single thick batt.
Upgrade To Higher-Density Insulation
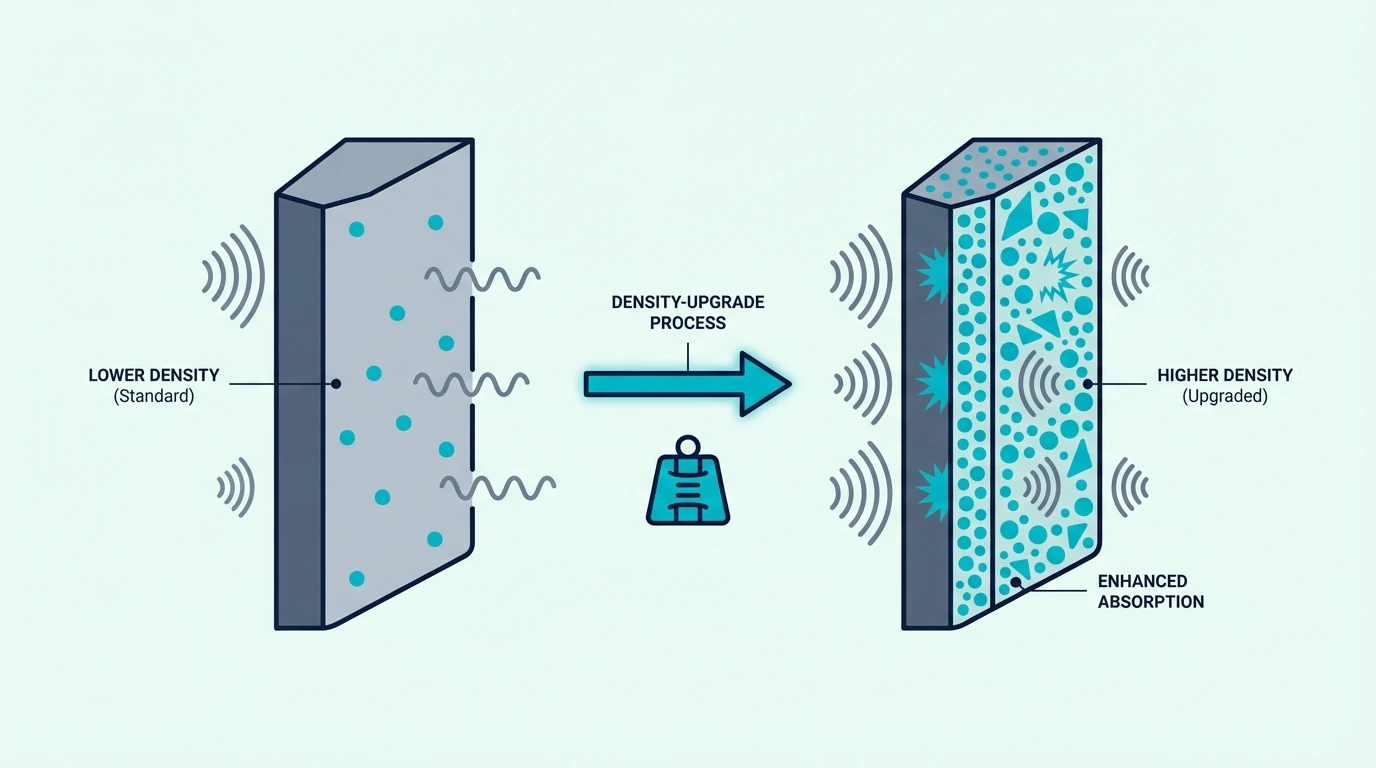
Material density directly affects absorption efficiency — denser material creates more friction per unit of thickness, converting more sound energy into heat at every frequency. Upgrading your insulation density is especially effective if your current traps use low-density foam or lightweight fiberglass.
The density sweet spot for bass traps is 3-6 pounds per cubic foot (PCF) — below 3 PCF, the material lacks enough fiber density to create sufficient friction for bass wavelengths. Above 8 PCF, the material becomes so dense that it starts reflecting some high-frequency energy, though this trade-off is minor and the bass absorption continues to improve.
Common upgrade paths:
Acoustic foam (1-2 PCF) to Rockwool Safe’n’Sound (3.5 PCF) — this is the most dramatic improvement you can make. Mineral wool at the same thickness as foam absorbs roughly 2-3x more energy at frequencies below 250 Hz because the higher fiber density creates proportionally more friction against bass particle movement.
Owens Corning 703 (3 PCF) to Rockwool ComfortBoard 80 (5 PCF) — a moderate upgrade that improves bass absorption by roughly 20-30% at 125 Hz. Both are already in the effective range, so this upgrade has less impact than going from foam to mineral wool.
If you cannot replace your insulation, you can still improve density by compressing the material — pushing a 6-inch batt into a 4-inch cavity increases its effective density by 50% without any material cost. The trade-off is reduced thickness, so this works best when combined with an air gap behind the compressed panel.
Optimize Bass Trap Placement
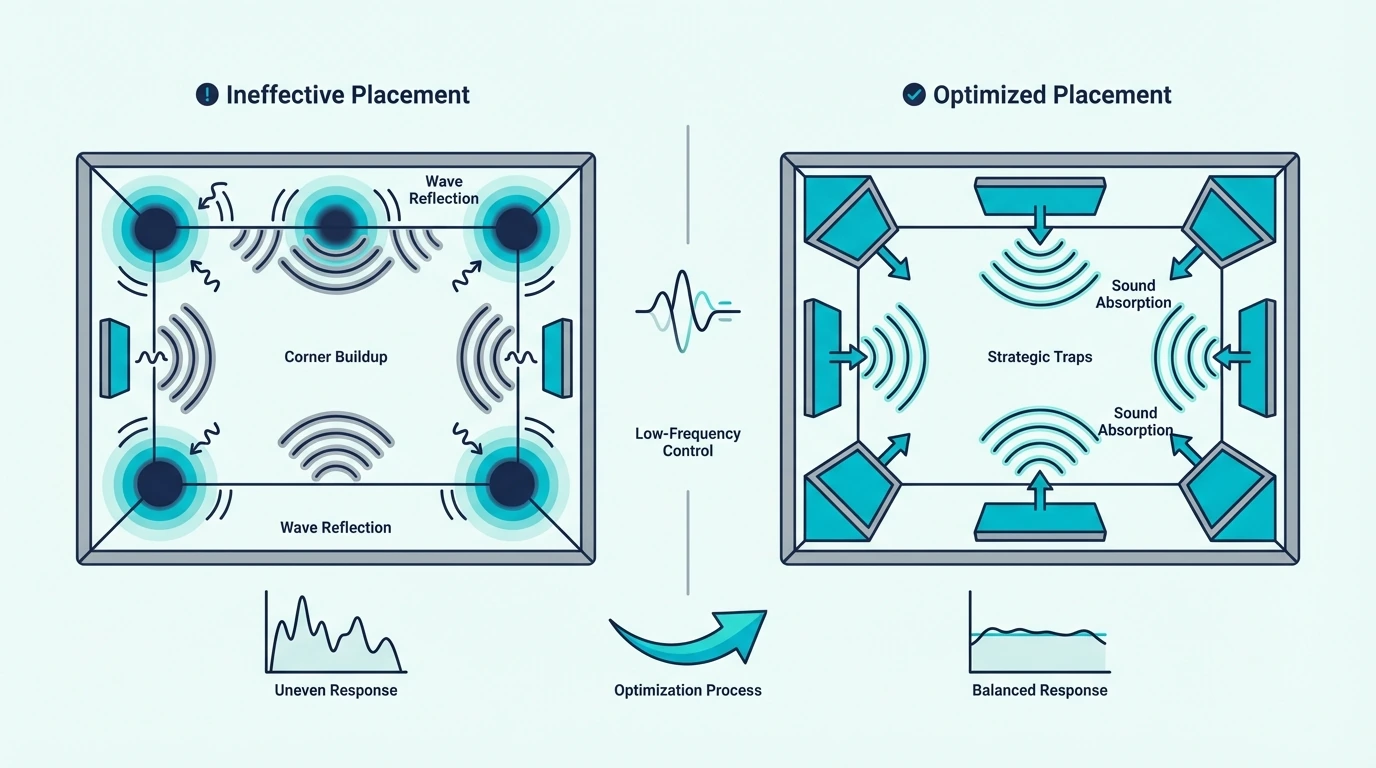
Where your bass traps sit in the room matters as much as what they are made of. Moving traps from flat walls to corners is the highest-impact zero-cost upgrade because corners have 2-4x the bass pressure of flat wall surfaces.
The priority sequence for placement optimization:
Move traps from flat wall centers to vertical wall-wall corners first — every room has four vertical corners, and each one concentrates bass energy from two intersecting boundaries. A single panel straddled across a corner absorbs more bass than the same panel centered on a flat wall between the corners.
Next, add treatment to ceiling-wall edges — these are horizontal “corners” where the ceiling meets each wall, and they are the second-highest-pressure zones in the room. Panels mounted along these edges catch bass energy that wall-only treatment misses entirely.
Finally, treat tri-corners (where two walls and the ceiling or floor meet) if your bass trap count allows it. These eight points in every rectangular room have the highest bass pressure of any location because three boundaries converge.
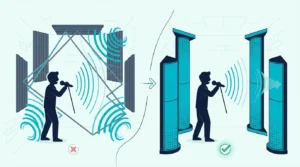
Straddling vs flush corner mounting: A panel straddled at 45 degrees across a corner outperforms the same panel mounted flush in the corner by a significant margin. The straddled position creates a natural air gap (the triangular space behind the panel), while flush mounting places the absorber directly against the wall boundary in the low-velocity pressure zone.
For small rooms, placement optimization often matters more than material upgrades because the room modes are more severe and the corners are closer to the listening position. Even repositioning two panels from flat walls to corners can reduce the worst room mode by 3-6 dB.
Do Bass Traps Increase Bass?
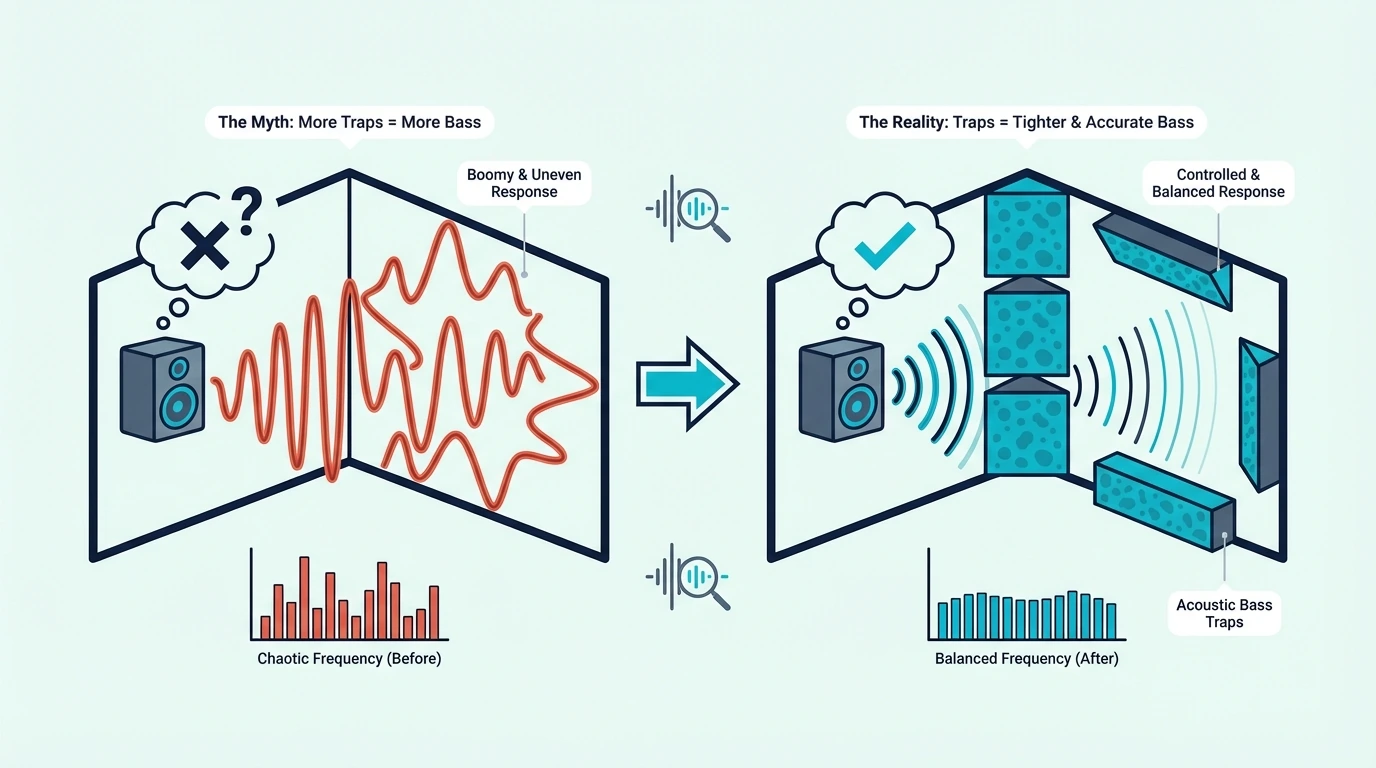
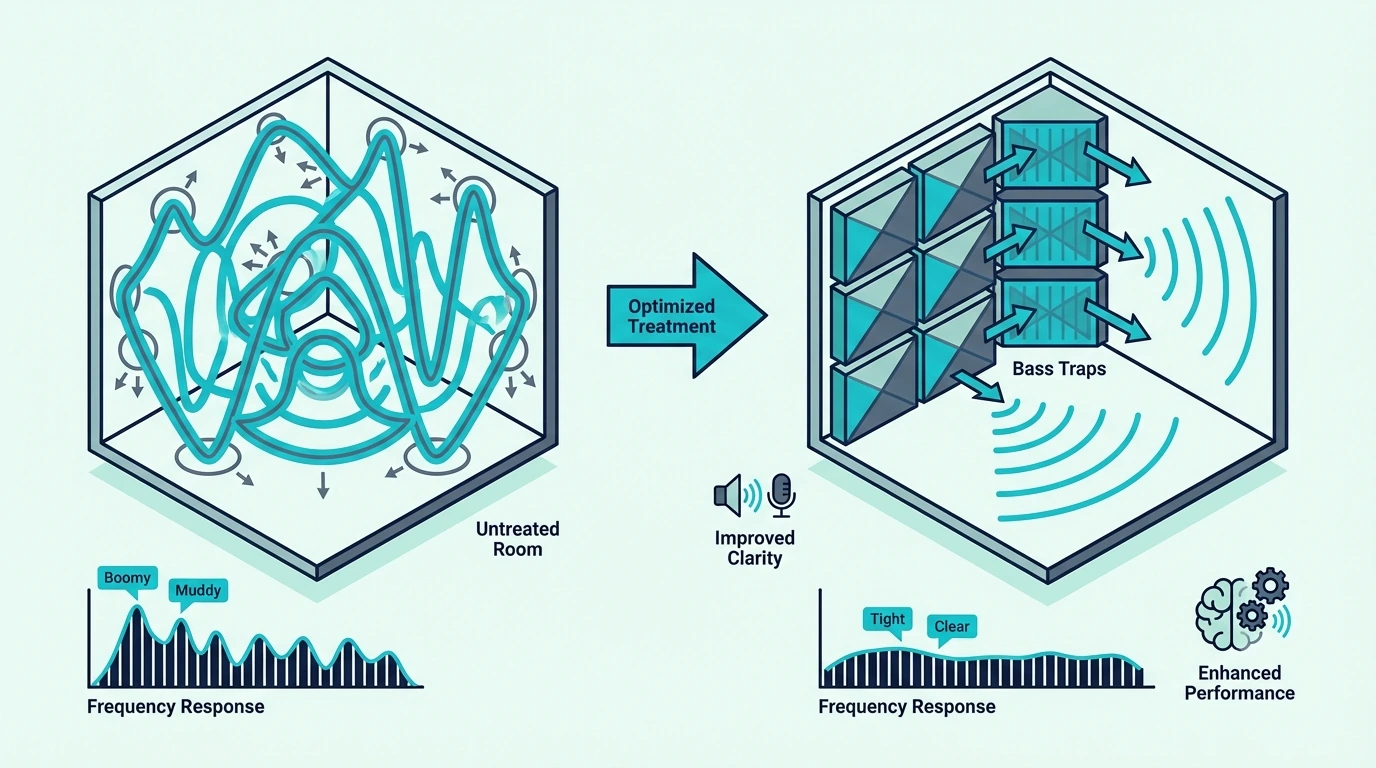
Bass traps do not increase bass — they reduce excess bass energy at specific frequencies where room modes create peaks. The common misconception comes from the fact that after installing bass traps, the bass often sounds “better” and more defined, which some listeners interpret as “more bass” when it is actually “cleaner, tighter bass.”
Here is what actually happens: in an untreated room, certain bass frequencies are boosted 10-20 dB by standing waves (room modes), while other frequencies are canceled by 10-15 dB at the same listening position. This creates a wildly uneven bass response where some notes are painfully loud and others nearly disappear.
Bass traps work by reducing those peaks — they absorb the excess energy that causes the 10-20 dB boost, bringing the response closer to flat. The frequencies that were being masked by the overwhelming peaks suddenly become audible, which makes the overall bass response sound fuller and more detailed even though the total bass energy in the room has decreased.
The result is that bass traps are necessary not because they add bass, but because they reveal the bass that was already there but was being hidden by the room’s resonances. Your subwoofer or speakers were producing those frequencies all along — the room modes were just preventing you from hearing them accurately.
The Bottom Line
Improving bass traps starts with the two free upgrades: add air gaps behind your panels (4 inches is ideal) and move them into corners where bass pressure is highest. These changes alone can double your low-frequency absorption without spending a dollar on new materials.
For the next level of improvement, increase panel thickness to 4+ inches by stacking, and upgrade to denser insulation material (3-6 PCF mineral wool or rigid fiberglass).
For ready-made corner treatment, the 4 Pack Bass Traps for Ceiling Corner provides triangular corner pieces that maximize the air gap advantage of corner mounting.
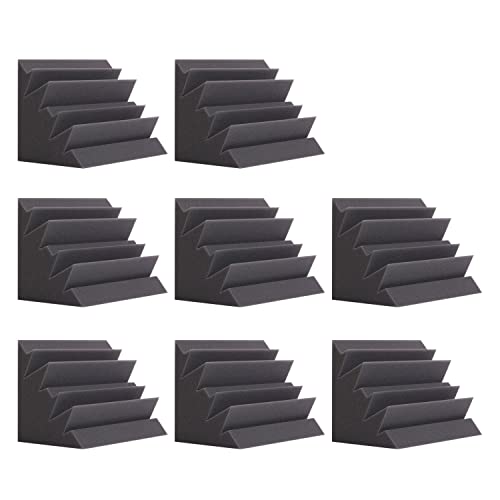
For stacking additional coverage in corners, the 8 Pack Bass Traps Acoustic Foam Corner gives you enough pieces to increase coverage across all four vertical corners and ceiling-wall edges.
Frequently Asked Questions
Can you stack bass traps for better performance?
Stacking bass traps doubles the effective thickness, which extends absorption down by roughly one octave. A stack of two 2-inch panels performs similarly to a single 4-inch panel at most frequencies, making stacking the most cost-effective way to upgrade thin panels without replacing them.
Does adding fabric over bass traps reduce performance?
Acoustically transparent fabric (like standard speaker grille cloth or muslin) has no measurable impact on absorption at any frequency. Thick, dense fabrics like vinyl, leather, or heavy canvas will reduce high-frequency absorption, but standard coverings pass sound through without meaningful resistance.
Should I replace foam bass traps with mineral wool?
Replacing foam with mineral wool produces the single biggest material upgrade available — mineral wool at 3-4 PCF absorbs 2-3x more bass energy than acoustic foam at 1-2 PCF at the same thickness. If your budget allows only one upgrade, swapping foam for Rockwool or rigid fiberglass in your existing trap frames delivers the most improvement per dollar.