Connect Soundbar To Hisense TV With Optical Cable — Settings That Actually Work

Connect soundbar to Hisense TV with optical cable is one of the cleanest ways to get TV sound into a bar when HDMI ARC is missing, unstable, or more trouble than it is worth.

The cable part is easy, but the settings part is where most Hisense setups fail.

You need the optical cable seated in the TV’s digital audio output, the soundbar set to optical, and the Hisense sound menu set to external audio or optical output with a sound format the bar can decode.

If one of those steps is wrong, the soundbar can power on, show the right light, and still play nothing.

Start by setting up the connection in order: cable first, soundbar input second, Hisense audio output third, then PCM or passthrough settings only after sound appears.

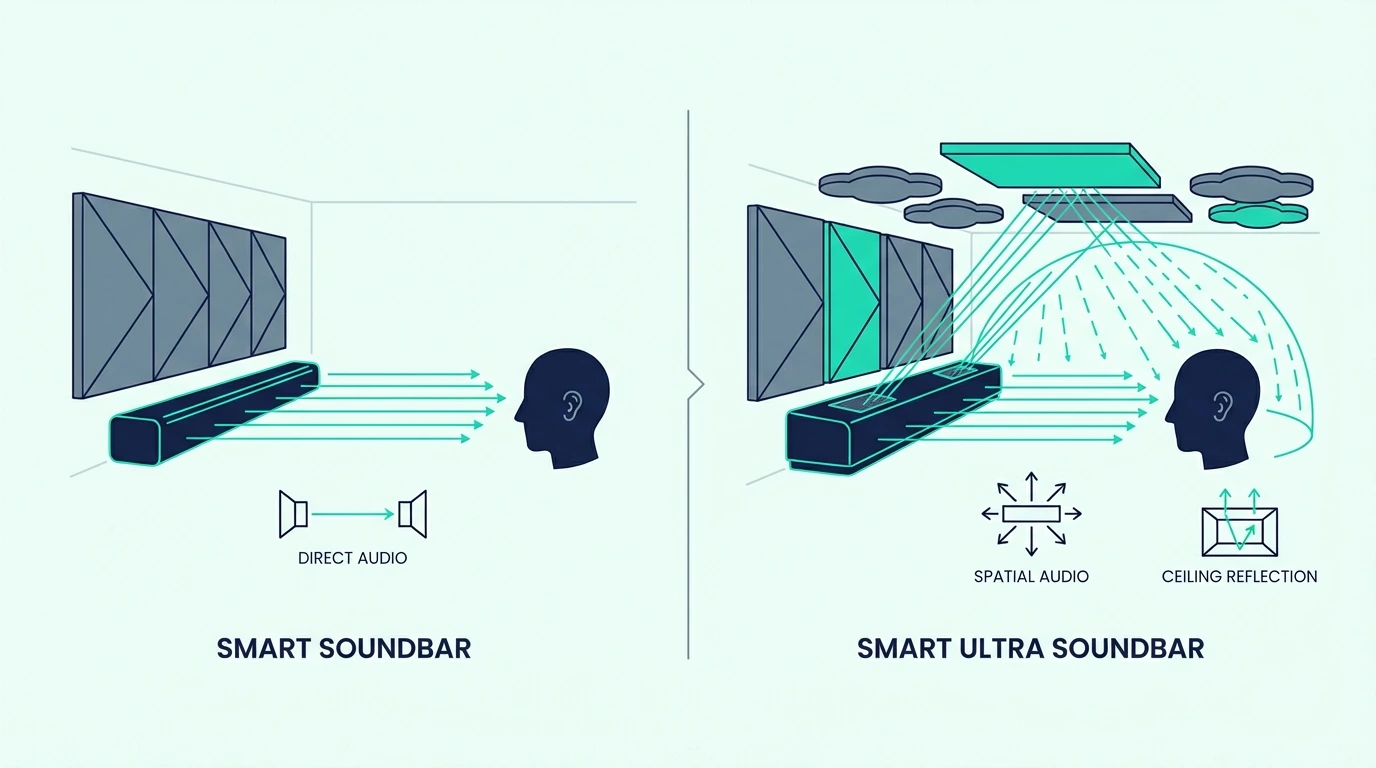
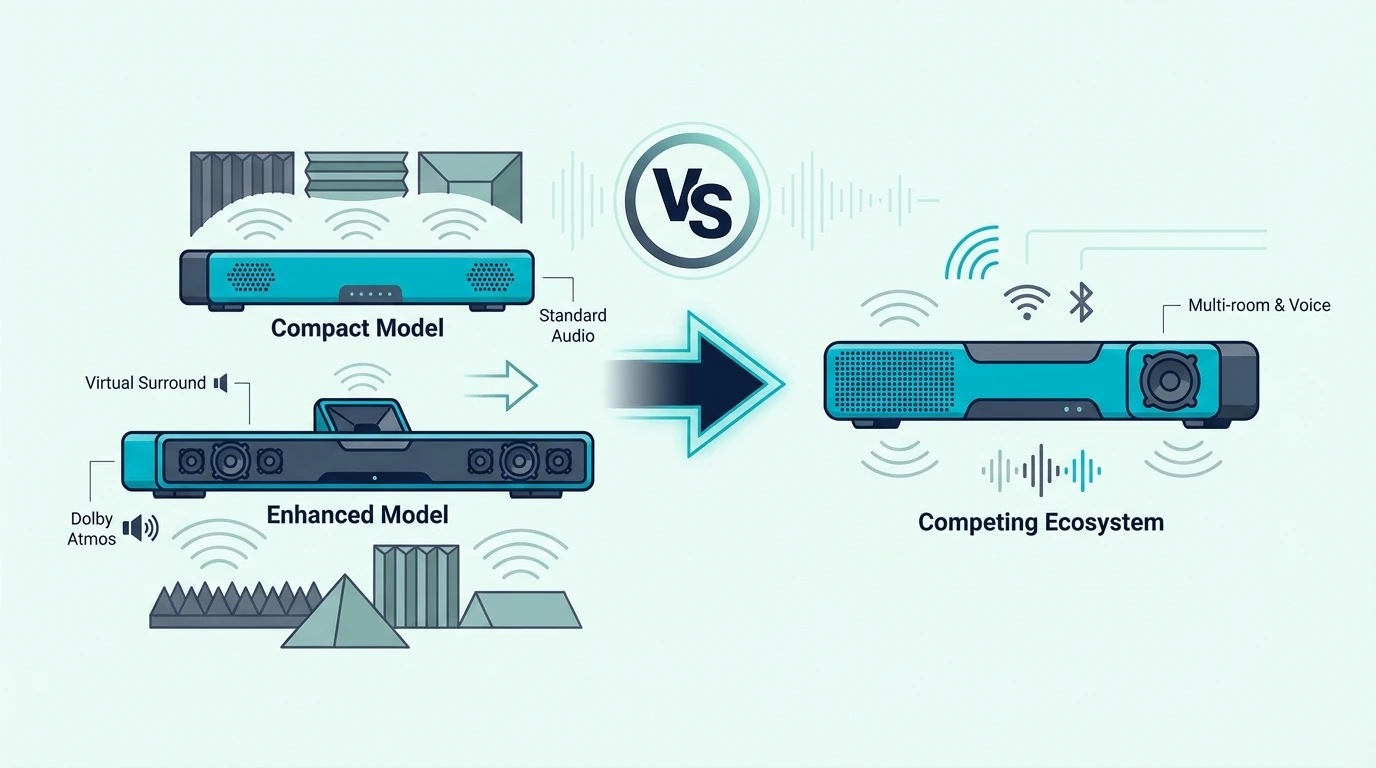
If you are still mapping how a soundbar fits with a Hisense TV in general, a soundbar replaces TV speakers with a single front-stage box that connects via HDMI, optical, or Bluetooth covers the baseline before you commit to optical.

Quick Takeaway

To connect a soundbar to a Hisense TV with optical, plug the optical cable into the TV’s Digital Audio Out or Optical Out port and the soundbar’s Optical In port.

Then set the soundbar input to Optical, D.IN, or Digital In, and change the Hisense TV sound output away from TV speakers toward optical, external speaker, or audio system.

If you get no sound, set the digital audio format to PCM first.

After basic sound works, try Auto or Dolby Digital only if your soundbar supports passthrough.

Optical will not let the Hisense remote control soundbar volume unless your soundbar has a separate IR learning feature.

What Do You Need Before Connecting Optical On A Hisense TV?

Start by checking the labels on the TV and soundbar.

On the Hisense TV, look for Digital Audio Out, Optical, or TOSLINK.

It is usually a small square port with a flap or red light inside when the TV is on.

On the soundbar, look for Optical In, Digital In, D.IN, or TOSLINK.

If you are setting up the soundbar for the first time, the standard power-on, input-select, TV Sound Out, source-device verification sequence once confirms the bar itself is awake before you troubleshoot Hisense specifically.

The cable must connect output on the TV to input on the soundbar.

Optical is one-direction audio, so plugging into the wrong side of another device will not work.

Remove the tiny plastic caps from both ends of the optical cable before you plug it in.

This mistake is common because the caps can look like part of the connector.

The cable should click or sit firmly without being forced.

If the connector will not fit, rotate it and try again because TOSLINK plugs have a specific shape.

Any reliable TOSLINK optical cable is enough for this connection.

You do not need a premium optical cable to unlock better audio.

You need a working cable, the right ports, and the right Hisense sound settings.

If your Hisense TV and soundbar both have HDMI ARC, optical is still valid, but HDMI may be more convenient for TV-remote volume control.

HDMI ARC carries Dolby Atmos, lossless audio, and HDMI-CEC remote control; optical carries Dolby Digital and stereo but drops Atmos and CEC entirely — that tradeoff matters before you commit to optical on a Hisense.

This page stays focused on optical because that is the most stable fallback when ARC is unavailable or behaving badly.

How Do You Connect The Optical Cable To A Hisense TV?

Turn off the TV and soundbar before you make the first connection.

Plug one end of the optical cable into the Hisense TV port labeled Digital Audio Out or Optical Out.

Plug the other end into the soundbar port labeled Optical In, Digital In, or D.IN.

Turn the TV on first, then turn the soundbar on.

Use the soundbar remote or top-panel source button to choose Optical, Digital In, or D.IN.

Do not leave the soundbar on HDMI, Bluetooth, USB, or AUX and expect optical audio to play.

The input label varies by brand.

Samsung bars often show D.IN.

Vizio and many budget bars may show Optical or OPT.

Bose and Sony bars may use a source light or app label instead of a big front display.

After the soundbar is on the right input, play a normal TV source.

Use a built-in streaming app, live TV channel, or another source already known to make sound from the TV speakers.

Do not test with a silent menu screen.

If the soundbar plays audio right away, lower the TV speaker volume or turn TV speakers off in the Hisense menu so you do not hear both sets of speakers at once.

If the soundbar is silent, do not replace the cable yet.

Most optical failures on Hisense TVs are menu-output failures, not cable failures.

Move to the TV settings before you buy anything else.

Which Hisense TV Sound Settings Should You Change?

Open the Hisense TV settings and go to the sound or audio menu.

The exact label depends on whether the TV uses Google TV, Android TV, Roku TV, VIDAA, or another Hisense interface.

Look for settings named Audio Output, Speakers, Digital Audio Out, Advanced Audio, or Sound Output.

Set the output away from internal TV speakers and toward optical, external speaker, audio system, receiver, SPDIF, or digital audio out.

If your menu has a TV Speaker toggle, turn it off after the soundbar works.

If the menu offers ARC, Bluetooth, and TV Speaker but not a clear optical option, check the advanced audio menu for digital output settings.

Some Hisense menus keep optical under a separate digital audio label rather than the speaker picker.

After output is selected, find the digital audio format.

Set it to PCM for the first test.

PCM is the safest format because nearly every optical soundbar can decode it.

Once audio works on PCM, you can try Auto, Dolby Digital, bitstream, or passthrough if your bar supports surround over optical.

Do not start with the most advanced option.

If the TV sends a format the soundbar cannot decode, the optical cable can be perfect and you will still get silence.

This is why a setup can work in one app and fail in another.

One app may send stereo PCM while another sends a surround format the bar does not understand.

If that happens, return to PCM to prove the connection, then decide whether the soundbar should receive a surround format.

PCM hands the bar pre-decoded audio while bitstream sends the raw codec for the bar to decode — the Hisense Digital Audio Out setting only works when both ends understand the chosen format.

Why Is There Still No Sound From The Hisense Optical Output?

No sound means you should isolate one part of the setup at a time.

First, confirm the soundbar input is optical.

This sounds obvious, but it is the most common soundbar-side mistake.

Second, confirm the Hisense TV is not still set to internal speakers only.

Some TVs keep the speakers active even with an optical cable connected.

Third, set digital audio output to PCM and test again.

If PCM works but Auto or Dolby Digital does not, the issue is format support, not the cable.

Fourth, try a different TV source.

Use the built-in YouTube, Netflix, or live TV app if available, then test the HDMI source later.

A cable box, game console, or streaming device can have its own audio setting that confuses the first test.

Fifth, power-cycle both devices.

Unplug the Hisense TV and soundbar from power for one minute, reconnect the TV first, then reconnect the soundbar.

This clears stuck output states without wiping every setting.

If optical still fails, reseat the cable and inspect both ends.

Optical cables can pass light even when the connector is not seated well enough for stable audio.

If nothing changes after every check above, a soundbar power reset can clear a stuck input state, and the soft-reset-first, factory-reset-last escalation covers the safe sequence so you do not lose pairings before you have to.

If you have another optical source or another optical cable, test one variable at a time.

Do not change the cable, soundbar input, Hisense output, and audio format all at once.

If the soundbar works from another optical source, the TV setting is still the likely problem.

If the soundbar fails from every optical source, the soundbar optical input may be the issue.

The input-swap test — change source device, swap to a known-good TV, try a different cable is the better next step once you know the failure is not only Hisense optical setup.

Why Does Optical Work But The Hisense Remote Will Not Control Volume?

Optical carries audio only.

It does not carry TV remote volume commands the way HDMI ARC can.

That means many Hisense optical setups require the soundbar remote for volume.

This is normal, not a setup failure.

Some soundbars can learn IR commands from the Hisense remote.

If your soundbar has IR learning, follow the soundbar manual to teach it volume up, volume down, and mute.

Some universal remotes can also control both devices.

If you mostly use the TV to play music and only need volume control from a phone, switching the music to a Bluetooth soundbar connection sidesteps the optical remote limitation for streaming.

But the optical cable itself will not add that control layer.

If one-remote control matters more than optical stability, use HDMI ARC when both devices support it.

Connect the HDMI cable to the Hisense port labeled ARC or eARC and the soundbar’s ARC or eARC port.

An eARC-rated HDMI cable fits that alternative setup, and turning on HDMI-CEC, confirming the ARC-labeled port, and setting TV Sound Out to external is the enable sequence on both ends.

If ARC creates dropouts, power issues, or input confusion, optical may still be the better daily choice even with a second remote.

That is the practical tradeoff.

Optical gives stable audio with simpler behavior.

HDMI ARC gives easier control when the TV and soundbar cooperate.

Why Is Hisense Optical Audio Out Of Sync Or Only Stereo?

Optical should usually have better sync than Bluetooth, but settings can still create delay.

Start by turning off extra TV sound processing.

Disable virtual surround, volume leveling, dialogue enhancement, and heavy audio processing during the first test.

Then check whether the soundbar has its own audio delay or lip-sync setting.

Set delay to zero, test a familiar dialogue scene, then adjust slowly if needed.

If the soundbar receives only stereo, check the Hisense digital audio format.

PCM over optical is often stereo.

That is why PCM is best for proving the connection but not always the final choice for surround.

If your soundbar supports Dolby Digital over optical, try Auto, Dolby Digital, bitstream, or passthrough after stereo PCM works.

If the bar still reports stereo, the source app, HDMI device, or TV may be outputting stereo before the optical stage.

Optical can carry Dolby Digital 5.1, but it cannot carry the newest high-bandwidth formats.

It will not carry full Dolby Atmos, Dolby TrueHD, or other modern high-data TV audio formats.

If your goal is Atmos or higher-end surround from a newer Hisense TV, HDMI eARC is the better target.

For a basic 2.0, 2.1, or 3.1 soundbar, optical is usually enough.

A second known-good HDMI lead can help only if you decide to compare ARC against optical.

For that kind of test, a two-pack of fresh HDMI 2.1 cables is more useful than swapping random old cables.

Use it only after optical is already proven or after you choose ARC instead.

Should You Use Optical Or HDMI ARC On A Hisense TV?

Use optical when you want the most predictable wired fallback.

It is especially useful on older Hisense TVs, simple soundbars, bedrooms, rentals, and setups where ARC keeps losing the soundbar after the TV wakes up.

Use HDMI ARC when you want TV-remote volume control, automatic power behavior, and a cleaner one-cable setup.

Use HDMI eARC when the TV and soundbar both support newer surround formats that optical cannot carry.

The right answer depends on what problem you are solving.

If the problem is no sound and you just need the soundbar working today, optical is often the fastest clean fix.

If the problem is daily convenience after the audio already works, ARC may be worth setting up.

Do not connect optical and HDMI ARC at the same time during troubleshooting.

Many soundbars will switch inputs or choose the wrong source, which makes the problem harder to read.

Pick one connection, make it work, then decide whether to compare the other.

The brand-neutral HDMI ARC, optical, and Bluetooth setup paths cover every connection type if your TV brand changes or you are advising a non-Hisense setup.

This Hisense page is for the specific optical setup where the old redirect currently misses the user’s real task.

If You Want A Soundbar With Both Optical And HDMI ARC

If the optical path keeps fighting the Hisense menus and you still want TV-remote volume control later, the cleanest fix is a soundbar that gives you both options on one bar.

The most popular pick on this list is the Polk Audio Signa S2 Sound Bar with Wireless Subwoofer because it includes both optical and HDMI ARC plus a long history of positive reviews on Hisense pairings.

For a 5.1-channel Dolby Atmos pick at a moderate price, the ULTIMEA 5.1CH Surround Sound Bar with Subwoofer upgrades the surround coverage when you watch more movies than live TV.

If you want a compact 3.1-channel all-in-one that handles Dolby Atmos without a separate subwoofer, the Amazon Fire TV Soundbar Plus with built-in subwoofer fits Fire TV-friendly Hisense setups.

A budget 2.1 pick is the ULTIMEA 2.1 Sound Bar with Wireless Subwoofer, 240W when the priority is keeping the Hisense setup simple at a lower cost.

The Bottom Line

Connect a soundbar to a Hisense TV with optical by doing the job in the right order.

Plug the optical cable from Hisense Digital Audio Out to the soundbar Optical In.

Set the soundbar to Optical, D.IN, or Digital In.

Then change the Hisense audio output to external, optical, SPDIF, receiver, or digital audio out.

If there is no sound, set digital audio format to PCM first.

After sound works, try Auto, Dolby Digital, or passthrough only if the soundbar supports those formats.

Optical is stable and simple, but it does not give Hisense remote volume control or the newest high-bandwidth surround formats.

If you need those features, compare HDMI ARC or eARC after the optical setup is proven.

If you need the broader soundbar setup map, start from the soundbar hub and choose the connection that matches your actual ports.

Frequently Asked Questions

How do I get my Hisense TV to play through my soundbar with optical?

Connect the optical cable from the Hisense Digital Audio Out port to the soundbar Optical In port, set the soundbar input to Optical or D.IN, then change the TV sound output to optical, external speaker, audio system, or digital audio out.

If there is no sound, set digital audio format to PCM first.

Why is my Hisense TV optical output not working?

The usual causes are the TV still using internal speakers, the soundbar on the wrong input, the digital audio format set to something the bar cannot decode, or an optical cable that is not fully seated.

Start with PCM and one known-good TV source.

Should Hisense digital audio output be PCM or Auto?

Use PCM first when troubleshooting because almost every soundbar can decode it.

After basic sound works, try Auto, Dolby Digital, bitstream, or passthrough if your soundbar supports surround over optical.

Can I control soundbar volume with a Hisense remote over optical?

Usually no.

Optical carries audio only, not volume-control commands.

Use the soundbar remote, IR learning if the soundbar supports it, or HDMI ARC if one-remote control matters.

Is optical better than HDMI ARC on a Hisense TV?

Optical is often more stable and simpler when ARC causes dropouts or setup problems.

HDMI ARC is more convenient when it works because it can add TV-remote volume control and automatic power behavior.

Connect Subwoofer Speakers To Soundbar — What You Can Add, What Will Not Work

Connect subwoofer speakers to soundbar is usually the search people make when the bar sounds thin, the bass is missing, or they have spare speakers they want to use.

The honest answer is split, but the limits are clear once you know how soundbars handle extra speakers.

You can connect a subwoofer or extra speakers only when the soundbar was designed for that kind of expansion.

Most wireless subs must be the matching unit from the same soundbar system, most rear speakers must be same-brand compatible kits, and most soundbars cannot power random wired speakers at all.

If you treat a soundbar like an AV receiver, the setup usually fails because the bar has no speaker terminals, no open channel assignment, and no way to sync unrelated wireless speakers.

Start by checking what your specific soundbar model supports below, then add only the speakers it was designed for.

Quick Takeaway

You usually cannot connect random subwoofers or speakers to a soundbar.

A wireless subwoofer must normally be the original bundled or officially compatible model, and rear speakers must be same-brand speakers supported by that exact soundbar.

If your soundbar has a real subwoofer output, you may be able to connect a powered subwoofer with the right cable, but most all-in-one bars do not include that output.

If you want full freedom to use any subwoofer and speakers, use an AV receiver instead of trying to force a soundbar to act like one.

Can You Connect Any Subwoofer To A Soundbar?

No, you usually cannot connect any subwoofer to a soundbar.

Most soundbar subwoofers are not universal Bluetooth speakers.

They use a private wireless link designed for one soundbar family.

That means a Samsung wireless sub usually will not pair with an LG soundbar.

A Vizio sub usually will not pair with a Bose bar.

Even two products from the same brand may fail if they belong to different generations or packages.

The first question is whether the subwoofer is officially compatible with the exact soundbar model.

If the subwoofer shipped in the same box, it should usually pair automatically or through the brand’s re-pair steps.

If it was bought separately, check the manual or compatibility list before pressing pairing buttons.

A blinking light on the subwoofer does not mean it can pair with any bar.

It only means it is looking for the system it was designed to find.

If the sub is the correct matched unit, use the normal pairing flow.

The brand-neutral re-pair sequence — bar in pairing mode first, sub power-cycled second, single LED solid third covers that re-pair process in detail.

If the sub is not the correct matched unit, pairing attempts are usually wasted time.

That is not a settings problem.

It is a system-design limitation.

Can You Connect Wired Speakers To A Soundbar?

Most soundbars cannot power wired speakers.

A normal passive speaker needs an amplifier channel.

A soundbar does not usually expose speaker-wire terminals for left, right, center, or rear speakers.

The amplifiers are built inside the bar and already assigned to the drivers inside the bar.

That is why twisting speaker wire into an AUX jack, RCA input, optical port, or HDMI port will not work.

Those ports are audio inputs or digital connections, not powered speaker outputs.

Some soundbar systems support rear speakers, but those are usually wireless rear kits or special modules made for that model.

They are not generic bookshelf speakers.

Some older or specialty soundbars may have a subwoofer output, pre-out, or proprietary speaker connector.

If yours does, the manual will say so clearly.

If there is no speaker output label, assume the bar cannot power external wired speakers.

Trying to force passive speakers into a soundbar output can damage equipment if the port is not meant for that job.

If you want to use any wired speakers you choose, the correct tool is an AV receiver or amplifier.

A discrete AVR plus wired or wireless speakers can drive timed 5.1 or 7.1 the way a soundbar-plus-sub cannot explains when that bigger speaker setup makes more sense.

What Extra Speakers Can A Soundbar Actually Use?

A soundbar can use extra speakers only when the manufacturer built that option into the system.

The most common add-ons are a matching wireless subwoofer and compatible wireless rear speakers.

Those pieces do not just play random duplicated sound.

They receive specific bass, rear, or surround information from the main bar.

That channel assignment is the part generic speakers do not get.

Samsung, LG, Sony, Sonos, Bose, JBL, Vizio, and other brands each handle expansion differently.

Some bars have no expansion at all.

Some accept a matching subwoofer only.

Some accept rear speakers only with certain model years.

Some packages include the sub and rears from the start.

Check the exact soundbar model before buying accessories.

Do not rely on the brand name alone.

A same-brand speaker can still be incompatible if the model is wrong.

This is why a bundled package is often easier than adding pieces later.

The bar, subwoofer, and rear speakers are already built to pair and stay in sync.

A budget all-in-one with multiple inputs like the Sound Bar with Bluetooth, ARC, Optical and AUX is easier to reason about than trying to force a spare subwoofer into an incompatible bar.

If you want true rear-channel expansion, same-brand wireless rears that share processing and timing with the main bar are the move before buying any rear speaker kit.

Can You Add A Powered Subwoofer With A Cable?

A powered subwoofer can work only if the soundbar has the right output.

Look for a port labeled Sub Out, Subwoofer Out, Pre Out, or a brand-specific subwoofer output.

If that output exists, the soundbar may send low-frequency audio to a powered subwoofer through an RCA or 3.5mm cable.

The subwoofer must be powered because the soundbar is not amplifying it like a receiver would.

Most modern compact soundbars do not include this output.

They either use their own wireless subwoofer or no subwoofer at all.

An AUX input on the soundbar is not a subwoofer output.

An optical port is not a subwoofer output.

HDMI ARC is not a subwoofer output.

Bluetooth pairing is not a universal subwoofer output.

If the port is not clearly labeled as a sub output, do not assume it can feed a sub.

If your soundbar does have a sub output, connect it to the powered subwoofer’s line input, set the subwoofer volume low at first, and raise it slowly.

Then use a bass-heavy track or movie scene to confirm the sub is playing only low frequencies.

If the subwoofer hums, turn the level down, check the cable, and keep audio cables away from power bricks.

A cable will not solve compatibility if the soundbar has no output to feed it.

At that point, a compatible wireless sub package or a receiver-based system is the cleaner answer.

Can You Add Rear Speakers Or Surround Speakers To A Soundbar?

You can add rear speakers only to soundbars that support compatible rear speakers.

The rear speakers must usually be from the same brand and supported by the exact model.

They are normally paired through the brand app, remote setup flow, or an included wireless module.

Generic Bluetooth speakers do not become surround speakers.

Bluetooth delay is too high for real-time rear-channel audio.

Generic wired speakers also do not work unless the soundbar system includes a rear-speaker amp or wireless receiver designed for them.

The reason is channel routing.

The soundbar must know which audio belongs behind you and send that information to the rear speakers at the right time.

A random speaker connected through a splitter only gets duplicated front audio.

That is not surround sound.

It is just more sound from another place.

If your current bar supports compatible rears, buy the correct rear kit and follow the model’s pairing flow.

If it does not support rears, upgrade to a soundbar system that includes them or move to a receiver setup.

A complete matched surround package like the Sony HT-S40R 5.1ch Home Theater Soundbar System is an example of buying the synced system instead of improvising separate speakers.

For the decision itself, 2.1 pairs the bar with a wireless sub; 5.1 adds two wireless rears to that pairing covers the upgrade choice before you spend money on add-ons.

Why Do Splitters And Adapters Usually Fail?

Splitters duplicate a signal.

They do not create the missing amplifier, channel routing, timing, or compatibility logic.

An RCA splitter can copy analog audio, but it cannot tell a subwoofer what bass to play unless the source is already a proper sub output.

An optical splitter can duplicate digital audio, but it cannot extract separate rear channels for random speakers.

An HDMI extractor can pull audio from an HDMI source, but it does not turn a soundbar into a receiver with speaker terminals.

Bluetooth adapters can send wireless audio, but they add delay and still do not create true surround channels.

That is why adapter-heavy setups often create new problems.

You may get sound, but it is delayed, duplicated, too quiet, too loud, or impossible to control with one remote.

If the goal is better TV audio, use one correct soundbar connection first.

A known-good HDMI 2.1 cable that supports ARC or eARC is useful for the main bar connection, not for adding unsupported speakers.

If ARC is the problem, optical can be a stable fallback.

A simple TOSLINK optical cable can prove the main soundbar works before you chase add-ons.

But if the question is expansion, adapters rarely solve the real limitation.

What Should You Do If Your Soundbar Has No Bass?

If the problem is weak bass, first confirm whether your current soundbar already has a subwoofer.

If it does, check whether the subwoofer is powered, paired, close enough, and turned up in the soundbar settings.

If the subwoofer light keeps blinking, treat it as a pairing problem.

Use the matched subwoofer pairing flow before buying a replacement.

If your soundbar has no subwoofer, check whether it supports an optional matching wireless sub.

If it does, buy that compatible subwoofer rather than a random wireless model.

If it does not support a subwoofer, you have two practical options.

Replace the soundbar with a bar-and-sub package, or move to a receiver and powered/passive speaker system.

Do not expect EQ or bass boost to create deep bass from a small bar with no subwoofer.

It can make the bar sound thicker, but it cannot move the same air as a real sub.

A midrange matched system like the SAMSUNG S60D 5.0ch Soundbar with Wireless Dolby Atmos is the kind of midrange Atmos-ready upgrade that avoids random pairing uncertainty.

If you are comparing options, the bar-plus-sub picks ranked by wireless reliability and crossover frequency match is the better next page.

If you are unsure whether you need a sub at all, whether the bar’s own drivers handle action scenes and music or collapse at higher volume is the diagnostic before buying.

More Matched Soundbar Systems Worth Considering

If the matched picks above do not fit the room, two more options round out the list.

For a 5.1-channel Atmos pick at a moderate price, the ULTIMEA 5.1CH Surround Sound Bar with Subwoofer is a strong value alternative to the Sony 5.1 system.

For a compact 2.0 bar that still adds DTS Virtual:X stereo width, the Amazon Fire TV Soundbar (2.0) covers a bedroom-class setup without the expansion question.

When Should You Use A Receiver Instead?

Use a receiver when you want open speaker compatibility.

A receiver is built to power separate speakers and manage channels.

It has speaker terminals, subwoofer outputs, decoding, calibration, and upgrade flexibility.

That is what a soundbar hides inside one box.

If you want to use existing bookshelf speakers, floorstanding speakers, passive center speakers, or a separate powered subwoofer, a receiver is usually the right tool.

If you want to upgrade one speaker at a time, a receiver is also the right tool.

If you want one cable, one remote, and simple TV sound, a soundbar is still easier.

The split is not about which product is universally better.

It is about whether you want convenience or open expansion.

A soundbar is convenient because it is closed.

A receiver is expandable because it is not closed.

Trying to turn one into the other creates the adapter problems that brought you here.

If the goal is full speaker freedom, passive bookshelf speakers driven by a discrete amp give driver and amp upgrade paths a soundbar-plus-sub cannot helps you decide whether the extra wiring and setup are worth it.

If the goal is just better bass, a matched soundbar-with-subwoofer system is usually simpler.

The Bottom Line

You can connect subwoofer speakers to a soundbar only when the soundbar was designed for that expansion.

A matching wireless subwoofer can pair with the correct bar.

Compatible same-brand rear speakers can work with supported models.

A powered subwoofer can work only when the soundbar has a real subwoofer output.

Random wired speakers, generic Bluetooth speakers, spare wireless subs, and adapter chains usually do not work the way people expect.

They lack the required amplification, timing, channel routing, or brand compatibility.

If your current bar supports the add-on, use the exact compatible accessory.

If it does not, upgrade to a matched bar-and-sub or surround package, or switch to a receiver-based system.

For the next step, use the soundbar vs receiver comparison, the 5.1 surround vs soundbar comparison, or the soundbar hub depending on which add-on you were trying to connect.

Frequently Asked Questions

Can I connect any wireless subwoofer to my soundbar?

Usually no.

Most wireless subwoofers pair only with the matching soundbar model or product family they were designed for.

Can I connect wired speakers to a soundbar?

Usually no.

Most soundbars do not have powered speaker terminals, so they cannot drive passive wired speakers the way an AV receiver can.

Can I add a powered subwoofer to a soundbar?

Only if the soundbar has a real subwoofer output such as Sub Out, Subwoofer Out, or Pre Out.

If the soundbar has no output, a powered subwoofer has no proper signal to use.

Can I connect rear speakers to a soundbar?

Only if the soundbar supports compatible rear speakers.

Those speakers usually need to be same-brand models designed for that exact soundbar or product family.

What should I buy if I want to use any speakers I want?

Buy an AV receiver or amplifier-based system.

That is the setup designed for separate speakers, powered subwoofers, channel routing, and future upgrades.

Connect Soundbar With LG TV — HDMI ARC, Optical, Bluetooth & Sound Out Settings

Connect soundbar with LG TV is usually easy once the TV is using the right Sound Out setting, but LG menus can make a good cable look broken.

The most reliable order is simple: use HDMI ARC or eARC first when both devices support it, use optical when ARC is unavailable or unstable, and use Bluetooth only when wireless convenience matters more than lip sync and daily reliability.

Most failures come from three small mismatches.

The HDMI cable is not in the LG port labeled ARC or eARC, the soundbar is listening to the wrong input, or the LG TV is still set to internal speakers instead of the external audio device.

Fix those in order and you’ll usually get sound back without resetting everything or replacing the soundbar.

Quick Takeaway

To connect a soundbar with an LG TV, use HDMI ARC or eARC first if both devices have it.

Connect the LG TV’s ARC/eARC HDMI port to the soundbar’s TV ARC, HDMI OUT, or eARC/ARC port, then set LG Sound Out to HDMI ARC or external audio device.

Turn on Simplink when using ARC, set Digital Sound Out to PCM for basic troubleshooting, then try Auto or Pass Through only after sound works.

If ARC keeps failing, use optical as the stable fallback and set Sound Out to Optical or Optical/HDMI ARC depending on your LG menu.

What Is The Best Way To Connect A Soundbar With An LG TV?

The best first choice is HDMI ARC or eARC when the LG TV and soundbar both support it.

ARC sends TV audio back to the soundbar over HDMI and can also allow the LG remote to control volume when Simplink is working.

That makes it cleaner than optical for daily use.

The port labels matter more than the cable shape.

On the LG TV, use the HDMI port labeled ARC or eARC.

On the soundbar, use the port labeled TV ARC, HDMI OUT, ARC, or eARC/ARC.

Do not plug the TV into a normal soundbar HDMI input meant for streamers or game consoles unless the soundbar manual tells you that port handles TV return audio.

If your TV or soundbar does not have ARC, use optical.

Optical is still a strong wired connection for basic TV sound, dialogue, and standard surround formats.

It just does not carry TV-remote control or newer high-bandwidth sound formats.

If neither wired method is practical, Bluetooth can work.

Use it for simple wireless audio, not for the most stable movie or gaming setup.

On Samsung, Sony, TCL, or Vizio TVs, the same ARC-first, optical-fallback order applies — only the Sound Out menu labels change.

This LG guide focuses on the Sound Out, Simplink, eARC, and Digital Sound Out settings that make LG setups succeed or fail.

How Do You Connect An LG TV To A Soundbar With HDMI ARC Or eARC?

Turn off the LG TV and soundbar before you wire the first test.

Connect one HDMI cable from the LG TV port labeled ARC or eARC to the soundbar port labeled TV ARC, HDMI OUT, ARC, or eARC/ARC.

Turn on the TV first, then the soundbar.

Set the soundbar input to TV ARC, eARC, HDMI ARC, or the equivalent TV input.

Then open the LG settings menu and go to Sound.

Choose Sound Out and select HDMI ARC, wired speaker, external speaker, audio system, or the menu label your LG model uses.

On many LG TVs, the setting may read HDMI(ARC) Device, Optical/HDMI ARC, or Wired Speaker.

After selecting the output, turn on Simplink if it is not already on.

Simplink is LG’s HDMI control feature, and ARC behavior often depends on it.

If your LG TV and soundbar both support eARC, turn eARC support on or set it to Auto.

Do not start troubleshooting with every advanced sound format enabled.

First prove that basic audio works.

A known-good HDMI 2.1 cable that supports ARC or eARC is a good baseline when the old cable is unknown.

The cable will not fix the wrong port or wrong Sound Out setting, but it removes one common weak point.

Which LG Sound Out Settings Matter Most?

LG Sound Out decides where the TV sends audio.

If Sound Out stays on Internal TV Speaker, the soundbar can be wired correctly and still stay silent.

For HDMI ARC, choose HDMI ARC, HDMI(ARC) Device, Wired Speaker HDMI, Optical/HDMI ARC, or the closest external audio label on your model.

For optical, choose Optical, Optical Out, Optical/HDMI ARC, wired speaker optical, or external speaker.

The wording changes across WebOS versions, but the job is the same.

The TV must stop using its own speakers as the only output.

Next, check Digital Sound Out.

Use PCM when you are troubleshooting silence because almost every soundbar can decode PCM.

After audio works, try Auto or Pass Through if the soundbar supports Dolby Digital, Dolby Atmos over eARC, or other surround formats.

Do not assume Pass Through is always the first setting to use.

It can send a format the soundbar does not understand, which creates silence even when ARC is connected correctly.

If PCM works and Pass Through fails, the issue is sound format compatibility, not the HDMI cable.

If Pass Through works only with some apps, the source app or external device may be sending a different audio format.

PCM hands the bar a pre-decoded stereo or surround track, while bitstream sends the raw codec for the bar to decode — which is why a Pass Through that breaks Netflix but not YouTube usually points to a codec the bar cannot handle, not the cable.

If Simplink as a name is throwing you off, the brand-neutral ARC enable sequence — port label, HDMI-CEC under any vendor name, Sound Out set to the external device works as a clean checklist.

How Do You Connect An LG TV To A Soundbar With Optical?

Use optical when HDMI ARC is missing, unreliable, or not worth debugging today.

Connect a TOSLINK optical cable from the LG TV Digital Optical Out port to the soundbar Optical In port.

Remove the plastic caps from the cable ends before plugging it in.

Set the soundbar input to Optical, OPT, Digital In, or D.IN.

Then open LG Sound Out and choose Optical, Optical/HDMI ARC, wired speaker optical, or external speaker depending on your menu.

Set Digital Sound Out to PCM for the first test.

If sound works, you can try Auto later for surround formats your soundbar supports.

Any reliable TOSLINK optical cable is enough for this setup.

Optical is audio only.

It will not give the LG remote the same soundbar volume control that ARC can offer.

Some soundbars can learn LG remote IR commands, but that is a soundbar feature, not an optical-cable feature.

If you hear both TV speakers and soundbar at the same time, turn off internal TV speakers or choose the external output only.

If optical works immediately and ARC does not, the soundbar is probably not dead.

The failure is more likely the LG ARC port choice, Simplink, eARC mode, Digital Sound Out, or a handshake problem.

Can You Connect A Soundbar To An LG TV With Bluetooth?

Bluetooth can connect an LG TV to a soundbar when both devices support it.

Put the soundbar in Bluetooth pairing mode, open the LG Sound Out or Bluetooth device menu, then choose the soundbar from the device list.

If the TV asks whether to use the Bluetooth audio device, confirm it.

Bluetooth is convenient, but it is not the best first choice for movies or games.

It can add delay, compress the sound, and disconnect more easily than HDMI or optical.

Use Bluetooth when the room layout makes cables difficult or when the soundbar is used casually.

If your LG TV cannot send Bluetooth audio or pairing keeps failing, an external transmitter can help only when it receives the right audio output from the TV.

A line-level Bluetooth transmitter can bridge some older or awkward setups, and budget transmitters do the same job at a lower cost for casual TV audio.

If Bluetooth is only being used because ARC failed, test optical before buying a transmitter.

Optical is usually more stable, cheaper, and better for lip sync.

The pairing flow on Samsung, Vizio, and TCL TVs follows the same pattern as LG once both devices are in pairing mode — if wireless is the final choice, the brand-neutral steps are short.

Why Is The LG TV Not Playing Through The Soundbar?

Start with the soundbar input.

If the soundbar is on Bluetooth while the TV is connected by HDMI ARC, there will be no TV sound.

If the soundbar is on HDMI while the cable is optical, the same problem happens.

Next, check LG Sound Out.

The TV must be set to HDMI ARC, Optical, Optical/HDMI ARC, wired speaker, or external audio depending on the connection.

If it is still set to Internal TV Speaker only, the soundbar may never receive audio.

Then check Simplink for ARC.

Turn it on, power-cycle the TV and soundbar, and test again with a built-in TV app.

A built-in app is the cleanest test because it proves whether the TV itself can send audio to the bar.

After that, check Digital Sound Out.

Use PCM for the first no-sound test.

If PCM works, then Auto or Pass Through can be tested later.

If PCM does not work, the issue is probably not just a format mismatch.

Reseat the cable, confirm the port labels, and unplug both devices from power for one minute.

Reconnect the TV first, then the soundbar.

If ARC still fails, try optical as a proof test.

If optical works, the soundbar hardware is probably okay and the ARC handshake is the issue.

If every connection fails, swap the bar onto a known-good audio source — a phone over Bluetooth, a streaming stick over HDMI, or any TV that is not the LG before assuming the LG settings are the problem.

If the bar behaves strangely after settings changes, a soft reset clears stuck EQ presets and input-locking quirks without wiping pairings — try that before a full factory reset that loses Wi-Fi credentials and connected device lists.

If the LG TV connection completes but the bar still drops out, distorts, or fails on the subwoofer, the LG-specific fault-isolation pass — Simplink reset, eARC mode toggle, Digital Sound Out PCM test, subwoofer re-pair, sound-mode reset is the next page after this setup is correct.

Why Is LG Soundbar Audio Delayed, Stereo Only, Or Too Quiet?

Audio delay usually comes from processing or a mismatch between the source, TV, and soundbar.

Turn off extra TV sound processing first.

Disable heavy virtual surround, volume leveling, and dialogue modes during the test.

Then check whether the soundbar has a lip-sync or audio-delay setting.

Start at zero and adjust slowly.

Stereo-only audio usually comes from the Digital Sound Out setting or the source device.

PCM may be stereo in many setups, which is why it is safest for proving sound but not always the best final setting for surround.

If the soundbar supports Dolby Digital over ARC or optical, try Auto after PCM works.

If the soundbar and LG TV support eARC, try Pass Through only after basic sound is stable.

Too-quiet sound is less common over HDMI or optical than over analog, but it can happen when the soundbar is in the wrong sound mode or when the app output is limited.

Test a built-in streaming app, an HDMI source, and live TV separately if available.

Change one variable at a time.

Do not switch cables, sound format, app source, soundbar mode, and TV output all in the same test.

If the issue appears only with one external device, the LG TV and soundbar connection may be fine.

The problem may be the streamer, console, or cable box audio setting.

A regular HDMI port on the bar accepts audio from the source while the ARC/eARC port sends audio back from the TV — confusing the two ports is the most common reason a console plays through some apps but not others.

Should You Use The Same Brand Soundbar With An LG TV?

You do not need an LG soundbar just because you have an LG TV.

Brand matching can make some control features, app prompts, or setup labels feel cleaner, but the main connection rules are still port-based.

An LG TV can work with Samsung, Sony, Vizio, Bose, Sonos, JBL, Yamaha, Polk, and many other soundbars when the connection type matches.

What matters first is whether both devices support HDMI ARC or eARC, optical, or Bluetooth.

Then check which sound formats the soundbar can decode.

A basic bar may connect perfectly but still receive only stereo or standard Dolby Digital.

A higher-end bar may need eARC to get its best sound from newer sources.

If your LG TV has eARC and the bar supports eARC, use that setup first.

If your LG TV is older or the bar is simple, optical may be the more stable real-world setup.

Brand choice should come after connection fit, room fit, and the soundbar’s actual format support.

HDMI ARC carries Dolby Digital, Atmos via eARC, and remote control; optical carries Dolby Digital and stereo but drops Atmos and CEC entirely — that tradeoff matrix decides which port is worth the debugging time.

If your LG model is the C4 specifically, the OLED-tuned picks line up against its WOW Orchestra and DTS:X passthrough capability rather than generic LG matching.

LG-Aligned And Cross-Brand Soundbar Picks

If you do want to lean on LG’s own ecosystem for the cleanest Simplink and WOW Orchestra behavior, two LG bars stand out at different price points.

The LG S60T 3.1 ch Soundbar with Wireless Subwoofer is the LG-aligned mid-tier pick that keeps the menu prompts and remote control consistent with the TV.

For a smaller, budget-tier LG bar that still pairs cleanly with LG TV menus, the LG S20A 2.0 ch Soundbar covers a bedroom or small living-room LG setup without overspending.

If you do not need brand alignment and want the strongest Dolby Atmos performer in the list, the Sonos Arc Ultra Soundbar with Dolby Atmos and Voice Control is the premium cross-brand pick that still works cleanly over eARC on a new LG OLED.

For a 5.1-channel cross-brand pick at a moderate price, the ULTIMEA 5.1CH Surround Sound Bar with Subwoofer is a strong value alternative for movie nights on an LG TV.

A compact 3.1-channel pick is the Amazon Fire TV Soundbar Plus with built-in subwoofer when the LG TV pairs with a Fire TV stick and you want a unified streaming experience.

The Bottom Line

Connect a soundbar with an LG TV by choosing the connection first and then matching LG Sound Out to that connection.

Use HDMI ARC or eARC when both devices support it.

Turn on Simplink, choose the correct LG Sound Out option, and use PCM first if you are troubleshooting silence.

Use optical when ARC is missing or unreliable.

Set the soundbar to Optical or D.IN and choose optical output in the LG menu.

Use Bluetooth only when wireless convenience is worth the tradeoff in delay and stability.

If the setup fails, do not replace everything at once.

Check the port, soundbar input, LG Sound Out, Simplink, Digital Sound Out, then power-cycle in that order.

If you need the wider TV setup map, the LG-aligned soundbar picks ranked by eARC, Simplink, and WOW Orchestra integration show which bars actually leverage LG’s features, and the soundbar hub is the broader cluster starting point.

Frequently Asked Questions

How do I connect my LG TV to a soundbar?

Use HDMI ARC or eARC first if both devices support it.

Connect the LG ARC/eARC port to the soundbar ARC/eARC port, set LG Sound Out to HDMI ARC or external audio, and turn on Simplink.

Why is my LG TV not recognizing my soundbar?

The most common causes are using a non-ARC HDMI port, leaving Sound Out on internal speakers, keeping Simplink off, or leaving the soundbar on the wrong input.

Test with a built-in LG TV app after changing those settings.

Should LG Digital Sound Out be PCM, Auto, or Pass Through?

Use PCM first when troubleshooting because it is the safest basic format.

After sound works, try Auto or Pass Through if your soundbar supports the formats your LG TV is sending.

Can I connect a soundbar to an LG TV with optical?

Yes.

Connect LG Digital Optical Out to the soundbar Optical In, select Optical on the soundbar, and choose optical or external output in LG Sound Out.

Can an LG TV use a non-LG soundbar?

Yes.

An LG TV can work with most soundbar brands as long as the ports and settings match.

What matters more is HDMI ARC, eARC, optical, and Bluetooth support.

Connect Turntable To Soundbar — Phono Preamp, AUX, Optical & Bluetooth

Connect turntable to soundbar sounds simple until the record player is quiet, distorted, or impossible to plug into the ports on the back of the bar.

The real issue is not vinyl itself, but signal type.

Most turntables usually output phono-level audio unless they have a built-in preamp switched to line output, while most soundbars expect line-level analog audio, digital optical audio, or Bluetooth.

That mismatch is why the right setup starts with the turntable output first, not the soundbar brand.

Once the turntable signal is converted correctly, you’ll fix the no-sound problem fast: start with line out to AUX, then try a Bluetooth transmitter or an analog-to-digital converter for optical.

Quick Takeaway

To connect a turntable to a soundbar, the turntable must output line-level audio before it reaches the soundbar.

If your turntable has a built-in phono preamp, switch it to LINE and connect it to the soundbar’s AUX input with the right analog cable.

If the turntable has no built-in preamp, add an external phono preamp first. If the soundbar has only optical or Bluetooth, add the correct converter after the preamp.

Do not connect a raw phono output directly into a soundbar AUX input and expect normal volume.

Why Can’t Every Turntable Plug Straight Into A Soundbar?

A turntable is not the same kind of source as a TV, phone, or streaming box.

Many turntables send a very quiet phono-level signal that also needs RIAA equalization before it sounds normal.

A soundbar AUX input is usually looking for line-level audio.

That is the stronger, already-corrected signal you get from a phone headphone output, CD player, mixer output, or turntable with a built-in phono preamp switched to LINE.

If you send raw phono output into the soundbar, the result is usually extremely quiet, thin, noisy, or distorted after you raise the volume too far.

That does not mean the soundbar is broken.

It means the phono stage is missing.

This is the same kind of signal-level mistake that makes microphone setups fail, but the fix is different.

Mic-level voltage and phono-level voltage need different preamp gain stages, even though both look like “small audio source on short cable” from the soundbar input’s perspective — a turntable specifically needs a phono preamp with RIAA equalization before line level.

A regular mic preamp or tiny passive adapter does not automatically solve vinyl playback.

The clean path is turntable, then phono preamp if needed, then soundbar-compatible input.

That compatible input might be AUX, RCA line-in, optical through an analog-to-digital converter, or Bluetooth through a transmitter.

HDMI ARC is usually not the answer.

ARC is designed for a TV sending audio back to a soundbar, not for a turntable sending audio into the bar directly.

If your soundbar only has HDMI ARC and no AUX, optical, or Bluetooth input, it is a poor target for a turntable without extra conversion hardware.

If you are unsure what your soundbar even supports, most bars include AUX, Bluetooth, optical, and HDMI but accept different source types on each — the input map is what matters for a turntable, not the bar’s price tier.

Which Turntable Output Do You Have?

Start by looking for a PHONO/LINE switch on the turntable.

If the switch exists, the turntable has a built-in phono preamp.

Set it to LINE when connecting to a soundbar AUX input, Bluetooth transmitter, powered speaker input, or analog-to-digital converter.

Set it to PHONO only when connecting to a true phono input on a receiver, amplifier, DJ mixer, or external phono preamp.

Most soundbars do not have a true phono input.

If your turntable has RCA cables and a thin ground wire but no PHONO/LINE switch, assume it needs an external phono preamp.

The ground wire should connect to the preamp’s ground post when available.

That helps prevent the low hum that makes vinyl setups sound broken even when the audio path is correct.

If your turntable has Bluetooth built in, it can usually pair directly with a Bluetooth soundbar.

That is the simplest cable-free path, but it is not always the best-sounding path.

Bluetooth adds compression and can create connection delays, although delay matters less for records than it does for TV dialogue.

If your turntable has USB only, do not assume that USB will feed the soundbar.

Most soundbar USB ports are for firmware or file playback, not for acting as a live USB audio input from a turntable.

A quick output check prevents the biggest mistake.

You are not choosing the final cable yet; you are finding out whether the turntable signal is ready for the soundbar.

How Do You Connect A Turntable To A Soundbar With AUX?

AUX is the easiest soundbar input for a turntable because it accepts analog line-level audio.

The path is simple when the turntable has a built-in preamp.

Set the turntable switch to LINE, connect RCA out from the turntable to the soundbar AUX input with an RCA-to-3.5mm cable if needed, then select AUX on the soundbar.

Keep the turntable volume path simple during the first test.

Play a clean record, set the soundbar to a moderate volume, and raise it slowly.

If the sound is extremely quiet, the turntable is probably still sending phono-level audio.

If the sound is harsh and overloaded, the turntable may be feeding a signal that is too hot for the soundbar input, or the wrong input mode is selected.

When the turntable does not have a built-in preamp, add the external phono preamp between the turntable and soundbar.

The chain becomes turntable RCA into phono preamp, phono preamp line output into the soundbar AUX input.

Do not skip the preamp just because the plugs fit.

RCA connectors only tell you connector shape, not signal level.

AUX also makes troubleshooting easier than Bluetooth.

If AUX works, you know the turntable and preamp are producing usable audio.

After that, you can decide whether a wireless bridge is worth adding.

If AUX fails, solve that first before adding Bluetooth, optical converters, or a TV into the chain.

HDMI ARC, optical, and Bluetooth all route audio around the TV first, which is the opposite of what a turntable needs unless the TV is the only device with a usable input.

If the soundbar is brand-new and the AUX path still feels wrong, the standard power-on, input-select, TV Sound Out, source-device verification sequence once confirms the bar is awake before you blame the turntable.

What If The Soundbar Only Has Optical?

Optical soundbar input can work with a turntable, but only after the vinyl signal is converted in the correct direction.

A turntable is analog.

Optical input is digital.

That means you need an analog-to-digital converter after the phono preamp, not a normal DAC.

A DAC usually converts digital optical audio into analog RCA audio, which is the reverse of what this setup needs.

For a turntable feeding an optical-only soundbar, the chain is turntable, phono preamp if needed, analog-to-digital converter, optical cable, then soundbar optical input.

If your turntable already has a LINE output, that LINE output can feed the converter directly.

If your turntable only has PHONO output, the phono preamp must come before the converter.

Once the converter outputs optical, use a normal TOSLINK cable into the soundbar.

A simple TOSLINK optical cable is the final link in the chain.

It does not replace the phono preamp or the analog-to-digital converter.

This path is useful when the soundbar has optical but no AUX.

It is not always worth building if you are starting from scratch.

If the goal is serious vinyl listening, powered speakers or a small stereo amp may be cleaner than forcing an optical-only soundbar to act like a hi-fi system.

Optical stays stable once the signal is digital, while Bluetooth adds compression and pairing windows — that is why optical wins for the digital side of a turntable rig.

The hard part here is getting the turntable into that digital format correctly.

Can You Connect A Turntable To A Soundbar With Bluetooth?

Bluetooth is the easiest wireless option if the turntable already has Bluetooth output.

Put the soundbar into Bluetooth pairing mode, put the turntable into Bluetooth transmit mode, and pair them directly.

If the turntable has no Bluetooth, you need a Bluetooth transmitter after the phono preamp or LINE output.

The transmitter must receive line-level analog audio.

That means the phono preamp rule still applies.

A line-level Bluetooth transmitter can make sense when the turntable side already outputs a soundbar-ready signal and you would rather not run an analog cable across the room.

Budget transmitters do the same job at a lower cost when cable routing is the main problem rather than absolute sound quality.

Neither one magically fixes a raw phono output.

Bluetooth is convenient, but it is the least purist vinyl path.

The record is analog, the transmitter converts and compresses it, and the soundbar converts it again for playback.

That can still sound fine for casual listening in a living room.

It is just not the cleanest way to judge a cartridge, record pressing, or turntable upgrade.

If Bluetooth pairing keeps failing, clear the old pairing entry from both devices and repeat from scratch.

Bar into pairing mode first, source device scans second, single confirmation tone third is the brand-neutral pairing flow for any Bluetooth source, including a turntable with a built-in Bluetooth transmitter.

Should You Use The TV As The Middle Device?

Using the TV as the middle device only works when the TV can actually accept the turntable audio and send it onward.

Many modern TVs do not have analog audio inputs anymore.

Even when they do, the TV may not pass that analog input out to HDMI ARC or optical the way you expect.

That makes TV routing unpredictable for vinyl.

If the TV has RCA or 3.5mm input and the soundbar is already connected to the TV, you can test it.

The chain still needs line-level audio before the TV.

Turntable PHONO output into a TV input is the same mistake as PHONO output into a soundbar input.

If the turntable has a built-in preamp, switch it to LINE before feeding the TV.

If it does not, use an external phono preamp first.

Then set the TV input, confirm the TV can hear that source, and check whether the TV sends that audio to the soundbar.

If it fails, do not spend hours changing ARC settings.

The TV may simply not pass analog inputs to the soundbar path.

HDMI ARC carries TV-side audio back to the bar with HDMI-CEC remote control as a bonus — that path is built for TVs and consoles, not for a turntable that lacks HDMI output.

A direct connection to the soundbar or a dedicated converter is usually easier.

Why Is The Turntable Quiet, Humming, Or Distorted Through The Soundbar?

Quiet sound usually means the turntable is still sending phono-level audio.

Check the PHONO/LINE switch or add a phono preamp.

Thin sound with weak bass can point to the same missing phono stage because RIAA equalization is not being applied.

Hum usually means a grounding problem, a noisy analog cable path, or the turntable sitting too close to power gear.

If the turntable has a ground wire, connect it to the phono preamp ground post.

Keep analog cables away from power bricks and TV power cords during the first test.

Distortion usually means the signal is too hot, the soundbar input is overloaded, or the record/needle setup has its own issue.

Lower the soundbar volume, confirm the turntable is not feeding a headphone output at full volume, and test another record.

Bluetooth dropouts usually mean distance, pairing memory, or wireless interference.

Move the transmitter closer, clear old pairings, and do one pairing test with no other Bluetooth device trying to connect.

Optical silence usually means the converter is wrong-direction, not powered, or set to the wrong input.

Remember the direction: analog from the turntable side must become digital optical for the soundbar.

If you bought a converter with optical input and RCA output, that is a DAC for the opposite job.

If the setup feels too adapter-heavy, that is a sign to reconsider the target.

A soundbar can play vinyl, but it is not always the best tool for vinyl.

Passive stereo speakers driven by a discrete amp give wider soundstage and cleaner phono-stage compatibility when the real question is whether a speaker pair would make more sense for records than any soundbar can.

If You Decide To Upgrade To A Turntable-Friendly Soundbar

If the current soundbar makes this harder than it should — no AUX, no Bluetooth, no optical — the cleanest fix is sometimes a soundbar with the right inputs rather than more adapters.

The most turntable-friendly pick on this list is the Sound Bar with Bluetooth, ARC, Optical and AUX because it gives you AUX, Bluetooth and optical on one bar.

If you also want a wireless subwoofer and a stronger long-term review history, the Polk Audio Signa S2 Sound Bar with Subwoofer is the volume choice with over twenty thousand reviews, with Bluetooth available for a wireless turntable bridge.

For a 5.1-channel option with stronger surround coverage, the ULTIMEA 5.1CH Surround Sound Bar with Subwoofer works when the turntable is one source among many.

The Amazon Fire TV Soundbar Plus with built-in subwoofer is a compact all-in-one that still accepts Bluetooth from a turntable transmitter.

For a Samsung-ecosystem pick at a moderate price, the Samsung B-Series Soundbar HW-B550F covers the same brief in the Samsung ecosystem.

Music-tuned bars ranked by midrange clarity, wide stereo separation, and balanced (not bass-heavy) response are the better next stop when vinyl is your main use case.

The Bottom Line

Connect turntable to soundbar by fixing the signal level first.

If the turntable has LINE output and the soundbar has AUX, use that path.

If the turntable only has PHONO output, add a phono preamp before anything else.

If the soundbar only has optical, add an analog-to-digital converter after the preamp.

If you want wireless convenience, use Bluetooth only after the turntable signal is already line-level.

Do not treat connector shape as proof that the setup is right.

RCA, AUX, optical, Bluetooth, and HDMI ARC all carry different assumptions.

Once those assumptions match, the setup becomes much easier to debug.

If you want the broader soundbar connection map, start from the soundbar hub and then choose the guide that matches the input you actually have.

Frequently Asked Questions

Can I plug a turntable directly into a soundbar?

Yes, but only if the turntable outputs line-level audio and the soundbar has a compatible input such as AUX, RCA line-in, Bluetooth, or optical through the right converter.

A raw phono output should not go directly into a soundbar AUX input.

Do I need a preamp to connect a turntable to a soundbar?

You need a phono preamp unless the turntable already has one built in and switched to LINE.

The preamp raises the signal and applies the correction vinyl playback needs before the soundbar can play it normally.

Can I connect a record player to a soundbar with Bluetooth?

Yes, if the record player has Bluetooth output or if you add a Bluetooth transmitter after a line-level output.

Bluetooth is convenient, but a wired AUX path is usually cleaner when sound quality matters most.

Can optical connect a turntable to a soundbar?

Optical can work only after the analog turntable signal is converted to digital optical.

Use a phono preamp first when needed, then an analog-to-digital converter, then an optical cable into the soundbar.

Why is my turntable very quiet through my soundbar?

The usual cause is missing phono preamp gain.

Switch the turntable to LINE if it has a built-in preamp, or add an external phono preamp before the soundbar.

Can You Connect Two Soundbars Together? What Works, What Breaks & Better Options

Can you connect two soundbars together? Usually not in the way people hope.

Two soundbars cannot normally become a true left-right pair, rear surround system, or bigger home theater, but the idea keeps getting tried because both bars can technically play audio at the same time.

Most soundbars are closed all-in-one systems with their own processing, delays, volume control, and input switching.

When you force two of them to play the same TV signal, you often get echo, lip-sync mismatch, comb filtering, uneven volume, or a setup that only works until one bar changes input.

There are a few narrow workarounds you’ll see below, but the better answer is usually same-brand rear speakers, one stronger soundbar system, or a real receiver-based speaker setup.

Quick Takeaway

You usually should not connect two soundbars together for one TV room.

Most TVs and soundbars are not designed to sync two separate bars as one system, so Bluetooth, optical splitters, AUX splitters, and HDMI tricks often create delay, echo, or control problems.

The practical alternatives are same-brand wireless rear speakers, a soundbar package that already includes surrounds, or an AV receiver with separate speakers.

Use two soundbars only for separate rooms or separate listening zones, not as fake surround channels in the same seating area.

Can Two Soundbars Play From The Same TV?

Two soundbars can sometimes receive the same audio signal, but that does not mean they will work well together.

A TV may be able to send audio through one wired output and one wireless output.

Some TVs can pair more than one Bluetooth device.

Some people also try optical splitters, AUX splitters, or HDMI audio extractors.

Those methods can make two bars make sound.

The problem is synchronization.

Each soundbar processes audio internally before it reaches the speakers.

One bar may add virtual surround processing, dialogue enhancement, bass management, or wireless subwoofer delay.

The other bar may add a different delay.

Even a small timing difference can make dialogue sound smeared or doubled.

If the bars are near each other, you may hear hollow tone, phase cancellation, or a strange wide-but-blurry sound.

If one bar is behind you, it will not become a real surround channel.

It will usually play the same front mix late, which makes the room feel less clear instead of more immersive.

That is why the better question is not “Can both bars play?”

The better question is “Can they play the right channels at the same time?”

For most consumer soundbars, the answer is no.

The real surround upgrade path uses same-brand wireless rears that share processing and timing with the main bar explains why a second generic bar cannot replace true rear speakers.

Why Do Two Soundbars Usually Sound Worse Together?

Two separate soundbars usually sound worse because they are not sharing one clock, one processor, or one channel map.

A proper surround system knows which speaker should play each channel.

The center channel handles dialogue.

The left and right channels create width.

Surround channels play effects behind or beside you.

Two independent soundbars do not know any of that.

They both try to act like the main front sound system.

That means both may play dialogue, bass, and effects at the same time.

If one is even slightly delayed, voices become cloudy.

If the bars process bass differently, the low end can boom in one seat and vanish in another.

If both bars use virtual surround, the processing can fight itself.

Instead of getting a larger sound field, you get two front-stage processors making different guesses about the same signal.

Bluetooth makes this worse.

Bluetooth delay is too high and too variable for synchronized room audio.

Even if a TV can output to two Bluetooth devices, the result is usually not tight enough for movie dialogue or gaming.

Optical or AUX splitters are more stable physically, but they still do not solve processing delay inside each bar.

HDMI ARC is not a simple two-output audio feed either.

ARC is a return-audio link between the TV and one audio system.

Most TVs are not built to send one ARC stream to two independent soundbars and keep volume, power, and formats synchronized.

A regular HDMI port on the bar takes audio from a source while the ARC/eARC port returns audio from the TV helps explain why those two ports are not interchangeable for a two-bar attempt.

Can You Use One Soundbar In Front And One Behind You?

Putting one soundbar under the TV and one behind the couch sounds like a cheap surround trick, but it rarely works well.

The rear soundbar will not receive rear-channel audio unless the system was designed to send it rear-channel audio.

Most splitter setups send the same stereo or TV mix to both bars.

That means dialogue plays behind you.

Bass may come from the wrong direction.

Effects that should move around the room become duplicated instead of placed.

If the rear bar is delayed by Bluetooth or internal processing, it becomes an echo.

If it is louder than the front bar, it pulls attention away from the screen.

If it is quieter, it adds little except smear.

There are niche cases where a rear soundbar can act like a background fill speaker for parties, sports, or casual music.

That is not surround sound.

It is just duplicated audio in another part of the room.

For movie watching, a rear soundbar is usually worse than no rear bar at all.

Use rear speakers only when they are supported by the main soundbar or by an AV receiver.

Same-brand rear kits exist because timing matters.

They connect through the manufacturer’s wireless system and receive the correct channel information.

A second soundbar does not get that information.

If you want the room to sound bigger without rear speakers, use the soundbar’s own virtual surround mode and placement correctly.

A 2.1, 3.1, 5.1, or Atmos layout describes how processing splits the source across drivers, not how many physical boxes are in the room — that is why adding another speaker box does not become 5.1.

What About Optical, AUX, Bluetooth, Or HDMI Splitters?

Splitters can duplicate a signal, but they cannot turn two soundbars into one controlled audio system.

An optical splitter can send the same digital audio to two optical inputs.

That may work for simple stereo playback if both bars are near the TV and you keep processing modes off.

It still gives you no shared volume control, no channel assignment, and no guarantee that both bars process at the same speed.

An AUX splitter can feed two bars with analog input.

It has the same problems plus extra noise and level issues if the cable run is long.

Bluetooth dual-audio features are convenient for headphones, but they are a poor foundation for TV soundbars.

Latency and sync drift are the enemy.

Two Bluetooth soundbars can make dialogue feel detached from the screen.

HDMI splitters and extractors are also not a clean answer.

A splitter may send HDMI audio to two devices, but CEC, ARC, eARC, HDCP, format support, and volume control can all become fragile.

The more adapters you add, the harder it gets to know which device caused the failure.

If you only want a test cable for a normal single-bar ARC setup, use a known-good HDMI lead rather than building a two-bar workaround.

Any known-good HDMI 2.1 cable that supports ARC or eARC is useful for the correct one-bar connection.

If ARC keeps failing and you need a stable fallback, optical is cleaner than a two-soundbar setup.

Any simple TOSLINK optical cable solves the basic TV-audio connection without adding sync problems.

When Does Using Two Soundbars Make Sense?

Two soundbars can make sense when they are not trying to be one sound system.

Use one soundbar in the living room and another in a bedroom.

Use one soundbar for a TV and another for a desk or gaming monitor.

Use two bars in separate zones for casual music if your app, TV, or source can handle multi-room playback.

Even then, treat them as separate systems.

Do not expect one TV remote to control both perfectly.

Do not expect matching volume curves.

Do not expect both bars to decode the same formats.

If the goal is party audio, duplicated sound across zones can be acceptable.

If the goal is movie surround, it is the wrong tool.

Some brand ecosystems support multi-room audio through apps.

Sonos, Bose, Apple AirPlay, Chromecast, and some TV platforms can group speakers for music.

That is different from surround sound.

Multi-room grouping is built for whole-home playback, not precise front-rear movie effects.

If you already own two soundbars, the least-bad same-room test is to keep them both in front, turn off surround modes, set one source, and listen for echo.

If dialogue gets cloudy, stop.

That cloudiness is the timing problem you cannot fully fix with volume alone.

What Should You Do Instead Of Connecting Two Soundbars?

The right alternative depends on what you wanted the second soundbar to fix.

If you wanted surround effects, buy the same-brand rear speaker kit for your compatible soundbar.

Check the app or manual for supported rear speakers before buying anything.

If your current bar does not support rears, upgrade to a soundbar package that includes rear speakers.

That gives you one processor, one channel map, and one synced wireless system.

If you wanted more bass, add the matching wireless subwoofer if your bar supports it.

A second soundbar is not a subwoofer.

If you wanted louder sound, upgrade to a stronger soundbar rather than stacking two weaker ones.

Two small bars playing the same signal are not the same as one bar designed for the room.

If you wanted true speaker placement and upgrade flexibility, switch to an AV receiver.

A receiver can power separate front, center, surround, and subwoofer channels correctly.

It also gives you a real upgrade path.

A full home theater AVR plus discrete speakers can drive timed 5.1 or 7.1 the way a soundbar pair cannot explains when that bigger move actually makes sense.

For a soundbar-first upgrade, the Atmos picks ranked by real up-firing drivers rather than virtual-only height processing are the most relevant next step rather than chaining two bars.

For channel decisions, compare 2.1 vs 5.1 soundbars before buying another bar that still cannot do what you want.

If you need a clean one-bar TV connection before upgrading anything, the brand-neutral HDMI ARC, optical, and Bluetooth setup paths are where to start.

Better Single-Bar Or Matched-System Replacements

If you came here trying to solve a real audio problem rather than a two-bar curiosity, one well-chosen replacement bar is almost always cleaner than chaining two.

For a budget all-in-one with every common input, the Sound Bar with Bluetooth, ARC, Optical and AUX covers the basic TV-audio problem with a single bar.

For a 5.1-channel matched system with dedicated bass, the ULTIMEA 5.1CH Surround Sound Bar with Subwoofer handles surround the right way.

For a compact all-in-one with a built-in subwoofer, the Amazon Fire TV Soundbar Plus with built-in subwoofer is the simplest single-bar upgrade.

For a premium Atmos pick that supports a real rear-speaker ecosystem later, the Sonos Arc Ultra Soundbar with Dolby Atmos and Voice Control is the long-term upgrade path.

For a brand-aligned Samsung pick at a moderate price, the Samsung B-Series Soundbar HW-B550F covers the brief in the Samsung ecosystem.

How Do You Troubleshoot If You Already Connected Two Soundbars?

If you already connected two soundbars and hate the result, simplify the system.

Turn one soundbar off and make the main bar work by itself first.

Use one connection type.

HDMI ARC or eARC should go to one bar.

Optical should go to one bar.

Bluetooth should go to one bar.

Once the main bar works, turn off extra processing modes such as virtual surround, night mode, dialogue boost, or bass enhancement during testing.

Then add the second bar only if you still want to experiment.

Keep both bars in front, set both to simple stereo if possible, and play dialogue.

If voices sound doubled, hollow, or late, the bars are out of sync.

Changing volume may hide the issue, but it does not fix timing.

If one bar has an audio delay setting, you can try small adjustments.

Most soundbars do not offer enough fine control to sync two independent processors perfectly.

If the issue is one bar turning on or off with the TV and the other not following, that is expected.

CEC and ARC control are built around one audio system, not two separate bars.

If you used Bluetooth for one bar and optical for the other, expect delay.

The Bluetooth bar will usually lag behind the wired bar.

If you used splitters and the volume controls do not match, that is also expected.

Two independent soundbars keep their own volume and sound modes.

At that point, the stable fix is not another adapter.

The stable fix is one properly connected soundbar or a system designed for multiple speakers.

The Bottom Line

You can sometimes make two soundbars play from the same TV, but you usually should not.

They will not become true surround speakers.

They will not behave like one larger soundbar.

They will not share channel mapping, timing, or volume control the way a real system does.

For movies, TV, and gaming, one correctly connected soundbar is usually clearer than two unsynced bars.

If you want surround, use same-brand wireless rear speakers, a soundbar package with included surrounds, or an AV receiver setup.

If you want bigger sound, upgrade the main bar or add the matching subwoofer.

If you only want separate-room audio, use the two soundbars as separate systems instead of forcing them into one TV setup.

For the wider setup map, start with the soundbar hub, then soundbar vs receiver comparison covers when a discrete AVR is worth the rack space, and Atmos object audio versus 5.1 channel-based mixing covers which format your room actually benefits from before buying another adapter.

Frequently Asked Questions

Can you connect two soundbars to one TV?

Sometimes you can make two soundbars receive audio from one TV through split outputs, Bluetooth dual audio, or adapters.

That does not mean they will stay synced or behave like one system.

Can two soundbars create surround sound?

No, not in a normal consumer setup.

A second soundbar will usually play duplicated front audio, not true rear-channel surround audio.

Can I use one soundbar in front and one behind me?

You can physically do it, but it usually creates echo, cloudy dialogue, and incorrect sound placement.

Use same-brand rear speakers or a receiver-based surround system instead.

Can Bluetooth connect two soundbars together?

Bluetooth is not a good way to sync two soundbars for TV audio.

The delay is usually too high and too variable for clear dialogue, movies, or gaming.

What is better than connecting two soundbars?

Use one stronger soundbar, a compatible rear-speaker kit, a soundbar system with included surrounds, or an AV receiver with separate speakers.

Those options solve timing and channel mapping instead of duplicating the same signal twice.

Bose Soundbar Blinking Orange Light — What To Check Before You Reset It

Bose soundbar blinking orange light is frustrating because the bar often looks alive but refuses to behave normally.

The important detail is that orange, amber, and blinking patterns are not one universal Bose error code across every model.

On Bose smart soundbars, an amber or orange light can point toward setup, Wi-Fi, app notification, update, voice assistant, or connection status depending on the model and pattern.

That means the best fix is not to factory reset first.

Start by identifying the light pattern, then check the Bose app, power-cycle cleanly, and follow the steps below for rebuilding Wi-Fi, HDMI ARC, optical, or Bluetooth only after you know which part is failing.

If you are new to Bose soundbars in general, a healthy bar shows a steady power LED, responds to remote input changes, and outputs sound on the selected input sets the baseline for how a Bose bar should behave when nothing is wrong.

Quick Takeaway

If your Bose soundbar is blinking orange or amber, open the Bose app first and check for setup prompts, updates, notifications, or connection warnings.

Then unplug the soundbar and TV for one minute, restart the router if Wi-Fi is involved, and test one audio connection at a time.

Do not factory reset first unless the app or Bose support flow tells you to, because a reset can erase setup without fixing the real Wi-Fi, HDMI ARC, or update problem.

If the light changes after a power cycle, the bar was probably stuck in a temporary state. If it returns immediately, follow the connection-specific checks below.

What Does A Blinking Orange Bose Soundbar Light Usually Mean?

Treat the blinking orange or amber light as a status clue, not a single diagnosis.

Bose uses different light behavior across SoundTouch, Smart Soundbar, Soundbar 300, Soundbar 500, Soundbar 700, Smart Soundbar 600, Smart Soundbar 900, and Smart Ultra models.

A pulsing or blinking amber pattern may appear during setup, Wi-Fi connection, update behavior, notification states, or voice-assistant/app issues depending on the product.

That is why the first question is not just “What color is it?”

The first question is what the bar was doing when the light appeared.

If it started during first setup, the bar may be waiting for app setup or Wi-Fi.

If it started after a network change, the bar may be failing to reconnect.

If it appeared after an update, the bar may be stuck finishing or recovering from that update.

If it appears only when using Alexa, Google Assistant, AirPlay, Spotify, or the Bose app, the issue may be service or account related rather than audio hardware.

If it appears after HDMI ARC stopped working, the orange light may be a side effect of the bar being awake but not receiving a clean TV connection.

Do not jump straight to factory reset.

A reset can remove the bar from the Bose app, erase network setup, and still leave you with the same router, TV, cable, or account problem.

The soft-reset-first, factory-reset-last escalation explains why resets should come after the lighter app, power, and input checks rather than as the first move.

For Bose specifically, the Bose app is the best first place to look because it can show setup, update, or service prompts that the front light cannot explain by itself.

What Should You Check In The Bose App First?

Open the Bose Music app or the correct Bose app for your soundbar generation.

Make sure the app can still see the soundbar.

If the app shows a setup prompt, finish setup before changing cables.

If the app shows an update prompt, let the update complete with stable power and Wi-Fi.

If the app shows a notification or account prompt, clear that before you assume the bar is broken.

Some orange or amber behavior is easy to misread from the front of the bar because the light cannot tell you whether the issue is Wi-Fi, voice assistant, account state, or update status.

The app can often separate those.

If the app cannot find the soundbar, move your phone near the bar and confirm the phone is on the same Wi-Fi network you expect the bar to use.

Turn off VPNs temporarily during setup if they block local device discovery.

Restart the Bose app, then restart the phone if needed.

If the app still cannot see the bar, power-cycle the soundbar and router before you reset the soundbar.

Unplug the soundbar for one minute.

Restart the router if the orange light appeared after a Wi-Fi change or outage.

Then reopen the app and wait for the bar to reappear.

If the app sees the bar but audio still fails, move to the connection you actually use for TV sound.

The brand-neutral HDMI ARC, optical, and Bluetooth setup paths are the better next step when the Bose app is fine but the TV is not sending audio.

How Do You Power-Cycle A Bose Soundbar Without Making It Worse?

A clean power cycle is the safest first fix for a blinking orange Bose soundbar.

Turn off the TV and soundbar.

Unplug the soundbar power cable from the wall.

If the problem involves TV audio, unplug the TV too.

Wait at least one minute.

Reconnect the TV first and let it fully boot.

Reconnect the Bose soundbar second and give it time to reconnect to the app and network.

Do not press every button while the bar is booting.

Many smart soundbars need time to reconnect to Wi-Fi, services, and the TV audio return connection.

After it boots, check the Bose app before testing audio.

If the light disappears, the bar may have been stuck in a temporary update, network, or handshake state.

If the light returns, note exactly when it returns.

Does it return before the TV turns on?

Does it return only after the TV switches to HDMI ARC?

Does it return only when the voice assistant wakes?

Does it return only when the app tries to update?

That timing tells you where to go next.

If the issue follows TV power or ARC wake behavior, check HDMI ARC.

If it follows Wi-Fi setup, check network.

If it follows Bluetooth, clear the pairing and rebuild it.

If it follows every source and the app cannot complete setup, then a deeper reset may be justified.

How Do You Fix Bose Orange Light From Wi-Fi Or Setup Problems?

If the orange light appears during setup or after a router change, focus on Wi-Fi before audio cables.

Open the Bose app and confirm the soundbar is assigned to the correct home, account, and Wi-Fi network.

If the router name or password changed, the bar may still be looking for the old network.

Put the phone near the bar and router during setup.

Use the normal home Wi-Fi rather than a guest network if the app needs local device discovery.

Restart the router and wait until Wi-Fi is fully back before restarting the soundbar.

If the bar supports Ethernet and you have a convenient port, test Ethernet only as a troubleshooting step.

Do not permanently move the whole setup until you know the orange light is really network-related.

If the Bose app shows an update, keep the bar powered and let the update finish.

Interrupting updates can keep the bar in a stuck state that looks like a connection problem.

If an update appears stuck for a long time, power-cycle the bar once and reopen the app.

Do not repeat factory resets back to back.

That can make setup harder without fixing the router, app, or account state.

If the orange light is tied to a voice assistant, check the assistant account and microphone status in the Bose app.

A service prompt or notification can look like a hardware warning when the bar is actually waiting for app attention.

How Do You Fix Bose Orange Light With HDMI ARC Or eARC?

If the orange light appears when the TV wakes or when you switch to TV audio, check HDMI ARC or eARC.

Make sure the HDMI cable is in the TV port labeled ARC or eARC.

On the Bose side, use the port labeled HDMI ARC, eARC, TV ARC, or HDMI OUT depending on the model.

Set the TV sound output to receiver, audio system, external speaker, or HDMI ARC.

Turn on the TV’s HDMI control setting.

That setting may be called CEC, Simplink, Anynet+, Bravia Sync, Viera Link, or another brand label.

If the TV has eARC mode, set it to Auto or On only when the Bose bar supports eARC.

If audio fails after changing eARC settings, power-cycle both devices.

ARC handshakes often do not rebuild cleanly while the TV and soundbar are half awake.

Use one known-good HDMI cable for the first test.

Any known-good HDMI 2.1 cable that supports ARC or eARC is a clean baseline if the old cable is questionable.

If ARC keeps failing, test optical for a few minutes.

If optical plays sound, the Bose speaker hardware is likely working and the real issue is the ARC path, TV control setting, or handshake.

The full ARC chain — HDMI-CEC on, ARC-labeled port confirmed, TV Sound Out set to external, bar on HDMI input is the checklist to run before the orange light becomes the headline failure.

HDMI ARC carries Atmos and HDMI-CEC; optical carries Dolby Digital and stereo but drops Atmos and CEC entirely helps decide whether optical is a better daily fallback when ARC keeps disconnecting.

How Do You Fix Bose Orange Light With Optical Or Bluetooth?

If your Bose soundbar uses optical, make sure the TV optical output is active and the bar input is set to optical.

Optical carries audio only, so it will not solve app, Wi-Fi, or voice-assistant prompts by itself.

It is still useful as a stable audio test.

Use the TV Digital Audio Out or Optical Out port and the Bose optical input.

Set the TV digital audio format to PCM for the first test.

If PCM works, try Auto or Dolby Digital only if the Bose model supports it over optical.

Any simple TOSLINK optical cable is enough for that test.

If the orange light appears around Bluetooth use, clear old pairings.

Remove the Bose soundbar from the phone, TV, or source device.

Then put the soundbar back into pairing mode and connect only one device during the test.

If the orange light is tied to a bass module or surround accessory rather than the bar itself, the safe re-pair sequence — bar in pairing mode first, accessory power-cycled second, single LED solid third covers what to do after a firmware update breaks the link.

Bluetooth can make troubleshooting messy because another phone or tablet may reconnect before the device you intended to use.

If Bluetooth audio works but Wi-Fi app control still fails, the soundbar audio section is not the whole problem.

The app or network side still needs attention.

If neither optical nor Bluetooth produces sound after the app is normal, the input-swap test — change the source device, swap TV, try a known-good audio output separates input failure from soundbar failure.

When Should You Reset A Bose Soundbar With An Orange Light?

Reset only after lighter checks fail or after the Bose app points you there.

Start with app prompts, power cycle, Wi-Fi restart, cable check, and one known-good input.

If those steps do not change anything, then a reset becomes more reasonable.

Before resetting, write down the current setup.

Note the Wi-Fi network, app account, TV connection type, soundbar input, and whether accessories like bass modules or surround speakers are paired.

A factory reset can remove those links.

That means the reset may create more setup work before you know whether the original issue is gone.

If you reset, rebuild the system one piece at a time.

Add Wi-Fi and app control first.

Then add the TV connection.

Then add Bluetooth, voice assistant, bass module, or surround speakers.

Do not reconnect everything at once.

If the orange light returns immediately after only Wi-Fi setup, the problem is not the TV cable.

If it returns only after ARC setup, the problem is probably the TV return connection.

If it returns only after a voice-assistant setup, check the assistant account, microphone, and app permissions.

If the reset changes nothing and the bar fails across every input, the issue may be hardware or firmware rather than normal setup.

At that point, stop repeating resets and use Bose support with the exact model and light pattern.

Why Does The Bose Light Return After Every Fix?

A repeating orange light usually means the real trigger has not been isolated.

If it returns at boot, focus on app setup, firmware, or network connection.

If it returns when TV audio starts, focus on HDMI ARC, optical, or TV output settings.

If it returns when a voice assistant is used, focus on assistant setup, microphone status, notification state, or account permission.

If it returns after the router changes, focus on Wi-Fi credentials and local device discovery.

If it returns after a power outage, power-cycle the TV, router, and soundbar in a clean order.

Router first, TV second, soundbar third is often the easiest order when the issue is network plus TV audio.

A full-chain HDMI test can also help if the issue is tied to TV wake behavior.

For rooms with multiple HDMI devices, a two-pack of fresh HDMI 2.1 cables can help isolate a weak cable path.

Use it only when HDMI is actually part of the symptom.

Do not buy HDMI cables for a Wi-Fi setup prompt.

Do not reset the soundbar for a TV still set to internal speakers.

Do not keep switching Bluetooth devices if the Bose app is warning about setup or updates.

The fastest fix is the one that matches when the orange light appears.

If The Bose Bar Cannot Be Fixed

If the orange light keeps returning after a clean app check, power cycle, Wi-Fi rebuild, ARC retest, optical fallback, and a final factory reset, the bar may be past saving.

At that point a known-good replacement soundbar is more practical than another reset cycle.

For a premium Atmos pick that keeps the same all-in-one feel as a Bose smart bar, the Sonos Arc Ultra Soundbar with Dolby Atmos and Voice Control is the closest cross-brand equivalent.

For a 3.1.2-channel Atmos pick at a more moderate price, the Hisense AX3120Q 3.1.2Ch Sound Bar with Wireless Subwoofer covers the Atmos brief at a lower entry price.

For a 5.1-channel Atmos pick with the strongest bass-to-price ratio in this list, the ULTIMEA 5.1CH Surround Sound Bar with Subwoofer is the budget surround pick.

For a compact all-in-one with built-in subwoofer that still handles Atmos, the Amazon Fire TV Soundbar Plus with built-in subwoofer is the simplest replacement when you want to retire the Bose ecosystem entirely.

If you also use a PC desk setup, the Razer Leviathan V2 Multi-Driver PC Gaming Soundbar with Subwoofer is a niche pick when the Bose was actually a desk bar.

The Bottom Line

A Bose soundbar blinking orange light should be handled in order.

Check the Bose app first.

Power-cycle the soundbar, TV, and router if the issue involves Wi-Fi or TV audio.

Then test the one connection you actually use: HDMI ARC, optical, or Bluetooth.

Use PCM for optical troubleshooting and a known-good HDMI cable for ARC troubleshooting.

Save factory reset for after app, power, network, and connection checks fail.

The orange or amber light is not one universal diagnosis across every Bose soundbar, so the timing and model matter.

If the light returns after every clean test, collect the exact model name, light pattern, app message, and connection type before contacting Bose support.

If you need broader setup help after the light is gone, start with the soundbar hub, the Bose Music app sequence — phone on the same Wi-Fi as the bar, app discovery, network credentials covers Wi-Fi re-onboarding, and distortion at any volume, dead channel, or random shutoff are the hardware-failure symptoms to check if the orange light returns.

Frequently Asked Questions

Why is my Bose soundbar blinking orange?

A blinking orange or amber Bose soundbar light can point to setup, Wi-Fi, update, app notification, voice assistant, or connection status depending on the model and pattern.

Open the Bose app first because it can show the prompt the front light cannot explain.

Should I factory reset my Bose soundbar if the light is orange?

Not first.

Power-cycle the bar, check the Bose app, confirm Wi-Fi or TV audio settings, and test one input before factory resetting.

Can HDMI ARC cause a Bose soundbar orange light problem?

It can be related if the light appears when the TV wakes or when ARC audio starts.

Check the ARC port, TV sound output, HDMI control setting, eARC mode, and cable before blaming the soundbar hardware.

Does optical fix a Bose blinking orange light?

Optical can prove whether the soundbar can still receive TV audio, but it does not fix Wi-Fi, app, update, or voice-assistant prompts.

Use optical as a stable audio test, not as a universal light-code fix.

Why does my Bose soundbar orange light come back after unplugging it?

The underlying trigger is probably still present.

Check whether the light returns during boot, Wi-Fi setup, TV ARC use, Bluetooth pairing, voice assistant use, or app update, then troubleshoot that specific trigger.

Troubleshoot LG Soundbar Issues — No Sound, ARC, Subwoofer, Bluetooth & Reset Fixes

Troubleshoot LG soundbar issues by starting with the symptom, but don’t factory reset everything as the first move.

LG soundbar problems usually fall into a few repeatable groups: no TV audio, HDMI ARC or eARC not waking up, optical silence, Bluetooth pairing failure, wireless subwoofer dropouts, remote-control problems, or sound that is delayed or stuck in stereo.

Each symptom points to a different part of the system.

If you walk through the steps in the right order, you can tell whether the failure is the LG TV Sound Out menu, the soundbar input, the cable, Simplink, the subwoofer link, Bluetooth memory, or the bar itself.

That keeps you from wiping settings when a simple Sound Out or input correction would have fixed the room.

Quick Takeaway

For LG soundbar issues, first match the soundbar input to the connection you are using: HDMI ARC/eARC, Optical, Bluetooth, or another source.

Then check the TV Sound Out menu, Simplink for ARC, Digital Sound Out format, and the physical cable or wireless pairing.

Use PCM when testing no-sound problems, optical as a stable fallback when ARC fails, and a clean power cycle before any factory reset.

Only reset the LG soundbar after you isolate whether the problem is TV audio, Bluetooth, subwoofer pairing, or the soundbar itself.

What LG Soundbar Problem Are You Actually Having?

Start by naming the symptom.

If the LG soundbar powers on but there is no TV sound, the problem is usually input, Sound Out, ARC, optical, or digital audio format.

If the TV remote no longer controls volume, the issue is usually Simplink, HDMI control, ARC, or the wrong output mode.

If the wireless subwoofer light keeps blinking, the issue is the subwoofer link, distance, power, or pairing state.

If Bluetooth will not connect, the issue is pairing memory, BT mode, distance, or another device already connected.

If audio is delayed, the issue is processing, Bluetooth delay, TV audio delay, or a source-device setting.

If the bar shuts off or freezes, the issue may be auto-standby, power, firmware, overheating, or hardware failure.

That symptom map matters because different LG fixes are easy to mix up.

Changing Digital Sound Out will not pair a subwoofer.

Resetting Bluetooth will not fix an HDMI cable in the wrong ARC port.

Factory resetting the bar will not fix a TV still set to internal speakers.

Use the symptom to choose the next section.

If the problem is general TV setup rather than an LG-specific failure, the brand-neutral HDMI ARC, optical, and Bluetooth setup paths cover the wider map.

If the LG TV connection itself is the missing piece, the Sound Out, Simplink, eARC, and Digital Sound Out menu sequence that actually completes the handshake is the setup pass to run after this troubleshooting.

Why Is There No Sound From An LG Soundbar?

No sound from an LG soundbar usually comes from the audio path, not from a dead speaker.

First, confirm the soundbar input.

If the TV is connected over HDMI ARC, the LG soundbar must be on ARC, eARC, TV ARC, or the matching HDMI TV input.

If the TV is connected over optical, the bar must be on Optical, OPT, or D.IN.

If the source is Bluetooth, the bar must be in BT mode and paired to the right device.

Second, check the TV audio output.

On an LG TV, open Sound Out and select HDMI ARC, Optical, wired speaker, external speaker, or the matching output for your connection.

If Sound Out is still on Internal TV Speaker, the soundbar may stay silent even when the cable is connected.

Third, check Digital Sound Out.

Set it to PCM for the first test.

PCM is not always the best final surround setting, but it is the safest no-sound test because nearly every soundbar can decode it.

If PCM works and Auto or Pass Through fails, the issue is sound format compatibility rather than the cable.

Fourth, test a built-in TV app.

If a built-in app works but a cable box, console, or streamer does not, the external device may be outputting a format the TV or soundbar is not passing correctly.

Any known-good HDMI 2.1 cable that supports ARC or eARC helps only after the port and Sound Out settings are right.

The input-swap test — change source device, swap TV, try a known-good audio output is the broader next step if the silence is not only an LG-specific issue.

How Do You Fix LG HDMI ARC Or eARC Problems?

LG ARC problems usually come from the port, Simplink, eARC mode, Sound Out, or a stale handshake.

Use the LG TV HDMI port labeled ARC or eARC.

Use the soundbar port labeled TV ARC, HDMI OUT, ARC, or eARC.

Do not use a normal HDMI input on the TV or a source-device HDMI input on the soundbar for TV return audio.

Open the LG TV settings and choose the soundbar in Sound Out.

Turn on Simplink.

Simplink is LG’s HDMI control layer, and ARC often misbehaves when it is off.

If both devices support eARC, turn eARC on or set it to Auto.

If eARC makes the setup unstable, test standard ARC with simpler audio settings before assuming the bar is bad.

Power-cycle after changing ARC or eARC settings.

Unplug the LG TV and soundbar for one minute.

Reconnect the TV first, let it boot, then reconnect the soundbar.

ARC handshakes often need a full restart after settings changes.

If ARC still fails, test optical.

If optical works, the LG soundbar hardware is likely fine and the issue is ARC, CEC, eARC, or HDMI negotiation.

If optical also fails, the issue may be the TV output, soundbar input, or the bar itself.

The full return-audio chain — HDMI-CEC on, ARC-labeled port confirmed, TV Sound Out set to external, bar on HDMI input is the setup beneath Simplink and worth knowing brand-neutrally.

A regular HDMI port on the bar takes audio from a source while the ARC/eARC port sends audio back from the TV — confusing the two ports is the most common reason the LG or soundbar HDMI labels look broken.

How Do You Fix LG Optical Soundbar Problems?

Optical is the clean fallback when ARC is missing or unreliable.

Connect the TV Digital Optical Out port to the LG soundbar Optical In port.

Remove the plastic caps from both ends of the optical cable.

Set the LG soundbar input to Optical, OPT, or D.IN.

Then set the TV Sound Out to Optical, Optical/HDMI ARC, wired speaker, or external speaker depending on the TV menu.

Set Digital Sound Out to PCM for the first test.

If sound appears, the cable and basic audio path work.

After that, you can try Auto or Dolby Digital if the soundbar supports it.

If there is no sound, check whether the optical cable is fully seated.

A TOSLINK plug has a specific shape and may feel connected when it is not fully in.

Any simple TOSLINK optical cable is enough to rule out a bad or missing optical lead.

Optical will not carry LG remote volume commands by itself.

If optical sound works but volume control does not, that is normal.

Use the soundbar remote, an IR learning feature if your model supports it, or HDMI ARC when one-remote control matters.

HDMI ARC carries Atmos via eARC and HDMI-CEC; optical carries Dolby Digital and stereo but drops Atmos and CEC entirely covers that tradeoff in more detail.

How Do You Fix An LG Wireless Subwoofer Not Pairing?

An LG wireless subwoofer issue is separate from TV audio.

The main soundbar can play dialogue while the subwoofer stays disconnected.

Check the subwoofer power light first.

If it is off, confirm the outlet and power cable.

If it is blinking, the subwoofer is powered but not linked to the bar.

Move the subwoofer closer to the soundbar for the pairing test.

Keep it away from routers, metal cabinets, and thick furniture until pairing is stable.

Power-cycle the soundbar and subwoofer.

Turn both off, unplug both for one minute, then reconnect the soundbar first and the subwoofer second.

Many LG subwoofers pair automatically after power returns.

If they do not, use the manual pairing process for the exact model.

That often involves pressing a pairing button on the subwoofer and waiting for the light to turn solid, but the exact steps vary by LG model.

Do not keep pressing random buttons on the bar.

Use the model manual if the automatic link fails.

If the subwoofer links but drops out during playback, check distance and interference before resetting the soundbar.

Wireless bass dropouts often come from placement or interference, not from a broken subwoofer.

The brand-neutral pairing sequence — bar in pairing mode first, sub power-cycled second, single LED solid third covers the general pairing logic before you blame the LG subwoofer specifically.

If the subwoofer never powers on or never changes light behavior after the correct pairing process, hardware failure becomes more likely.

How Do You Fix LG Bluetooth Pairing Problems?

Bluetooth problems usually come from pairing memory or the wrong mode.

Set the LG soundbar to BT or Bluetooth mode.

Remove the LG soundbar from the phone, TV, tablet, or computer’s saved Bluetooth list.

Then pair it again as a fresh device.

Only test one source device at a time.

Another phone or TV may reconnect first if it was previously paired.

Keep the source device close to the soundbar during the first test.

If Bluetooth connects but plays no sound, check the source device audio output.

The phone or TV may show the soundbar as paired but still play audio through another output.

If Bluetooth audio is delayed, that is normal for many TV uses.

Bluetooth can be fine for music, but it is often worse than HDMI or optical for movies and games.

If you are using Bluetooth only because a wired setup failed, fix ARC or optical first.

A transmitter can help older TVs that cannot send Bluetooth audio, but it should not be the first solution for an LG ARC problem.

A budget Bluetooth transmitter is best treated as a fallback for convenience, not the main fix for a broken wired setup.

The pairing flow on Samsung, Vizio, and TCL TVs follows the same pattern as LG once both devices are in pairing mode — the brand-neutral steps are short if wireless is the final plan.

How Do You Fix LG Soundbar Audio Delay Or Bad Sound?

Audio delay can come from the TV, soundbar, source device, or connection type.

Start by testing HDMI ARC or optical instead of Bluetooth.

Bluetooth is the most likely connection to create noticeable delay.

Then turn off extra sound processing while you test.

Disable virtual surround, night mode, auto volume, heavy dialogue enhancement, and TV sound processing.

Once sync is close, add only the features you actually want.

Check the TV audio delay or AV sync setting.

Set it to zero first, then adjust slowly while watching familiar dialogue.

If one app is delayed and another is fine, the app or source device may be the problem.

If every source is delayed, the TV-to-soundbar connection is more likely.

Bad sound can also come from the wrong digital audio format.

PCM is safest for no-sound testing but may be stereo in many setups.

Auto or Pass Through can preserve more surround information when the LG TV and soundbar both support it.

If Auto or Pass Through creates silence, return to PCM and confirm the basic connection.

PCM hands the bar pre-decoded audio while bitstream sends the raw codec for the bar to decode explains why LG Digital Sound Out changes what the bar receives.

If the LG soundbar sounds thin, confirm the subwoofer is linked.

If dialogue is buried, try the soundbar’s clear voice or dialogue mode after the basic connection is stable.

Do not tune sound modes while the bar is still on the wrong input or while the subwoofer is disconnected.

When Should You Reset An LG Soundbar?

Reset the LG soundbar only after you know what symptom you are trying to clear.

A reset can help with frozen controls, stuck inputs, bad pairing memory, or settings that will not respond.

It does not fix a TV using the wrong Sound Out setting, an HDMI cable in the wrong port, a dead outlet, or a subwoofer sitting too far away.

Start with a power cycle.

Unplug the TV, soundbar, and subwoofer if involved.

Wait one minute.

Reconnect the TV first, then the soundbar, then the subwoofer.

Test one input before reconnecting every device.

If the same symptom returns, use the model-specific reset method from the LG manual.

LG reset button combinations vary by model, so do not assume one universal sequence applies to every bar.

After resetting, rebuild in this order.

Connect the TV sound first.

Then pair the subwoofer.

Then add Bluetooth devices.

Then adjust sound modes.

If everything is reconnected at once, you will not know which step brought the issue back.

If the LG soundbar still fails across HDMI, optical, Bluetooth, and direct input after a correct reset, the issue may be hardware.

Distortion at any volume, a dead one channel, or random shutoff during normal use are the hardware-failure symptoms that separate setup failure from a failing bar.

If The LG Bar Cannot Be Saved

If the bar fails across every input after a correct reset and a clean retest, the next move is a replacement rather than another troubleshooting cycle.

For an LG-aligned replacement that keeps the menu prompts and remote behavior consistent with the TV, the LG S60T 3.1 ch Soundbar with Wireless Subwoofer is the natural same-brand step up.

For a premium cross-brand Atmos pick that still works cleanly on eARC LG OLEDs, the Sonos Arc Ultra Soundbar with Dolby Atmos and Voice Control is the long-term upgrade.

For a 5.1-channel cross-brand pick at a more moderate price, the ULTIMEA 5.1CH Surround Sound Bar with Subwoofer covers larger rooms when an LG bar feels too small.

For a compact all-in-one with a built-in subwoofer, the Amazon Fire TV Soundbar Plus with built-in subwoofer is the simplest replacement when you want to retire a finicky LG bar entirely.

For a budget replacement when the LG bar simply needs to be gone, the MZEIBO 120W Sound Bar with Subwoofer covers the basic TV upgrade.

The Bottom Line

Troubleshoot LG soundbar issues by matching the fix to the symptom.

No sound points to input, Sound Out, ARC, optical, or digital audio format.

ARC problems point to the labeled port, Simplink, eARC, and power-cycle order.

Optical problems point to input selection, PCM, and cable seating.

Subwoofer problems point to power, distance, interference, and pairing.

Bluetooth problems point to saved devices and pairing mode.

Delay and bad sound point to processing, audio format, and connection type.

Reset only after those lighter checks fail.

If you need setup help after troubleshooting, the LG standard vs cinema split shows which preset modes each tier offers, the LG-aligned soundbar picks ranked by Simplink, eARC, and WOW Orchestra integration show which bars actually leverage LG features, and the soundbar hub is the broader cluster starting point.

Frequently Asked Questions

Why is my LG soundbar connected but no sound?

The most common causes are the wrong soundbar input, the TV still set to internal speakers, ARC or Simplink disabled, or Digital Sound Out set to a format the bar cannot decode.

Set the input correctly, choose external audio in Sound Out, and test PCM first.

Why is my LG subwoofer blinking and not connecting?

A blinking subwoofer light usually means it has power but is not linked to the soundbar.

Move it closer, power-cycle both devices, then use the model-specific manual pairing process if automatic pairing fails.

How do I reset an LG soundbar?

Use the reset method from the exact LG soundbar manual because button combinations vary by model.

Before factory reset, try a full power cycle and confirm the issue is not TV Sound Out, ARC, optical, Bluetooth, or subwoofer pairing.

Why does my LG soundbar keep cutting out?

Cutouts can come from ARC handshake problems, a loose optical cable, Bluetooth interference, wireless subwoofer distance, or power-saving behavior.

Test one connection at a time and power-cycle after changing ARC or eARC settings.

Should I use HDMI ARC or optical for an LG soundbar?

Use HDMI ARC or eARC when it is stable and you want TV-remote volume control.

Use optical when ARC keeps failing or when you need the simplest stable TV audio connection.

Factory Reset ONN Soundbar — Safe Reset Steps Before You Re-Pair It

Factory reset ONN soundbar is usually the right search when the bar will not respond, will not pair, or keeps coming back with the same bad setting.

But ONN soundbars don’t all reset the same way, so the safest first move is not to guess at a random button combination.

This guide walks through a clean power reset first, then exact model identification, then the factory reset steps to use only when the bar still behaves badly after a basic restart.

That order protects your Bluetooth pairings, subwoofer link, and TV audio settings from being wiped before you know whether the soundbar was actually the problem.

If the reset works, the ONN bar should boot cleanly, accept the right input, and reconnect to the TV or subwoofer without repeating the same failure.

Quick Takeaway

Unplug the ONN soundbar for at least one minute before you try a factory reset.

If your model supports a full reset, use the button sequence from that exact manual rather than a generic reset-button claim.

Some ONN models use a soundbar-button combination such as holding volume down and volume up together, but other ONN bars rely on a power reset and re-pairing steps instead.

After the reset, test one simple input first before you reconnect every device.

Should You Factory Reset An ONN Soundbar First?

Do not factory reset the ONN soundbar first if it only failed once.

A single no-sound moment can come from the TV audio output, the HDMI ARC handshake, Bluetooth pairing, or a muted source.

That is why the brand-neutral escalation — soft reset before hard reset before factory reset is the safer order on any soundbar, not just ONN.

For an ONN bar, the same rule matters even more because model instructions are inconsistent across 2.0, 2.1, 5.1, and Atmos systems.

If you are not sure how the bar should behave on a normal day, a healthy bar shows steady power, responds to remote input changes, and outputs audio on the selected source — that baseline is what a reset should restore.

A factory reset is worth using when the soundbar powers on but acts stuck.

Use it when the bar keeps choosing the wrong input, refuses to pair after normal Bluetooth clearing, or will not reconnect to the wireless subwoofer after the normal pairing routine.

It is also a reasonable second step when the bar responds to buttons but keeps returning to a bad state after every restart.

Do not treat it as a cure for every soundbar problem.

A factory reset will not repair a bad HDMI cable, a disabled TV audio output, or a broken port.

It also will not fix a soundbar that has no power, smells burnt, or fails across every source after a clean retest.

If the ONN bar is silent only through the TV, check the TV connection before wiping settings.

If the issue is the TV-to-bar wiring rather than the bar itself, the brand-neutral HDMI ARC, optical, and Bluetooth setup paths are the better next step than another factory reset.

If the bar works on Bluetooth but fails on ARC, the reset may not be the fix.

That points toward the HDMI chain, so enabling ARC on the TV side — HDMI-CEC on, ARC-labeled port confirmed, Sound Out set to external is the more useful next step.

If nothing works after the correct reset and a simple retest, move into failure diagnosis.

If a fresh factory reset leaves the same distortion, dead channel, or random shutoff, the hardware-failure symptoms a reset cannot fix is the better page to read next.

How Do You Soft Reset An ONN Soundbar Safely?

A soft reset is the safe first step because it clears temporary behavior without wiping saved settings.

Turn the ONN soundbar off, unplug the power cable from the wall, and leave it disconnected for at least one minute.

Unplug the TV from power during the same minute if the problem is HDMI ARC, optical audio, or sound output from the TV.

That matters because the TV can hold the bad handshake even after the soundbar restarts.

Reconnect the TV first, let it boot completely, then reconnect the ONN soundbar.

Turn the soundbar on and select one simple input.

If you are testing TV sound, use HDMI ARC or optical only after confirming the TV is set to external speakers, receiver, HDMI ARC, or optical output.

If you are testing Bluetooth, remove the old ONN pairing from the phone before trying again.

A soft reset is enough when the bar was frozen, slow to respond, or stuck after a source change.

It is also enough when the problem appeared after a power flicker or after the TV updated its audio settings.

If the ONN soundbar comes back normally after this step, stop there.

There is no advantage to a factory reset after the issue is already gone.

If you need a clean HDMI retest after the reset, use one cable you trust instead of swapping three things at once.

A single known-good HDMI cable from another device keeps the retest simple.

That makes it easier to know whether the restart fixed the soundbar or whether the old cable path is still failing.

How Do You Factory Reset An ONN Soundbar?

Factory reset the ONN soundbar only after the soft reset fails.

First, identify the exact ONN model from the label, box, Walmart order page, or manual.

This matters because ONN soundbars do not share one universal reset button.

Some ONN manuals describe a factory-default reset from the physical buttons on the bar.

On some 5.1.2-style ONN systems, the factory-default method is to hold volume down and volume up on the soundbar together until the unit resets.

Do not assume that combination applies to every ONN bar.

Other ONN models may only document a power reset, Bluetooth clearing, or subwoofer re-pairing process.

If your manual lists a factory reset, follow that exact method with the soundbar powered on and stable.

Hold only the listed buttons, wait for the display or indicator behavior to finish, then release and let the bar reboot.

If your manual does not list a factory reset, do not keep experimenting with random button holds.

Use the power reset, clear Bluetooth pairings, and rebuild the TV connection instead.

After the reset, the ONN bar may forget paired devices and custom settings.

That means you should test one source at a time.

Start with optical or one HDMI ARC path, then add Bluetooth, USB, surround speakers, or the subwoofer after the main bar plays sound.

If the display shows a mode you do not recognize, cycle the source slowly.

Many reset failures are really source-selection problems after the bar returns to default behavior.

For an optical retest, use a simple cable and make sure the caps are removed from the ends.

Optical is useful here because it removes HDMI control settings from the test.

If optical works but HDMI does not, the soundbar is probably not the whole problem.

How Do You Reset An ONN Soundbar Without The Remote?

You can usually restart an ONN soundbar without the remote, but a full factory reset depends on the model.

The safest no-remote reset is still the power reset.

Unplug the soundbar, wait at least one minute, reconnect it, and use the physical power or source buttons on the bar.

If the bar has volume and source buttons, you may be able to enter pairing or reset behavior from the unit itself.

Use the printed manual or model page before holding buttons.

The risk is that a random button combination can put the soundbar into Bluetooth pairing, subwoofer link mode, demo behavior, or a different source instead of resetting it.

If the remote is missing but the soundbar still responds to physical buttons, rebuild the setup in a simple order.

Power the bar on, choose the input from the bar, then set the TV audio output to match that input.

If HDMI ARC is part of the setup, check whether the TV has CEC, HDMI control, ARC, or eARC enabled.

If optical is part of the setup, check whether the TV digital audio output is set to PCM when surround formats create silence.

That does not reset the ONN bar, but it often fixes the same symptom people try to reset.

If the soundbar cannot be controlled from the remote or the physical buttons, the problem may be control failure rather than bad settings.

At that point, repeating power resets is less useful than confirming power, buttons, and one direct input.

What Should You Re-Pair After The ONN Reset?

After a factory reset, rebuild the ONN setup one link at a time.

Start with the main TV connection because that tells you whether the bar can play sound at all.

If HDMI ARC is your normal connection, connect the cable to the TV port labeled ARC or eARC and the matching HDMI ARC port on the soundbar.

Then open the TV sound menu and choose external speakers, receiver, HDMI ARC, or the equivalent label.

If HDMI remains unstable, test optical before you decide the ONN soundbar is still broken.

If the ONN system includes a wireless subwoofer, wait for the main bar to work before you re-pair the subwoofer.

Many ONN subwoofers are paired at the factory, but they can lose the link after resets, power loss, or a failed setup.

If the subwoofer light keeps blinking, put the system into the pairing routine from the manual and keep the subwoofer close to the bar during the test.

If the subwoofer still will not pair, the brand-neutral pairing sequence — bar in pairing mode first, sub power-cycled second, single LED solid third covers the recovery flow, and the full setup checklist — power on, input selected, TV Sound Out confirmed, source device verified is the wired TV path you should restore first.

Bluetooth should come after the wired TV test.

Delete the old ONN soundbar entry from the phone, put the soundbar into Bluetooth mode, then pair it as a fresh device.

If Bluetooth works but the TV still does not, the reset succeeded and the TV connection is the next problem.

If both fail, the issue is more likely in the bar, power, or control board.

For ARC-heavy setups, a cable known to handle the return channel keeps the post-reset test cleaner.

An eARC-rated HDMI cable from a working setup is a better ARC test than an unknown cable from another device.

Use it for one clean test before you rebuild every other connection.

Why Is The ONN Soundbar Still Not Working After Reset?

If the ONN soundbar still does not work after reset, separate the symptom from the reset.

No power is not a settings problem.

Check the wall outlet, power cable, and power button before you keep resetting the bar.

No TV sound after reset usually points to the input, TV audio menu, HDMI ARC control, optical format, or cable path.

That is why a reset can look like it failed even when it actually cleared the soundbar settings.

Bluetooth failure after reset usually means the old phone pairing was not removed, the soundbar is not in pairing mode, or another device is connecting first.

Delete the old pairing entry and try one phone close to the bar.

Subwoofer failure after reset usually means the main bar and subwoofer need to be linked again.

Move the subwoofer closer, power both units off, then follow the manual pairing routine for that ONN system.

Random shutoffs after reset can point to auto-standby, weak power, overheating, or hardware trouble.

If the bar shuts off with every source after a clean reset, stop treating it as a setup issue.

Distorted sound after reset is also not always a reset problem.

Lower the TV output, switch sound modes, and test a second source before deciding the speaker section is damaged.

The reset is successful only if something changes.

If every symptom is identical after a correct reset, one of three things is usually true.

The factory reset method was not the correct method for that ONN model.

The issue is outside the soundbar in the TV or cable path.

Or the soundbar has a hardware fault that resetting cannot repair.

If You Decide The ONN Bar Needs Replacing

If the correct reset does not change the symptom, a clean retest still fails, and the bar shuts down or distorts on every source, the ONN bar is likely past saving.

At that point, look at known-good replacements rather than chasing more reset combinations on a unit with a hardware fault.

For a small room or dialogue-first setup, the Bose Smart Dolby Atmos Soundbar is the all-in-one upgrade when you do not want a separate subwoofer to re-pair.

If the bundled ONN sub was the part that kept failing, the GEOYEAO 2.1 Soundbar with Subwoofer is a budget-tier 2.1 replacement at a similar price point.

For a more reliable mid-tier pick with strong long-term review history, the Polk Audio Signa S2 Sound Bar with Subwoofer is the volume choice with over twenty thousand reviews.

If you want a 5.1-channel replacement with a wireless subwoofer at a moderate price, the Hisense HS5100 5.1Ch Sound Bar with Wireless Subwoofer covers a larger room than the typical ONN 2.1 bundle.

For a brand-new Dolby Atmos all-in-one without managing a separate subwoofer, the SAMSUNG S60D 5.0ch Soundbar with Wireless Dolby Atmos is the premium step up.

Browse the full soundbar category hub if you want to compare more options before you decide.

The Bottom Line

Factory reset ONN soundbar should be a controlled troubleshooting step, not a first guess.

Start by unplugging the bar and TV, then test one input before you wipe anything.

If your exact ONN model has a documented factory reset, use that method and rebuild the setup slowly afterward.

If the manual does not list a factory reset, do not force a random button combination.

Use a power reset, clear Bluetooth pairings, re-check the TV audio output, and re-pair the subwoofer only after the main bar works.

If the ONN soundbar still fails after the correct reset and a clean retest, the next move is not another reset.

If no sound returns after the reset, the input-swap test — change input on the bar, swap the source device, then try a different TV separates a reset-fixable issue from a wiring failure, and the budget replacement picks ranked by reliable ARC handshake and lifetime quality is the practical move when every source still fails.

Frequently Asked Questions

Is there a reset button on an ONN soundbar?

Some ONN soundbars have physical buttons that can trigger reset or pairing behavior, but there is not one universal ONN reset button across every model.

Check the exact model manual before holding buttons.

How do I factory reset an ONN soundbar without a remote?

Start with a power reset by unplugging the soundbar for at least one minute.

If your model supports a no-remote factory reset from the soundbar buttons, use the exact button sequence from that model manual.

Why will my ONN soundbar not pair after reset?

The old Bluetooth entry may still be saved on your phone, or the wireless subwoofer may need its own pairing routine.

Delete the old Bluetooth device first, then re-pair one device at a time.

Does resetting an ONN soundbar fix no sound?

It can fix no sound when the issue is frozen settings, a stuck source, or a bad temporary handshake.

It will not fix a wrong TV audio output, bad HDMI cable, disabled ARC setting, or hardware failure.

Should I reset the ONN soundbar or the TV first?

For TV sound problems, reset both lightly by unplugging the TV and soundbar for one minute.

Then boot the TV first, boot the soundbar second, and test one connection path.

Difference Between Bose Smart Soundbar And Bose Smart Ultra Soundbar — Is Ultra Worth It?

The difference between Bose Smart Soundbar and Bose Smart Ultra Soundbar looks small on paper, but the wrong choice can waste money if you pay for flagship scale you will never use. This comparison is really about room size, Dolby Atmos expectations, and whether the Ultra gives you a real upgrade or just a more expensive Bose badge.

The problem is that both bars live in the same Bose app ecosystem, both support HDMI eARC, both offer Amazon Alexa control, and both promise immersive sound. That makes it easy to assume the cheaper option is basically the same thing or the pricier option is automatically better.

The real difference is not branding. It is how much bigger, deeper, and more spacious the Ultra sounds, how much room-calibration convenience you get, and whether those gains actually matter in the room you have.

That clarity helps you avoid overspending and choose the bar that actually fits your room, habits, and upgrade plans. Start by comparing sound quality, dialogue clarity, personal surround features, Bose app controls, and overall value.

Below, we break down the difference between Bose Smart Soundbar and Bose Smart Ultra Soundbar the practical way.

Quick Takeaway

The regular Bose Smart Soundbar is the better buy for most small and medium rooms because it keeps Dolby Atmos, A.I. Dialogue Mode, HDMI eARC, and the Bose app at a far lower price. The Bose Smart Ultra Soundbar is the better bar if you want the most spacious single-bar Bose experience, ADAPTiQ room calibration, and a more premium all-in-one home-theater feel. The Ultra is better, but the regular Smart Soundbar is usually the smarter value.

What Is The Difference Between Bose Smart Soundbar And Bose Smart Ultra Soundbar?

Bose Smart Soundbar and Bose Smart Ultra Soundbar differences

At the core, both models aim at the same buyer: someone who wants a single elegant bar instead of a subwoofer-and-rear-speaker system scattered around the room. That means both models lean on Dolby Atmos decoding, Bose TrueSpace processing, the Bose app, HDMI eARC, Bluetooth, and built-in smart-platform convenience.

The more affordable Bose Smart Soundbar is the compact value play in the lineup. Bose positions it as the simpler path to immersive sound, clearer dialogue, and multi-room Bose app control without jumping to flagship pricing.

The bigger difference is what the cheaper bar does not try to be. It is designed to fit under more TVs, sound fuller than a basic dialogue bar, and give you the Bose smart-platform experience without demanding a premium-room budget.

That matters because a lot of buyers looking at the best Bose soundbar options or the broader best all-in-one soundbar guide do not actually need the flagship chassis. They just need cleaner TV audio, better dialogue mode behavior, and a soundbar that does not dominate the room.

The Ultra model is the one Bose treats as the premium statement piece. That shows up in louder output, deeper bass, a more expansive surround impression, ADAPTiQ room calibration, a more premium material finish, and little details like the light bar and tempered glass top that make it feel more upscale on a console.

Sound Quality And Dolby Atmos — Does The Ultra Actually Sound Better?

Sound quality comparison for Bose Smart and Smart Ultra soundbars

Yes, the Ultra actually sounds better. The important question is whether it sounds better enough for your room and habits to justify the price jump.

The Bose Smart Ultra Soundbar is the clearly more capable bar for cinematic listening.

Bose’s own product language is pretty direct here: the Ultra plays louder, deeper, and more spacious than the smaller regular Smart Soundbar, and it adds ADAPTiQ so the bar calibrates itself to the room instead of making you accept a one-size-fits-all tuning.

That difference matters most with Dolby Atmos movies, larger living rooms, and setups where you actually sit down to watch rather than just keeping TV on in the background. In those rooms, the wider soundstage and stronger sense of height make the Ultra feel more like a premium home-theater bar than a better-TV-speaker upgrade.

In smaller rooms, though, the gap shrinks. The regular model still gets Bose TrueSpace, A.I. Dialogue Mode, and enough spatial lift to sound meaningfully bigger than a plain 2.0 or 3.0 bar.

That is why the Ultra belongs more naturally in conversations around the best Dolby Atmos soundbars and the overall best soundbar picks, while the regular model sits closer to the value-focused premium middle. The Ultra is better, but it is not magically better in every room.

Features, Bose App, HDMI eARC, And Personal Surround

Feature comparison for Bose Smart and Smart Ultra soundbars

Feature overlap is what makes this comparison tricky. Both bars support the Bose app, HDMI eARC, Bluetooth, Amazon Alexa, Apple AirPlay 2, Chromecast built-in, Spotify Connect, remote controls, and Bose’s multi-room grouping.

Both also support A.I. Dialogue Mode now, which matters because older Bose comparisons used to hinge on dialogue handling.

On current models, you are not choosing between a dialogue-focused bar and an immersive bar; you are choosing between a smaller immersive bar and a more serious one.

Where the flagship pulls away is convenience and polish. ADAPTiQ calibration, more premium materials, broader room scale, and a more overt personal surround sound pitch around Bose Ultra Open Earbuds make the Ultra feel like Bose’s full-featured showcase rather than the compact mainstream version.

That personal surround angle is real, but it is also easy to overspend on if you do not already care about Bose’s ecosystem. The earbuds and extra bass modules are sold separately, so the better decision is still to buy the right bar first and only expand later if the Bose app and whole-home setup genuinely matter to you.

This is also the right place to dismiss one distraction from the search results: BoseCare Protection Plan. It is available on both products, but it does not change the core buying decision, because the real difference between these two bars is sound quality and calibration, not the optional protection add-on.

Which Bose Soundbar Is The Better Value?

Value comparison for Bose Smart Soundbar versus Smart Ultra

For most buyers, the better value is the regular Smart Soundbar. It gives you the modern Bose feature set at less than half the Ultra’s price, and that changes the math more than any premium-material upgrade ever will.

The Samsung S60D helps frame that point well. It is not a Bose replacement if you specifically want Bose app control and Bose ecosystem features, but it shows how much single-bar performance you can buy before you ever hit Ultra pricing.

That makes the regular Bose model the more rational answer for people upgrading from TV speakers, older Bose bars, or compact living-room setups. You keep the cleaner design, better dialogue performance, and smart-platform convenience without paying for room-filling output you may never use.

The Ultra makes better value sense if you know you want flagship all-in-one performance and you do not want to compromise later. That is a narrower buyer than the marketing suggests, but it is still a real one.

If your main priority is speech clarity rather than sheer scale, the buying path often ends up closer to our best soundbars for dialogue guide or the budget soundbar roundup instead of the Ultra. Paying $999 just to make voices clearer is usually the wrong move.

Bose Smart Ultra Soundbar Vs Sonos Arc Ultra

Bose Smart Ultra Soundbar compared with Sonos alternatives

Once you are already considering the Ultra, the most honest outside comparison is not another midrange Bose bar. It is a premium single-bar rival that also asks for flagship money.

The Sonos Arc Ultra is the benchmark if you want the biggest single-bar Atmos experience and a deeper multi-room ecosystem. The Bose Ultra wins on Bose-specific touches like ADAPTiQ, the premium glass-top design, and a cleaner conversation around A.I. Dialogue Mode, but Sonos pushes harder on room scale and raw one-bar theater ambition.

That comparison matters because it exposes the Ultra’s real position in the market. It is not just the better Bose bar; it is Bose’s answer to premium single-bar systems from Sonos and other flagship brands.

If you already like Bose voice control, Bose app behavior, and the personal surround direction with Ultra Open Earbuds, staying inside Bose makes sense. If your main goal is the biggest premium one-bar Atmos field regardless of brand, the Sonos route is still the tougher rival.

That is why this decision should usually finish with the best Sonos soundbar guide, the best Bose soundbar guide, and the main soundbar hub rather than with forum noise about which one is more “future-proof.” The better bar is the one that matches your room, budget, and ecosystem tolerance now.

The Bottom Line

The difference between Bose Smart Soundbar and Bose Smart Ultra Soundbar is real, but it is mostly a question of scale, calibration, and budget. The regular Smart Soundbar is the smarter buy for most people because it keeps the modern Bose features that matter and drops the price to a level that makes sense for normal rooms.

The Ultra is the right pick if you want Bose’s best single-bar experience, broader Dolby Atmos presentation, ADAPTiQ room calibration, and the more premium flagship finish. It is better, but it is only worth the extra money if you will actually hear and value that extra headroom.

If you want the next layer of context before buying, compare these Bose models against the best Bose soundbar picks, the best all-in-one soundbar guide, and the broader best soundbar roundup so you are paying for the right class of bar instead of just the more expensive label.

Frequently Asked Questions

What is the difference between Bose Smart Soundbar and Bose Smart Ultra Soundbar?

The main difference is performance and premium extras. The Ultra plays louder, deeper, and more spacious, and it adds ADAPTiQ room calibration, while the regular Smart Soundbar keeps most of the modern Bose platform features at a much lower price.

Which Bose soundbar is the best?

The best Bose soundbar overall is the Ultra if you want Bose’s strongest all-in-one performance. The better value for most buyers is the regular Smart Soundbar, because it keeps the platform features that matter without forcing flagship pricing.

That depends on room size and budget, but premium one-bar buyers usually end up comparing flagship models from Bose, Sonos, and Samsung rather than staying inside a single brand. For most rooms, value matters as much as maximum performance.

What is the difference between Bose Smart and Smart Ultra reddit?

Most real-world discussion comes down to the same answer: the Ultra sounds bigger and more premium, while the regular Smart Soundbar is easier to justify financially. If your room is modest and your budget matters, the cheaper model is usually the more practical call.

How to Remove Acoustic Panels: Complete Guide [2026]

How to remove acoustic panels without destroying the wall behind them comes down to one thing — but only if you match your removal method to the way the panel was mounted instead of prying every panel off the same way.

The problem is that paint damage, torn drywall paper, and ruined panels usually happen when people treat Command strips, Z-clips, Velcro, and spray adhesive as if they release alike. They do not, and one bad first pull can turn a simple takedown into patching, sanding, and repainting.

The good news is that most removals are manageable if you identify the mounting system first, work slowly, and use the right tools for separation, cleanup, and storage. That helps you protect reusable panels, limit wall repairs, and make smarter choices for the next installation.

Below, you’ll see how to remove each mounting type, what damage to expect, how to clean residue, when panels are worth reusing, and what to prepare before you start.

Quick Takeaway

Lift Z-clip and French-cleat panels straight up, pull Command-strip tabs slowly downward, and use heat plus a plastic scraper for adhesive-mounted panels. Always test one panel first, expect the most wall damage from spray adhesive, and clean residue with paint-safe products before repairing the wall or reinstalling treatment.

How Do You Remove Different Types of Mounted Panels?

Before grabbing tools and yanking panels off your wall, identify your mounting method. Each type requires a specific approach to avoid damage.

The mounting hardware you chose during panel installation determines your removal experience. Removable methods like Command strips and Z-clips were designed for easy takedown. Permanent methods like spray adhesive fight back.

How to Remove Z-Clip Mounted Panels

Z-clips are the easiest mounting method to reverse. The interlocking brackets simply disengage when you lift the panel upward.

Grip the panel at both bottom corners. Lift straight up about an inch — you’ll feel the panel-side bracket clear the wall-side bracket. Then pull the panel away from the wall.

That’s it. No tools, no damage, no residue. The wall-side clips remain mounted with their screws, leaving only small screw holes if you remove those too.

For optimal placement after removal, you can reposition the wall clips anywhere. The panels themselves are completely unaffected by the removal process.

How to Remove Command Strip Panels

Command strips remove cleanly when you follow the stretch-release technique. Skip this step and you risk pulling paint off your wall.

Locate the pull tab on each strip — it should hang below the panel edge. If panels were mounted correctly, these tabs are accessible without removing the panel first.

Grip the tab and pull slowly straight down, parallel to the wall. The strip stretches and releases from the wall surface. Don’t pull outward — that’s how paint comes off.

For strips without accessible tabs, gently slide a putty knife behind the panel to separate it from the wall. Then access the tabs from behind. If you’re reinstalling treatment afterward, a bracket-ready set like UMIACOUSTICS acoustic panels with hanging brackets is the kind of setup that makes the next removal far easier.

How to Remove Adhesive-Mounted Panels

Spray adhesive and construction adhesive create the most challenging removal situations. These bonds were designed to be permanent.

Start with heat. A hair dryer or heat gun softens adhesive bonds, making separation easier. Hold heat 6-8 inches from the panel surface and move continuously to avoid scorching.

After 2-3 minutes of heat application, slide a wide putty knife between the panel and wall. A plastic putty knife set works better than metal for this — less likely to gouge drywall. Work slowly from one edge, applying more heat as needed. Rushing tears panel material or pulls chunks of drywall.

Accept that some damage is likely. Spray adhesive removal typically leaves residue on both the wall and panel back. The panel may be unusable for remounting depending on material type.

Will Removing Panels Damage Your Walls?

Understanding potential damage helps you plan repairs before removal begins. Some methods leave walls pristine; others require significant touch-up work.

Which Mounting Methods Damage Walls?

Z-clips and French cleats leave only small screw holes — the same as hanging a picture frame. These fill easily with spackle and disappear with touch-up paint.

Command strips leave no damage when removed correctly using the stretch-release method. Incorrect removal (pulling outward) can peel paint.

Velcro strips often leave adhesive residue even when the strips themselves release cleanly. The residue requires solvent removal but usually doesn’t damage underlying paint.

Spray adhesive causes the most damage. Expect to remove some paint or drywall paper with the panels. Budget for wall repair and repainting if you used this mounting method.

How Do You Minimize Damage?

Work slowly — rushing causes most removal damage. Heat softens adhesive bonds and prevents sudden releases that tear wall surfaces.

Test your technique on one panel in an inconspicuous location before removing visible panels. If damage occurs, you’ll know what repairs to prepare for.

Keep a putty knife angled low against the wall during prying. Steep angles dig into drywall. Shallow angles slide along the surface. The same careful handling matters if you’re taking down fabric-wrapped fiberglass panels you plan to hang again later.

How Do You Remove Adhesive Residue?

Even careful removal often leaves sticky residue behind. Several products safely remove adhesive without damaging painted surfaces.

What Products Remove Adhesive?

Most adhesive residue comes off with a paint-safe remover and patient scraping. Start with a small test area before you treat the whole wall.

Rubbing alcohol (isopropyl 70%+) dissolves many adhesives and evaporates without residue. It’s safe for most painted surfaces but test on a hidden area first.

WD-40 removes stubborn adhesive but leaves an oily film requiring additional cleaning. Use it as a last resort for persistent residue.

Avoid acetone and paint thinner — these dissolve paint along with adhesive.

How Do You Clean Walls After Removal?

After removing adhesive, wash the area with warm water and mild dish soap. This removes solvent residue and prepares the surface for any needed repairs.

For walls that will be repainted, light sanding with fine-grit sandpaper (220 grit) creates a smooth surface. Wipe with a tack cloth before priming.

If the wall has texture, you may need to reapply texture compound before painting. This is common after spray adhesive removal where wall paper tears. If the old panel core was destroyed during removal, rebuilds based on AFB Acoustical Fire Batts mineral wool insulation make more sense than trying to salvage a shredded DIY core.

Can You Reuse Acoustic Panels After Removal?

Panel reusability depends on mounting method and material type. Some panels survive removal perfectly; others are single-use only.

Which Panels Can Be Reused?

Fabric-wrapped fiberglass panels with Z-clip or Command strip mounting typically survive removal without damage. The mounting hardware attaches to wooden frames, leaving the acoustic material untouched. A product style like Olanglab fiberglass acoustic wall panels is far more reusable than peel-and-stick foam.

PET felt panels with removable mounting also reuse well. Their rigid construction resists the handling involved in removal.

Foam panels mounted with spray adhesive rarely survive intact. The adhesive bonds to foam material, tearing chunks during removal. Consider foam panels mounted this way as disposable.

If you’re wondering whether panels are worth the investment, reusability is one factor that makes professional panels more cost-effective than cheap foam over time.

Our acoustic panels guide and acoustic panel safety breakdown cover the material differences that affect durability, handling, and reuse.

How Do You Store Removed Panels?

Stand panels upright against a wall rather than stacking flat. This prevents compression damage to absorptive material.

If stacking is necessary, place cardboard or foam sheets between panels to prevent friction damage to fabric faces.

Store in climate-controlled spaces. Temperature and humidity swings can warp panel frames and grow mold in fiberglass cores.

What Should You Know Before Removing Panels?

Planning removal before you start prevents surprises and ensures you have necessary supplies ready.

Gather tools based on your mounting type: putty knife for adhesive panels, step stool for high panels, heat gun if dealing with spray adhesive. Have a drop cloth ready to catch falling debris.

Photograph your current panel arrangement if you plan to reinstall elsewhere. Recreating effective panel placement is easier with reference images.

Check your lease if renting. Some damage from removal may affect security deposits — know what repairs are expected before move-out. If you’re using the move as a chance to upgrade, a thicker option like Olanglab 2-inch fiberglass acoustic panels gives you a more durable next step than remounting cheap foam.

Panel Removal Methods Comparison

Mounting Type Removal Difficulty Wall Damage Panel Reusable? Residue?
Z-Clips Very Easy Screw holes only Yes None
French Cleats Very Easy Screw holes only Yes None
Command Strips Easy None (if correct) Yes Minimal
Velcro Strips Easy Minimal Yes Moderate
Double-Sided Tape Moderate Possible paint damage Usually Moderate
Spray Adhesive Difficult Likely paint/drywall damage Rarely Heavy
Construction Adhesive Very Difficult Significant damage No Heavy

What to Know Before Removing Acoustic Panels

Removal difficulty is largely determined at installation time. If you chose removable mounting methods, takedown is straightforward. Permanent adhesives create permanent challenges.

For future installations, consider Z-clips or Command strips if you might ever need to remove panels. The slight reduction in bond strength is worth the clean removal experience.

If you’re upgrading panels after removal, check our best acoustic panels guide for current recommendations. Panel technology improves regularly, and replacement may outperform your original choices.

Whatever mounting method you choose next time, the lessons from this removal experience will inform better decisions. Removable mounting saves headaches — and walls.

Frequently Asked Questions

Can You Remove Acoustic Panels Without Damaging Walls?

Yes — if you used removable mounting methods. Z-clips, French cleats, and Command strips all remove without wall damage when done correctly.

Spray adhesive and construction adhesive cause wall damage in most cases. The bond is designed to be permanent, and breaking it damages either the wall or panel (usually both).

How Do You Remove Old Adhesive?

Apply Goo Gone or rubbing alcohol to the residue. Wait 5 minutes for the solvent to soften the adhesive. Wipe with a clean cloth, repeating as needed.

For stubborn residue, use a plastic scraper at a low angle to avoid gouging drywall. Metal scrapers can damage wall surfaces.

Can Acoustic Panels Be Moved and Reused?

Most professionally-made panels with removable mounting can be reused multiple times. Remove carefully, store properly, and they’ll perform identically in their new location.

Foam panels mounted with spray adhesive typically cannot be reused — the adhesive tears the foam during removal.

What’s the Easiest Mounting Method to Remove?

Z-clips are the absolute easiest — simply lift the panel straight up and pull away. No tools, no residue, no damage.

Command strips are second easiest when the stretch tabs remain accessible. The stretch-release mechanism provides clean removal on most painted surfaces.