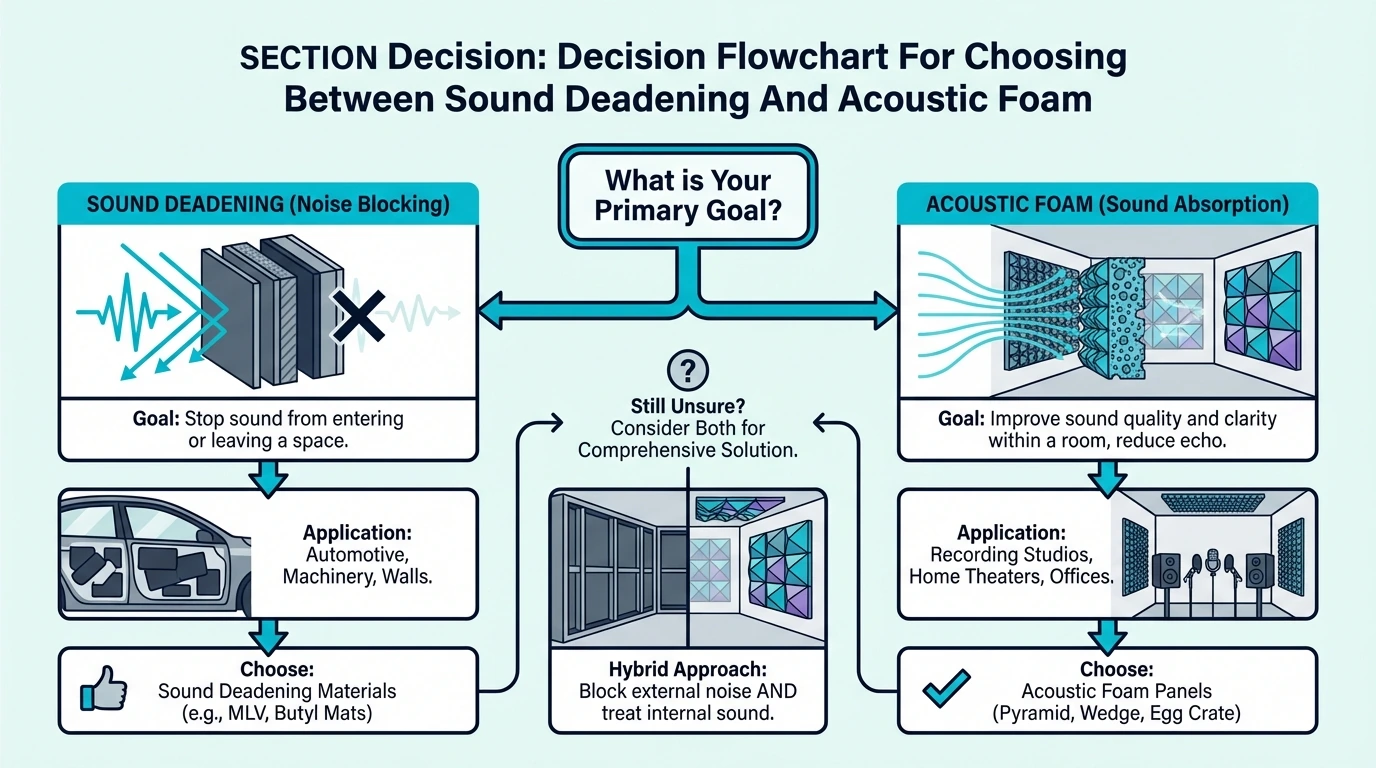
Acoustic foam and building insulation both affect sound, but they serve different purposes and work in different ways. Using the wrong one wastes money and leaves your actual problem unsolved.
The confusion is understandable—both materials absorb sound to some degree. But acoustic foam treats sound within a room while insulation primarily provides thermal control with secondary acoustic benefits.
Start with the quick takeaway below, then we’ll compare how each material works, what the performance numbers actually mean, and which rooms call for which solution.
Quick Takeaway
Use acoustic foam when you want to improve how your room sounds inside — it treats reflections on walls and ceilings to reduce echo, reverb, and harsh recordings.
Use building insulation when you need to reduce sound traveling through walls, ceilings, or floors as part of a soundproofing project. Neither one does the other’s job, so matching the material to the problem is the whole game.
Understanding the Core Difference
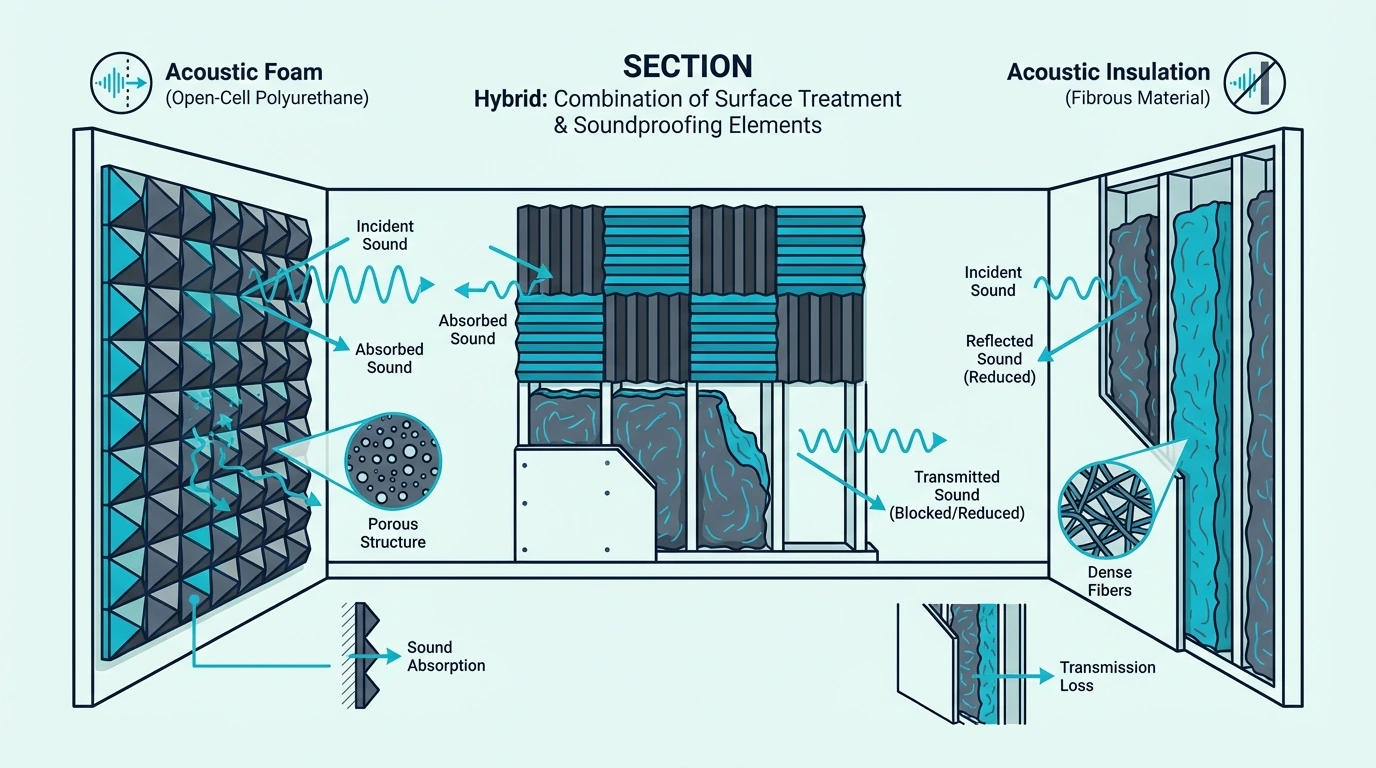
The fundamental difference is purpose and placement.
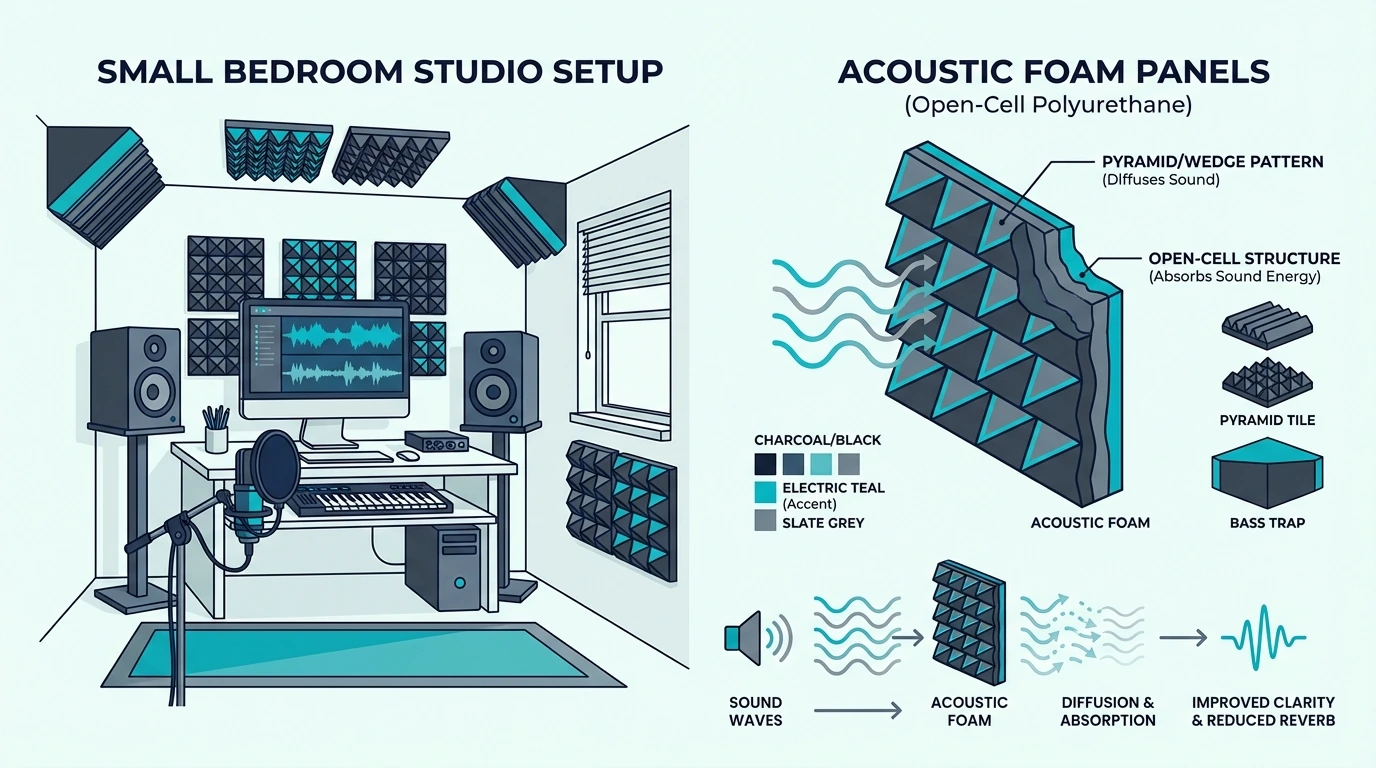
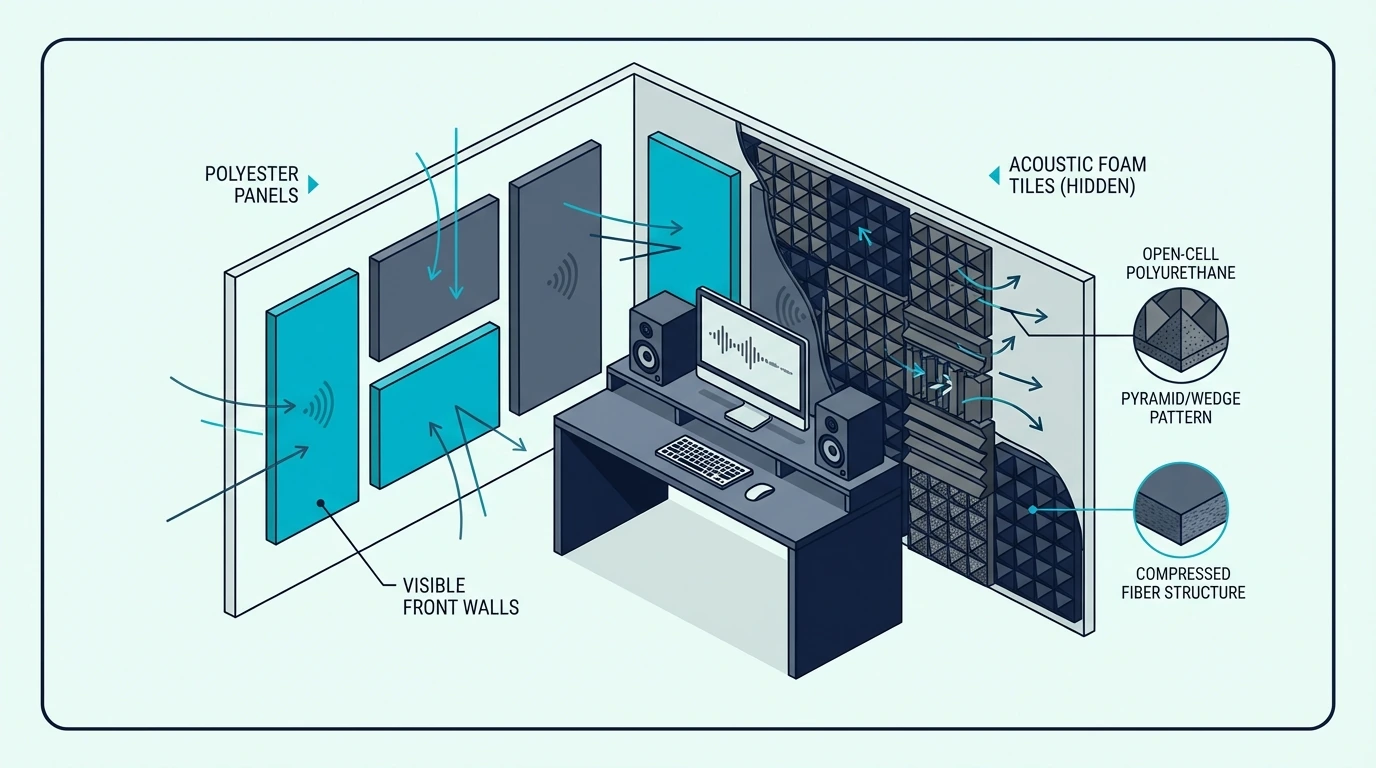
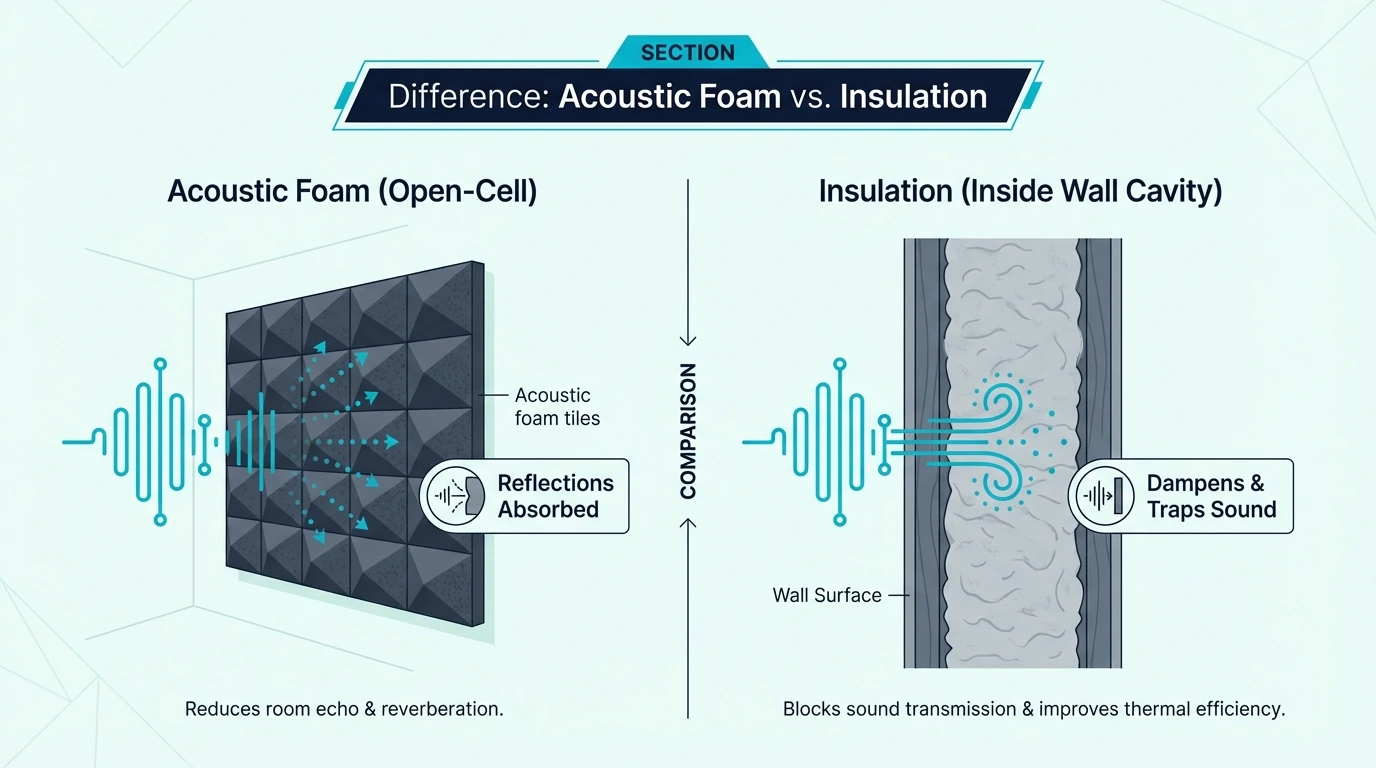
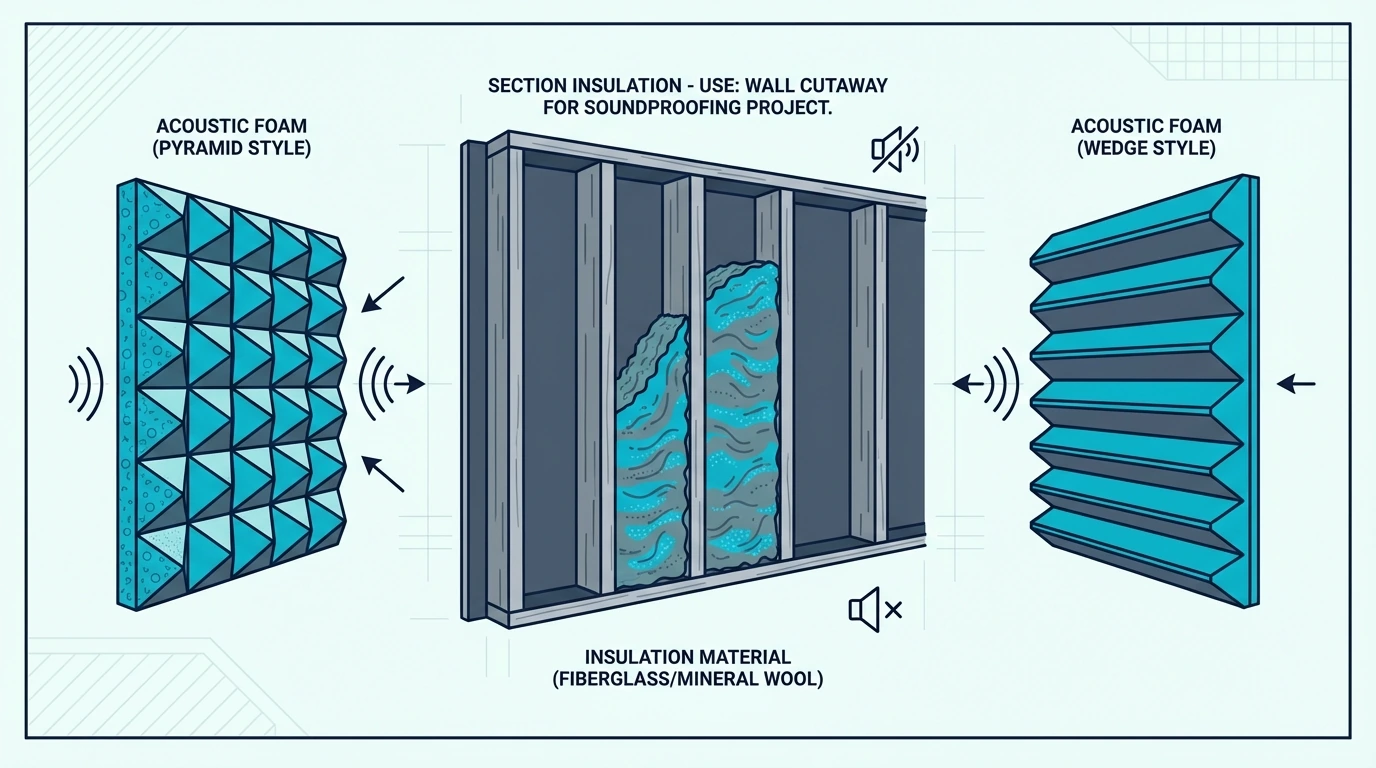
Acoustic Foam: Surface Treatment
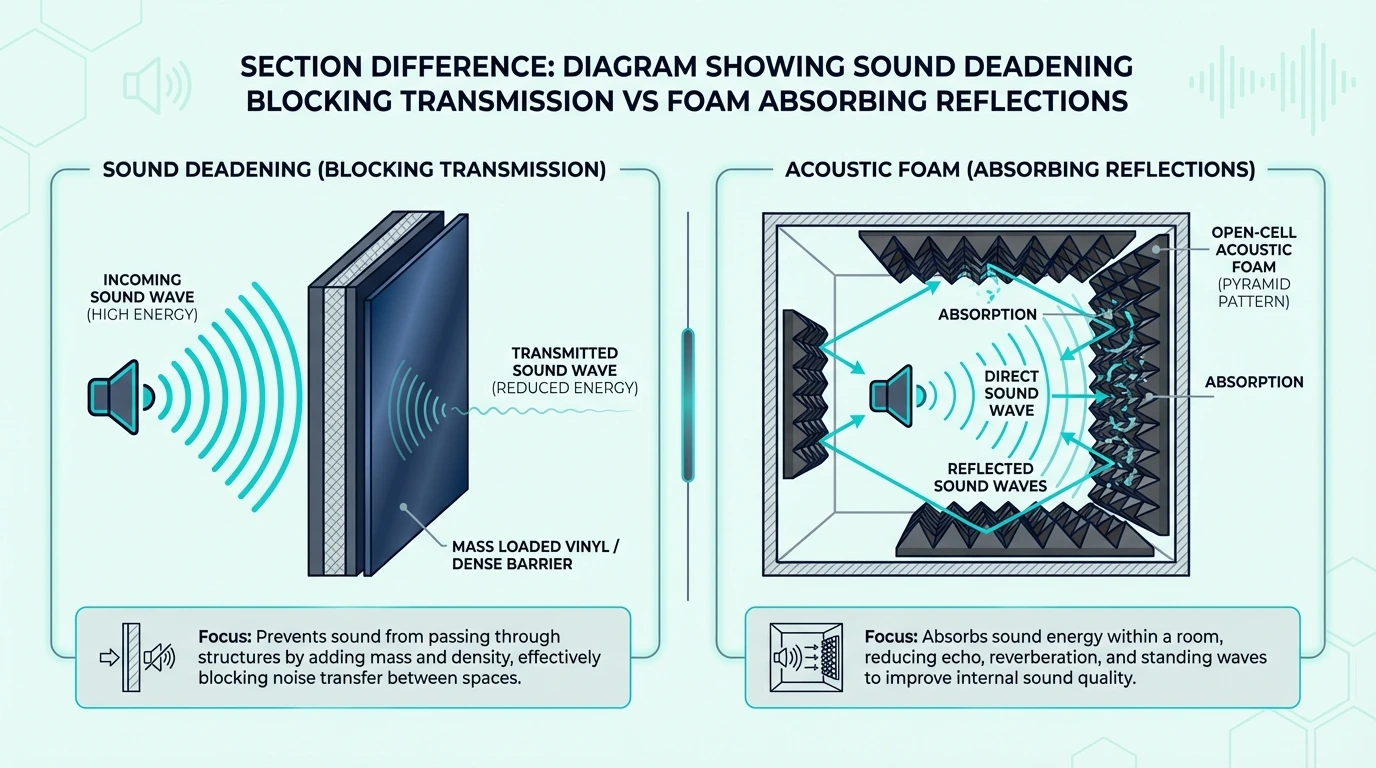
Acoustic foam mounts on the surfaces of your room—walls, ceiling, sometimes floor. It absorbs sound waves that would otherwise reflect off hard surfaces and bounce around the room.
This absorption reduces: – Echo and reverberation – Flutter (rapid repeated reflections) – Harsh, “roomy” sound quality – Comb filtering from delayed reflections
Acoustic foam does NOT stop sound from passing through walls. Sound transmission requires mass and decoupling to block — foam provides neither.
The does acoustic foam work guide covers what foam can realistically achieve.
The frequency absorption guide covers what foam can and can’t handle at each pitch.
Building Insulation: Cavity Fill
Building insulation fills cavities inside walls, ceilings, and floors. Its primary purpose is thermal control — keeping heat in or out.
Sound absorption is a secondary benefit.
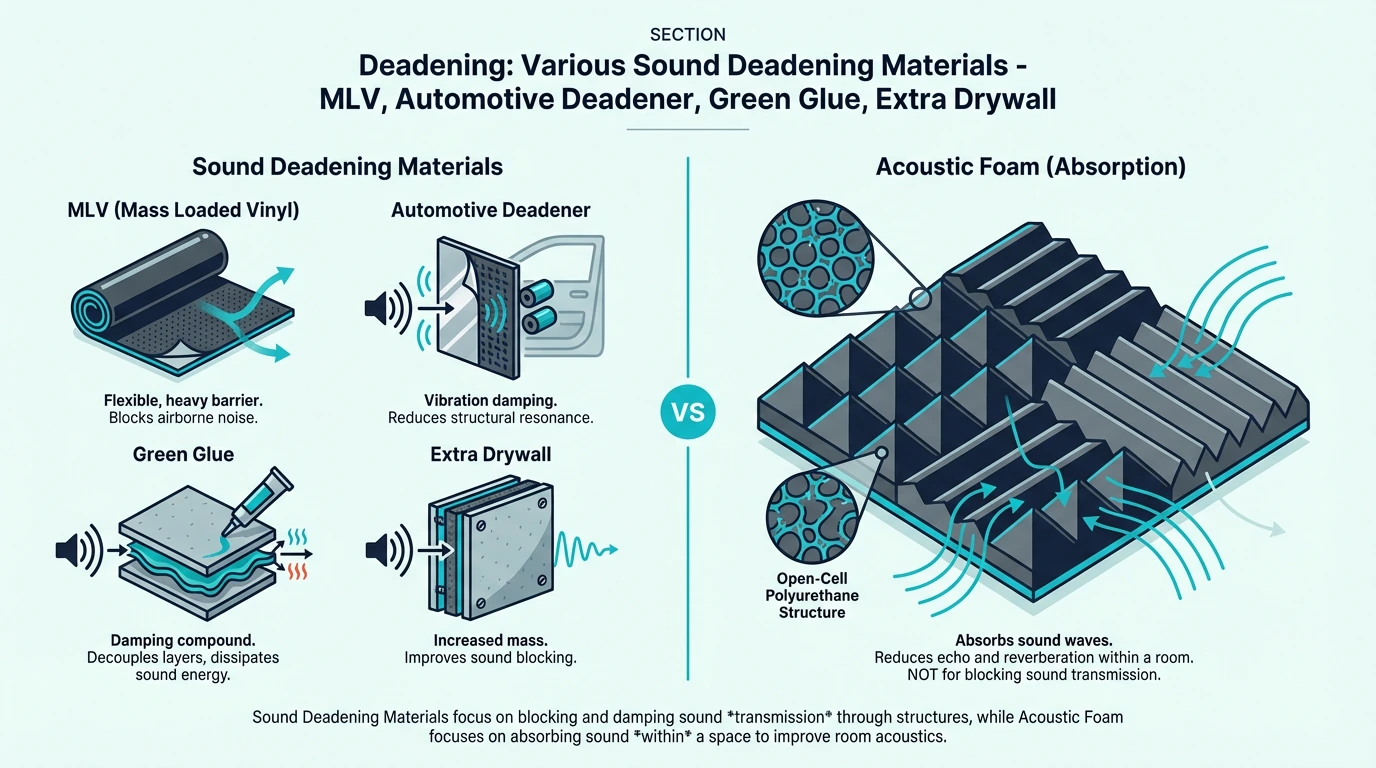
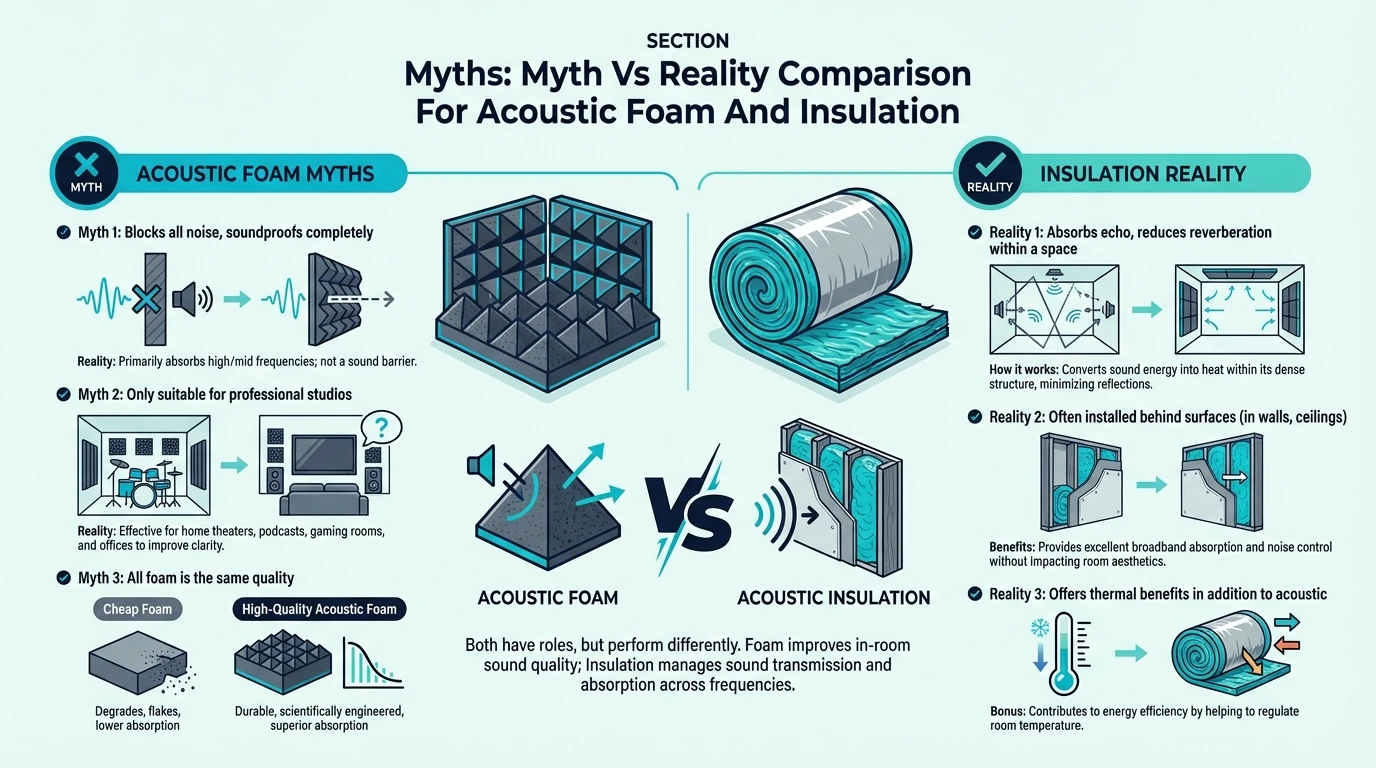
When used for acoustic purposes, insulation: – Absorbs sound within wall cavities – Reduces resonance in hollow walls – Contributes to sound transmission reduction (with other measures) – Provides broadband absorption when exposed
Insulation alone doesn’t soundproof either. Effective soundproofing requires mass (drywall layers), decoupling (isolated wall structures), and sealing (no air gaps)—insulation is just one component.
Material Comparison
Different materials, different properties, different applications.
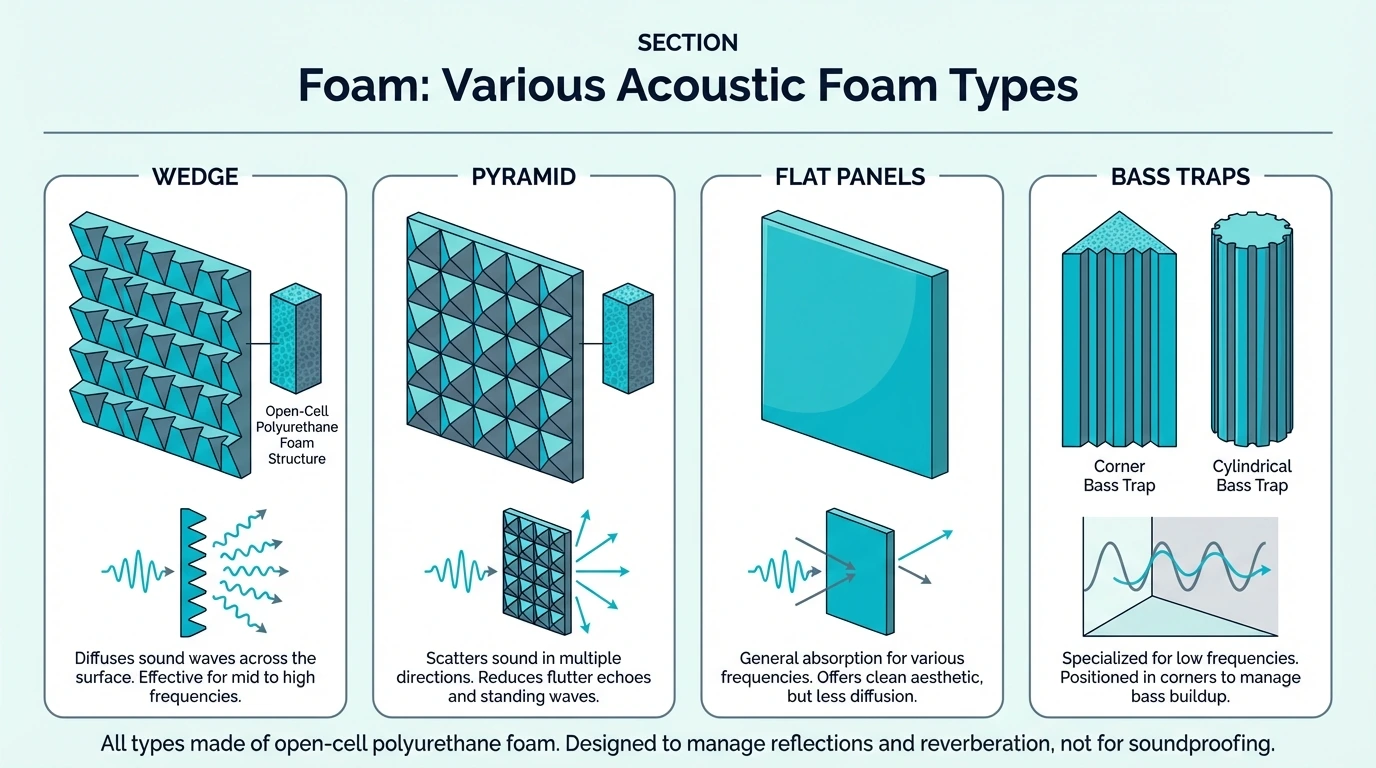
Acoustic Foam Types
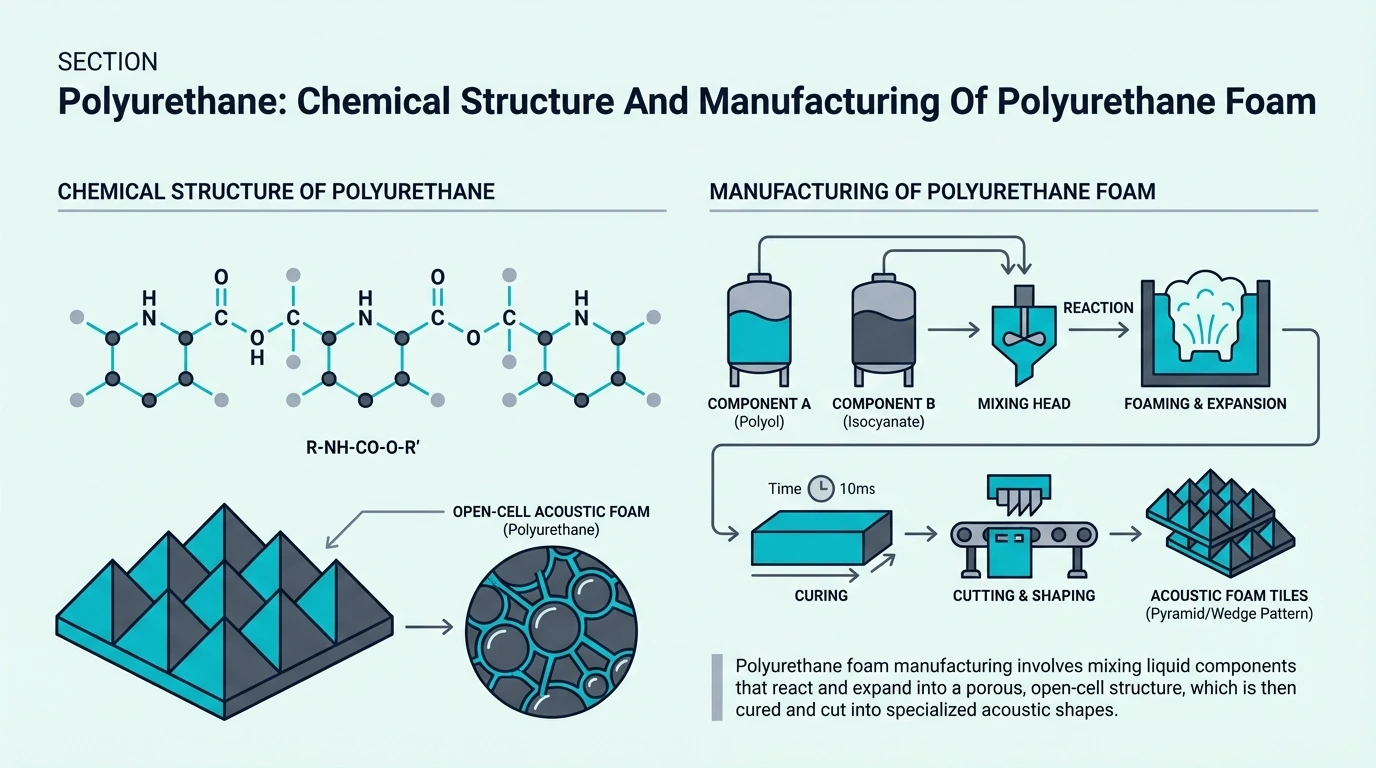
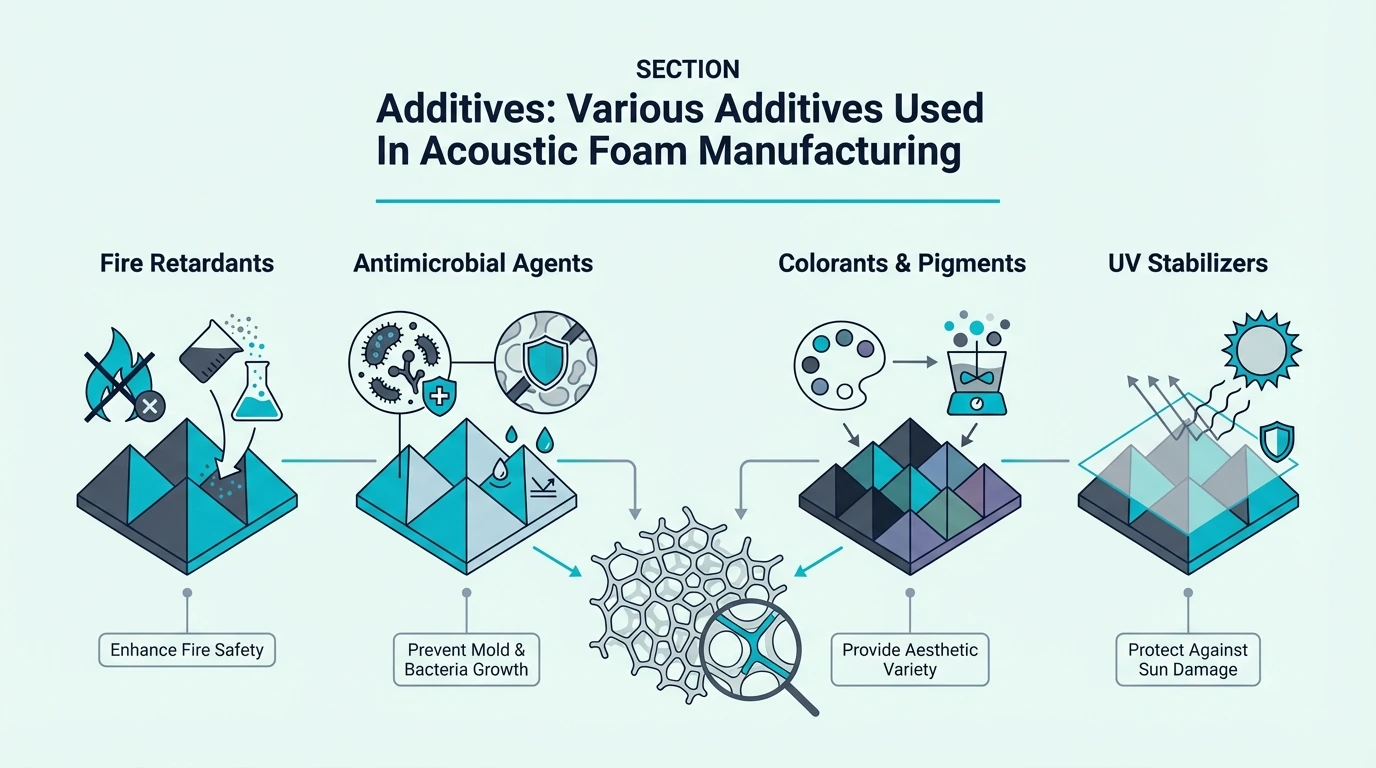
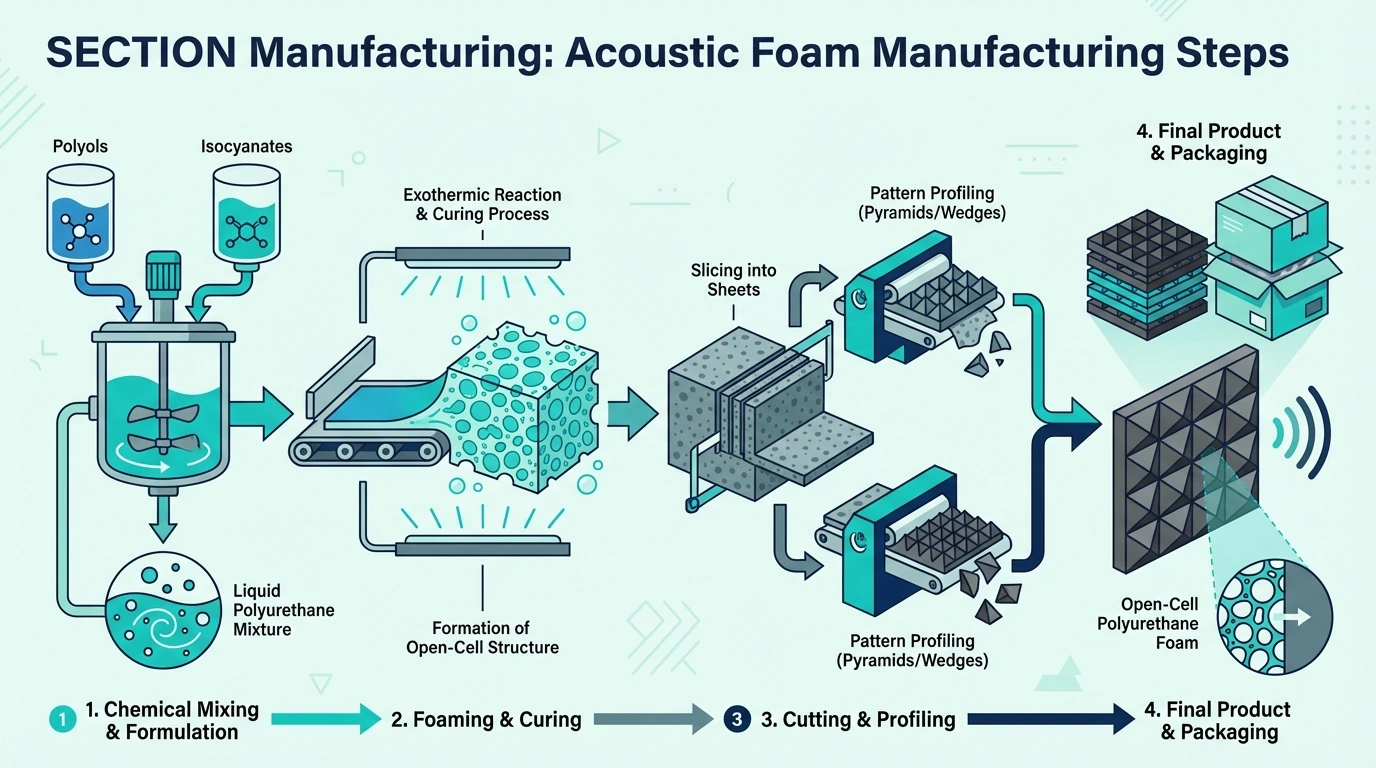
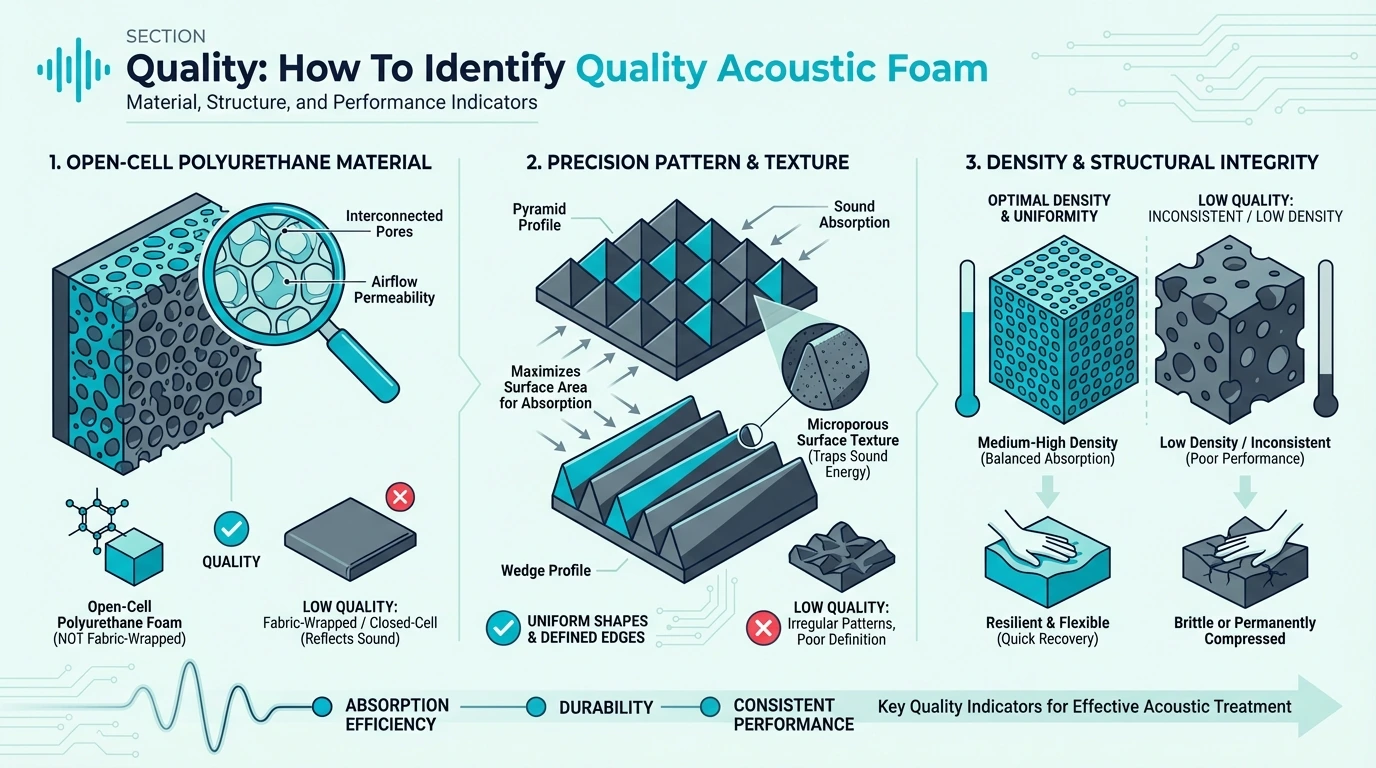
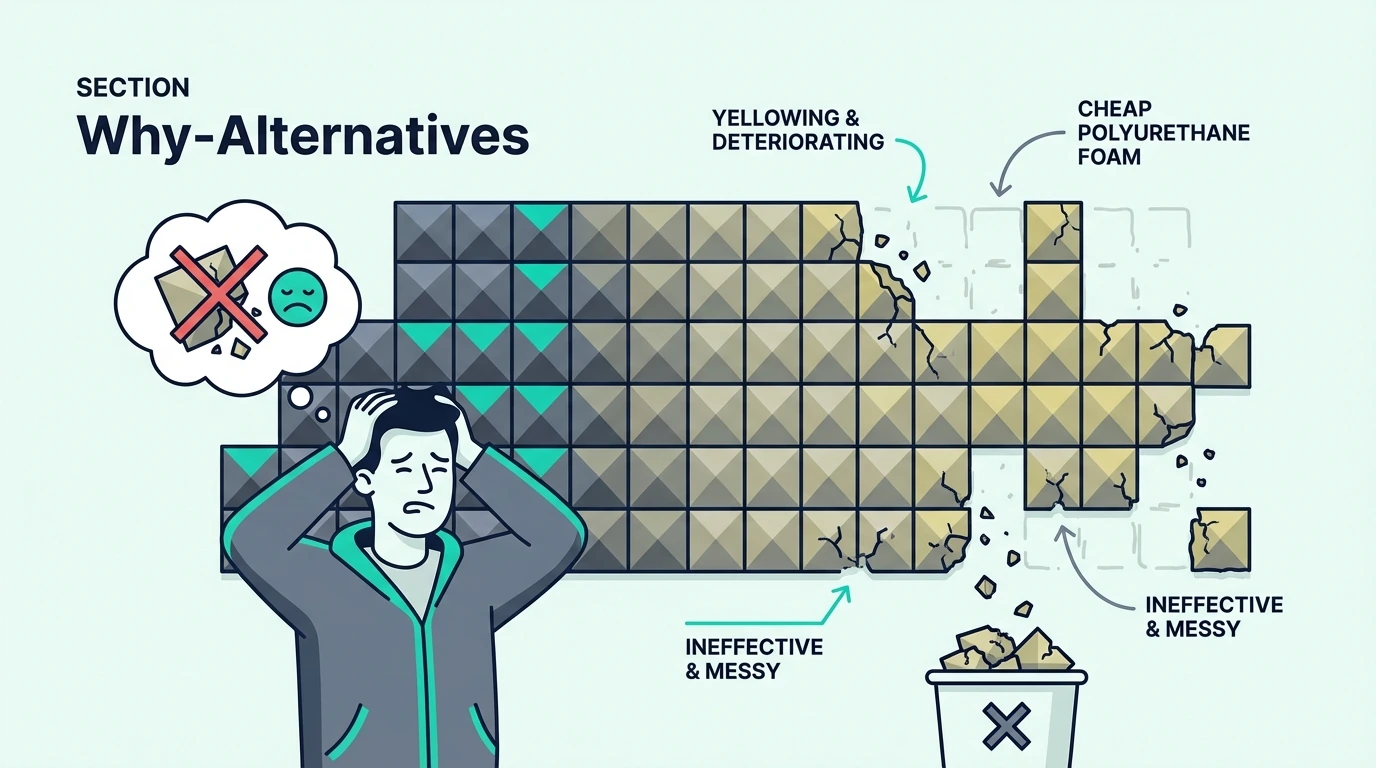
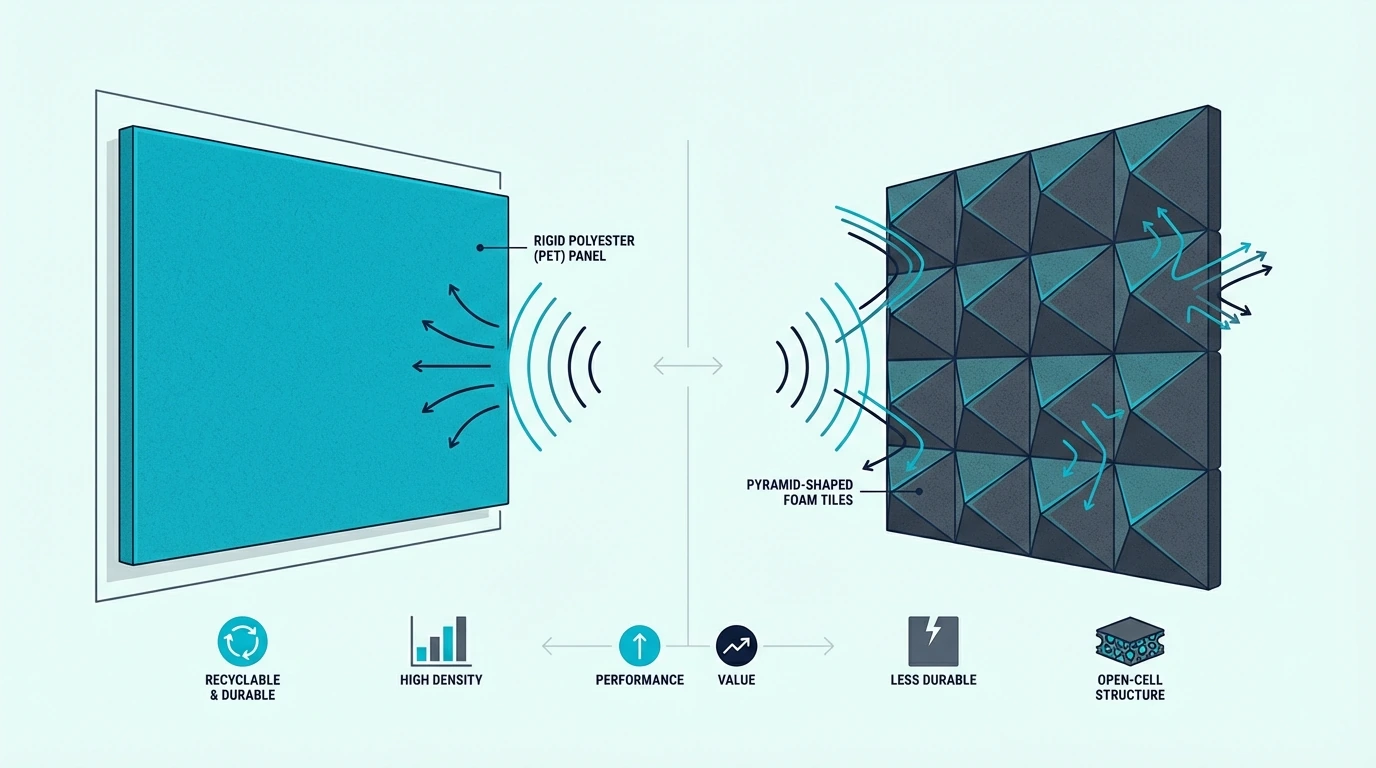
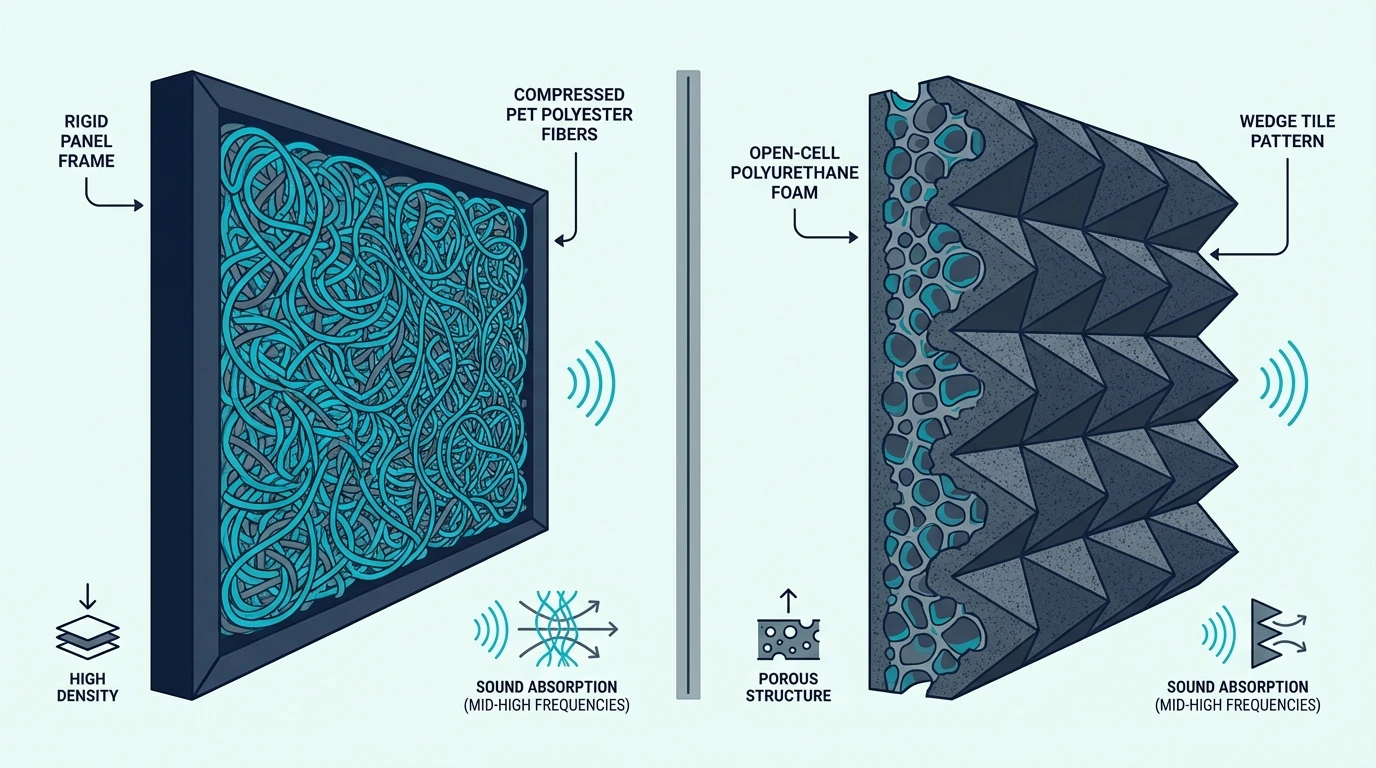
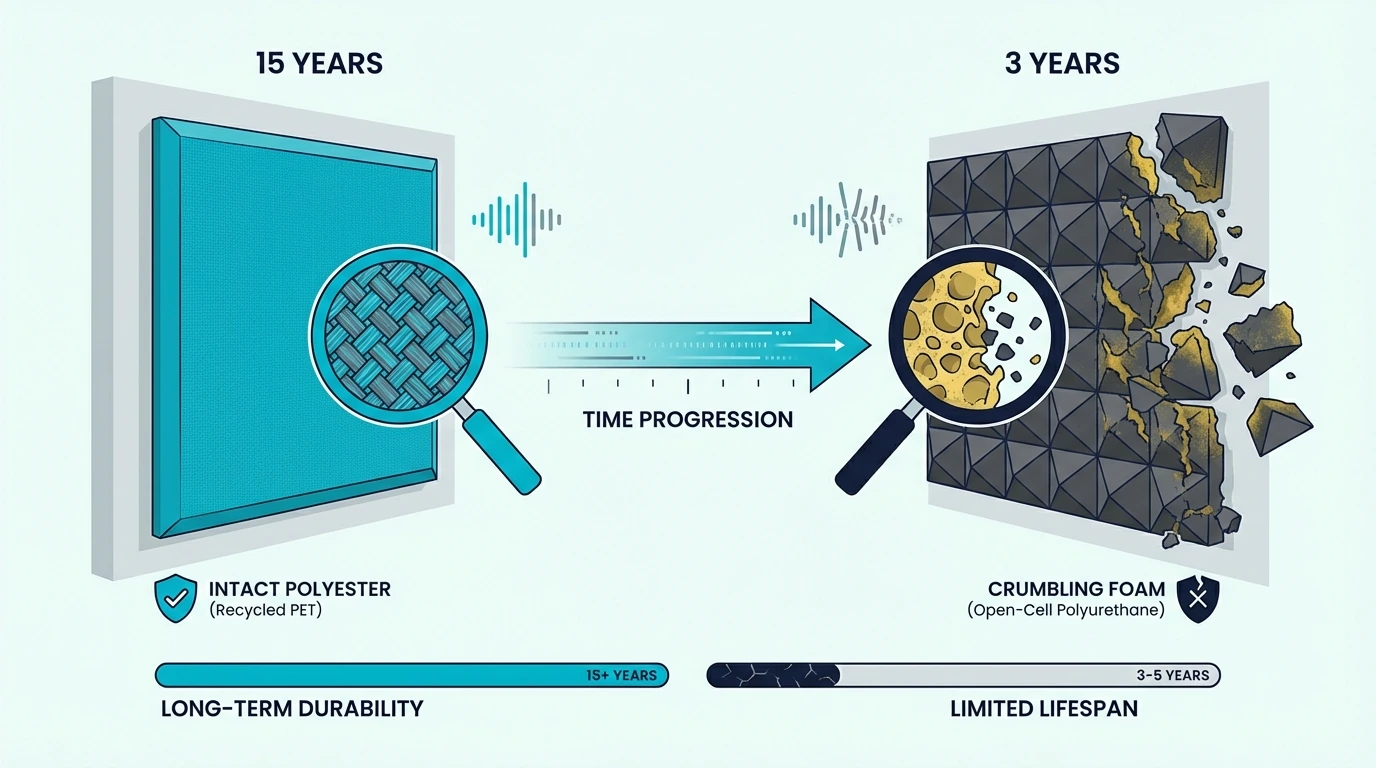
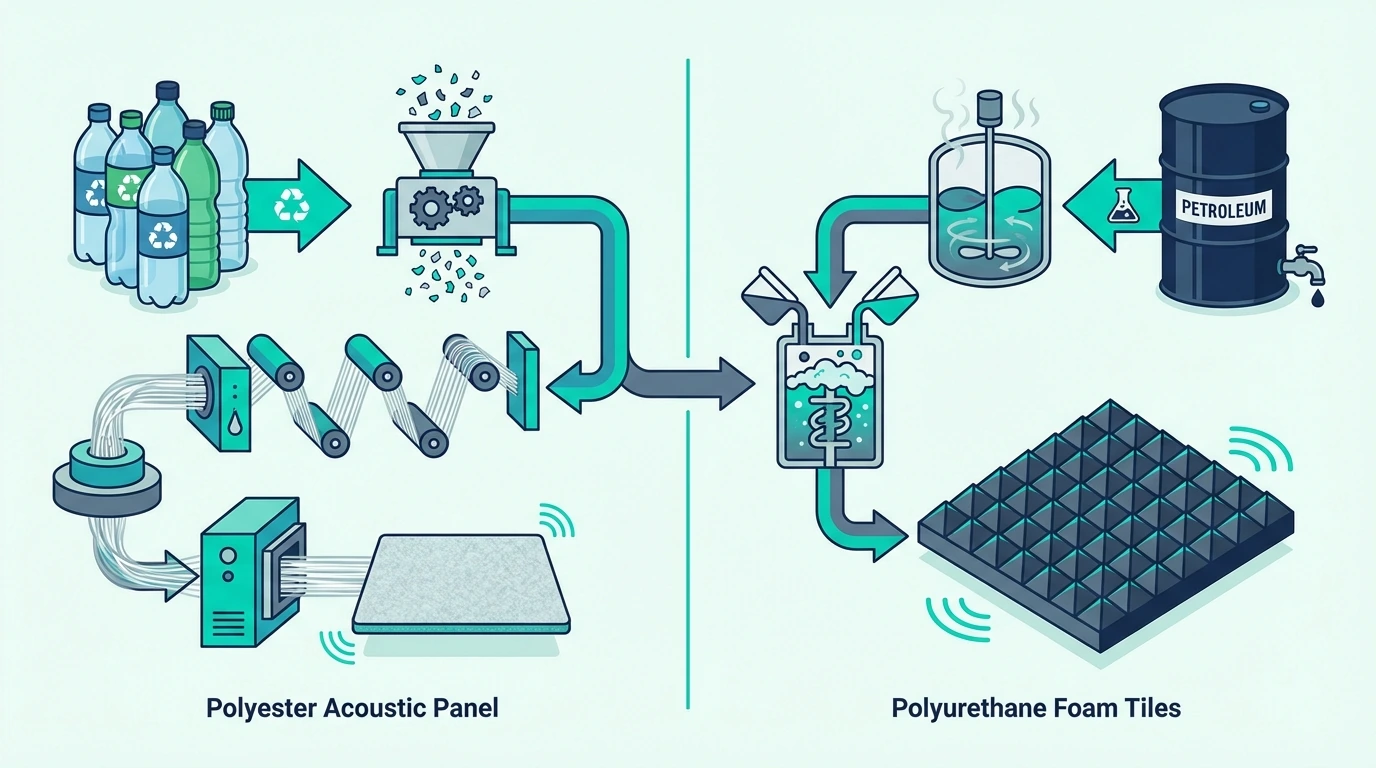
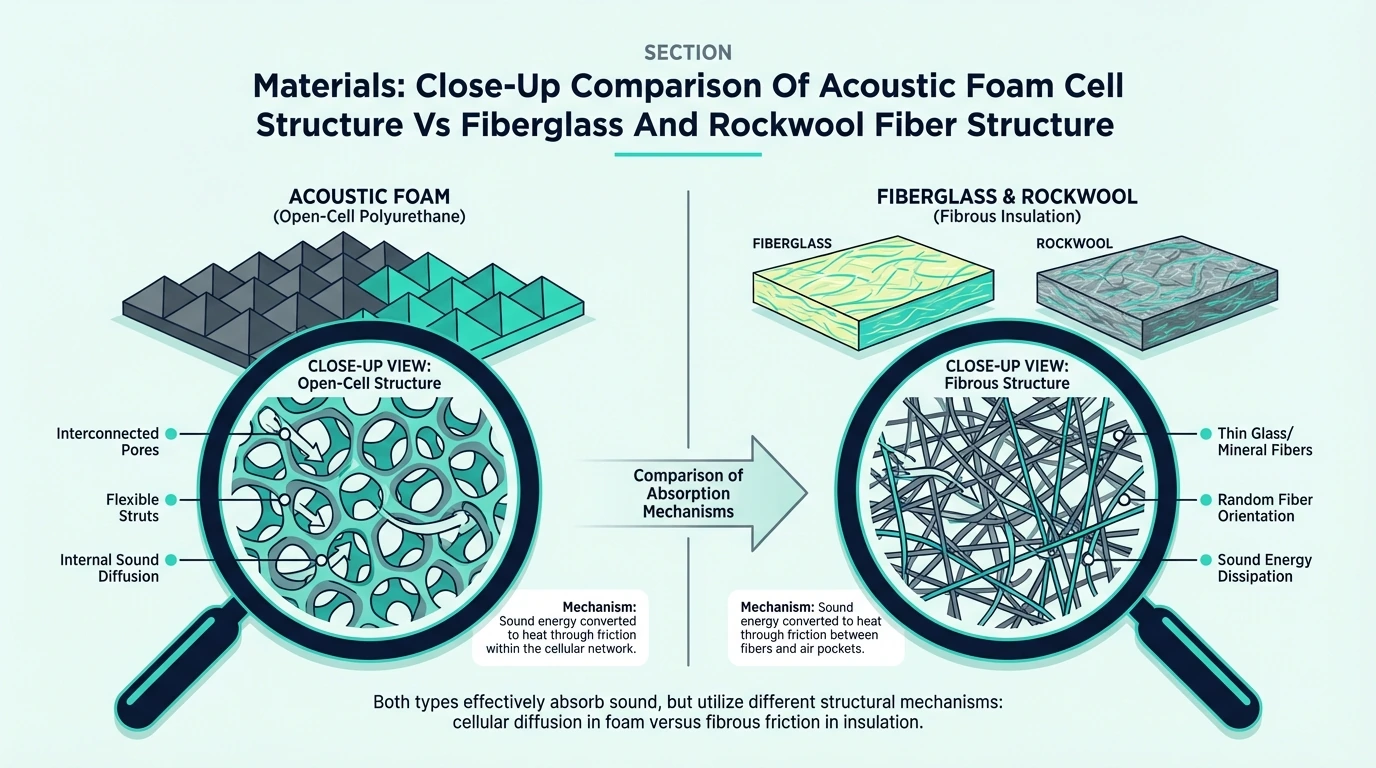
Polyurethane foam: – Most common acoustic foam material – Open-cell structure allows sound penetration – Lightweight, easy to cut and mount – Available in various densities (1.5-2.5 lb/ft³) – Degrades over time with UV exposure
Melamine foam: – Higher performance than polyurethane – Better fire resistance – More expensive – Used in professional installations
The foam materials guide covers how composition affects performance.
Building Insulation Types
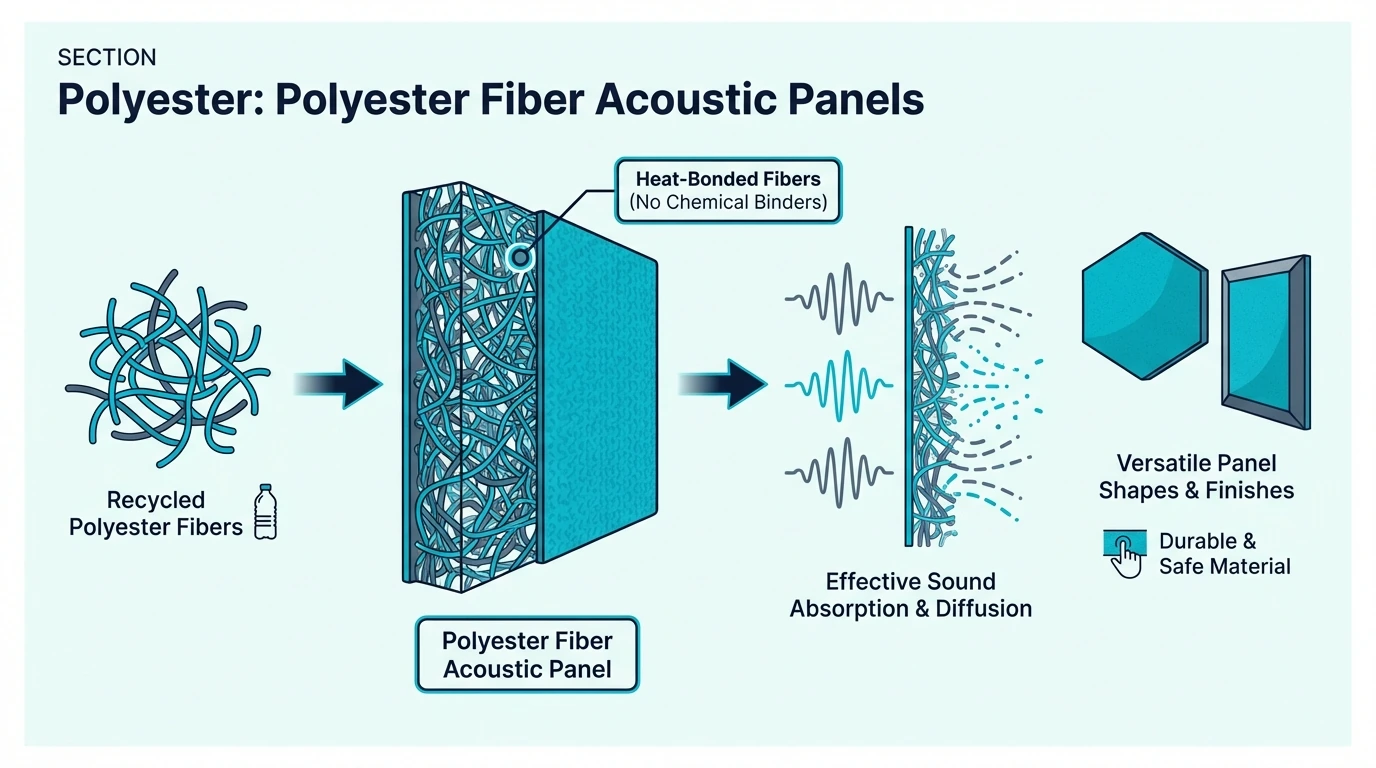
Fiberglass batts: – Pink or yellow fluffy material – Inexpensive, widely available – Good thermal properties – Moderate acoustic absorption – Irritating fibers require protection during handling
Mineral wool (rockwool): – Denser than fiberglass – Better acoustic properties – Superior fire resistance – More expensive than fiberglass – Preferred for acoustic applications
Rigid fiberglass boards (703, 705): – Dense, rigid panels – Excellent acoustic absorption – Used in professional acoustic panels – Higher cost than batts
Spray foam: – Expands to fill cavities – Excellent thermal properties – Closed-cell types reflect sound (poor for acoustics) – Open-cell types provide some absorption
Performance Comparison
How do these materials actually perform acoustically?
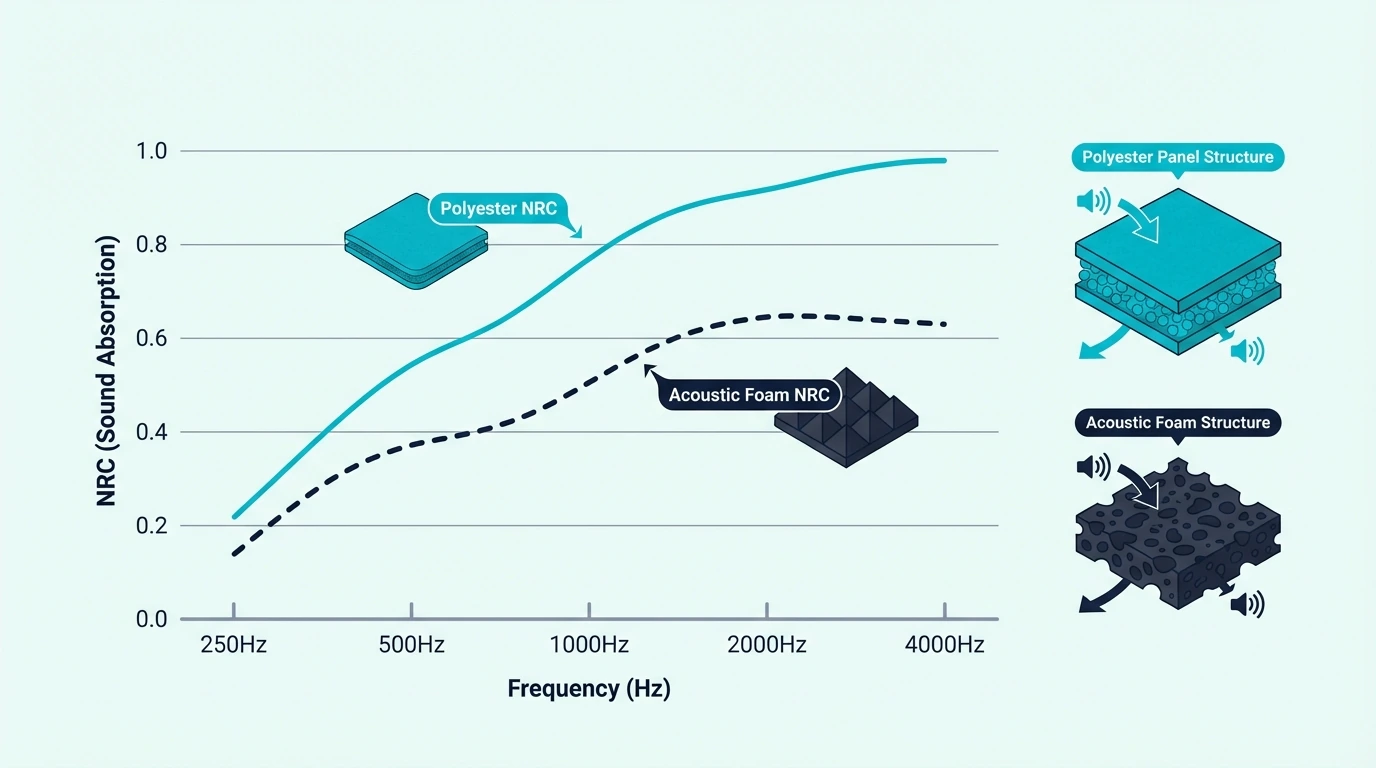
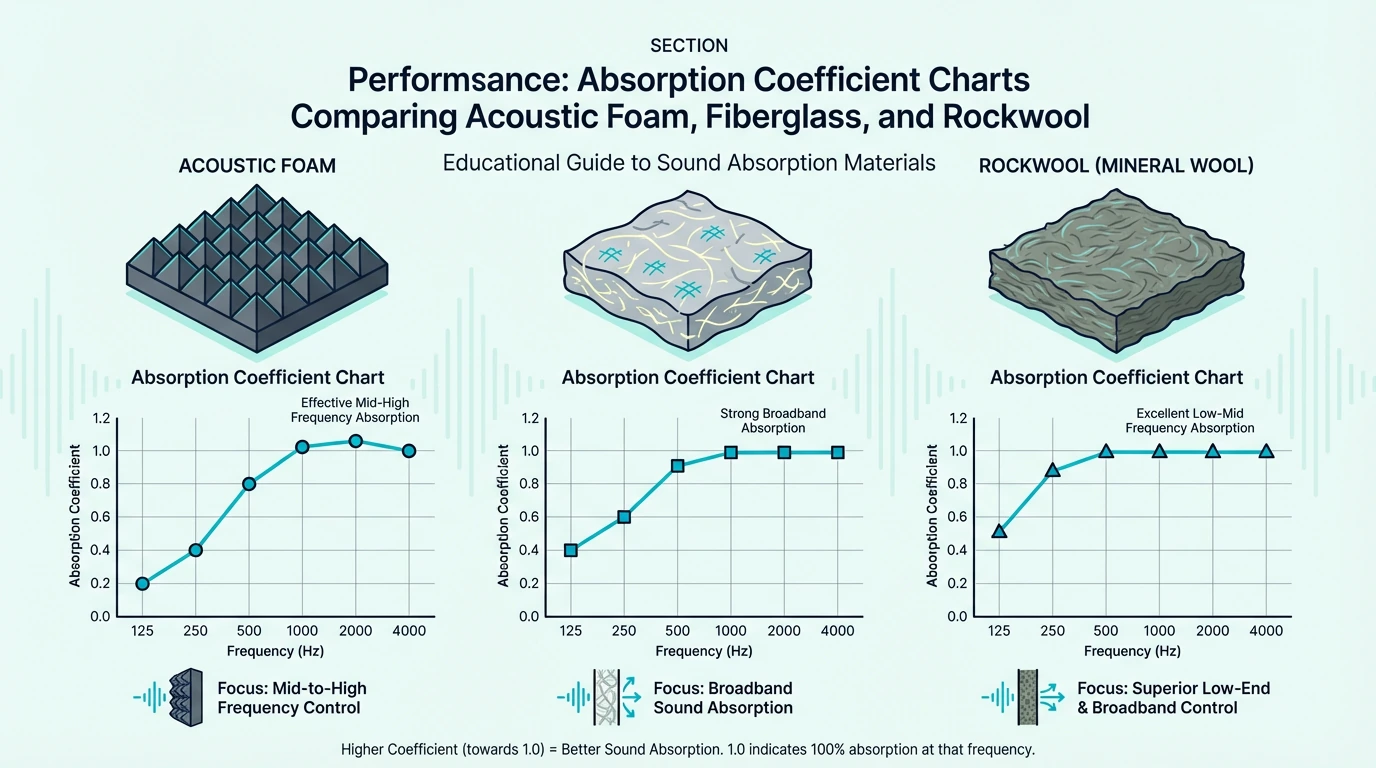
Absorption Coefficients
| Frequency | 2” Acoustic Foam | 3.5” Fiberglass Batt | 3” Rockwool |
|---|---|---|---|
| 125 Hz | 0.11 | 0.34 | 0.52 |
| 250 Hz | 0.30 | 0.73 | 0.93 |
| 500 Hz | 0.60 | 0.99 | 1.00+ |
| 1000 Hz | 0.85 | 0.99 | 1.00+ |
| 2000 Hz | 0.90 | 0.94 | 0.98 |
| NRC | 0.65 | 0.90 | 0.95 |
Values are representative; specific products vary.
What This Means
Building insulation (especially rockwool) actually absorbs sound better than acoustic foam across most frequencies. The denser fiber structure and greater typical thickness provide superior absorption.
So why use acoustic foam at all? Because: 1. Foam is designed for surface mounting 2. Insulation requires containment (fabric wrap, wall cavity) 3. Foam comes in convenient panel sizes 4. Insulation fibers are irritating without covering
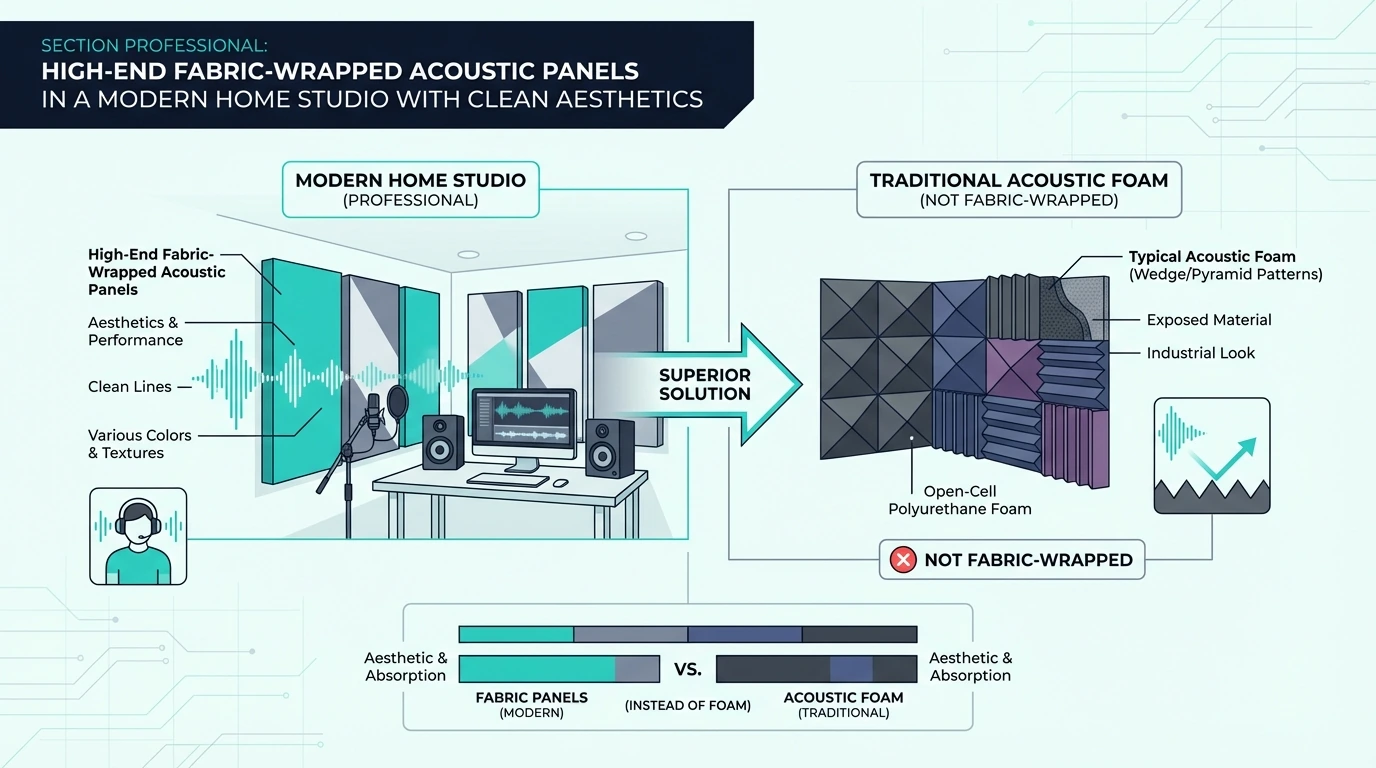
When insulation is properly contained in fabric-wrapped panels, it outperforms foam. But for simple surface treatment, foam’s convenience often wins.
When to Use Acoustic Foam
Acoustic foam is the right choice for specific situations.
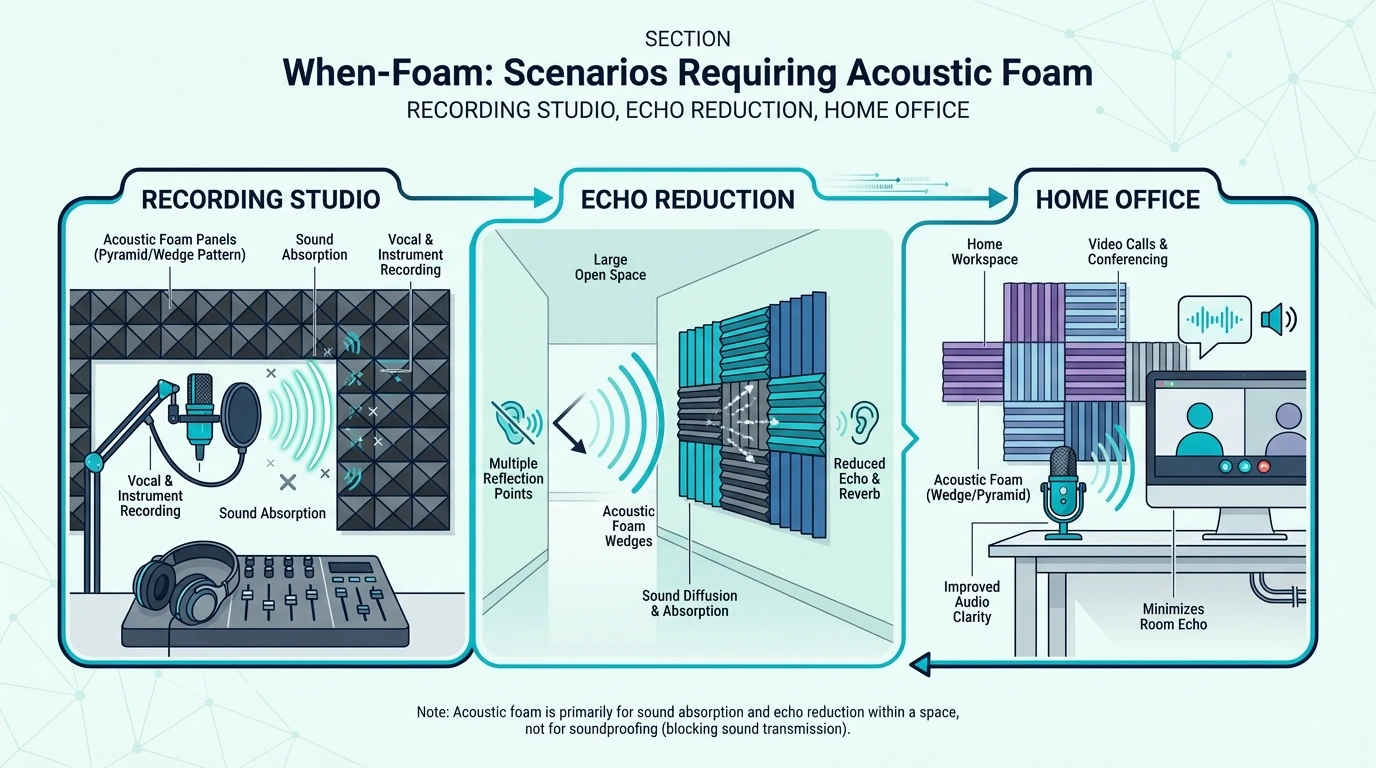
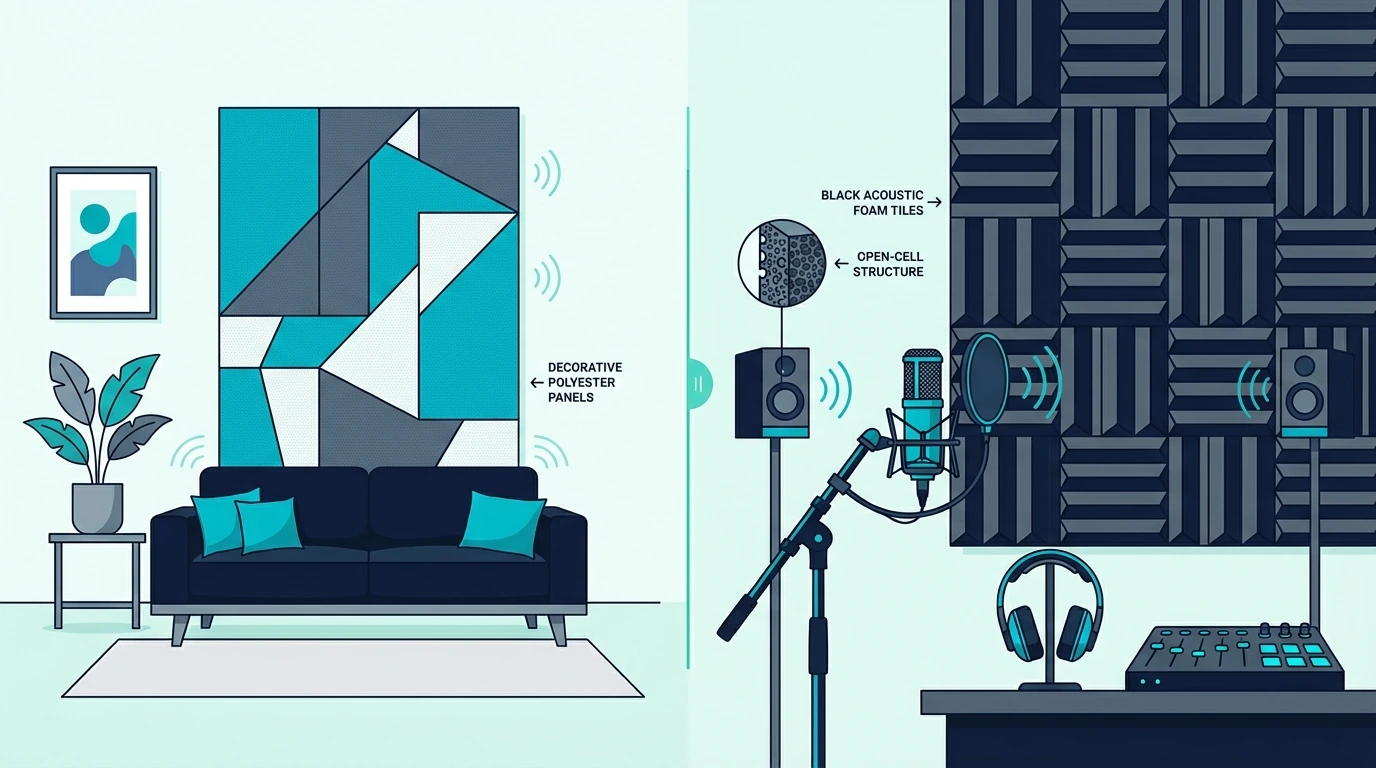
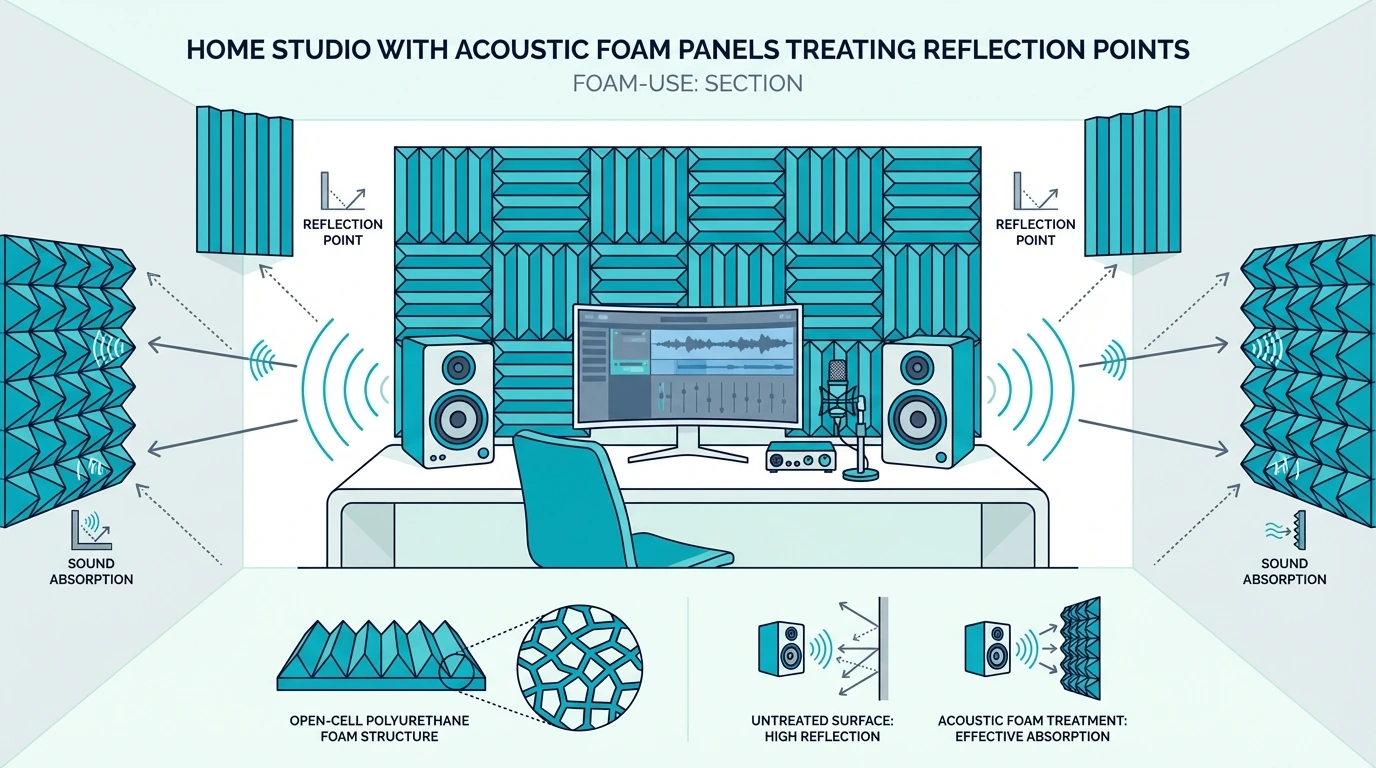
Treating Room Reflections
If your problem is echo, reverb, or harsh sound within your room, acoustic foam addresses it directly. Mount panels at reflection points to absorb sound before it bounces back to your ears or microphone.
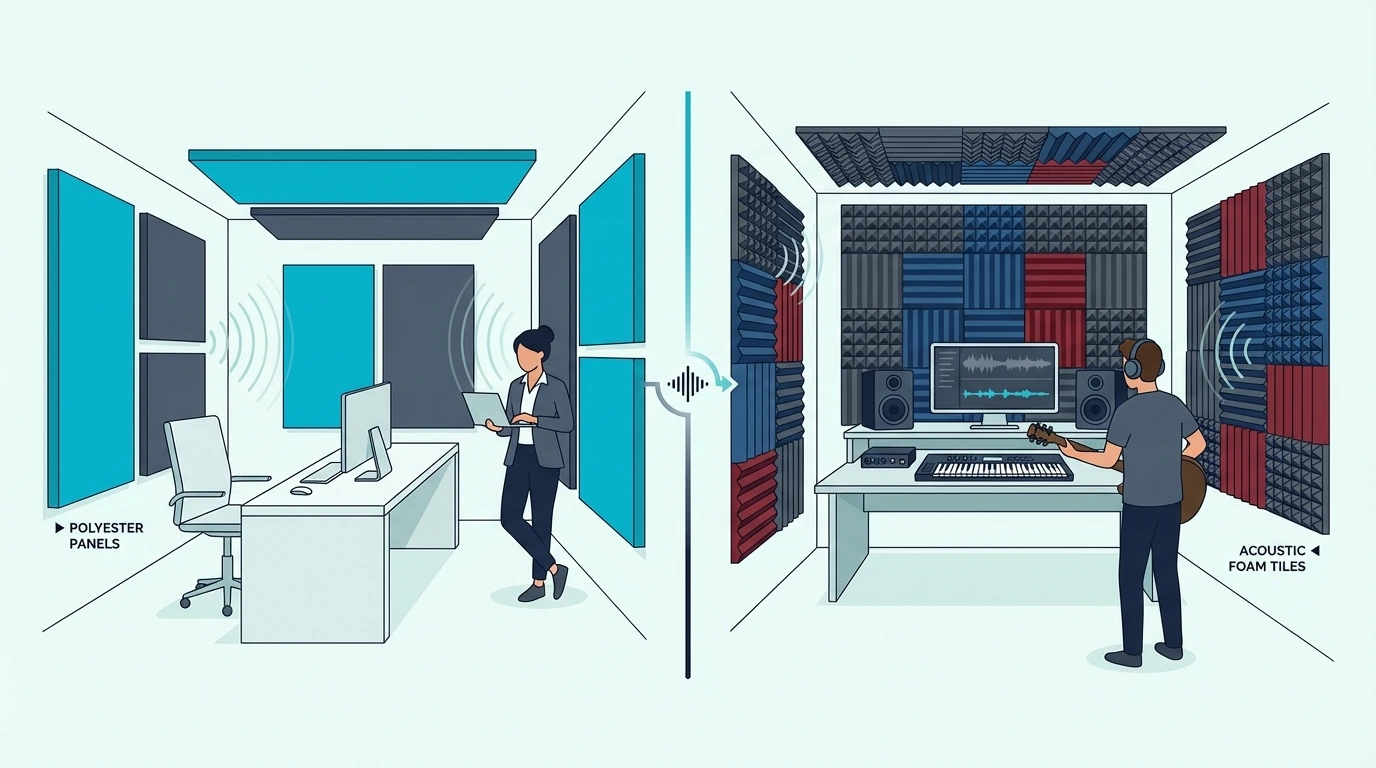
Common applications: – Home recording studios – Podcast recording spaces – Video conferencing rooms – Gaming and streaming setups – Practice rooms
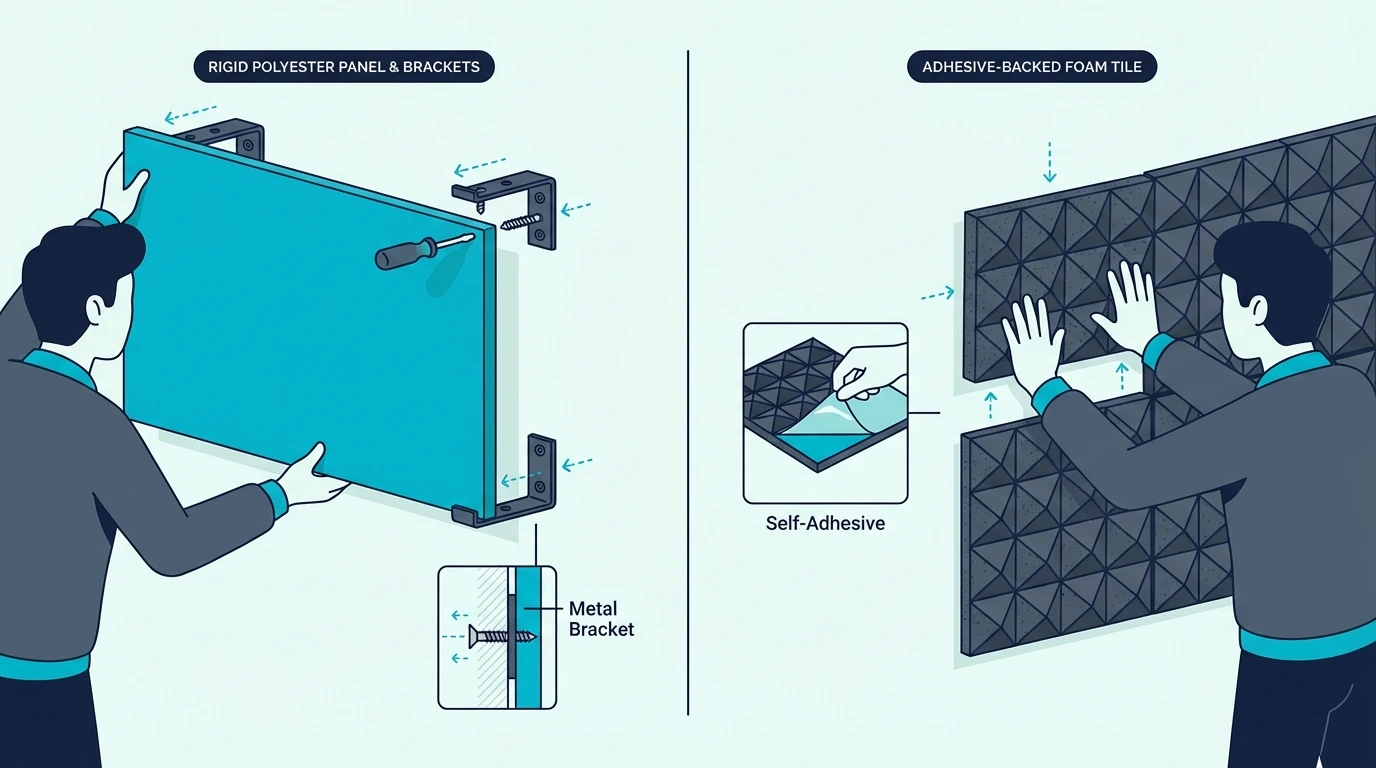
Quick, Easy Installation
Foam panels mount with adhesive, command strips, or clips — no construction required. Mounting tape like WINDIR double-sided adhesive squares makes it a one-person afternoon job.
For renters or temporary setups, foam’s easy installation and removal is a practical advantage. The wall installation guide covers every mounting method.
Budget-Conscious Treatment
Foam panels cost less than equivalent fabric-wrapped insulation panels. When budget is limited and you need surface treatment, a starter pack like TroyStudio 2-inch foam panels provides meaningful improvement at accessible prices.
The best foam for recording roundup covers top picks by use case.
Limitations to Accept
Foam won’t: – Soundproof your room – Stop sound from entering or leaving – Effectively absorb bass frequencies – Last as long as other treatments
If these limitations matter for your application, consider whether insulation-based DIY panels or commercial fabric-wrapped panels would better fit your needs.
When to Use Building Insulation
Building insulation serves different purposes than surface-mounted foam.
Soundproofing Projects
If you need to reduce sound transmission between spaces—stopping noise from entering your room or preventing your sound from disturbing others—insulation is part of the solution.
Effective soundproofing combines: – Mass (multiple drywall layers) – Insulation (cavity absorption) – Decoupling (isolated wall structures) – Sealing (no air gaps)
Insulation alone provides modest improvement. Combined with other measures, it contributes meaningfully — and sealing air gaps with acoustical caulk is one of the most overlooked steps.
New Construction or Renovation
When walls are open during construction or renovation, adding acoustic insulation is easy and cost-effective. Rockwool or fiberglass batts in wall cavities reduce sound transmission and resonance.
This is the ideal time to address acoustics—retrofitting insulation into existing walls is much more difficult and expensive.
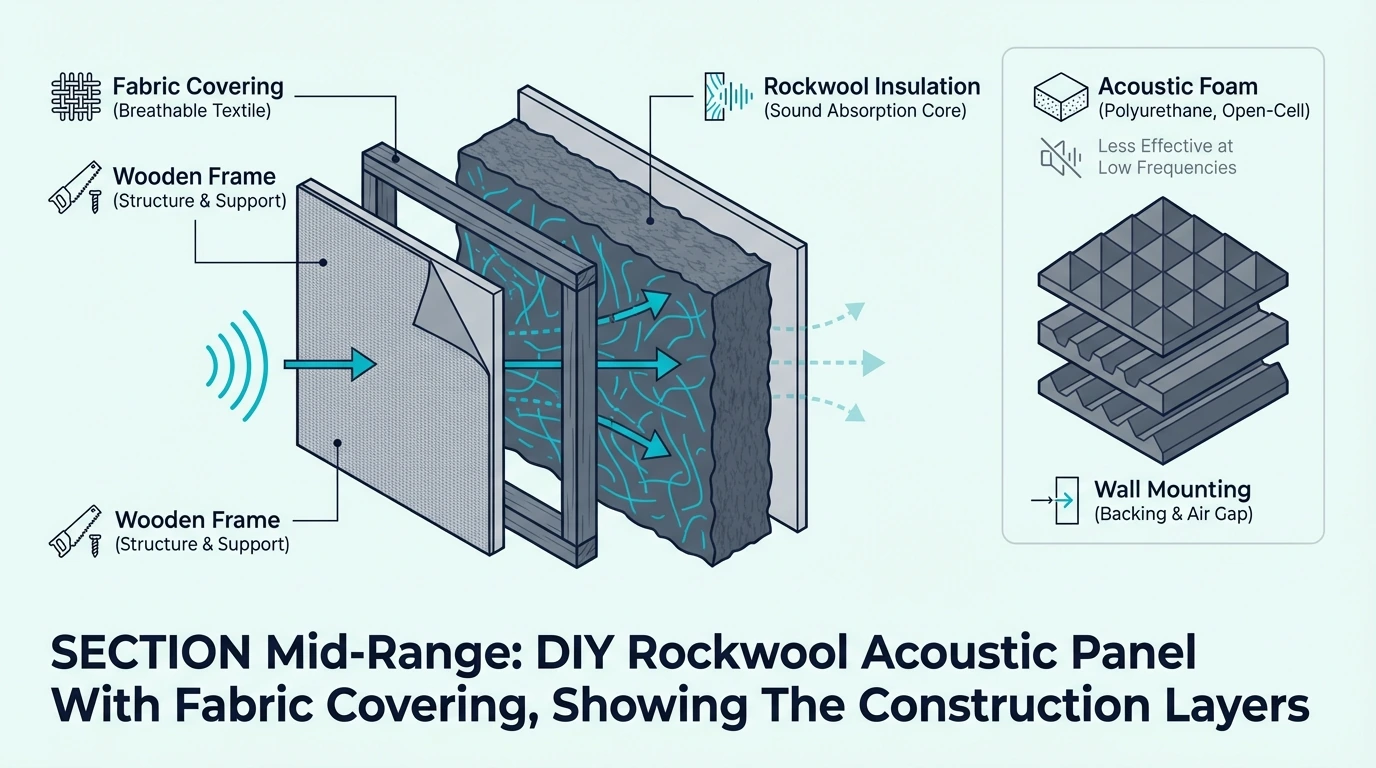
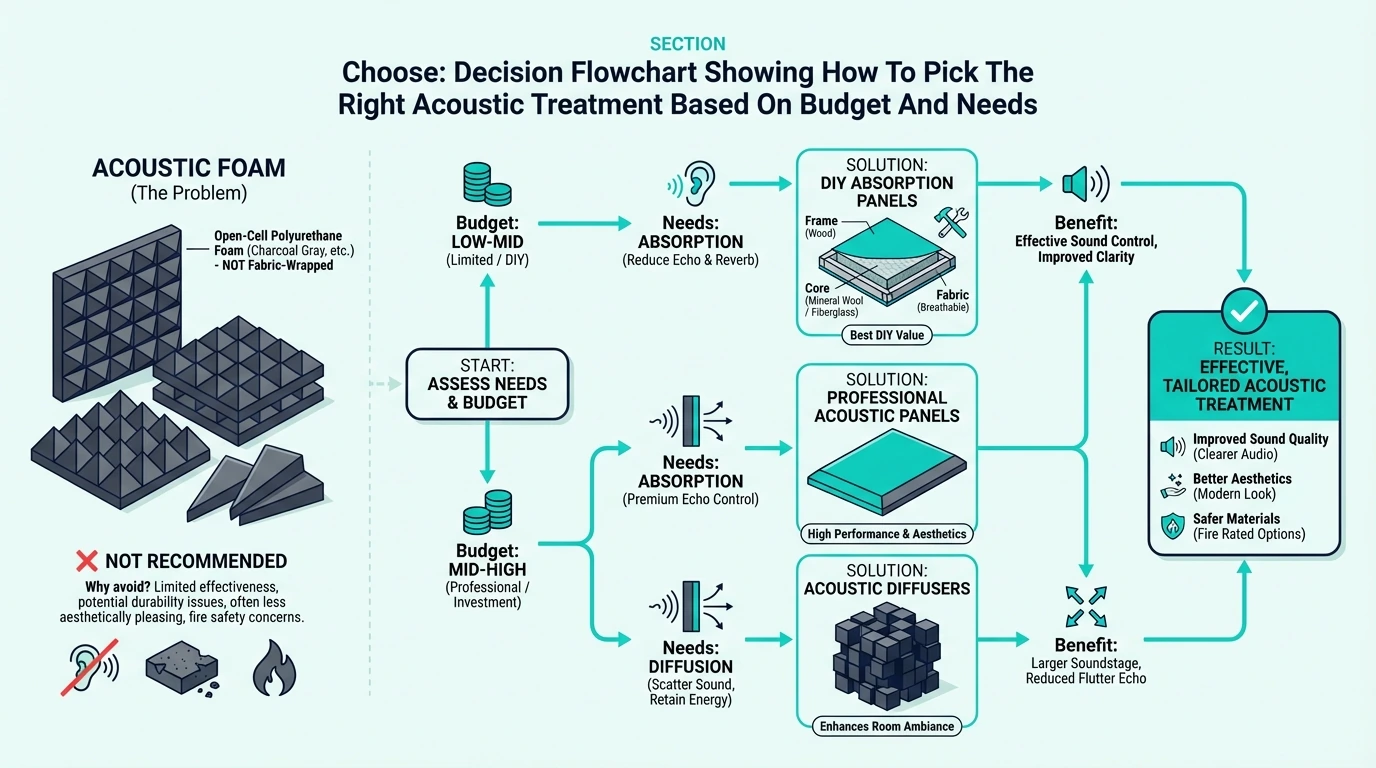
DIY Acoustic Panels
Building your own acoustic panels from rockwool or rigid fiberglass provides professional-grade absorption at lower cost than commercial panels.
The process: 1. Build simple wooden frames 2. Insert rockwool or fiberglass 3. Wrap with acoustically transparent fabric 4. Mount on walls
These DIY panels outperform foam while costing less than commercial fabric panels. The DIY acoustic panels guide walks through the build step by step.
Bass Traps
Low-frequency absorption requires thick, dense material. Rockwool bass traps (4-6 inches thick) absorb bass frequencies that foam can’t touch.
For corner treatment and bass control, insulation-based traps clearly outperform foam alternatives. The bass traps vs foam comparison covers when each makes sense.
Common Misconceptions
Several misunderstandings lead to wrong product choices.
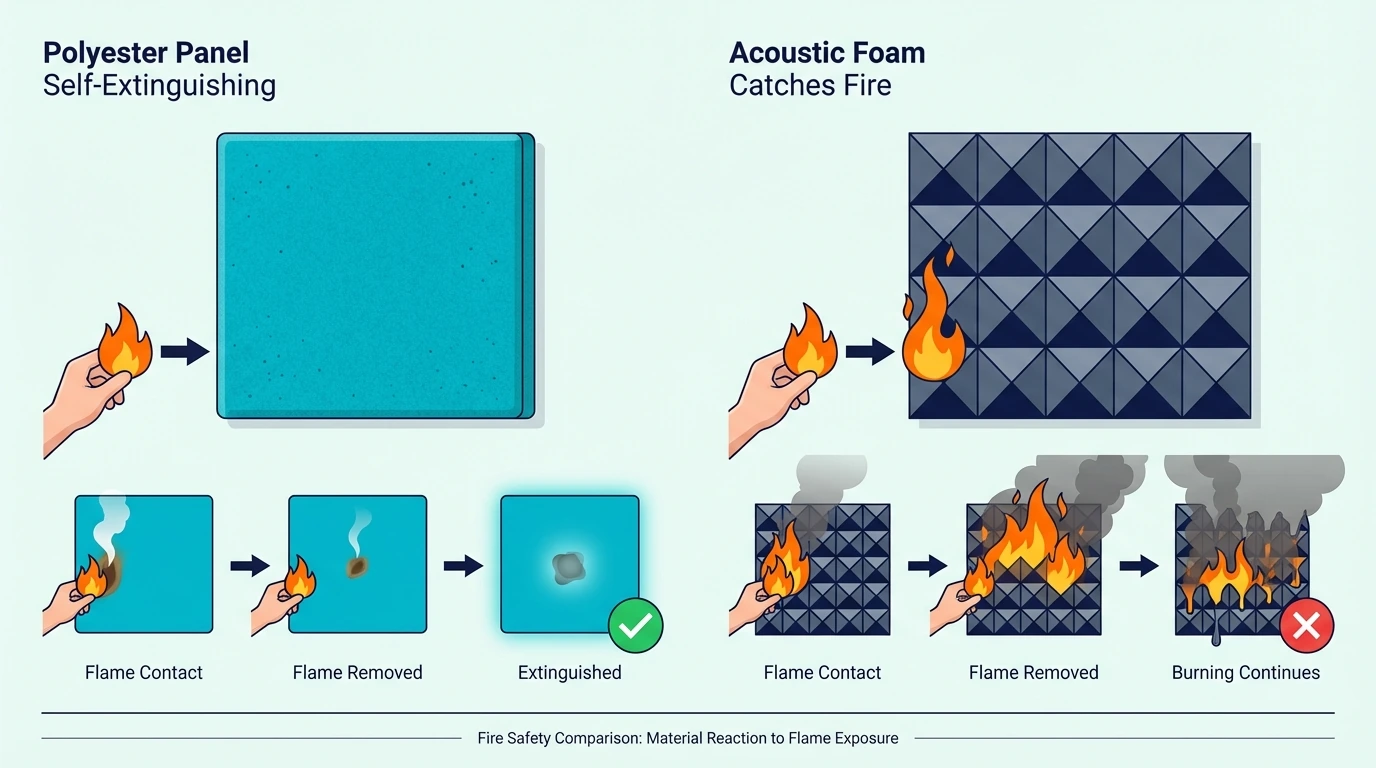
“Acoustic Foam Soundproofs Rooms”
This is the most common misconception. Acoustic foam absorbs sound within a room—it doesn’t block sound transmission through walls.
If you cover your walls with foam and expect neighbors to stop hearing you (or vice versa), you’ll be disappointed. Soundproofing requires mass and construction, not surface treatment.
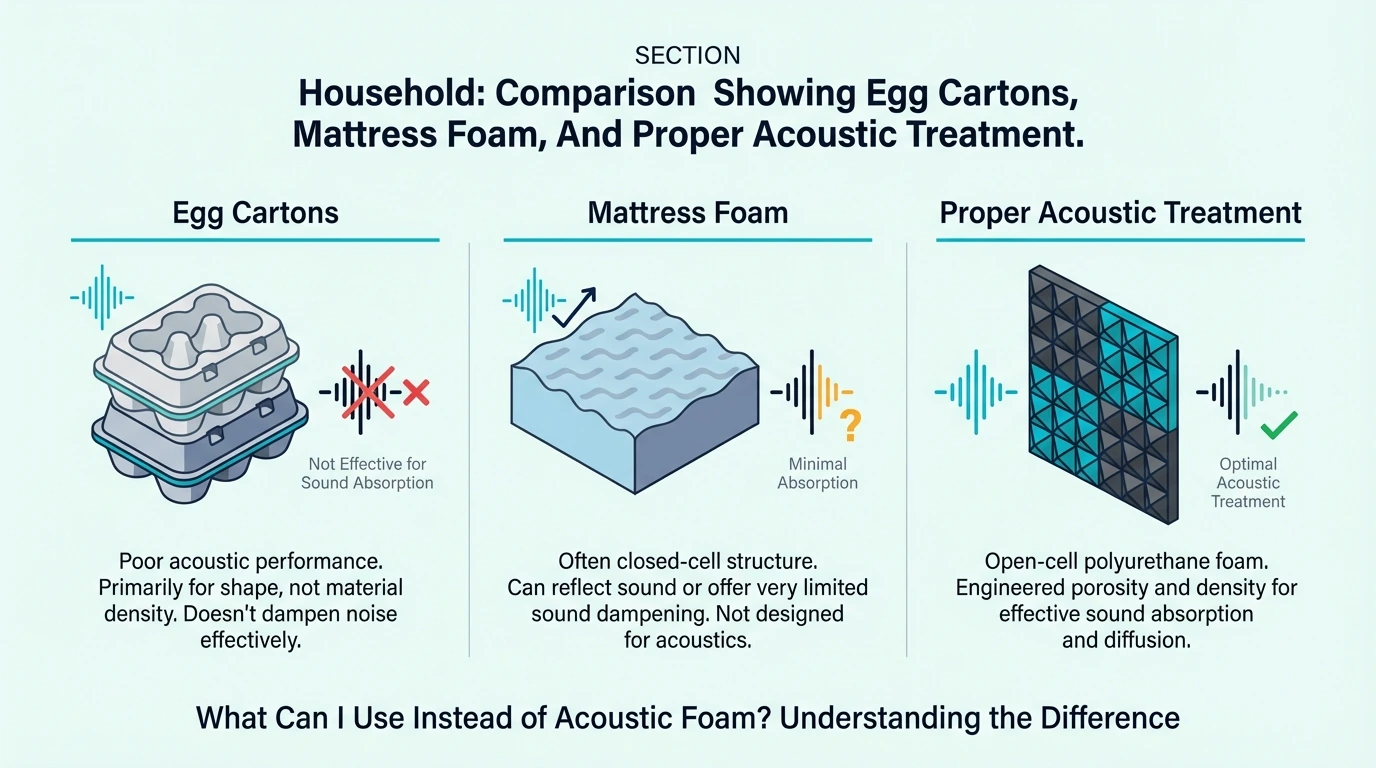
“Any Insulation Works for Acoustics”
Not all insulation is equal acoustically: – Closed-cell spray foam: Reflects sound, poor for acoustics – Polystyrene/styrofoam: Minimal absorption – Thin fiberglass: Limited effectiveness
For acoustic applications, use rockwool, mineral wool, or dense fiberglass (703/705). Standard pink fiberglass batts work but aren’t ideal.
“More Insulation = Better Soundproofing”
Insulation in wall cavities helps, but adding more beyond filling the cavity provides diminishing returns. Soundproofing improvements come from adding mass (more drywall) and decoupling (resilient channels, double walls), not just more insulation.
“Foam and Insulation Are Interchangeable”
They’re not. Foam is designed for surface mounting and convenient installation, while insulation is designed for cavity fill and requires containment.
Using insulation like foam (exposed on walls) creates fiber hazards and looks unprofessional. Using foam like insulation (stuffed in walls) wastes money on an expensive product where cheap insulation works better.
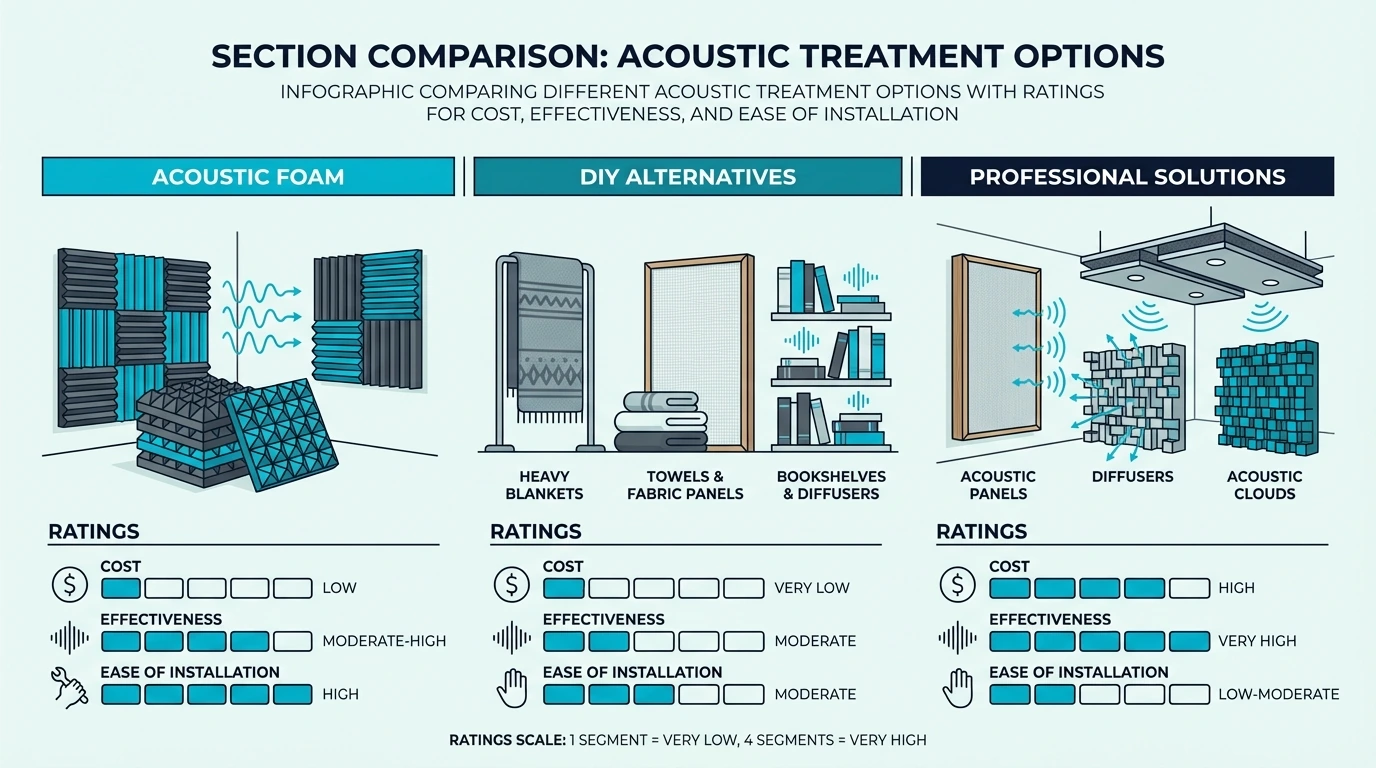
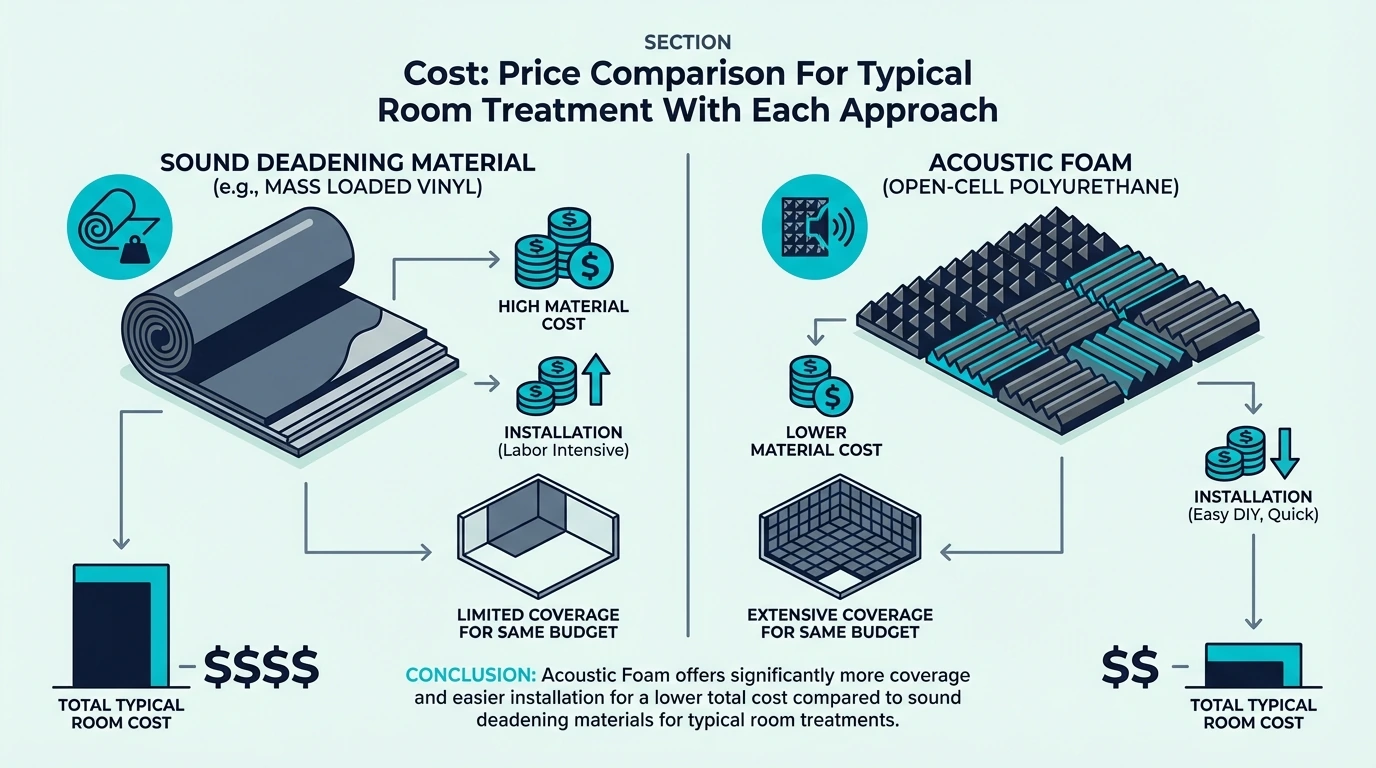
Cost Comparison
Budget often drives decisions. Here’s how costs compare.
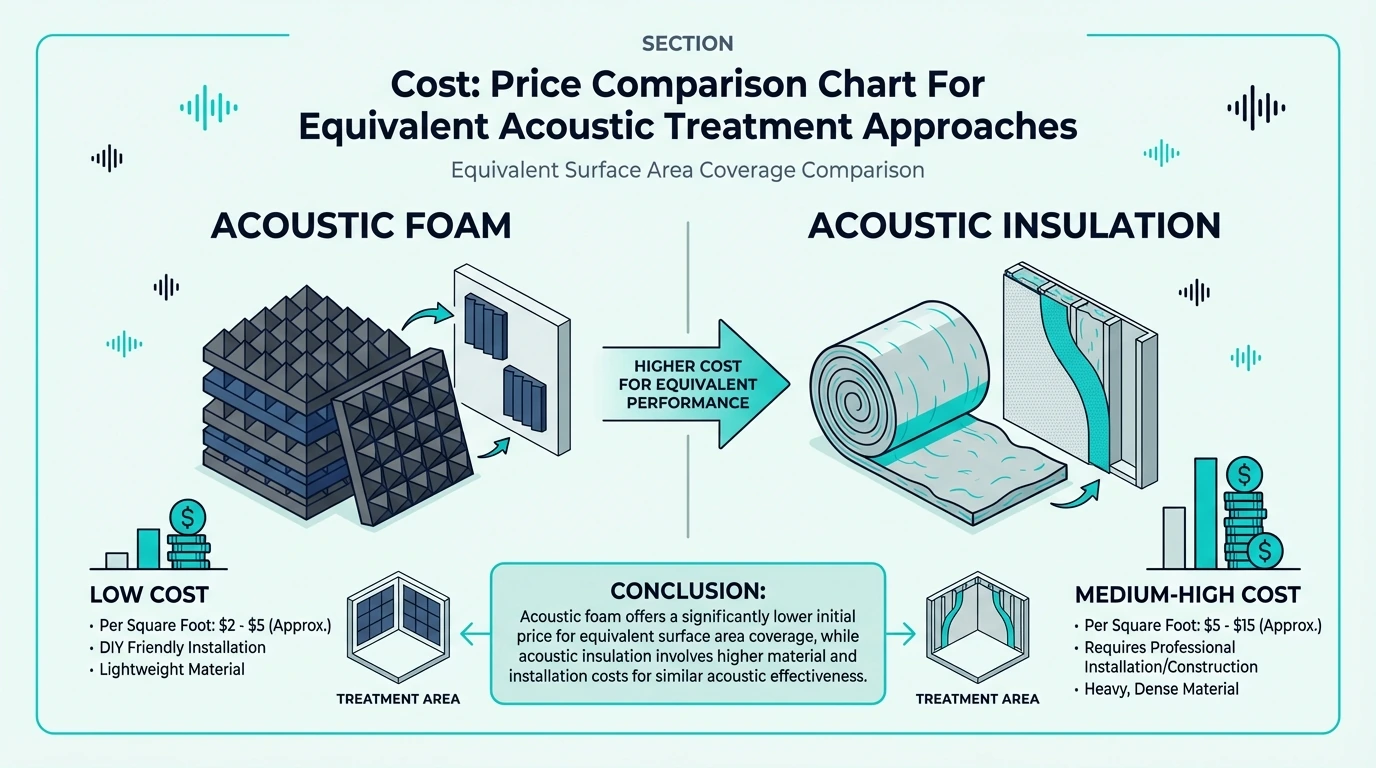
Surface Treatment Costs
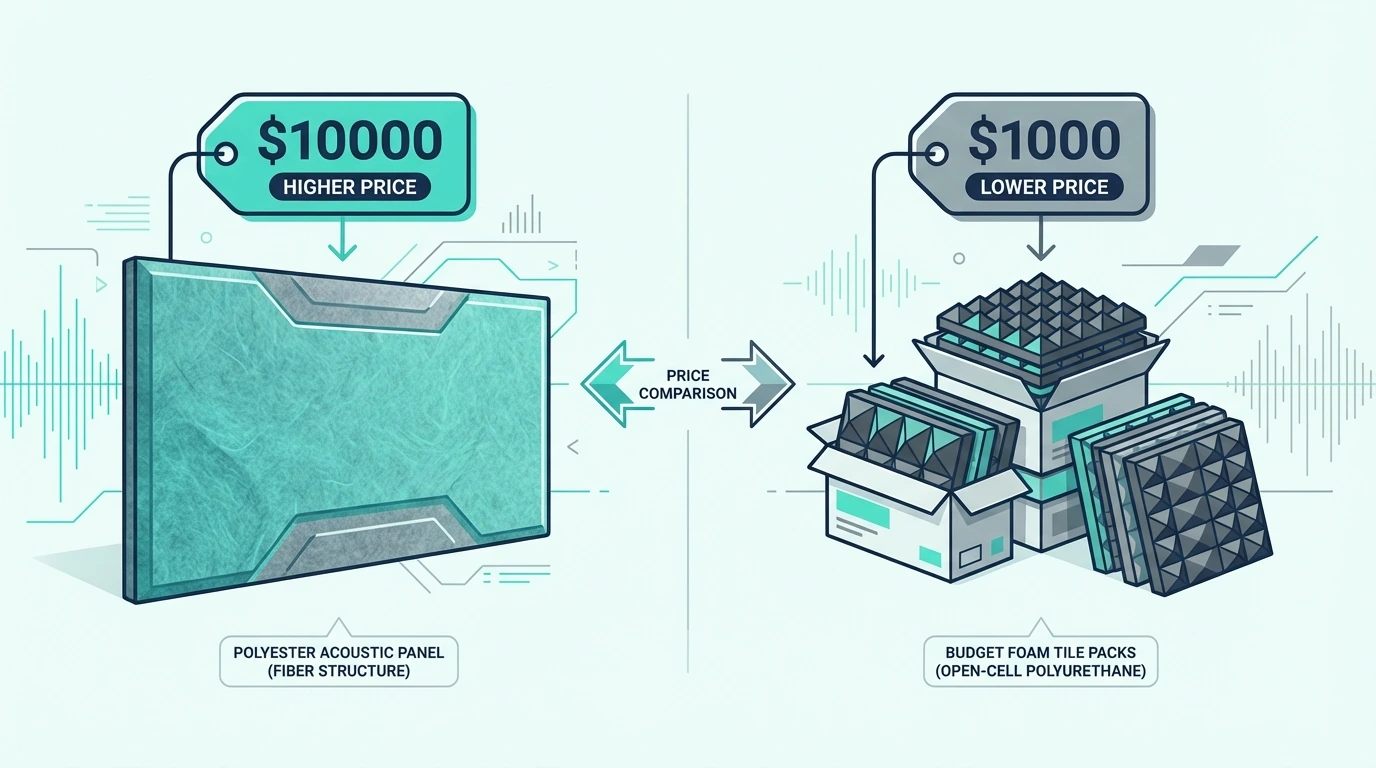
Acoustic foam panels: – Budget: Lower cost per square foot – Quality (Auralex): Moderate cost per square foot
DIY rockwool panels: – Materials: Lower cost per square foot – Plus labor time
Commercial fabric panels: – Budget brands: Moderate cost per square foot – Premium (GIK, ATS): Higher cost per square foot
Soundproofing Costs
Basic insulation upgrade: – Rockwool batts: Lower cost per square foot of wall – Installation: DIY possible for open walls
Full soundproofing: – Additional drywall layers – Resilient channels or clips – Acoustic sealant – Professional installation often needed – Total: Much higher per square foot of wall
Value Analysis
For surface treatment (reducing reflections), acoustic foam provides the best value for simple applications. DIY rockwool panels provide better performance per dollar if you’re willing to build them.
For soundproofing, there’s no cheap solution. Effective sound blocking requires serious investment in materials and often professional installation.
Making Your Decision
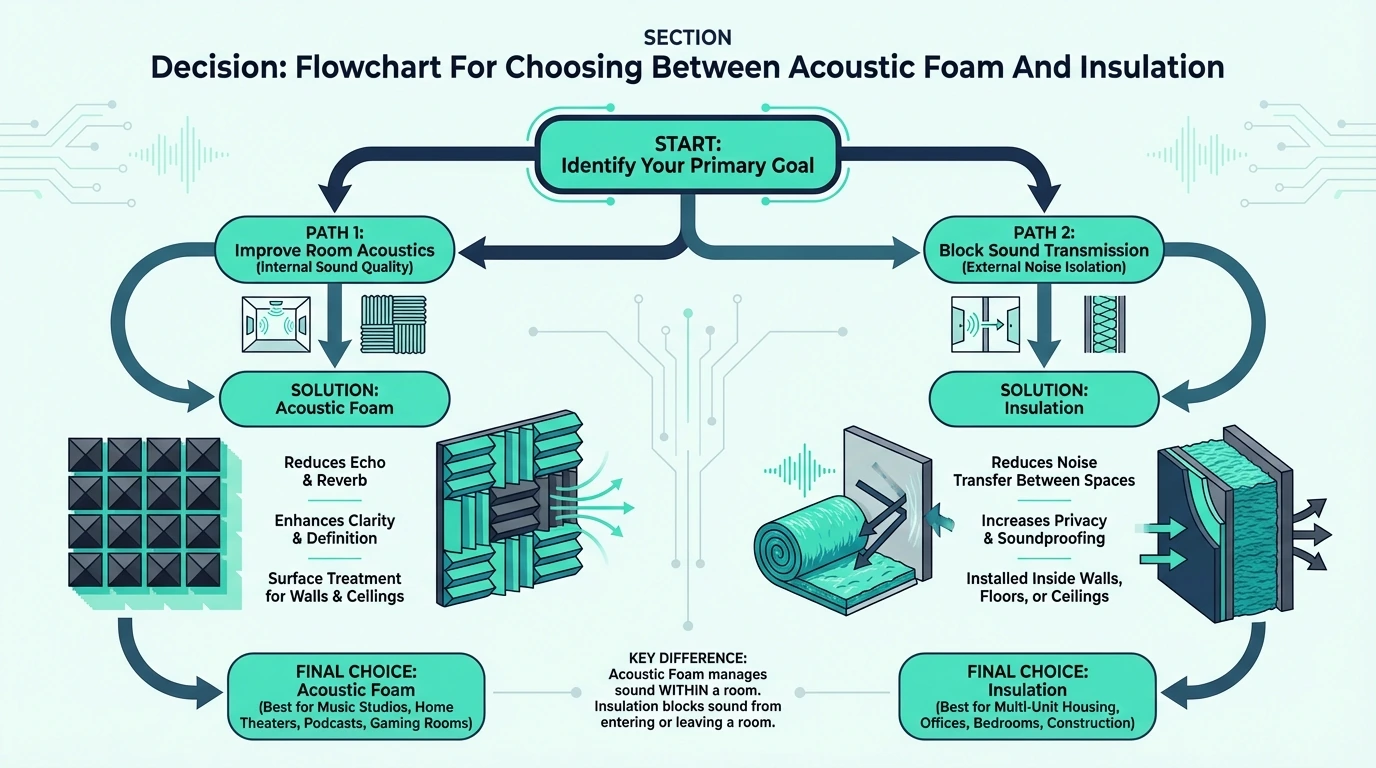
Answer these questions to determine what you need.
What’s Your Actual Problem?
“My recordings sound echoey/roomy” → You need surface absorption → Acoustic foam or panels
“I hear my neighbors / neighbors hear me” → You need soundproofing → Insulation + mass + sealing
“My room sounds boomy (too much bass)” → You need bass traps → Thick rockwool traps
“I want better sound quality for mixing” → You need full-spectrum treatment → Combination approach
The does foam improve recording guide covers what to expect from treatment.
What’s Your Budget?
Limited budget, need quick improvement: → Acoustic foam for key reflection points
Moderate budget, want good results: → DIY rockwool panels or quality foam
Larger budget, want professional results: → Commercial fabric panels + bass traps
Serious soundproofing needed: → Construction project with insulation, mass, decoupling
What’s Your Situation?
Renter, can’t modify walls: → Acoustic foam (removable mounting)
Homeowner, walls already finished: → Surface treatment (foam or panels)
New construction or renovation: → Insulation in cavities + surface treatment
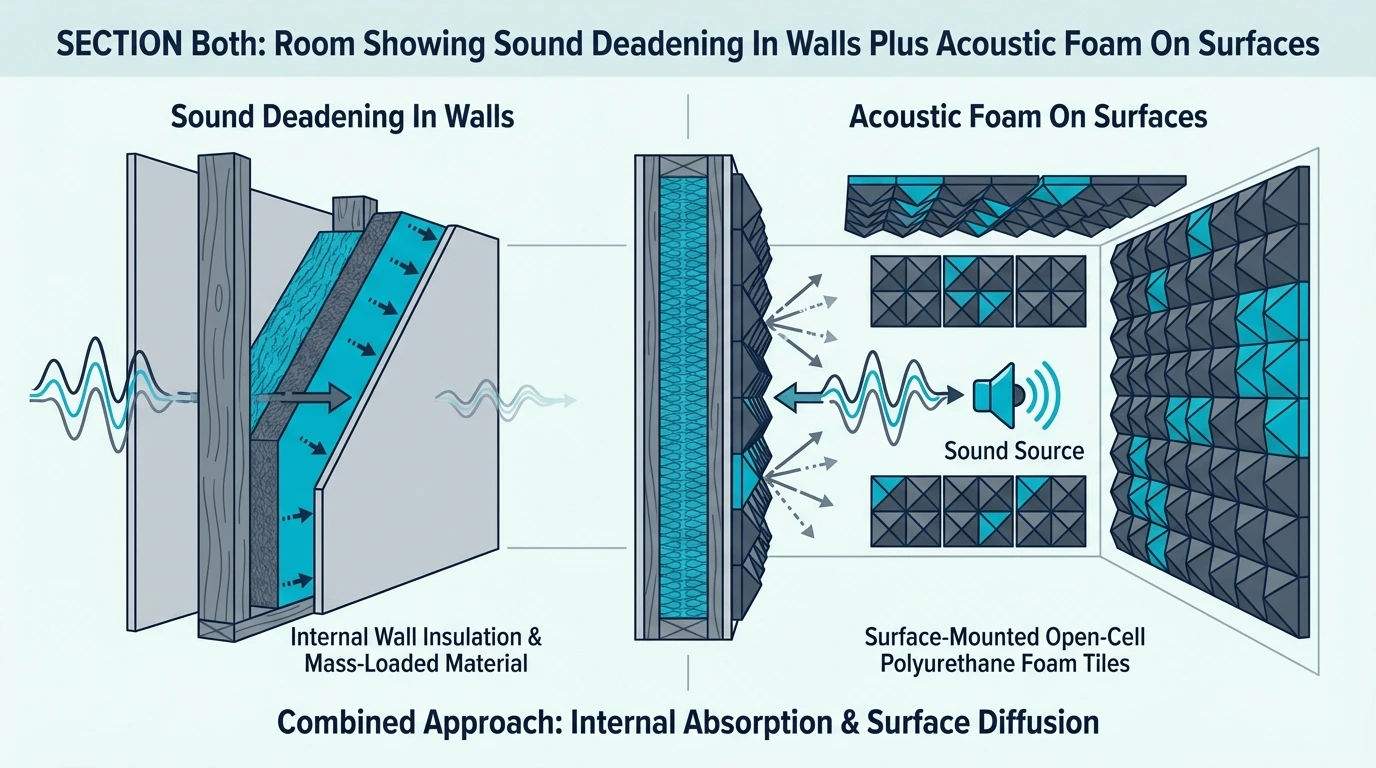
Hybrid Approaches
Often the best solution combines approaches.
Surface Treatment + Bass Traps
Use acoustic foam for mid/high frequency absorption on walls, combined with rockwool bass traps in corners. This addresses the full frequency range more effectively than either alone.
Partial Soundproofing + Absorption
If complete soundproofing isn’t feasible, partial measures (adding mass to one wall, sealing gaps) combined with absorption treatment can meaningfully improve your situation.
Insulation Panels + Foam Supplements
Build or buy fabric-wrapped insulation panels for primary treatment, supplement with foam for additional coverage where needed. This balances performance and cost.
The acoustic foam arrangement guide covers layout strategies for every room shape.
Conclusion
Acoustic foam and building insulation serve different purposes despite both affecting sound. Foam treats reflections within your room—reducing echo and improving recording quality.
Insulation fills wall cavities, providing thermal control with secondary acoustic benefits. It contributes to soundproofing when combined with mass and sealing.
Choose acoustic foam when you need to improve how your room sounds inside: cleaner recordings, reduced echo, better monitoring. It’s designed for surface mounting, easy to install, and effective for mid/high frequencies.
Choose insulation when you’re building acoustic panels, creating bass traps, or undertaking soundproofing projects. Rockwool and dense fiberglass provide superior absorption and contribute to sound blocking when properly implemented.
Don’t expect foam to soundproof or insulation to work as surface treatment. Understanding what each material actually does—and doesn’t do—ensures you invest in the right solution for your specific problem.
Frequently Asked Questions
Can I use building insulation instead of acoustic foam?
Yes, if you contain it properly. Rockwool or fiberglass wrapped in acoustically transparent fabric creates panels that outperform foam.
You can’t just stick exposed insulation on walls—the fibers are irritating and it looks terrible. But DIY fabric-wrapped panels using insulation provide excellent, cost-effective treatment.
Does acoustic foam provide any soundproofing?
Minimal. Foam absorbs some sound energy, slightly reducing what passes through walls, but the effect is negligible.
Effective soundproofing requires mass (heavy materials that block sound) and sealing (no air gaps). Foam provides neither, so foam alone won’t achieve it.
Which is better for a home studio—foam or insulation panels?
Depends on your priorities. Foam is easier to install and more affordable for basic treatment.
Insulation-based panels (DIY or commercial) provide better absorption, especially at lower frequencies, and look more professional. For voice recording, foam is often sufficient; for music production requiring accurate bass response, insulation panels are worth the extra effort or cost.
Is rockwool better than acoustic foam?
For absorption performance, yes. Rockwool absorbs more sound across a broader frequency range than equivalent thickness foam, and it’s more durable and fire-resistant.
The tradeoff is that rockwool requires containment (fabric wrapping) while foam can mount directly. For maximum performance, rockwool wins; for convenience, foam wins.
Can I soundproof a room with just insulation?
No. Insulation in wall cavities helps reduce sound transmission but isn’t sufficient alone.
Effective soundproofing requires mass (multiple drywall layers), decoupling (resilient channels or double-wall construction), and sealing (acoustic caulk at all gaps). Insulation is one component of a system, not a complete solution.
What’s the cheapest way to improve room acoustics?
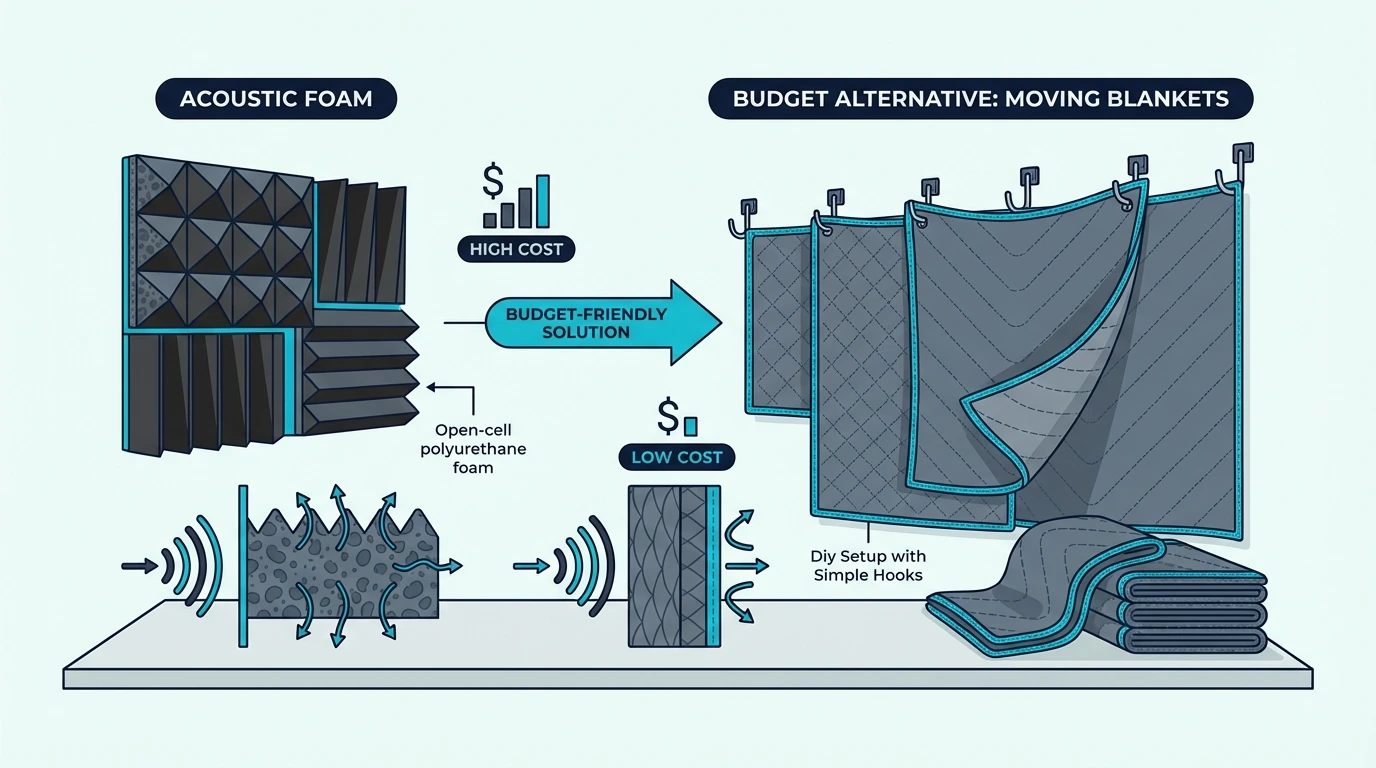
For echo reduction, DIY rockwool panels cost less than commercial options while performing better than foam. Heavy moving blankets are a fallback for very tight budgets.
For soundproofing, there’s no cheap shortcut — effective sound blocking requires serious investment in materials and construction.