Is Acoustic Foam Reusable? How to Remove, Store & Reinstall Panels

Is acoustic foam reusable? Yes, but only if the panels peel off cleanly and the foam itself hasn’t started to break down. The wrong removal method can damage both the foam and the wall.

Reusing foam can feel like an easy win when you’re moving or repainting. The problem is that most adhesive-mounted panels won’t survive removal intact, and crumbling foam just moves the mess into your new room.

Start with the mounting method (because that’s usually the make-or-break factor), then a quick condition check, then removal, storage, and reinstall options that keep your next setup clean and removable.

Quick Takeaway

Foam mounted with removable strips or clips usually comes off intact and can be remounted with fresh hardware. Foam glued with spray or construction adhesive often tears, so plan for a hybrid approach (reuse the survivors, replace the rest). If you want future reuse, remount with a removable method and treat foam like a consumable that lasts a few years — not a forever material.

How does your mounting method affect whether acoustic foam is reusable?

Different acoustic foam mounting methods and their impact on reuse

The quick takeaway is true, but it hides the real rule: your mounting method is the whole game. Acoustic foam tears easily from the back, and most “permanent” adhesives bond deeper than people expect.

If you can’t remember what you used, check one corner first. Clean pull-tabs or distinct strip shapes usually mean removable mounting, while smeared residue across the whole back usually means glue.

Removable strips (Command-style): the best-case scenario

If your foam is mounted with pull-tab strips, you’re in great shape. The trick is to remove the strips the way they’re designed to release, not the way your instincts want to yank them off.

Hold the foam panel with one hand so it doesn’t flex and tear. Then pull the release tab straight down (parallel to the wall), slowly, until the strip stretches and lets go.

Once a panel comes off cleanly, assume the old strips are “one-and-done.” You’ll usually want fresh strips for reinstalling.

Removable picture-hanging strips like Command picture hanging strips keep it damage-free as long as you pull the tab correctly. That’s still far less drama than scraping glue.

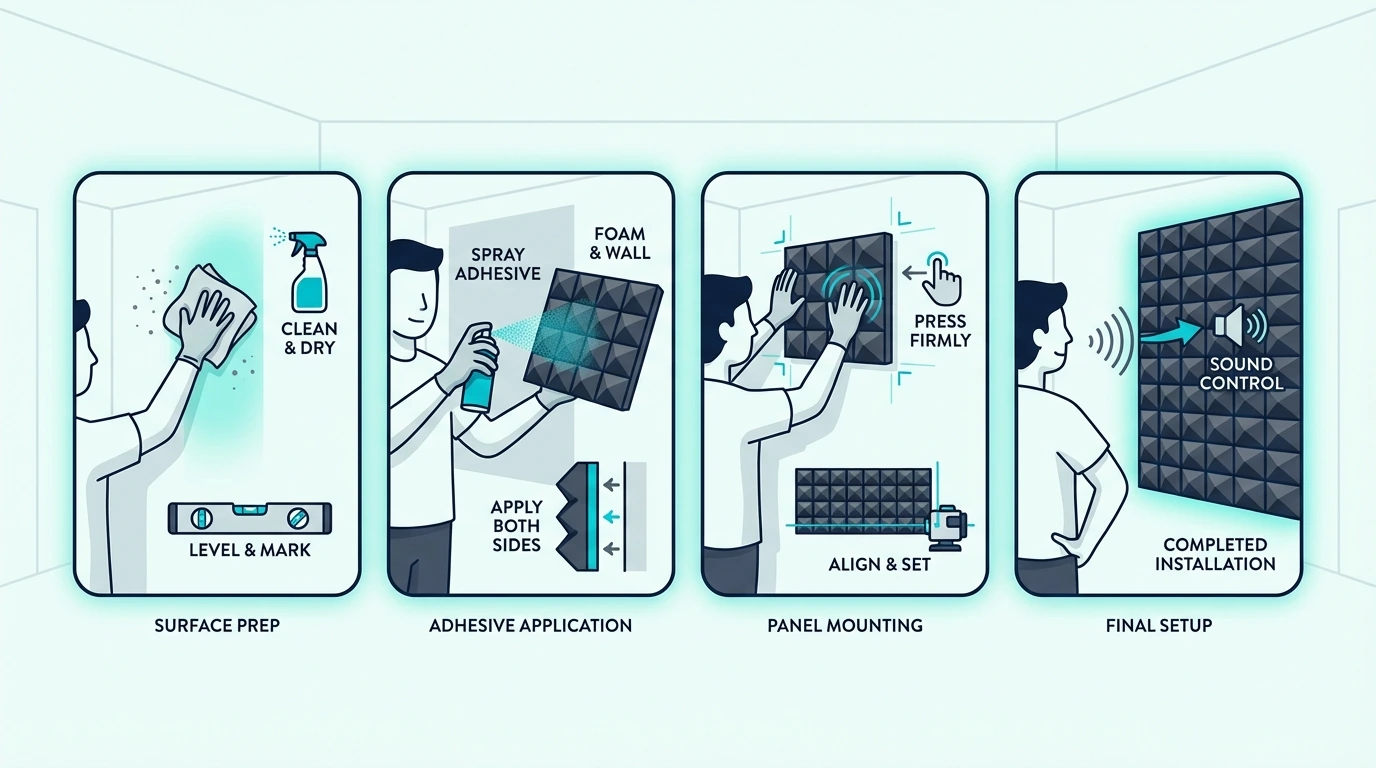
If you’re deciding how to mount foam in the new room, start with how to put acoustic foam on a wall.

Impaling clips and pins: reusable, but expect small holes

Clips are a solid option for reuse because the wall hardware takes the beating instead of the foam’s backing. The foam will have small holes, but that usually doesn’t affect performance in any noticeable way.

If you want a hardware kit that lets you pop panels on and off, push-on impaler mounts keep the wall hardware separate from the foam. You’ll still get small punctures, but you avoid glue entirely.

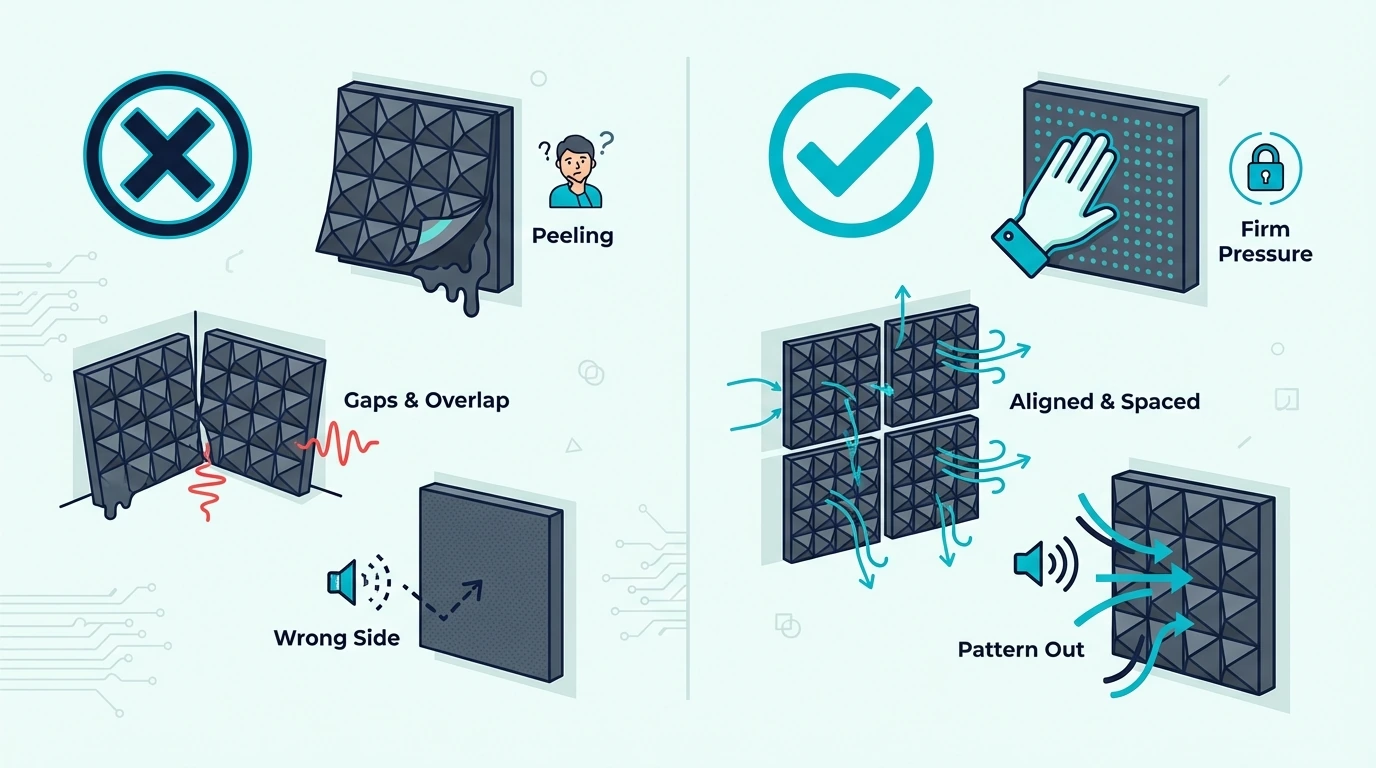
The main failure mode is tearing when you twist the panel off at an angle. Pull straight out with two hands, and work one corner free at a time so the foam doesn’t “zip” open.

If you liked the convenience of clips, reinstalling with new hardware is usually the cleanest move. It also keeps you from asking this reuse question again the next time you move.

Spray adhesive: possible to reuse, but plan for damage

Spray adhesive usually soaks into the foam and bonds unevenly, which is why panels tear in random chunks. You can sometimes salvage panels, but you should expect some casualties even if you go slow.

Start by trying to separate the foam with a thin plastic putty knife or dental floss instead of pulling with brute force. If the foam is fighting you hard, it’s better to “save what you can” than to rip the drywall paper off the wall.

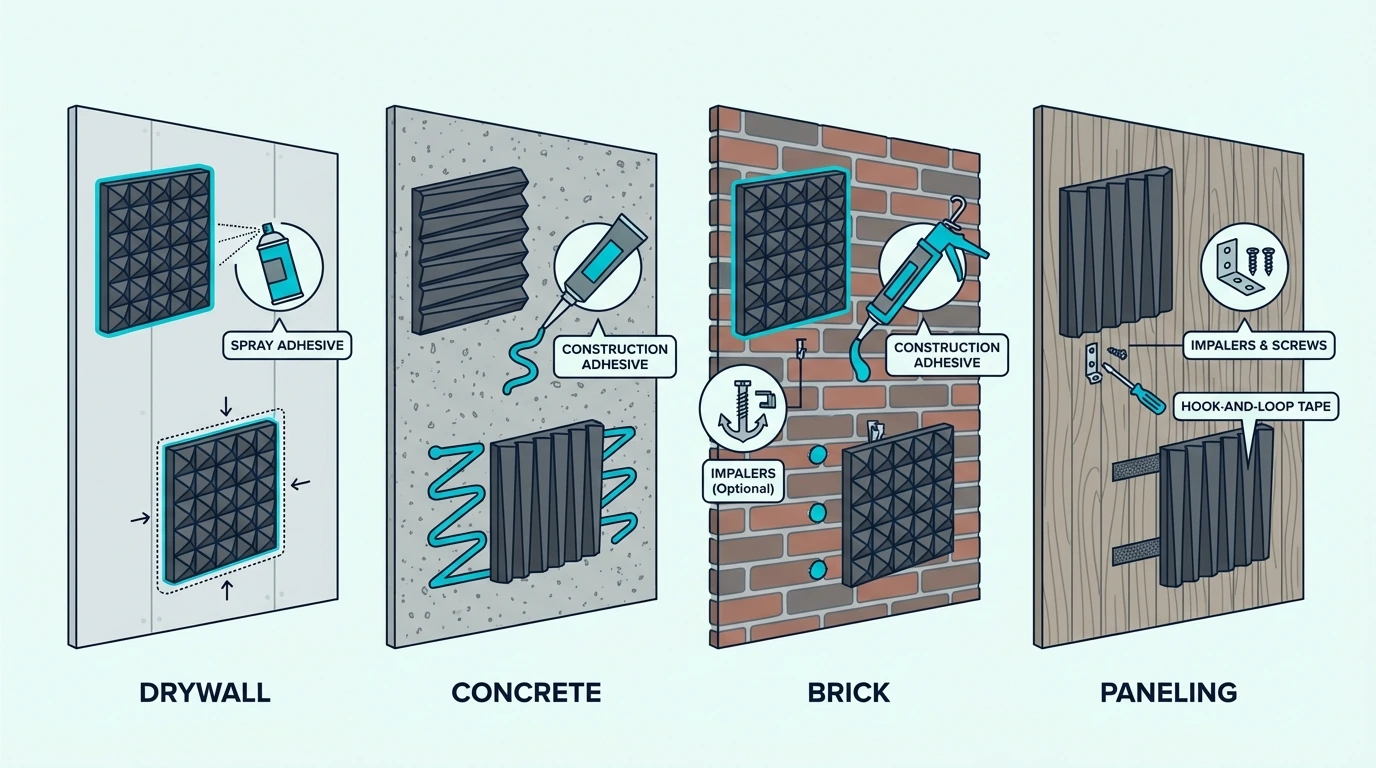
If your current install was glued and you want the next one to be removable, it’s worth switching methods. The acoustic foam adhesive guide also explains which options are meant to be permanent vs removable.

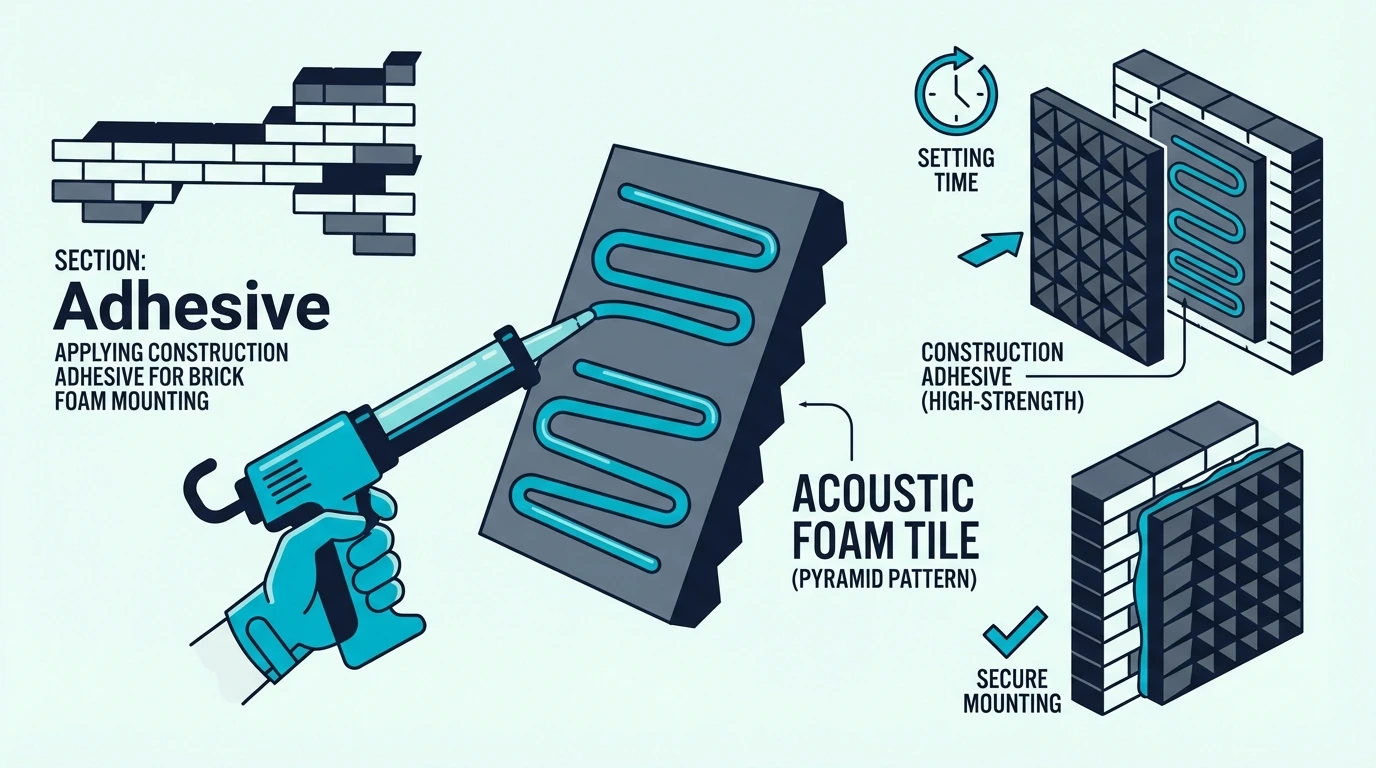
Construction adhesive: treat it as permanent

Construction adhesive is designed to be permanent, so the foam usually fails before the bond does. In a lot of cases, you’ll damage the wall too.

If that’s what you’re dealing with, your goal isn’t “perfect reuse.” It’s “salvage a few clean panels, then replace the rest with a removable mounting plan.”

How can you tell if your acoustic foam is still worth reusing?

Checking whether acoustic foam is still in good condition for reuse

Once you’ve identified the mounting method, the next gate is the foam itself. Reinstalling foam that’s already crumbling just moves the problem into your new room.

Do a quick “squeeze, sniff, crumble” test

You don’t need lab gear to judge foam condition. You just need to be honest about what your hands and nose are telling you.

  • Squeeze test: compress a corner and see if it springs back instead of staying flattened.
  • Crumble test: lightly rub an edge—if it sheds dust or flakes, it’s breaking down.
  • Smell test: musty or sour odor is a red flag for moisture and possible mold.
  • Surface check: look for brittleness, cracking, or sticky degradation.

If you’re not sure how long your foam typically lasts, can acoustic foam get old? walks through the most common failure modes and when replacement is the smarter call.

Yellow foam: cosmetic or end-of-life?

Yellowing by itself is usually cosmetic, and mildly yellowed foam can still work fine. The bigger question is whether yellowing came with stiffness and brittleness, which often points to UV damage.

If it’s still flexible and rebounds well, reuse it and keep it out of direct sunlight in the new room. If it feels dry, brittle, or cracks when you bend it, treat it as end-of-life.

If you want a deeper breakdown of materials (and why some foams age faster), see what type of foam acoustic foam is.

How do you remove acoustic foam without tearing it?

Step-by-step removal techniques for acoustic foam without ripping panels

If your foam passes the condition test, removal is where you either preserve it or destroy it. The goal is controlled separation, not “get it off the wall fast.”

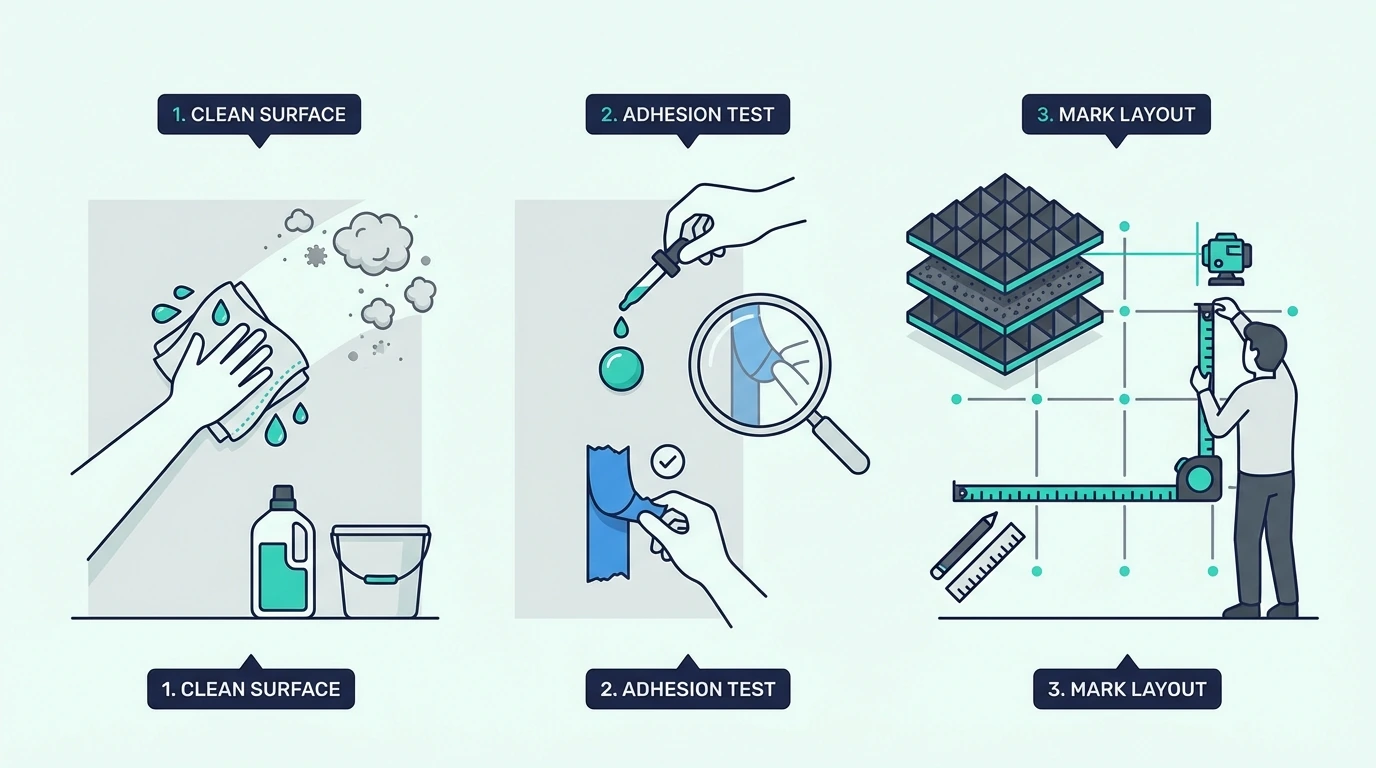
Before you start: protect the wall and the foam

Pick one panel you care least about and test your method there first. Walls vary a lot (flat paint vs textured paint vs older drywall), and you don’t want your best panels to be your experiment.

If you’re removing foam in a rental or you care about the paint finish, bookmark how to remove acoustic foam from walls without damaging paint. It’s a deeper dive on avoiding wall damage when the adhesive is the real enemy.

For removable strips: remove the strip, not the foam

With pull-tab strips, don’t pry the panel off the wall like a sticker. You want the strip to release, because the strip is the “sacrificial layer.”

Support the foam, pull the tab straight down slowly, and be patient. If you yank the foam outward, you can tear the back even with “removable” mounting.

For glued foam: separate first, then peel

With adhesive-mounted foam, pulling first is how you tear it. Instead, start separation with a plastic putty knife or floss/fishing line behind the panel, then peel only after the bond is already failing.

Work in small sections and keep the panel supported so it doesn’t stretch under its own weight. If you feel the drywall paper starting to lift, stop and change tactics before you turn one panel into a wall-repair project.

How should you store acoustic foam so it stays usable?

Proper storage practices to keep acoustic foam usable for reinstalling

Once the foam is off the wall, storage is the silent killer. Foam hates compression, UV, and damp air, and it will happily “take a set” if you stack heavy boxes on it for a month.

Store it flat, dry, and breathable

Store panels flat when you can, ideally in a clean cardboard box or between two sheets of cardboard. If you have to roll foam, roll it loosely with a big radius so you don’t crease it.

Avoid sealing foam in airtight plastic if there’s any chance it’s damp. Foam that can’t breathe is foam that starts smelling weird.

If the foam got wet: dry it fully before storage

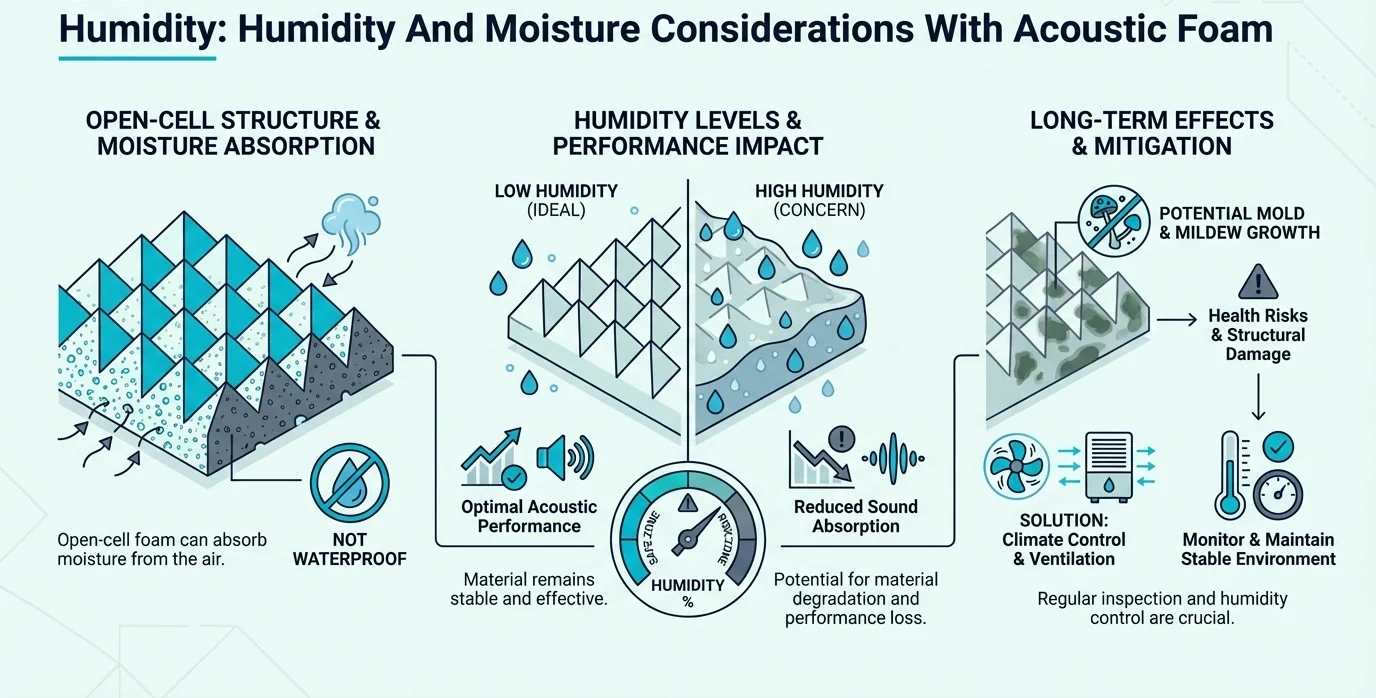
Even if the foam looks fine, trapped moisture can turn into musty odor later. Let it dry fully before packing it away, especially if it was near a window or exterior wall.

If you’re dealing with damp foam right now, can you put acoustic foam in the dryer? shows safer ways to dry it without melting or warping it.

Short-term vs long-term storage

For short-term storage (days to a few weeks), the goal is mostly shape protection. Keep it flat, keep it clean, and keep it out of the sun.

For long-term storage (months), add a quick monthly check for odor, softness, and any new brittleness. If it’s degrading in the box, it’s not going to magically improve on your wall.

How do you prep old acoustic foam before reinstalling it?

Cleaning and preparing old acoustic foam panels before reinstalling

Good storage keeps foam from getting worse, but prep is what makes it install cleanly. A little time here prevents panels from falling off later or transferring grime onto your new walls.

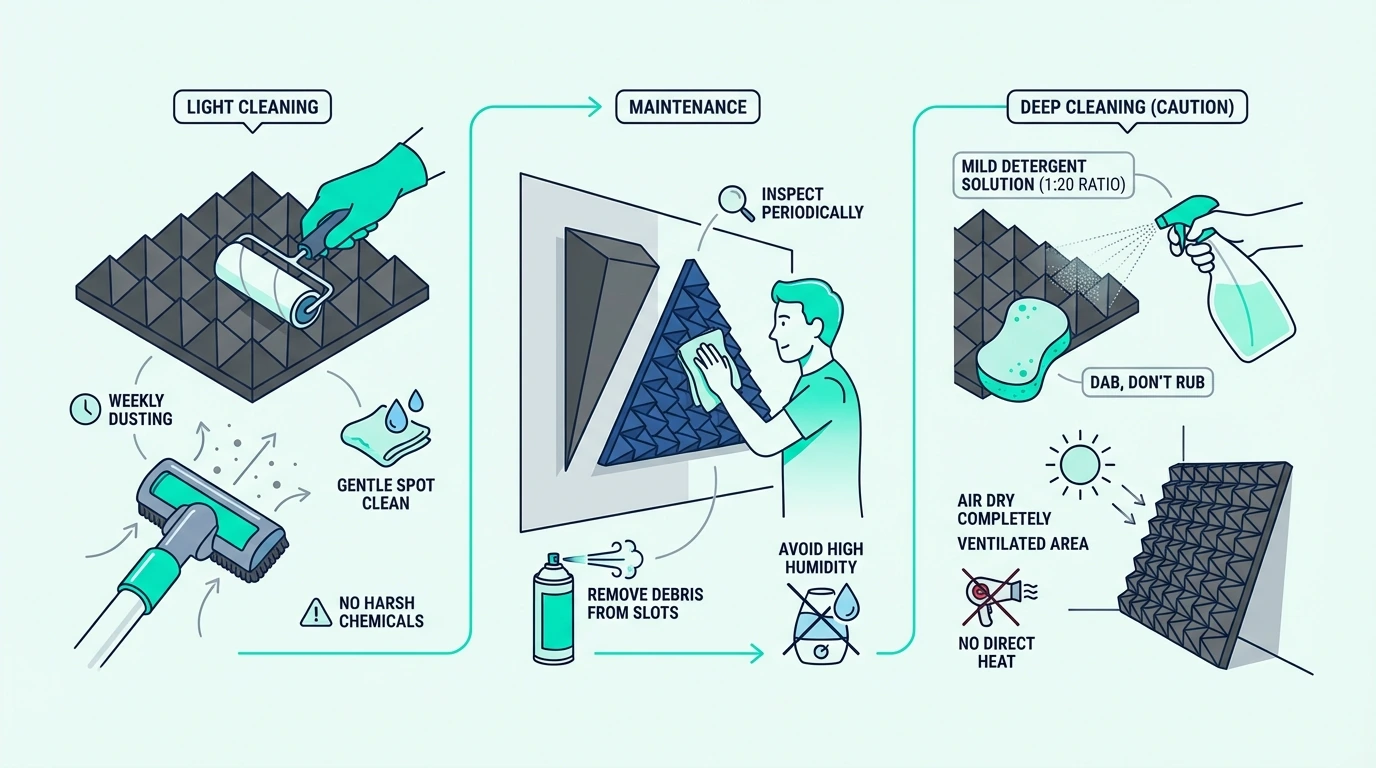
Clean it gently (and let it air out)

Vacuum foam with a brush attachment to remove dust without shredding the surface. If it has any odor, let it air out in a dry room before you reinstall it.

If you want a deeper cleaning walkthrough (and what not to do), use how to clean acoustic foam safely.

Deal with the back: residue matters

If you’re reusing foam that had adhesive on the back, remove any loose residue so your new mounting method can actually grip. Don’t try to make the back “perfect”—just get rid of the flaky bits that prevent contact.

On the wall side, a surface-safe remover like Goo Gone adhesive remover can help lift residue without aggressive scraping. Spot-test first and wipe it clean, especially on matte paint.

If the back is shredded, that’s your cue to switch to a mounting method that doesn’t depend on a pristine foam surface. The reinstall section below covers the cleanest options.

Fix minor damage instead of forcing a perfect panel

Small tears are mostly cosmetic, and a slightly ragged edge won’t ruin acoustic performance. Trim only if it helps the panel sit flat, and treat the ugliest panels as “fill panels” for less visible spots.

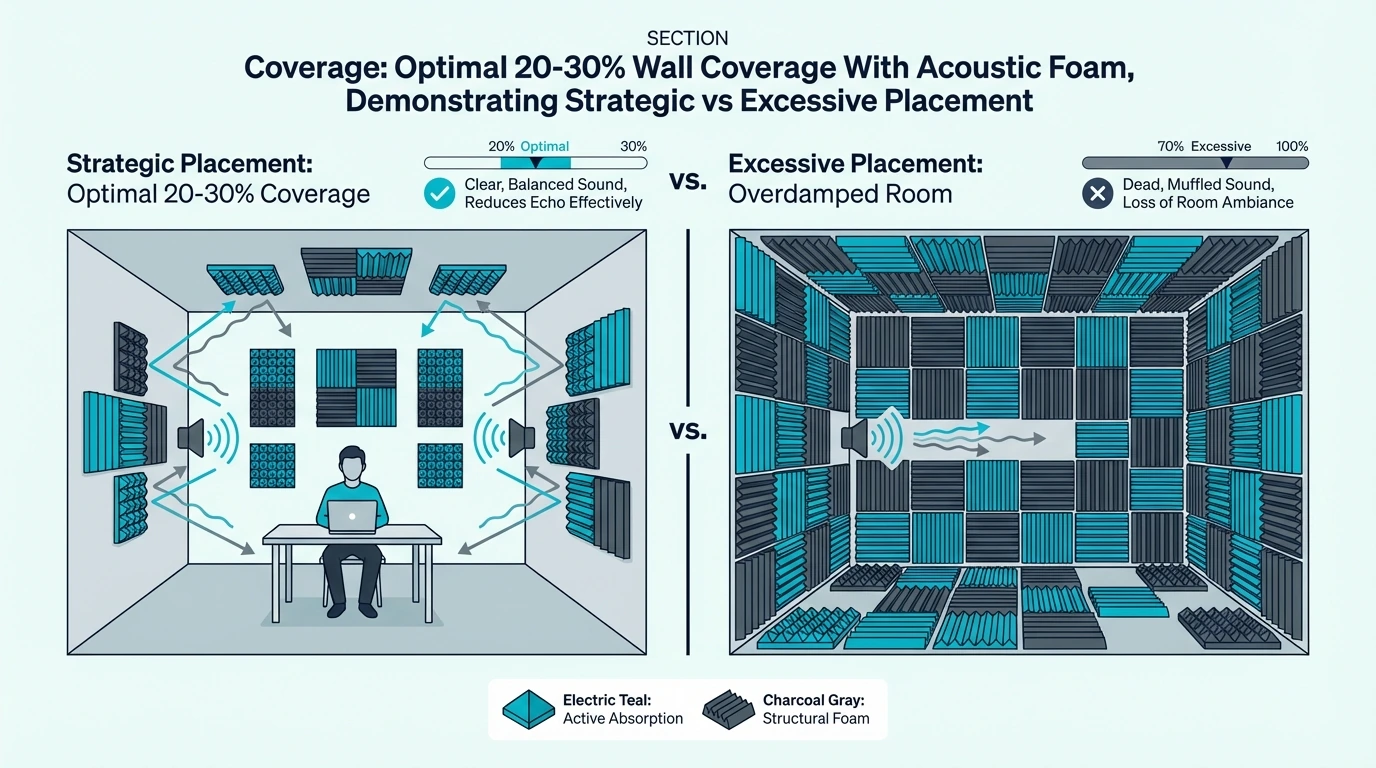
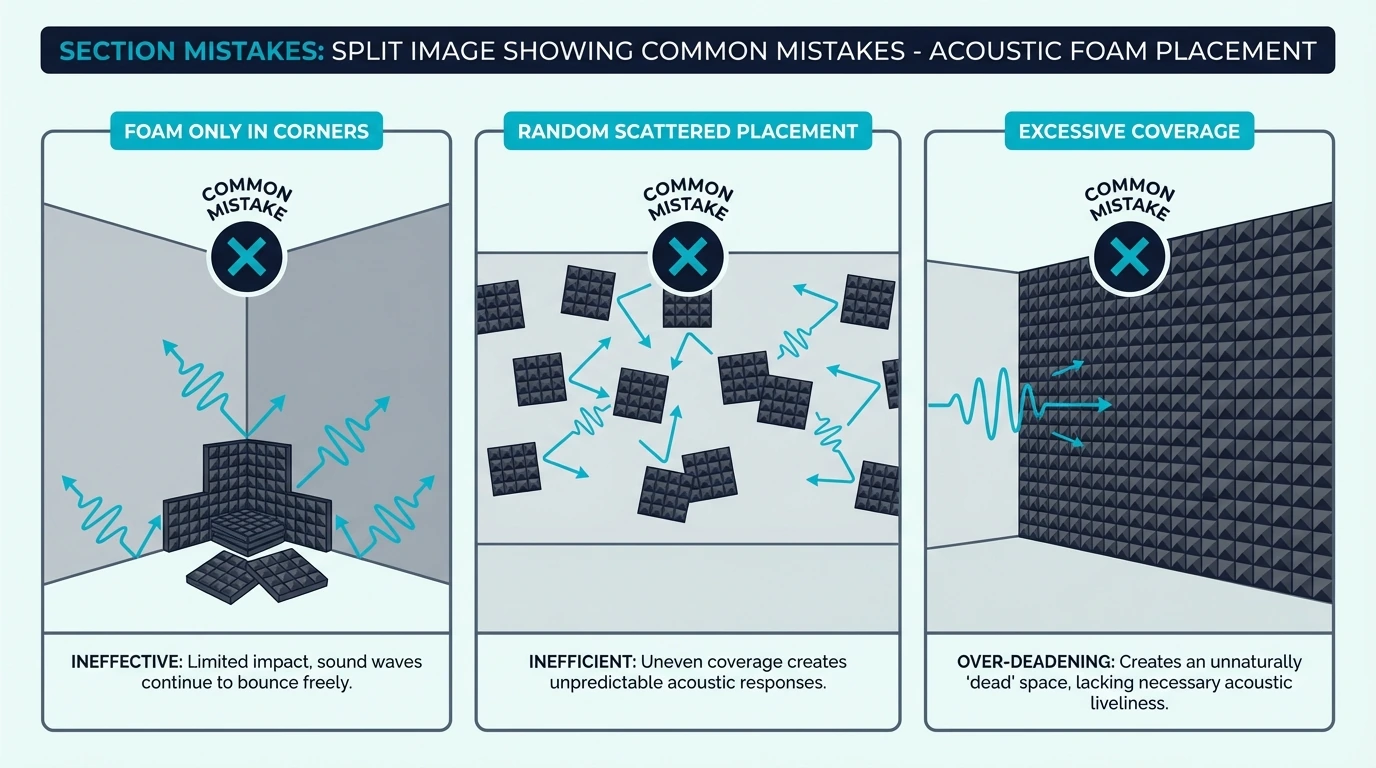
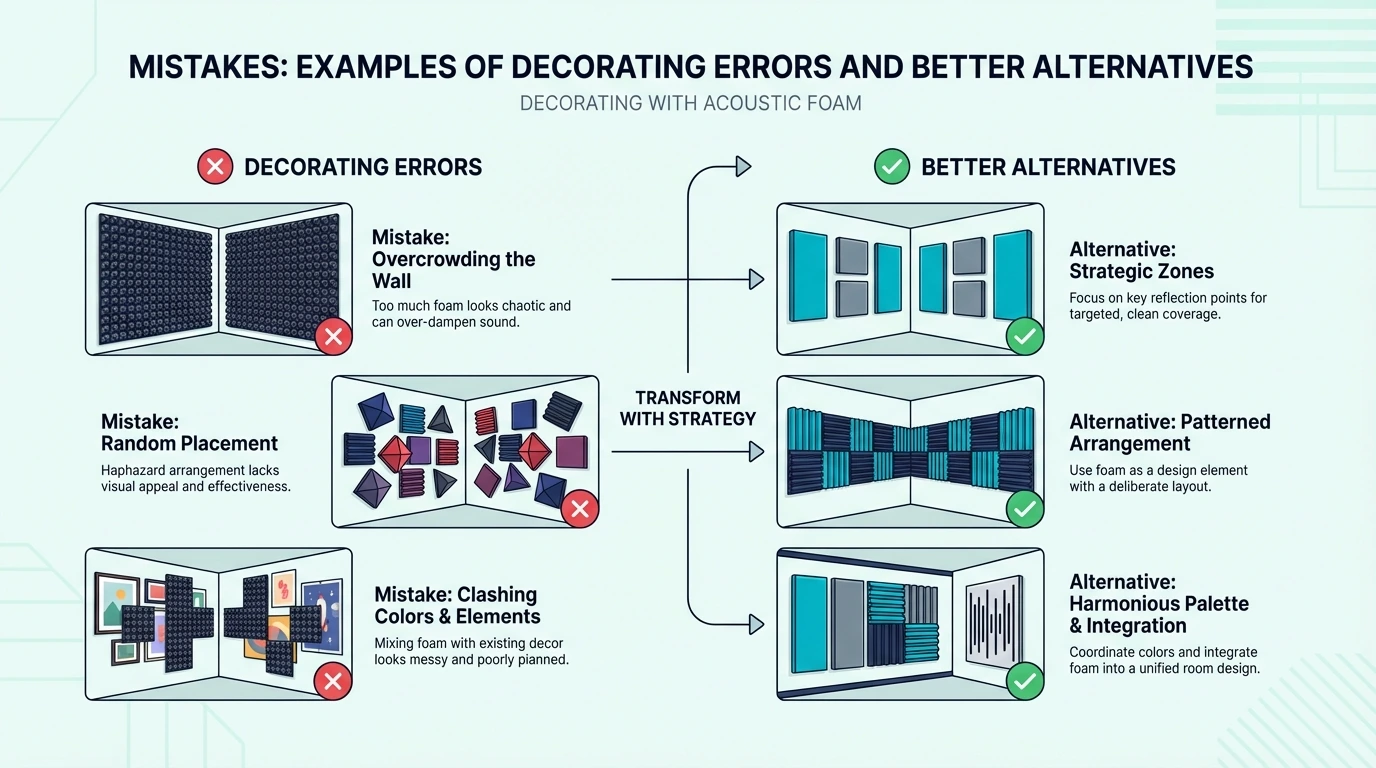
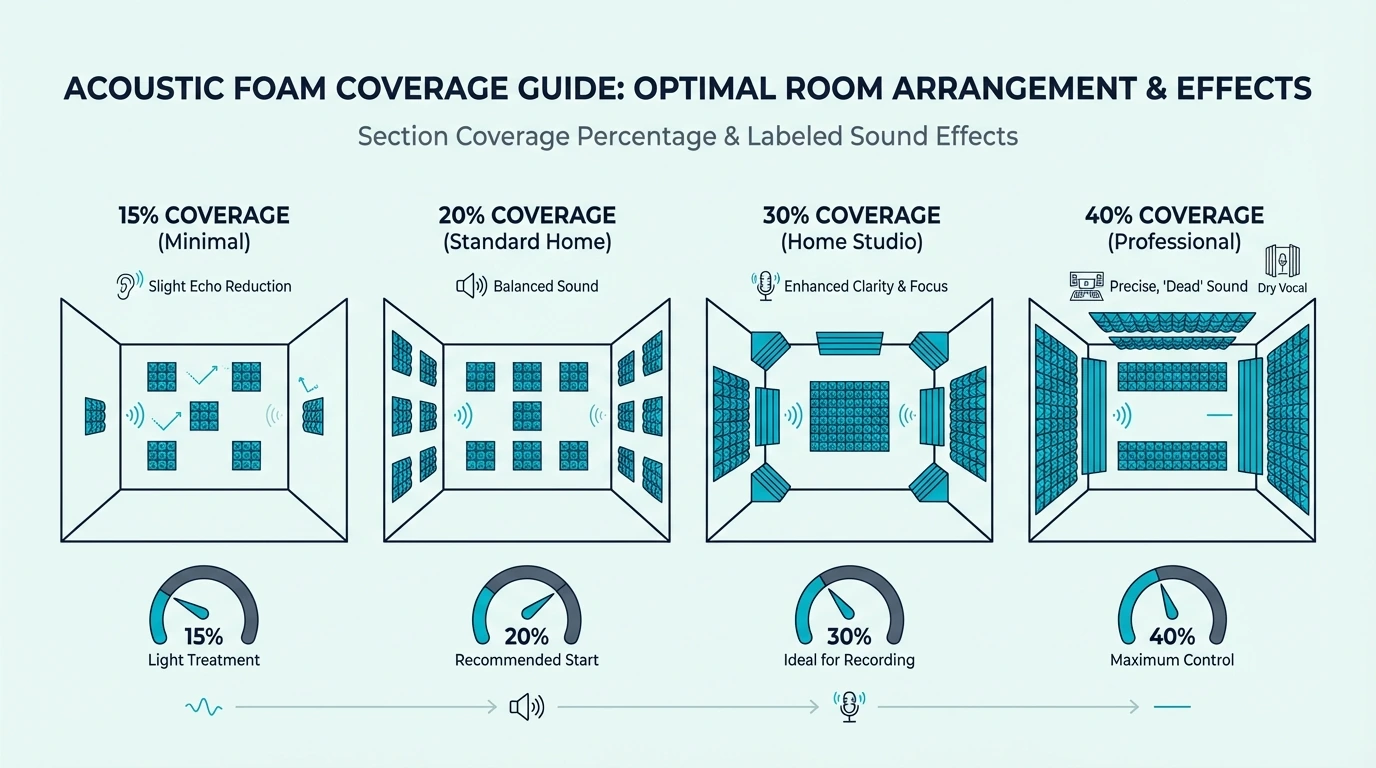
This is also a good moment to reassess how much foam you actually need in the new room. Most people overbuy early, and too much acoustic foam explains the “over-deadened room” problem and how to avoid it.

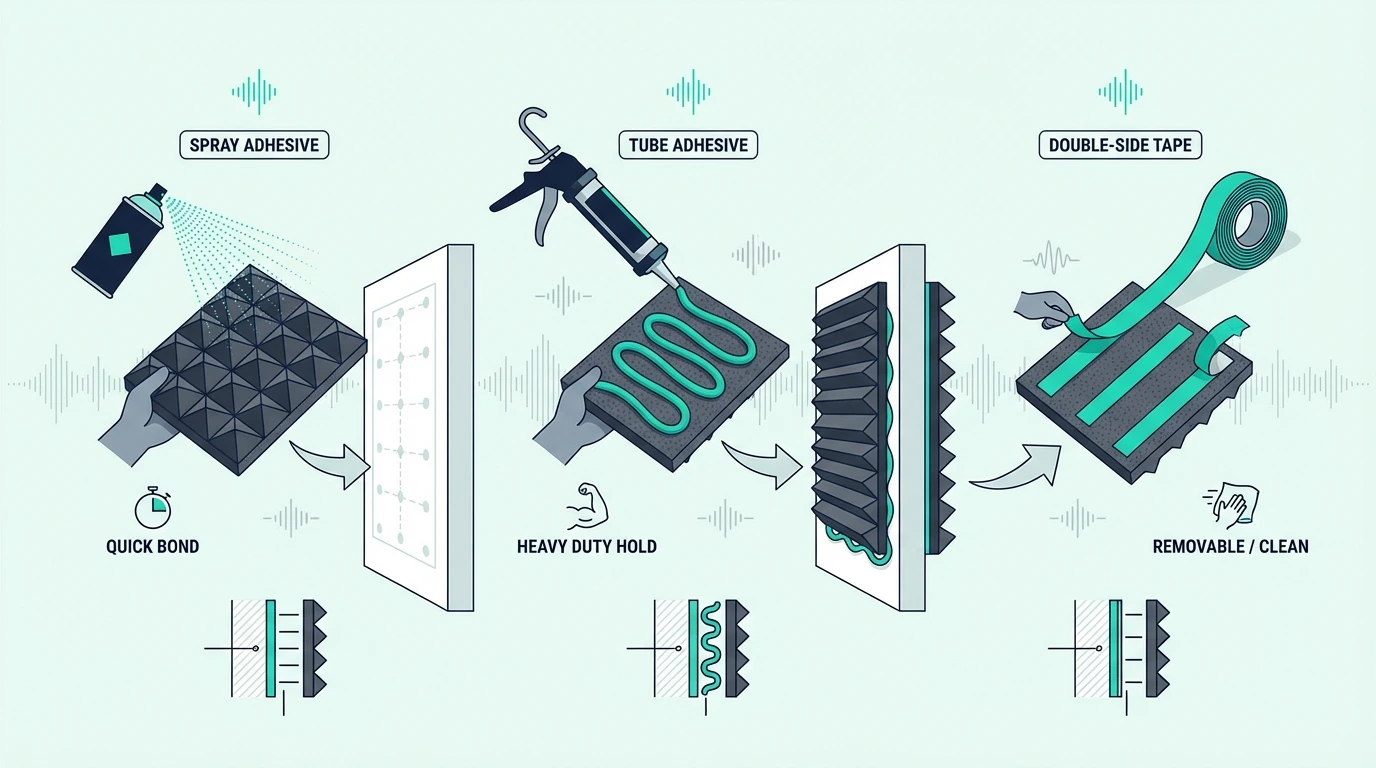
What’s the best way to remount reused acoustic foam?

Reinstallation options for reused acoustic foam (removable vs permanent)

This is where you decide whether you’re going to ask the “reusable” question again next time you move. The best reinstall method is usually the one that stays removable and doesn’t rely on a perfect foam backing.

If you want future reuse: choose a removable mount

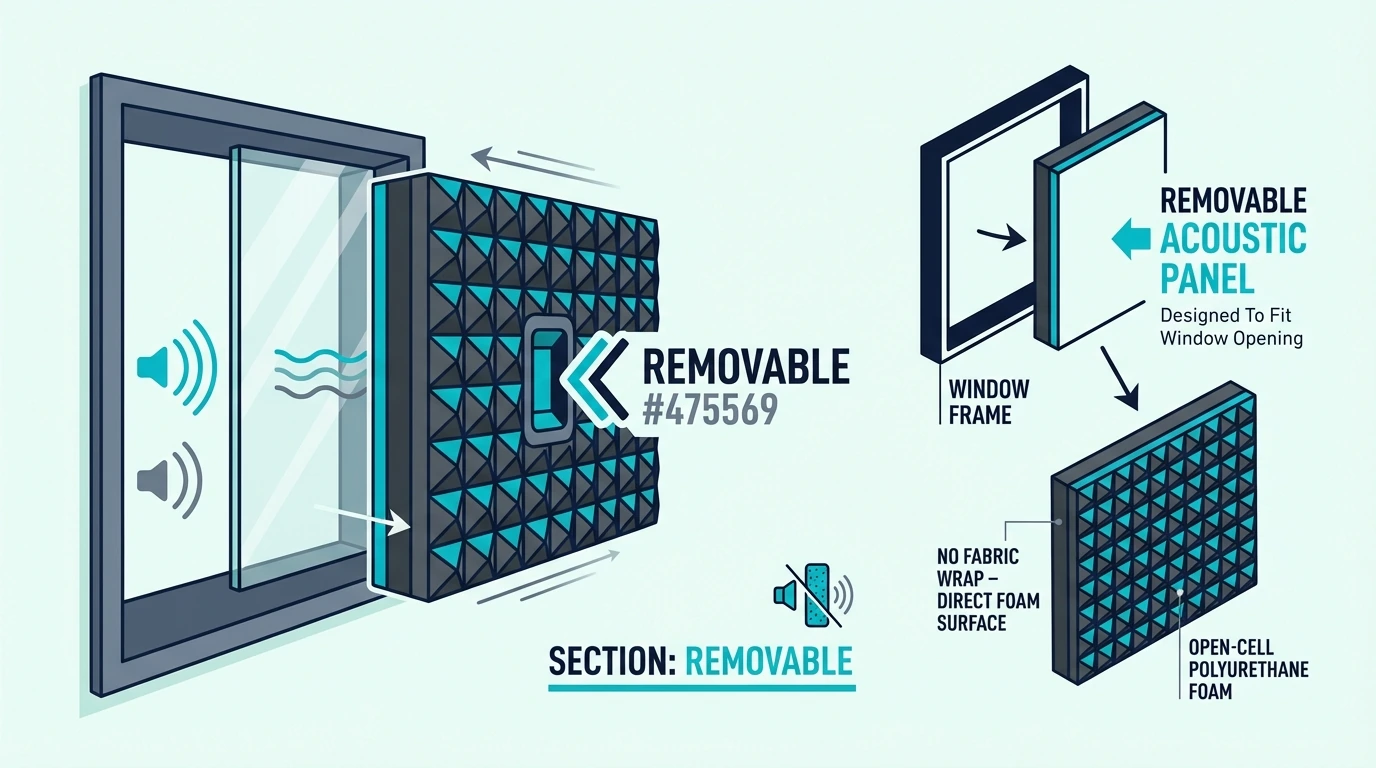
For most people, a removable method is the sweet spot: it holds well enough for daily use, but you can take it down without destroying the foam. That’s especially important if you’re in a rental, or if you’re still experimenting with placement.

If you’re unsure what to buy, how to choose acoustic foam also covers the “mounting reality” part of foam quality, not just shapes and thickness.

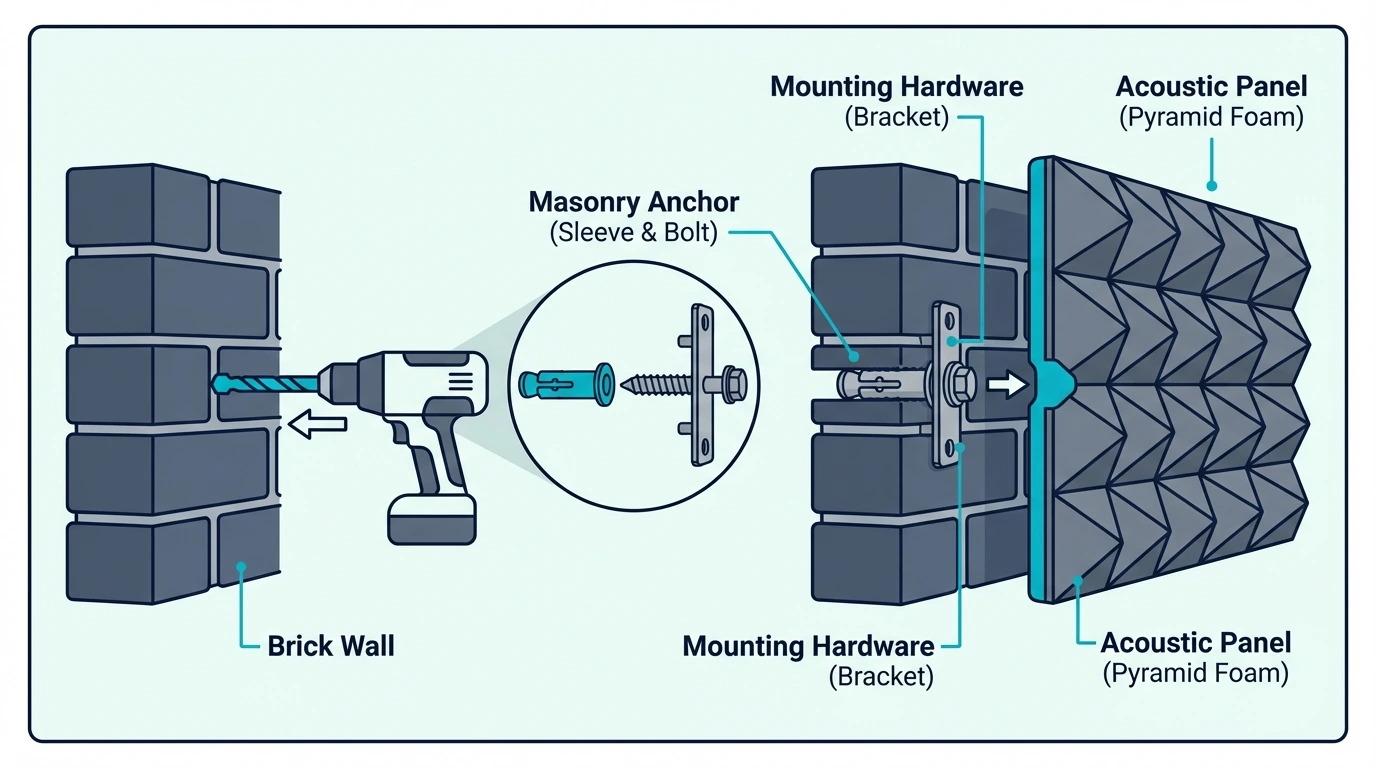
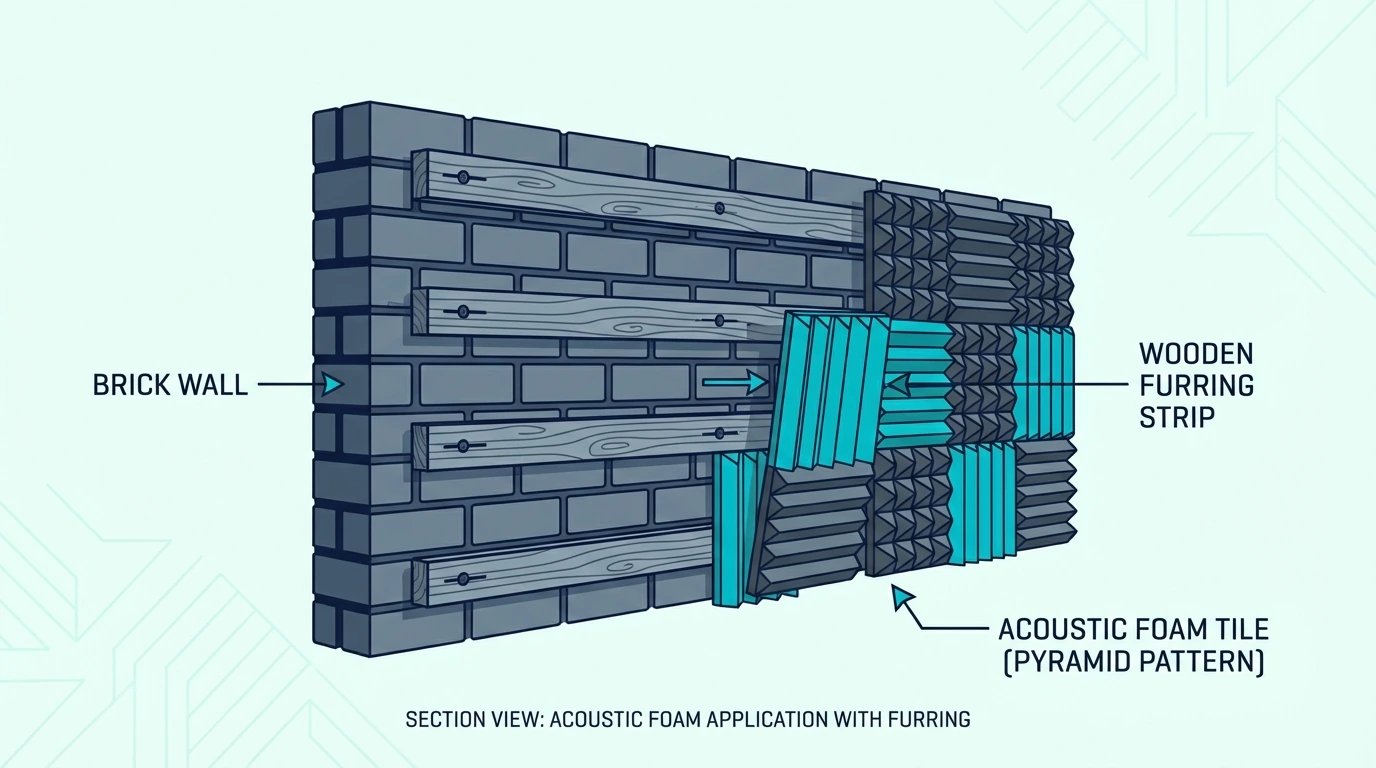
If the back is damaged: go mechanical or use a backing panel

When the foam’s back is rough or torn, adhesive tends to fail early. Mechanical mounting (clips, pins, screws + washers on thicker foam) avoids that problem because the wall hardware does the holding.

Another clean approach is to attach foam to a thin backing panel, then mount the backing panel like a single piece. It’s more work, but it makes removal and reinstallation painless.

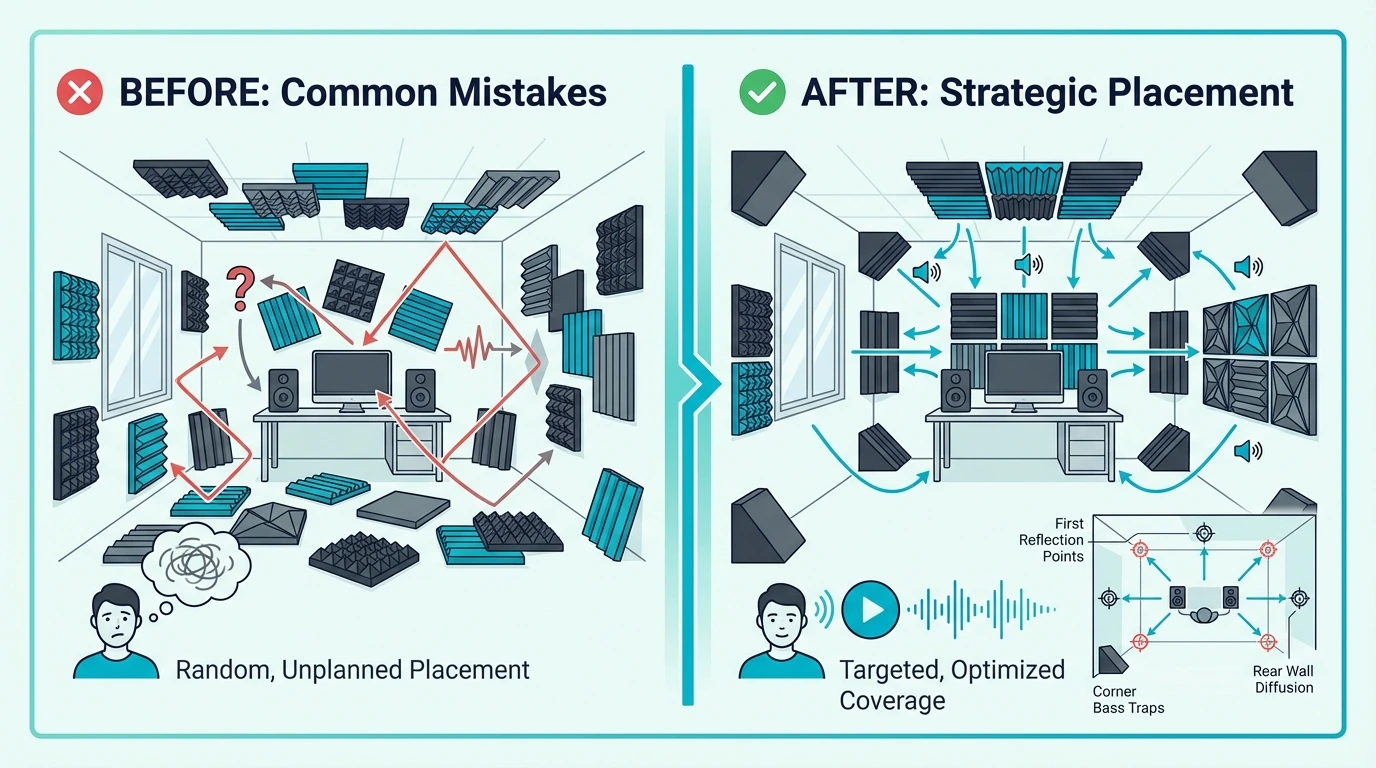
Quick placement reminder for your new room

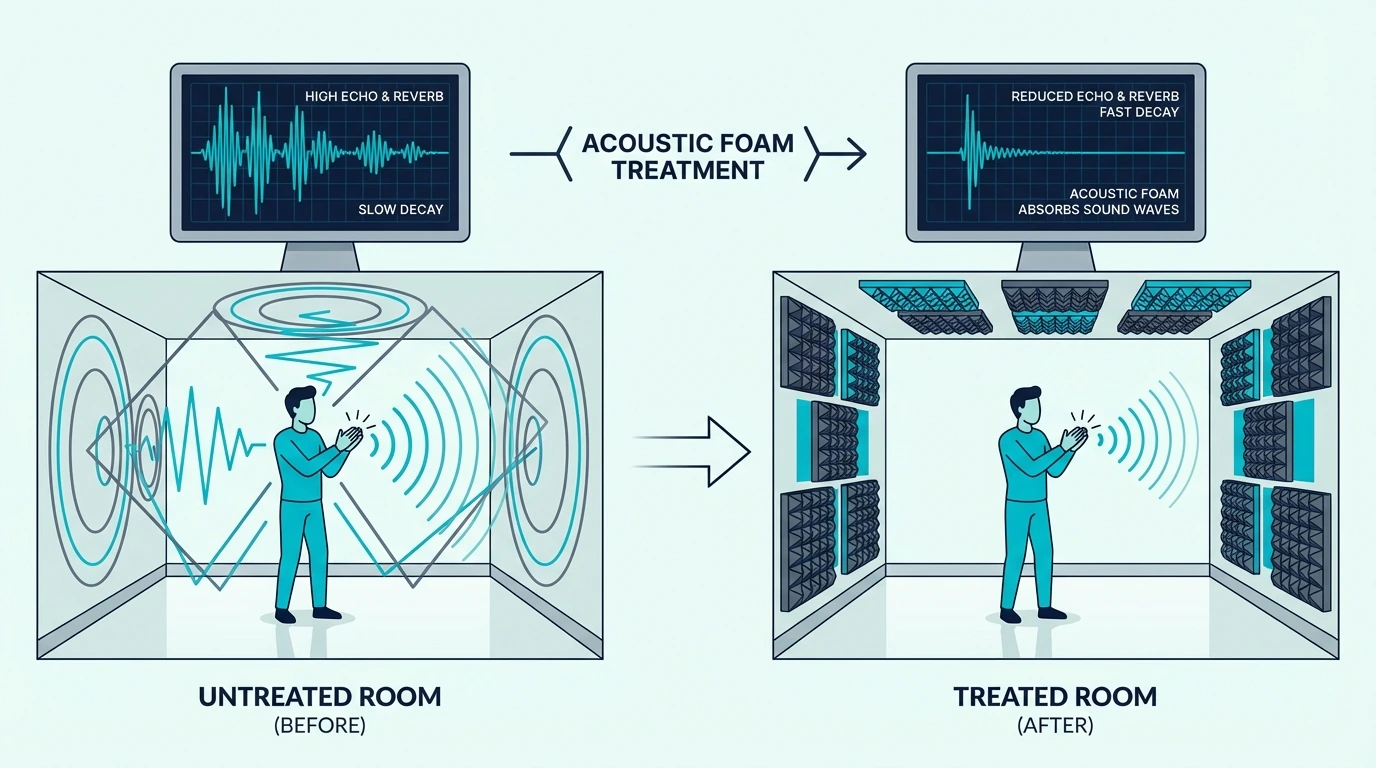
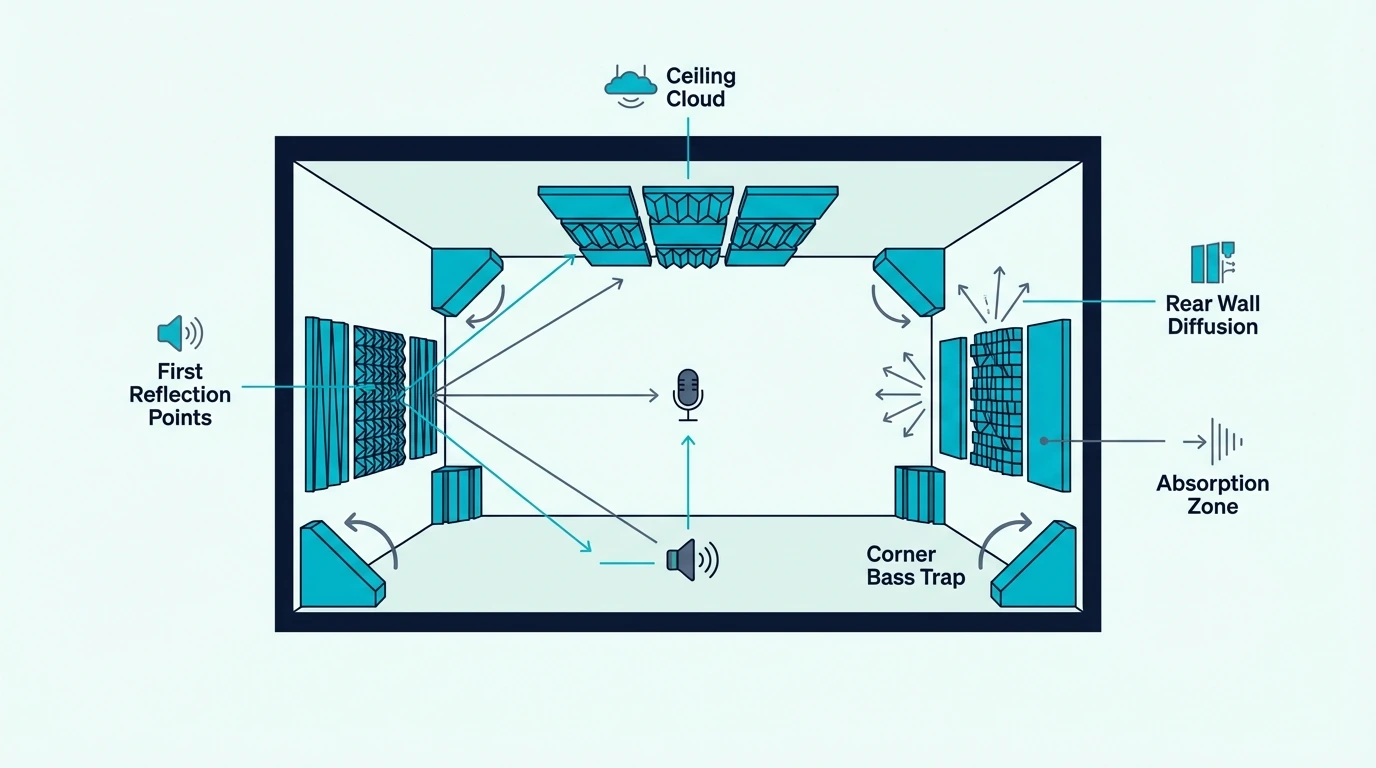
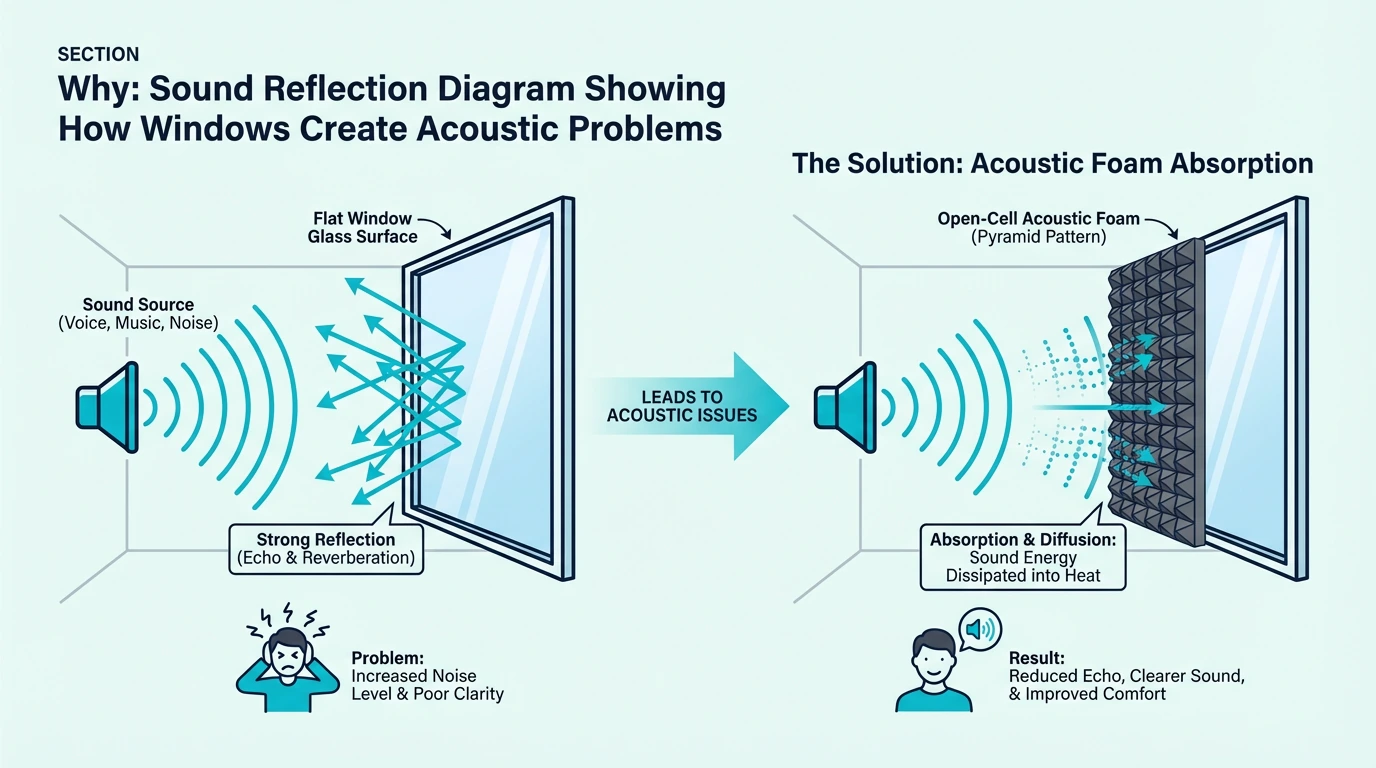
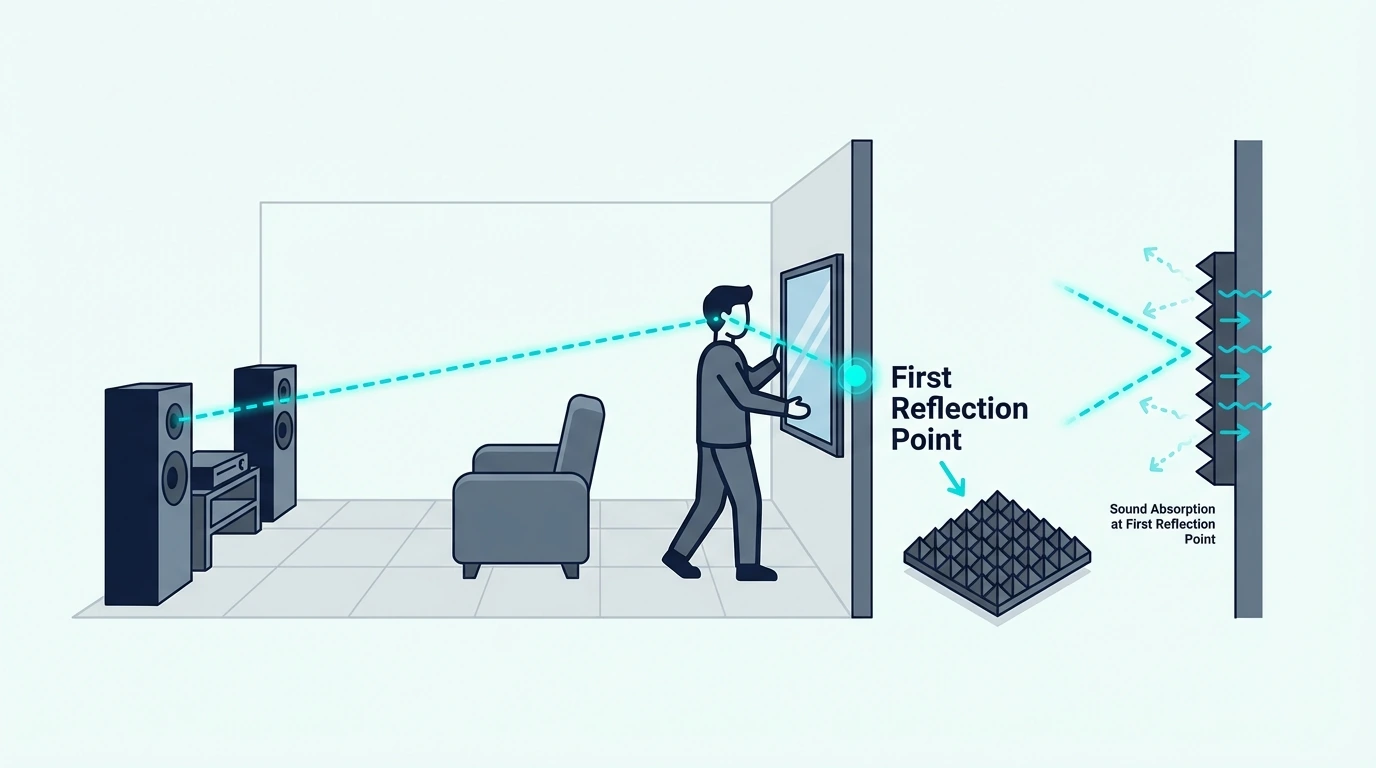
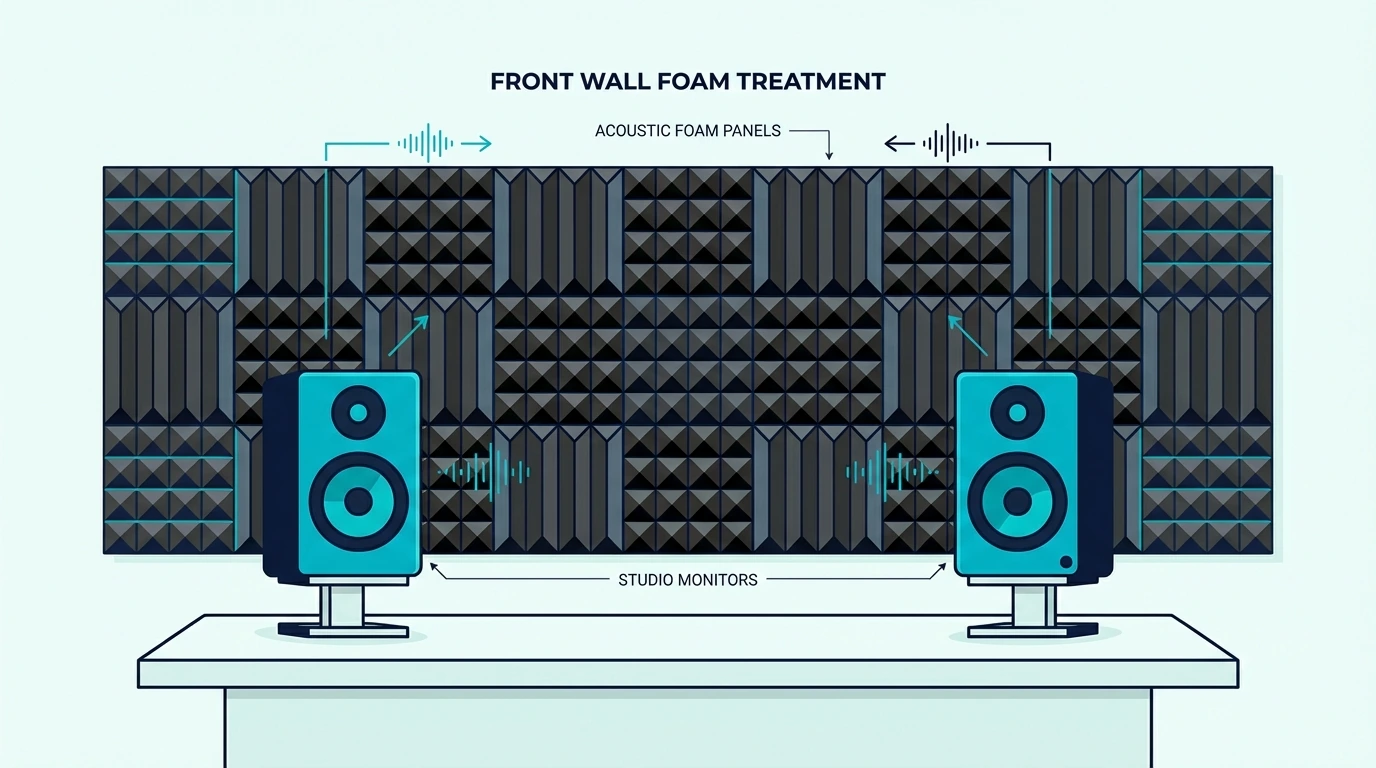
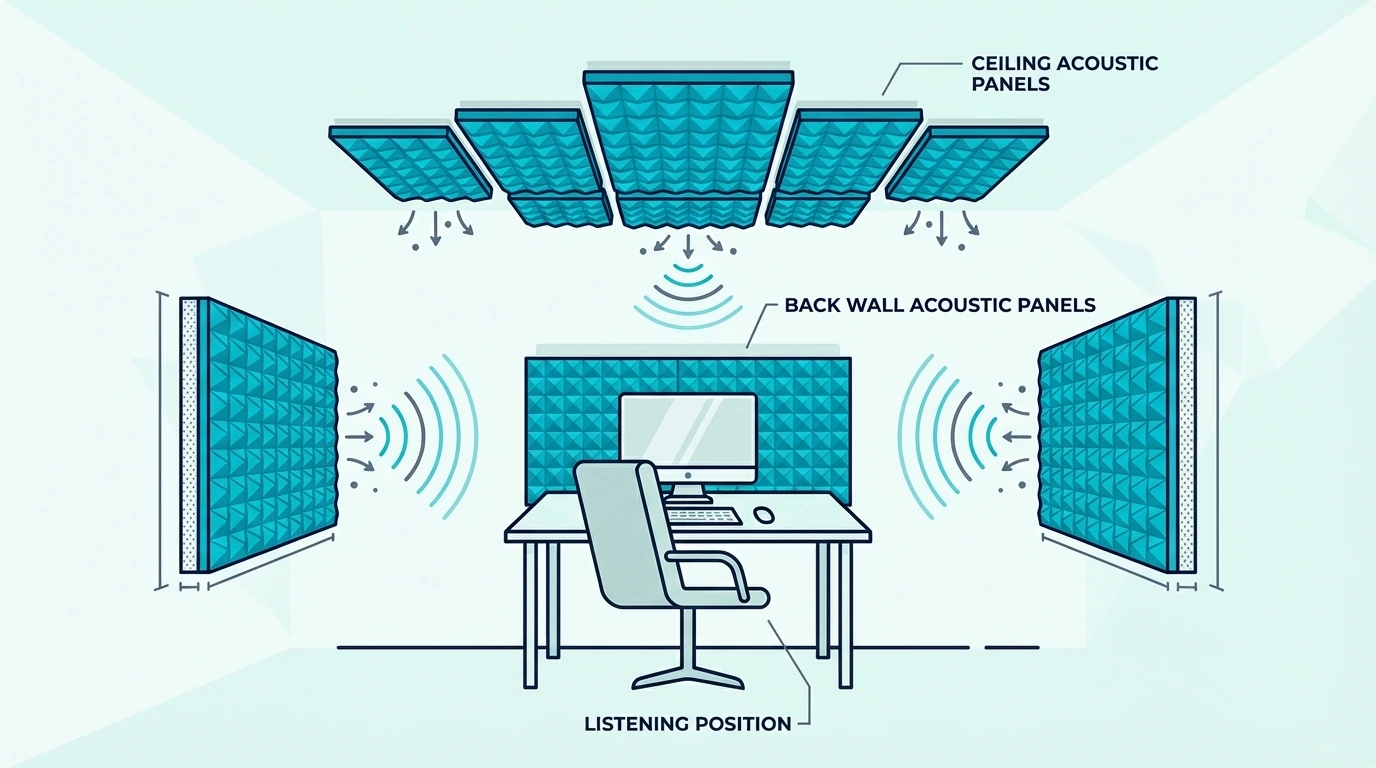
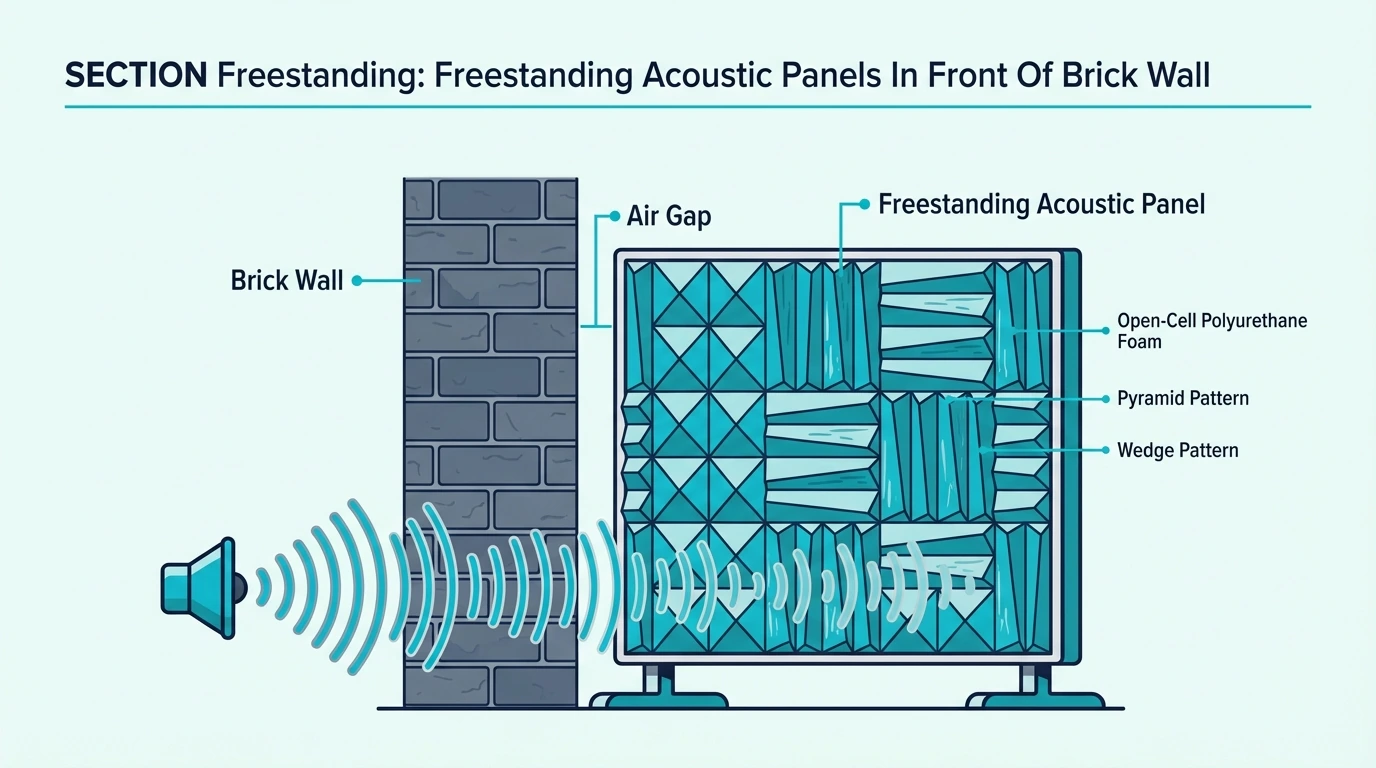
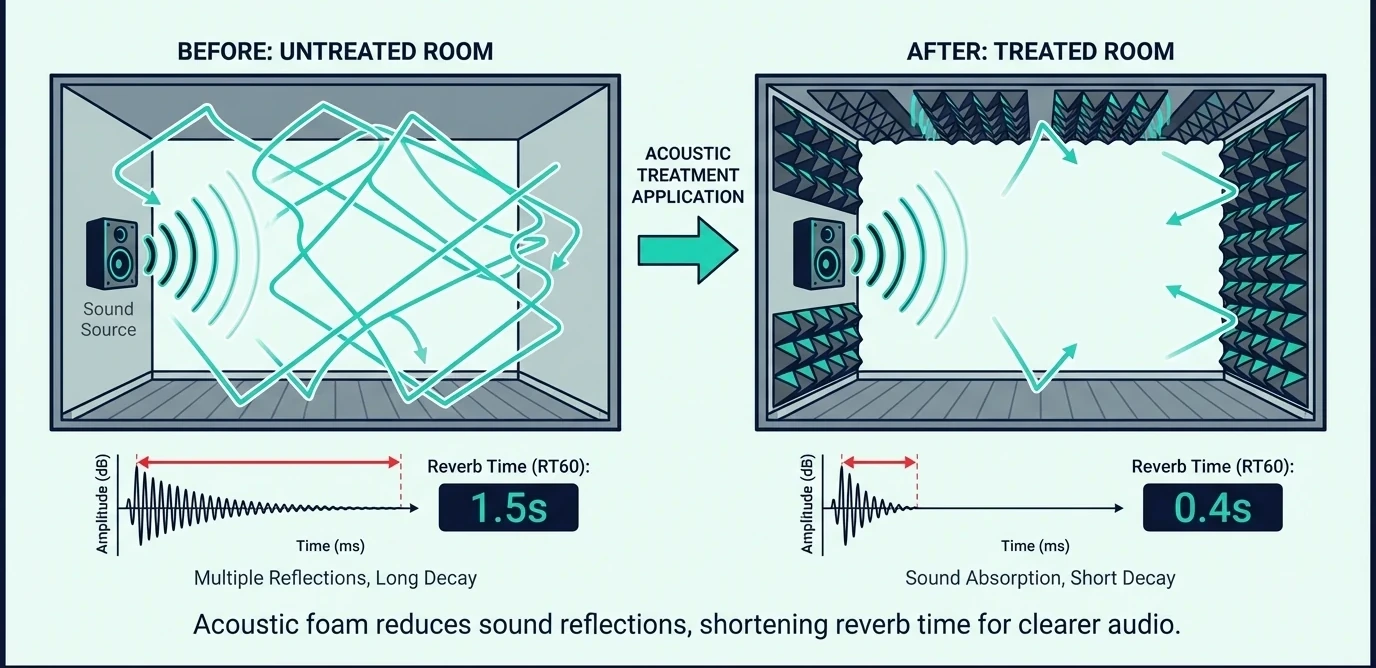
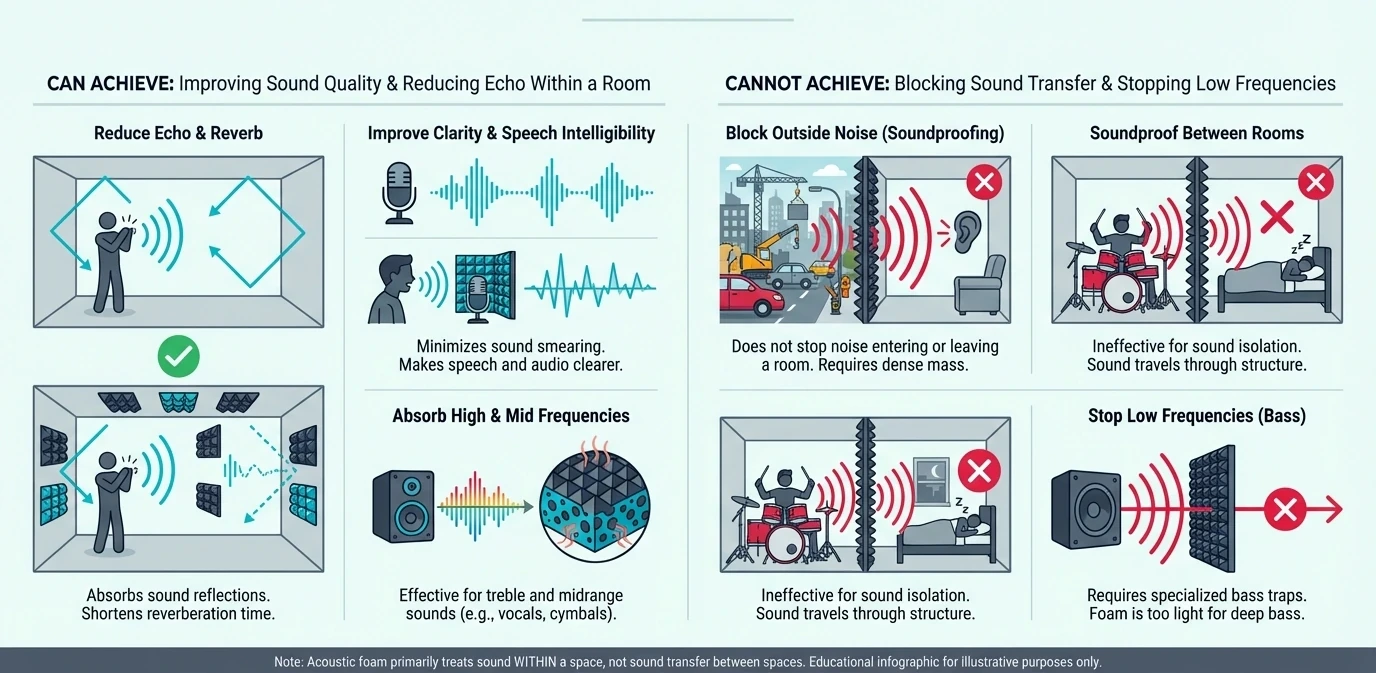
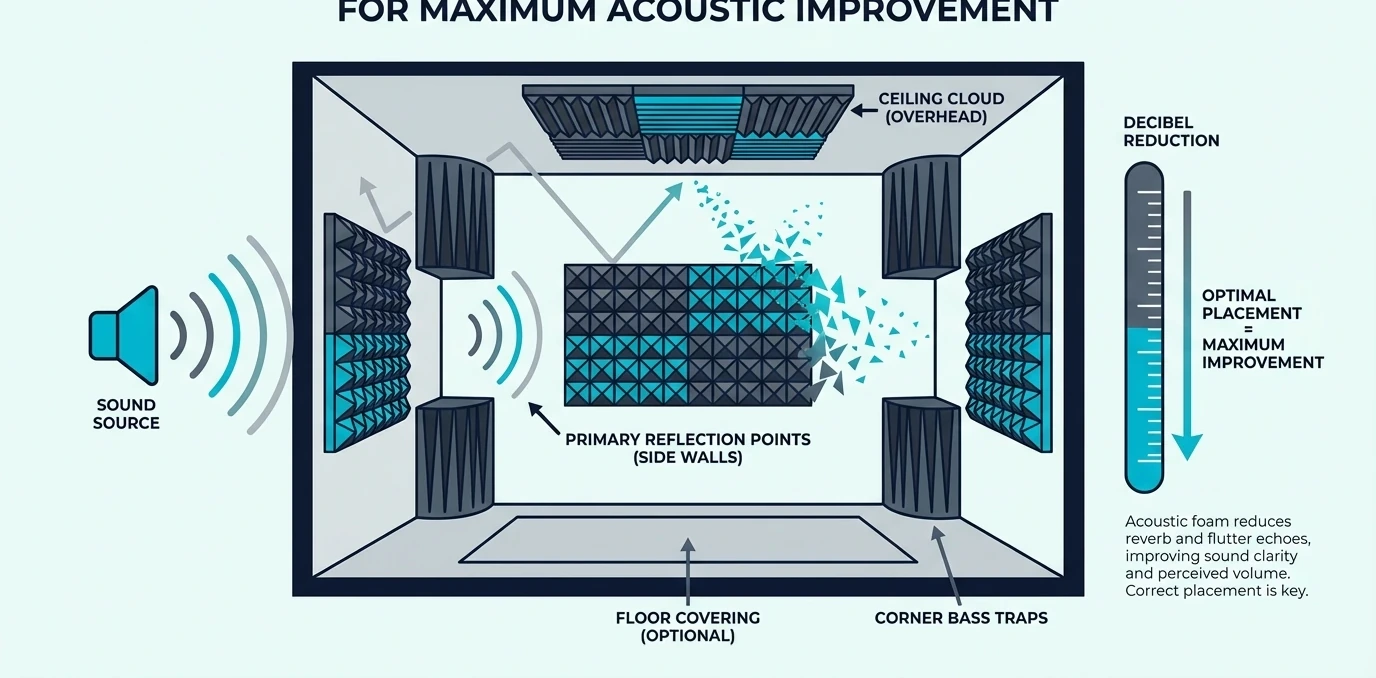
Reusing foam doesn’t change what foam does: it helps with reflections and reverb inside the room, not soundproofing between rooms. The biggest improvement still comes from placing it where your mic or speakers “see” hard reflections first.

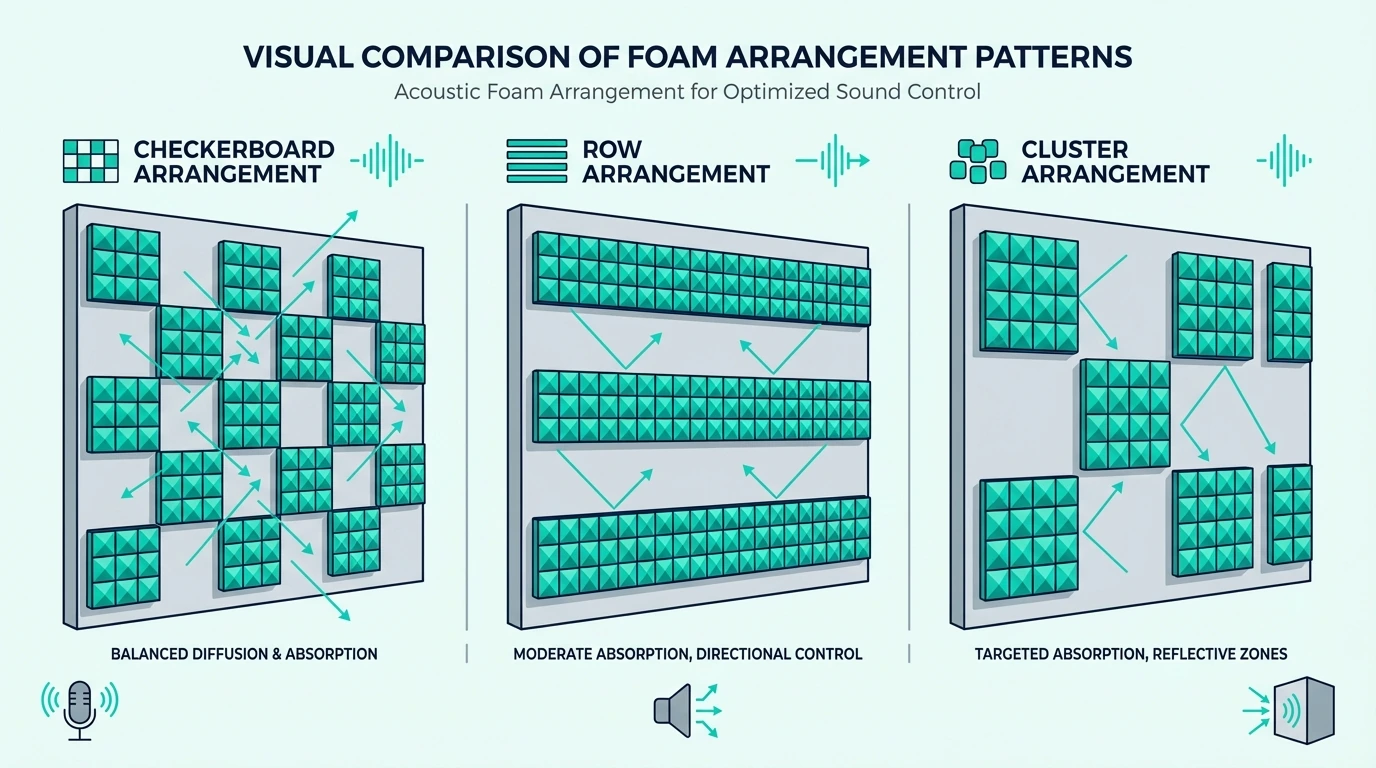
If you want a practical placement roadmap, how to arrange acoustic foam walks through the highest-impact spots before you start covering random walls.

When should you replace acoustic foam instead of reusing it?

When it makes more sense to replace acoustic foam instead of reusing it

At some point, reuse becomes false economy. If the foam is already breaking down, you’ll spend time reinstalling something that won’t look good, won’t hold well, and may smell worse in a new room.

Replace if the foam is degrading or contaminated

Replace foam if it crumbles when you touch it, stays permanently compressed, or smells musty even after airing out. Those are signs the foam’s structure is failing, and that’s not something “better mounting” can fix.

If you’re upgrading anyway, consider starting over with higher-quality foam or switching to a different approach. what acoustic foam panels are is a solid refresher on what “good foam” looks like versus the stuff that dies early.

Reuse if it still behaves like foam

Reuse makes sense when the foam is flexible, rebounds well, and comes off the wall in mostly one piece. In that case, you’re not sacrificing much performance by moving it.

This is especially true if you’re using foam as a budget treatment layer and you’re realistic about its limits. If you want the honest downside list, the cons of acoustic foam will keep expectations grounded.

A hybrid approach is usually the smartest

Most real-world moves end up hybrid: you reuse your best panels, replace the damaged ones, and fill gaps based on the new room layout. That gives you a clean-looking install without wasting decent foam.

If you need to replace a chunk of panels, best beginner acoustic foam is a helpful shortlist to restart without overthinking it.

Is reusing acoustic foam actually worth it (time vs replacement)?

Cost and effort trade-offs between reusing and replacing acoustic foam

This decision isn’t just “foam cost” versus “new foam cost.” It’s also time, wall repair, and the friction of reinstalling panels you secretly don’t like anymore.

The real costs people forget

Reusing foam usually means new mounting materials, some wall cleanup, and more time than you expect. If you’re peeling glue off painted drywall, the wall repair can take longer than mounting the foam in the first place.

Replacing foam costs more, but it can be faster and cleaner if your current panels are degraded or glued on permanently. That’s why the mounting-method check from earlier matters so much.

A simple decision rule

If the foam comes off cleanly and still feels springy, reuse it and spend your money on better mounting. If it’s tearing, crumbling, or smelly, replace the worst panels and move forward with a removable install.

Either way, treat this as a chance to build a setup you can actually live with. Foam is only helpful when it stays on the wall and stays in the right place.

The Bottom Line

Acoustic foam is often reusable, but the outcome is decided by two gates: how it was mounted, and whether the foam has started to degrade. If you used removable strips or clips and the foam still feels springy, reuse is usually the easier path.

If the foam was glued or it’s already crumbling, plan on a hybrid approach—reuse the survivors, replace the rest, and remount everything with a method you can undo. That way, your next move is a reinstall, not a demolition.

Frequently Asked Questions

Can I reuse acoustic foam that was glued to the wall?

Sometimes, but plan for damage. Spray adhesive can let you salvage panels if you separate slowly, while construction adhesive usually destroys the foam before it releases.

How do I remove acoustic foam without damaging it?

Go slow and separate before you peel. A plastic putty knife or floss behind the panel works better than pulling, and a test panel first can save your best foam from becoming your experiment.

Do I need new adhesive to reinstall reused foam?

Yes, you’ll need fresh mounting materials. Old adhesive won’t bond well again, and reused foam often holds better with removable strips or mechanical mounting.

Is it worth reusing cheap acoustic foam?

It depends on the condition and how it was mounted. If it comes off cleanly and still rebounds well, reuse it, but don’t spend hours rescuing panels that are already crumbling.

How long can I store acoustic foam before reinstalling?

You can store it for a long time if it’s kept flat, dry, and out of sunlight. The risk is gradual degradation, so check it occasionally if it’s stored for months.

Can I reuse foam that has yellowed?

Usually, yes, if it’s still flexible and springy. Yellowing alone is often cosmetic, but yellowing plus brittleness is a sign it’s time to replace.

How to Stop Echo With Acoustic Foam (Without Covering Every Wall)

Yes, acoustic foam can stop echo — but only if you put it where the reflections actually hit, not where the wall happens to be empty.

Most “foam didn’t work” stories come from random placement that misses first reflection points and the parallel-wall ping-pong that creates flutter echo.

This guide shows you where to start, how much coverage is usually enough, and when you need corner bass traps instead of more foam.

Start with the quick takeaway, then treat first reflection points first and work outward.

Quick Takeaway

To stop echo with acoustic foam, treat first reflection points and one wall of each parallel pair before you chase total coverage. Aim for around 20–30% wall coverage, then add corner bass traps if the room still sounds boxy.

Why Your Room Has Echo (And Why It Matters)

Diagram of sound waves bouncing between parallel walls and creating flutter echo

Echo isn’t just annoying—it actively degrades everything you do in that space. Understanding why it happens helps you fix it efficiently.

The Physics of Room Echo

Sound travels in waves. When those waves hit a hard surface, they bounce back like a ball off a wall.

In a room with multiple hard surfaces, reflections bounce around until they finally lose enough energy to fade out. That “tail” is what makes a room feel hollow.

You’ll usually hear two different problems: early reflections and late reflections. Early reflections arrive quickly and smear the direct sound.

Late reflections arrive later and create the reverb tail that makes rooms sound echoey. You don’t need the exact timing to fix it, but the “early vs late” split explains why placement matters.

Flutter echo is the worst offender. It happens between parallel surfaces—two walls facing each other, or the floor and ceiling.

Sound bounces back and forth rapidly, creating a metallic ringing that’s obvious when you clap. Foam fixes flutter when you break the ping-pong path.

That’s the mechanism. The reason it matters is simple: echo changes what you hear and what your mic captures, so it can make good gear sound bad.

How Echo Affects Your Space

In recording environments, echo contaminates everything your microphone captures. Your voice sounds distant even if you’re right on the mic.

Music recordings keep that amateur “room” on top of everything. Fixing echo is one of the fastest upgrades you can make.

For video calls and podcasts, echo makes you harder to understand. The reflections compete with your direct voice, reducing clarity and making listeners work harder to follow what you’re saying.

Even in normal living spaces, excessive echo is fatiguing. Conversations feel strained and music gets harsh.

Treating echo makes the room more comfortable day-to-day, not just “studio” nicer. If you’re in an apartment, read does acoustic foam help in apartments so you don’t confuse echo control with soundproofing.

Once you understand the problem, the next step is figuring out where it’s worst in your room. The clap test is the fastest way to do that without any gear.

The Clap Test: Finding Your Echo Problems

Stand in the center of your room and clap once, sharply. Listen to what happens after the clap.

A well-treated room produces a short, tight decay—the sound dies quickly without ringing. A problematic room produces a long tail with metallic ringing, especially noticeable in the high frequencies.

Walk around the room clapping in different spots. Echo is often worse in certain areas—usually between parallel walls or in corners.

Those hotspots tell you where to treat first. Don’t guess.

First Reflection Points: Your Highest Priority

Room diagram showing first reflection points and the mirror placement method

First reflection points are where sound bounces from your source (speakers, your mouth) to your ears via the nearest walls. Treating these points provides more improvement than any other placement.

Finding First Reflection Points

The mirror trick makes this easy. Sit in your primary listening or recording position.

Have someone slide a mirror along the side wall at ear height. When you can see your speaker (or your mic position) in the mirror, that’s a first reflection point.

Wherever you can see your speaker (or where your microphone would be) in the mirror, that’s a first reflection point. Mark these spots—they’re your priority treatment locations.

Typically, you’ll find first reflection points on both side walls, roughly 2-4 feet from your position depending on room geometry. The ceiling also has a first reflection point, though it’s harder to find without lying down.

Once you’ve found those spots, it helps to understand why they punch above their weight. That context keeps you from wasting foam on random walls just because they’re empty.

Why First Reflections Matter Most

First reflections arrive at your ears just milliseconds after the direct sound. Your brain can’t separate them—it perceives them as part of the original sound, but colored by the room’s acoustic signature.

These early reflections cause comb filtering, where certain frequencies cancel out and others reinforce. The result is an inaccurate, colored sound that changes based on where you sit.

Eliminating first reflections lets you hear the source without the room fighting you. It’s one of those changes that feels immediate.

For mixing, it means you trust what you’re hearing. For recording and calls, it means cleaner captures and better intelligibility.

So if you want the biggest audible win per panel, treat these first. Here’s the practical placement so you can do it without guessing.

Treating First Reflection Points

Place foam panels at each marked first reflection point. Standard 12×12 or 24×24 inch panels work well—you don’t need massive coverage, just enough to catch the primary reflection.

Mount panels at ear height when seated. If you stand while recording, raise them.

The goal is to intercept the reflection path between the source and your ears. If you want the mental model, read how acoustic foam works.

Two panels per side wall (four total) often handles first reflections adequately. This minimal treatment produces dramatic improvement—often more than covering entire walls randomly.

If you want a starter pack sized for these high-impact spots, JBER acoustic studio foam (24-pack) gives you enough tiles to hit first reflections without going overboard. Treat those spots first, then decide if you even need more.

For detailed mounting techniques, see our guide on how to put acoustic foam on walls.

If you’re renting, Command picture hanging strips (heavy duty) are the easiest damage-minimizing mount for foam tiles. Just clean the wall first and use the pull-tab removal method when you take them down.

Breaking Up Parallel Surfaces

Top-down room view showing parallel wall echoes reduced by foam treatment

Parallel surfaces create flutter echo—that metallic ringing when you clap. Breaking up at least one surface in each parallel pair eliminates this problem.

Identifying Parallel Surface Problems

Most rooms have multiple parallel surface pairs: front and back walls, side walls, floor and ceiling. Each pair can create flutter echo if both surfaces are hard and reflective.

The clap test reveals which pairs are problematic. Stand between two parallel walls and clap.

If you hear rapid ringing (almost like a “boing” sound), that pair needs treatment. If it’s a short, dull decay, you can move on.

Some parallel pairs matter more than others. Walls at ear level when seated tend to cause more obvious problems than floor/ceiling reflections.

Prioritize the pairs you can actually hear. Treating what you can’t hear is how you burn panels for no payoff.

Once you’ve found the worst parallel pair, the fix is simpler than most people expect. You don’t need to treat both walls—you just need to break the ping-pong path.

Treatment Strategy for Parallel Walls

You don’t need to treat both walls in a parallel pair. Treating just one breaks the reflection pattern enough to eliminate flutter echo.

Choose the wall that makes the most sense practically. If one wall has windows and the other is bare drywall, treat the drywall.

If one wall is behind your listening position, that’s often the better choice. You’re catching reflections that would otherwise bounce back into your ears.

Coverage doesn’t need to be complete. A few panels scattered across the wall—breaking up the flat surface—often suffices.

The goal is preventing clean reflections, not absorbing every sound wave. Think “break the mirror,” not “wrap the room in foam.”

That leads to the natural question: how much foam is “enough” for flutter echo? Here’s a realistic target so you don’t overbuy.

How Much Coverage Stops Flutter Echo

For flutter echo specifically, 30-40% coverage of one wall in a parallel pair usually eliminates the problem. That’s less than most people expect.

The panels don’t even need to be contiguous. Scattered placement actually works better for flutter echo because it breaks up the reflection pattern more effectively than a single large treated area.

Test after each addition. Clap between the walls and listen.

When the metallic ringing disappears, you’ve added enough. More treatment can help with other issues, but it won’t make flutter echo “more gone.”

Corner Treatment for Low-Frequency Echo

Bass trap installed in a room corner where low frequencies build up

Standard foam panels don’t address bass frequencies effectively. For low-frequency echo and boominess, you need corner treatment.

Why Corners Accumulate Bass

Low frequencies have long wavelengths—a 100Hz tone has a wavelength over 11 feet. These waves don’t “see” thin foam panels; they pass right through.

Corners are where bass energy accumulates. The geometry creates pressure zones where low frequencies build up.

That buildup causes boomy, muddy sound that flat-wall foam can’t fix. It’s a different problem with a different solution.

If your room sounds boomy or bass-heavy in certain spots, corner treatment is the solution. This is separate from treating echo in the mid and high frequencies.

So if the room still sounds boxy after you tame the slap and flutter, you’re probably hearing low-frequency buildup. That’s where bass traps earn their keep.

Bass Traps vs Regular Foam

Bass traps are thicker, denser absorbers designed specifically for low frequencies. They’re typically 4-6 inches thick minimum, compared to 1-2 inches for standard foam panels.

Placing bass traps in corners—especially the corners behind your speakers—addresses low-frequency buildup that regular foam misses. The improvement in bass clarity is often dramatic.

One reliable corner add-on is Auralex LENRD bass traps (2-pack) when you’ve handled reflections but the room still sounds boxy. They’re not soundproofing, but they can tame corner buildup that foam tiles miss.

You can use commercial bass traps or build DIY versions from rigid fiberglass or rockwool. Either way, corner treatment complements wall treatment for complete echo control.

For more on this topic, see our comparison of bass traps vs acoustic foam.

Once you pick traps, placement matters as much as product. Start with the corners that affect what you hear the most.

Corner Placement Strategy

Start with the front corners—behind and beside your speakers or primary sound source. These corners contribute most to what you hear at the listening position.

Rear corners matter too, especially for music production where accurate bass response is critical. A full corner treatment setup includes all four vertical corners, floor to ceiling.

If budget is limited, prioritize front corners first. Two bass traps in front corners provide more improvement than four regular foam panels on walls.

The 20-30% Coverage Rule

Room showing 20 to 30 percent foam coverage with strategic panel placement

More foam isn’t always better. Over-treating a room creates problems as bad as under-treating it.

Why Full Coverage Backfires

Rooms need some reflection to sound natural. When you absorb too much, the space sounds “dead”—quiet in a weird way.

Speech gets muffled, music loses life, and the room starts feeling oppressive. If it feels like you’re talking into a pillow, you overshot.

Professional studios aim for controlled acoustics, not dead acoustics. They use absorption strategically while preserving enough reflection for a natural sound.

The 20-30% coverage guideline keeps you in the sweet spot. Enough absorption to control echo, not so much that the room sounds like a padded cell.

So the goal isn’t “more foam”—it’s “enough foam in the right places.” Here’s how to translate that into a rough square-foot number for your room.

Calculating Your Coverage

Measure your total wall surface area. For a 10×12 room with 8-foot ceilings, that’s roughly 352 square feet of wall space (not counting floor and ceiling).

At 25% coverage, you need about 88 square feet of treatment. That’s roughly 22 standard 2×2 foot panels—far less than covering every wall.

This calculation gives you a target, not a requirement. Use it to stop yourself from buying 100 tiles out of panic.

Some rooms need more and some need less. Use the clap test and your ears to decide when you’ve added enough.

Now you’ve got a target number. Next is spending that coverage wisely instead of sprinkling tiles wherever they fit.

Strategic vs Random Placement

88 square feet of foam placed strategically outperforms 150 square feet placed randomly. Location matters more than quantity.

Prioritize in this order:

  • First reflection points: highest impact

  • One wall of each parallel pair: eliminates flutter echo

  • Corners: bass control

  • Additional coverage: only after the above

Following this order ensures each panel addition provides maximum benefit. Random placement wastes panels on low-impact locations while leaving high-impact spots untreated.

Room-by-Room Echo Solutions

Split image of home studio, office, and living room foam treatment examples

Different rooms have different echo challenges. Here’s how to approach common spaces.

Home Studio / Recording Room

Recording rooms need the most aggressive treatment because microphones capture everything. Echo that’s barely noticeable to your ears becomes obvious in recordings.

Focus on the area around your recording position. Foam behind the microphone, at side reflection points, and potentially overhead creates a controlled recording environment within the larger room.

You don’t need to treat the entire room for recording—just the immediate area where the microphone lives. This “room within a room” approach is more effective and less expensive than full-room treatment.

For complete studio setup guidance, see where to place acoustic foam in home studios.

If you’re not recording music and you just need to sound clear on calls, you can do a lighter version of this. Home office treatment is basically “treat what your mic sees” and stop once the hollowness is gone.

Home Office / Video Call Space

Video call quality depends heavily on room acoustics. Echo makes you sound unprofessional and harder to understand.

Treatment can be minimal but targeted. Foam on the wall behind your camera (which your microphone faces) makes the biggest difference.

Side wall treatment at your desk position helps further. If you have to pick only one area, treat what your mic “sees.”

Even 4-6 panels strategically placed transform video call audio. You don’t need a fully treated room—just enough absorption to control reflections near your desk.

Once the desk zone sounds tight, you can apply the same reflection logic to a couch-and-TV setup. Living rooms need a lighter touch so the space still feels natural day to day.

Living Room / Media Room

Living spaces need balanced treatment. You want to reduce echo without making the room feel dead or uncomfortable for daily use.

Focus on the wall behind your TV or speakers, plus treatment at first reflection points for your primary seating position. This improves audio clarity for movies and music without over-treating.

Aesthetic panels work well in living spaces. Fabric-wrapped panels or decorative foam options add absorption while still looking intentional.

If you want foam-specific ideas, use how to make acoustic foam look good.

Bedrooms are their own category because you already have a giant absorber: the bed. That usually means you can treat less and still get a real before/after.

Bedroom Studio

Bedrooms often have built-in absorption—bedding, curtains, carpet, clothes. You may need less treatment than you expect.

Do the clap test before buying anything. Many bedrooms only need treatment at first reflection points; the existing soft furnishings handle the rest.

If your bedroom still sounds echoey after you account for furnishings, add foam at reflection points first. That’s the highest return per panel.

The bed and closet often do some low-end damping already, so corner treatment may be less urgent. For a simple layout, use how to arrange acoustic foam.

Step-by-Step Echo Treatment Process

Step-by-step visual guide for assessing and treating room echo

Follow this process for systematic echo reduction.

Step 1: Assess Your Current Acoustics

Before buying anything, understand your room’s specific problems.

Do the clap test in multiple locations. Note where echo is worst.

Identify which parallel surface pairs create flutter echo. Listen for bass buildup in corners.

This assessment tells you what treatment you actually need. Many people buy foam for problems they don’t have while ignoring problems they do have.

Once you know what’s actually wrong, you can prioritize instead of buying foam out of panic. Here’s how to rank what to treat first.

Step 2: Identify Treatment Priorities

Based on your assessment, rank your treatment needs:

  • Severe flutter echo: treat parallel walls first

  • Recording quality issues: treat around the microphone position

  • General reverb: treat first reflection points

  • Bass problems: add corner treatment

Your priority determines where your first panels go. Don’t skip this step—it prevents wasted money on low-impact placements.

Now you’ve got an order of operations. Next is doing the smallest install that could plausibly fix the problem, then retesting.

Step 3: Start With Minimum Effective Treatment

Begin with the smallest amount of treatment that might solve your problem. For most rooms, that’s 4-6 panels at first reflection points.

Install these panels and reassess. Do the clap test again.

Then listen to a quick recording or a video call sample. Ask yourself: did the problem improve enough?

If yes, stop there. If no, name what’s still wrong and treat that specifically.

That loop keeps you from over-treating the room.

If the room is better but not there yet, don’t jump to full coverage. Add panels only to address the specific symptom you still hear.

Step 4: Add Treatment Incrementally

Each addition should target a specific remaining problem. Don’t add panels randomly hoping they’ll help somehow.

After first reflection points, typical next steps depend on what’s still bothering you.

Rear wall: add foam if echo still seems to come from behind you. This is common when your desk or mic position is near the middle of the room.

More side-wall coverage: if flutter echo is still ringing between a parallel pair, add a few more tiles on one wall. Retest after each small addition.

Corners: if the room sounds boxy or boomy, switch to corner bass traps instead of adding more flat wall foam. Foam tiles won’t do much down there.

Ceiling: if you hear slap from above, add a ceiling panel (a “cloud”) over your position. One panel can be enough to hear the room tighten up.

Test after each addition. Stop when the problems are solved.

Once the big problems are gone, tiny placement tweaks matter more than buying more foam. This is the “squeeze more performance out of what you already installed” step.

Step 5: Fine-Tune Placement

Once you have enough panels, experiment with exact positioning. Small adjustments can improve results without adding more treatment.

Try moving panels a few inches in each direction. Angle them slightly off the wall.

If you can, add a small air gap behind panels. It can improve low-frequency absorption.

These refinements extract maximum performance from your existing treatment.

Common Echo Treatment Mistakes

Common acoustic foam mistakes including corner-only and random panel placement

Avoid these errors that waste money and produce poor results.

Mistake 1: Treating Only Corners

Corners are important for bass, but standard foam in corners doesn’t address mid/high frequency echo. You need wall treatment too.

Some people put all their foam in corners because “that’s where sound builds up.” This addresses bass but leaves flutter echo and first reflections completely untreated.

Balance corner treatment with wall treatment. Both serve different purposes; neither alone solves all echo problems.

Mistake 2: Random Scattered Placement

Placing panels wherever they fit or look good rarely produces optimal results. Acoustic treatment isn’t decoration—placement follows acoustic principles.

A panel in a low-impact location does almost nothing. The same panel at a first reflection point can transform your sound.

Location is what makes treatment work.

Use the mirror trick and clap test to find high-impact locations. Place panels there first, regardless of aesthetics.

Mistake 3: Covering Everything

Full wall coverage seems logical but creates dead, uncomfortable spaces. Professional studios don’t do this—they treat strategically.

If your room sounds dead and lifeless after treatment, you’ve added too much. Remove a few panels and see if the sound improves.

Sometimes less is more.

Aim for controlled sound, not dead sound. You want to reduce echo while maintaining natural room ambience.

Mistake 4: Ignoring the Ceiling

Ceiling reflections contribute to echo, especially in rooms with hard ceilings. Many people treat walls thoroughly while ignoring the ceiling entirely.

At minimum, consider treatment at the ceiling’s first reflection point—directly above your listening or recording position. A single ceiling panel or cloud makes noticeable difference.

Full ceiling treatment is rarely necessary, but targeted ceiling absorption often is.

Mistake 5: Using the Wrong Thickness

Thin foam (1 inch or less) only absorbs high frequencies. If your echo problem includes mid frequencies, thin foam won’t fully solve it.

For comprehensive echo treatment, use 2-inch foam minimum. Thicker panels (3-4 inches) provide better absorption across a wider frequency range.

If you’re unsure which thickness to choose, our best acoustic foam panels guide compares options.

The thickness that works depends on your specific problems. High-frequency flutter echo responds to thin foam; broader reverb needs thicker treatment.

For guidance on thickness selection, see our comparison of 1-inch vs 2-inch acoustic foam.

Testing Your Results

Clap test in a treated room showing before-and-after echo reduction

After treatment, verify that you’ve actually solved the problem.

The Clap Test Revisited

Return to the clap test. Stand where echo was worst before treatment and clap sharply.

Compare the decay to your memory of the untreated room. The tail should be noticeably shorter, and any metallic ringing should be gone or greatly reduced.

If problems persist, identify what’s still wrong. Then match the fix to the symptom:

  • Flutter echo: treat more of the parallel surfaces

  • General reverb: add a bit more absorption where reflections hit first

  • Bass boom: add corner treatment (foam tiles won’t do much down there)

Recording Test

If you’re treating for recording, make test recordings before and after treatment. Speak or play music and compare the results.

The difference should be obvious. Treated recordings sound tighter, clearer, and more professional.

Untreated recordings have that hollow, echoey quality.

If recording quality hasn’t improved enough, your treatment may be in the wrong locations. Reassess placement around your microphone position.

The Conversation Test

For general living spaces, have a conversation in the treated room. Does speech sound clearer?

Is it easier to understand people?

In well-treated rooms, conversation feels effortless. In echoey rooms, you strain to hear and be heard.

The improvement should be noticeable in daily use.

The Bottom Line

Stopping echo with acoustic foam requires strategy, not just coverage. First reflection points, parallel wall treatment, and corner absorption—in that order—address echo systematically and efficiently.

Start with the clap test to understand your room’s specific problems. Then treat high-impact locations first: first reflection points on side walls.

Next, treat one surface of each parallel pair that’s creating flutter echo. Add corner treatment if bass is boomy.

The 20-30% coverage guideline prevents over-treatment. More foam isn’t better—strategic placement of fewer panels beats random placement of many.

Test after each addition. Stop when the problem is solved.

Echo treatment transforms rooms from uncomfortable and unprofessional to controlled and pleasant. The investment pays off in better recordings, clearer video calls, and more enjoyable daily living.

Follow the process and trust your ears. Your room will sound dramatically better.

Frequently Asked Questions

How many acoustic foam panels do I need to stop echo?

Most rooms need 8-16 panels for effective echo control, covering roughly 20-30% of wall surface. The exact number depends on room size and how strong the echo is.

Start with 4-6 panels at first reflection points, then add more based on results. Strategic placement matters more than quantity.

Eight well-placed panels beat 20 random ones.

Where is the best place to put acoustic foam for echo?

First reflection points on side walls provide the highest impact. Find them using the mirror trick: sit in your listening position and slide a mirror along the wall until you can see your speakers.

After first reflections, treat one wall of any parallel pair that’s causing flutter echo. Then add corner treatment if bass is still boomy.

Will acoustic foam completely eliminate echo?

Foam significantly reduces echo but rarely eliminates it completely—and that’s okay. Some room ambience is natural and desirable.

The goal is controlled acoustics, not dead silence. Properly treated rooms have short, tight decay without the harsh ringing of untreated spaces.

Can I use too much acoustic foam?

Yes. Over-treated rooms sound dead, muffled, and uncomfortable.

Speech sounds unnatural and music loses life. If your room sounds lifeless after treatment, remove a few panels.

The 20-30% coverage guideline helps prevent over-treatment.

Does acoustic foam work on all frequencies?

Standard foam (1-2 inches) primarily absorbs mid and high frequencies. Bass passes through thin foam largely unaffected.

For low-frequency echo and bass buildup, you need thicker bass traps (4+ inches) placed in corners. Complete echo treatment often needs both wall panels and corner traps.

How long does it take to notice a difference after adding foam?

The difference is immediate and obvious. The moment you add panels at first reflection points, you’ll hear tighter, more controlled sound.

The clap test shows a big improvement even with minimal treatment. You don’t need to “break in” acoustic foam—it works the moment it’s installed.

How to Install Auralex Acoustic Foam: Complete Step-by-Step Guide

How to install Auralex acoustic foam comes down to planning, prep, and a mounting method that matches your walls. It won’t soundproof your room, but it can reduce flutter echo and tame harsh reflections when it’s placed correctly.

A clean install reduces flutter and slapback, and it keeps panels from peeling off a week later. Start by mapping your first reflection points, then prep the wall and choose a mounting method that matches the surface.

If you’re deciding between spray, tube adhesive, or removable options, the best adhesive for acoustic foam guide helps you pick without wrecking your paint. That choice also determines how easy removal will be and how clean the finished layout looks.

Quick Takeaway

Mark your reflection points first, prep the wall, then mount the foam using a method that matches your surface and how removable you want the setup to be. The biggest mistake is skipping layout and surface prep, which leads to crooked rows, weak adhesion, and panels peeling off later.

What Should You Plan Before Installing Auralex Foam?

Room diagram showing optimal Auralex acoustic foam panel placement

Proper planning prevents wasted panels and poor results. It also keeps you from chasing problems later with random placement and extra adhesive.

Assess Your Room

Start by listening to the room the way your mic will. Talk at normal volume, clap once, and pay attention to any quick “zing” or flutter that comes back from parallel walls.

If you mix on monitors, your first reflection points on the side walls are the biggest early win. If you record vocals, the wall behind the microphone and the hard surfaces near the mic tend to matter most.

For monitor setups, the mirror trick is the fastest way to find first reflection points. Sit in your listening position and slide a mirror along the side wall, and treat the spots where you can see your speaker in the mirror.

If your mic is close to a desk, a bare tabletop can reflect straight into the capsule and make vocals sound harsher. In that case, move the mic away from the desk edge or add soft coverage to break up that bounce.

Calculate Coverage Needed

For voice recording, you can usually start with treatment focused around the mic position and the wall the mic “sees” behind it. For music production and mixing, prioritize the side-wall reflections from your monitors and consider a few panels overhead.

For general echo control in a multipurpose room, spread coverage across the most reflective surfaces instead of concentrating it on one spot. Auralex panels come in various sizes, so measure your target areas first and then convert that into the number of panels you need.

A simple way to estimate is to choose the “problem zone” you’re fixing and measure it in square feet. In a small bedroom studio, starting with a handful of panels at first reflection points and behind the mic is often more noticeable than buying a large pack and placing it randomly.

Once flutter echo is reduced, you can add panels in small batches and re-test instead of guessing at a final coverage number on day one. For help selecting the right Auralex products, see the best acoustic foam for recording guide.

Plan Your Layout

Before you open adhesive, do a quick dry-fit so you’re not making layout decisions with glue on your hands. Lay the panels on the floor in the pattern you want, then measure spacing so rows stay consistent.

Mark panel corners with painter’s tape and use a level to keep lines straight. Step back from your listening or recording position and confirm the pattern looks square and intentional.

If anything looks off, adjust now, because most mounting methods aren’t forgiving once you commit. A quick phone photo from across the room makes crooked rows obvious.

Gather Tools and Supplies

You don’t need a full contractor kit, but having the basics staged keeps you from rushing alignment while adhesive is setting. At minimum, have painter’s tape, a measuring tape, a level, a clean cloth, and drop cloths ready.

If you’re using spray adhesive, add a respirator or mask and plan for airflow so fumes don’t build up. For ceiling installs, a helper and a step stool make the job safer and prevent panels from shifting while the bond grabs.

For placement strategies, see the how to arrange acoustic foam guide. It shows where foam actually matters most for both recording and mixing.

Which Adhesive Works Best for Auralex Foam?

Adhesive options suitable for installing Auralex acoustic foam

The adhesive you choose determines how strong the bond is, how easy removal will be, and whether you damage the wall. Here are the main options ranked by permanence.

Auralex Tubetak Pro is the brand’s tube adhesive designed specifically for studio foam. If you want the “known quantity” option for a long-term setup, Auralex Tubetak Pro is a solid default.

The tradeoff is permanence. Once it cures, removal usually means paint damage and sometimes drywall paper coming with it.

Use small beads or a light zigzag pattern on the back of the foam, and avoid the outer edge to keep squeeze-out from showing. Press firmly and hold for a moment, because most “falling panel” failures come from not getting full contact across the back surface.

3M Super 77 Spray Adhesive

The 3M Super 77 Multi-Surface Spray Adhesive is a common pick for foam installs because it grabs quickly and spreads evenly. It’s a good fit when you want consistent coverage across many tiles without squeezing tube adhesive all day.

It’s also practical when you’re doing a larger layout and don’t want to squeeze out tube after tube. Treat it like a paint job.

Mask edges, ventilate the room, and apply a light, even coat so you don’t end up with wet glue bleeding through the foam. For best grip, spray from a consistent distance and aim for coverage that looks misted, not soaked.

If you can smell strong fumes immediately, you usually need better airflow, not more adhesive. In most rooms, better ventilation improves both bonding consistency and comfort.

Removable Mounting (Renter-Friendly)

If you need to move later or you’re renting, aim for a method that doesn’t bond foam directly to the wall. The cleanest approach is to mount foam to thin backing boards, then hang the boards.

To keep boards level and easy to remove, aluminum Z-hanger wall-mount brackets give you a repeatable, straight layout. They’re especially helpful if you want perfect rows and the option to take the treatment down later.

If you want a simpler approach for lightweight foam on smooth painted walls, Command large picture hanging strips can work. They still depend on a clean surface, so prep matters just as much as it does with permanent adhesives.

Impaling Clips

Impaling clips are a middle-ground option when you can tolerate small wall holes. You mount the clip to the wall, then press the foam onto the spikes.

They work best when you want foam panels to be removable without redoing adhesive every time. They’re also useful on surfaces where spray adhesive doesn’t bond consistently.

If you’re using drywall anchors, place clips so the panel stays flat instead of bowing at the corners. For most tiles, using multiple clips is more reliable than relying on one center point.

How Do You Prepare Walls for Auralex Foam?

Wall preparation steps for Auralex installation including cleaning and marking

Proper surface prep ensures adhesive bonds correctly. If foam is “mysteriously” falling off later, it’s almost always prep, not the brand of adhesive.

Clean the Surface

Dust, oils, and paint residue are what make panels fall off. Wipe the wall with a damp cloth, spot-clean greasy areas with a mild detergent, and let everything dry fully before you mount foam.

If the wall was painted recently, give it time to cure, because fresh paint can release oils that weaken the bond. Even paint that feels dry can still be curing underneath the surface.

Test Adhesive Compatibility

Before full installation, test on an inconspicuous area. Put a small dab of the adhesive you plan to use on a hidden spot, then press a foam offcut or a sacrificial tile into place.

Leave it overnight so the bond has time to fully set. Then remove it and check whether paint lifts, the adhesive stays gummy, or the wall feels oily.

If the paint comes away easily, switch to a removable approach instead of forcing a permanent bond. That’s the easiest way to avoid turning a small install into a drywall repair.

Some paints and wall coverings react poorly with certain adhesives. Testing prevents surprises.

For general wall mounting techniques, see the how to put acoustic foam on walls guide. It’s useful when you’re deciding between direct mounting and backing-board approaches.

Mark Your Layout

Treat this like hanging a gallery wall. Use painter’s tape to mark panel corners, check straight lines with a level, and measure spacing so the pattern stays consistent.

Once you commit to adhesive, small layout mistakes are what make the install look “DIY” even if the sound improves. Spending an extra few minutes here usually saves an hour of rework.

How Do You Install Auralex Foam Step by Step?

Sequential photos of the Auralex acoustic foam installation process

Follow these steps for professional results. The goal is consistent alignment and full contact, not speed.

Step 1: Prepare Your Workspace

You want everything within arm’s reach before adhesive gets tacky. If you tend to touch the foam a lot while aligning, wear gloves so oils from your hands don’t reduce adhesion on the back surface.

Lay drop cloths, ventilate the room, and stage panels in the order you’ll hang them. If you’re doing a full wall pattern, stage your panels in stacks by row.

That small step keeps you from mixing patterns and fighting alignment as you work across the wall. It also makes it easier to keep rows consistent if you need to pause mid-install.

Step 2: Apply Adhesive

Match the application method to the adhesive. If you’re using Tubetak, apply a thin zigzag to the back of the panel and stop short of the edges to prevent squeeze-out.

If you’re using spray adhesive, apply a light coat to both the wall and the foam, then wait briefly until it feels tacky before you hang. Two light coats are usually safer than one heavy coat, because oversaturation is what causes bleed-through and a sloppy finish.

If you’re spraying indoors, keep fans running and avoid open flames, because aerosols are both smelly and flammable. Even a small amount of overspray lingers longer than you expect in a closed room.

Step 3: Position and Press

This part is simple, but it’s where most installs go crooked. Align the panel with your tape marks, then press from the center outward to avoid air pockets.

Hold steady pressure for about a minute, and don’t slide the panel around once it starts to grab. Step back to confirm spacing and level before you move on.

If a panel is off, fix it immediately, because repositioning gets harder by the minute. If you need to remove it, peel slowly from a corner instead of yanking straight out.

Step 4: Allow Curing

Adhesive bonds are weakest in the first day. Avoid adjusting panels for 24-48 hours and keep the room at a stable temperature so the bond sets evenly.

If you’re mounting in a cold basement or garage, give it extra time. Most adhesives cure more slowly when the room is cold or humid.

Step 5: Install Remaining Panels

Work in a consistent direction across the wall so spacing stays uniform. Check alignment every few panels, and clean any squeeze-out immediately before it grabs dust.

If you’re installing around outlets or trim, cut panels before you apply adhesive. Trying to trim foam after it’s mounted usually tears edges and makes the layout look uneven.

How Does Installation Change on Different Wall Types?

Auralex installation techniques for drywall, concrete, brick, and paneling

Different wall types require adjusted techniques. The goal is the same, but the prep and mounting method change based on texture and porosity.

Drywall (Most Common)

Painted drywall is the easiest surface for foam. Once the wall is clean and dry, a test patch tells you whether the paint finish will hold, and then you can follow the same installation steps above.

Concrete/Cinder Block

Porous surfaces soak up adhesive and dust, so prep matters more than the product you choose. Clean thoroughly, remove loose grit, and expect to use more adhesive than you would on drywall.

If you’re trying to treat a garage or basement wall, see the putting acoustic foam on cinder blocks guide for placement and mounting tactics. It goes deeper on surface prep and mounting methods that actually hold on rough block.

Brick

Brick can work, but the texture means foam won’t contact the wall evenly. Clean mortar dust thoroughly and use a method that creates solid contact across the panel.

See the applying acoustic foam to brick guide for detailed instructions. Brick is uneven enough that backing boards are often the cleanest path.

Wood Paneling

Finished wood can be slick, so a test patch is mandatory. Light sanding can improve adhesion, but if you don’t want to alter the surface, removable backing boards are often the cleaner solution.

Ceiling Installation

Ceiling mounting is where panels fail if you rush. Work in small sections, use a stronger mounting method, and have a helper support the panel while the adhesive grabs.

The does acoustic foam work guide covers what to expect from foam on different surfaces, including ceilings.

What Are the Most Common Auralex Installation Mistakes?

Common Auralex installation errors compared with correct techniques

Avoid these errors that compromise results. Most of them are avoidable if you slow down at the prep and layout stage.

Too Much Adhesive

Too much adhesive usually shows up as dark spots on the foam face and glue squeeze-out on the edges. Apply a lighter coat that covers most of the back surface while staying away from the perimeter.

Poor Surface Prep

If the wall feels dusty or chalky, adhesive will stick to the dust and then the dust will let go. Clean the surface until a dry cloth comes away clean, then let it dry completely.

Rushing the Process

Rushing is what makes panels look crooked and fall over time. Slow down for alignment and give the bond the full cure time before you bump panels or move furniture.

Ignoring First Reflection Points

Random placement can look impressive on camera while barely changing the sound. Start at first reflection points and the surfaces closest to the mic or speakers, then expand outward if you need more control.

Be careful not to over-treat your room—see the whether you can put too much acoustic foam guide. It’s the easiest way to avoid turning your room dull while you’re trying to reduce harsh reflections.

How Do You Remove Auralex Foam Without Damage?

Safe removal techniques for Auralex acoustic foam panels

If you need to remove panels later, start by identifying how the foam was mounted. The right approach depends on whether you used a permanent adhesive or a removable mounting method.

Adhesive-Mounted Panels

Permanent adhesives usually mean wall damage. Pull slowly from one corner, use a putty knife to separate when needed, and plan on patching and repainting after removal.

Command Strip Mounted

If you used Command-style methods, follow the “stretch-release” technique. Pull the tab straight down slowly, then clean any residue so the next install has a clean surface.

Minimizing Damage

Heat can soften stubborn adhesive and reduce tearing. Work slowly and assume some damage if you used permanent adhesive, especially on older paint.

How Do You Maintain Auralex Foam Panels?

Cleaning and maintenance steps for Auralex foam panels

Proper care extends panel life. It also keeps foam from looking dusty, uneven, or worn out on camera.

For styling ideas, see how to decorate with acoustic foam.

Regular Cleaning

Dust buildup makes foam look worn and can reduce high-frequency absorption over time. Vacuum lightly with a brush attachment, and avoid water or cleaners that can break down the foam.

Addressing Damage

Small tears can be repaired with a foam-safe adhesive, but crushed foam usually doesn’t fully recover. If a panel is flattened or shedding, replacement is the better long-term fix.

Longevity Expectations

With stable humidity and normal indoor conditions, quality foam can last for years. Keep panels out of direct sunlight and avoid compressing them, because UV and physical wear are what shorten lifespan fastest.

The is acoustic foam reusable guide covers what to expect when swapping or relocating panels.

For more on foam lifespan, see the whether acoustic foam gets old guide. It covers what to expect in high-sun rooms and more humid spaces.

The Bottom Line

Installing Auralex acoustic foam correctly is less about sticking up more panels and more about placing the right panels in the right spots. Plan first reflection points, prep the wall, and pick a mounting method based on how permanent you want the setup to be.

Once panels are up, give the adhesive the full cure time so you’re not re-hanging foam every few days. If you want to double-check placement strategies, the how to arrange acoustic foam guide walks through the most effective positions.

For more foam guides in one place, start at the acoustic foam hub and drill down from there based on your room and goals. That’s the quickest way to find the right mounting and placement advice for your exact surface.

Frequently Asked Questions

What adhesive does Auralex recommend?

Auralex generally recommends using a foam-safe adhesive intended for permanent installs. Many installers also use a strong spray adhesive like 3M Super 77 Multi-Surface Spray Adhesive, as long as they prep the wall and keep overspray controlled.

Can I install Auralex foam without damaging walls?

Yes, but you usually need an extra layer between the foam and the wall. Mount the foam to thin backing boards and hang the boards with removable hardware, or use clips that only leave small holes.

For removable mounting, Command large picture hanging strips are a common choice when you want a clean removal. They’re most reliable when you attach the foam to a backing board first, then mount the board to the wall.

Just keep expectations realistic. Removable methods are usually less secure than permanent adhesive, especially on textured walls.

How long does Auralex adhesive take to cure?

Allow 24-48 hours for a full cure before you put stress on the bond. Avoid adjusting panels during that window, and remember colder temperatures and higher humidity can slow curing.

How many Auralex panels do I need?

Start with the positions that matter most. For voice recording, treat the area around the mic position and the wall behind it, then add panels if the room still sounds lively.

For mixing, prioritize first reflection points on the side walls and a little treatment overhead, because those reflections affect imaging and clarity. If the room still feels bright after that, add panels in small batches and re-test.

Can I reuse Auralex foam if I move?

Panels mounted with permanent adhesive are difficult to remove intact, so expect some damage to the foam and the wall. If you mount panels with removable methods, you have a much better chance of reusing them.

Should I install Auralex foam on the ceiling?

Ceiling treatment can noticeably improve room acoustics, especially for recording and mixing. Use a stronger mounting method for overhead installs, and consider having a helper support panels while the adhesive sets.

How to Install Acoustic Foam on Windows (Without Wrecking the Glass)

Acoustic foam on windows works, but only for the reflection bouncing back into your room — not for blocking outside noise. Glass is a hard, flat reflector right where your mic is most sensitive.

The annoying part is that windows are also the thing you don’t want to cover permanently. Nobody wants to turn a bright room into a cave just to tame one ugly reflection.

This guide walks you through the window-friendly ways to use acoustic foam: removable inserts, partial treatment, and full coverage for dedicated rooms — plus mounting methods that won’t wreck the glass and how to avoid condensation traps.

Start with the Quick Takeaway to pick the approach that matches your room, then follow the step-by-step sections below.

Quick Takeaway

Best all-around: build a removable window insert panel (foam on a light frame) that you can pop in for recording and pull out afterward. It gives you repeatable results without adhesive drama. Fastest compromise: treat the frame/perimeter and the wall around the window — it makes the room less “glassy” while keeping daylight. Avoid sticking foam directly to the glass long-term in humid or cold climates, because trapped condensation leads to musty foam and a foggy window.

Are You Trying to Soundproof the Window, or Just Kill Reflections?

Diagram showing how window reflections create acoustic problems

This topic gets confusing because it mixes two different goals. Once you decide whether you’re fighting echo inside the room or noise coming through the window, the right solution becomes obvious.

Foam helps with reflections (treatment), not noise coming through glass

Acoustic foam is designed to absorb airborne reflections in your room, mainly in the mid and high frequencies. It can make vocals and dialogue sound tighter because less sound bounces off the window and back into the mic.

What it won’t do is stop traffic noise or neighbors because that’s transmission through glass, not reflection off glass. If that’s the problem you’re trying to solve, start with sound deadening material vs acoustic foam.

Now, if your recordings sound “roomy” even in a small room, the window is often the first reflection point causing it. That’s good news, because reflections are one of the things foam can actually help with.

The window is a big “hard mirror” for mids and highs

In the mid-to-high range, glass behaves like a mirror: sound hits it and comes right back. That’s why an untreated window can create a sharp slap-back, comb filtering, or a brittle edge on vocals.

When you cover the window (or the area around it), you’re basically taking that mirror out of the room for those frequencies. For the bigger picture, read what frequencies acoustic foam absorbs.

Quick test: is the window actually your problem?

Stand where your mic would be and clap once while facing the window. If you hear a quick “tick” or flutter coming back from that direction, you’ve found a reflection worth treating.

You can also record a short spoken phrase, then hang a thick blanket over the window temporarily and compare takes. If the difference is obvious, treating the window (or the wall around it) is usually worth it.

If there’s little change, your first reflections might be coming from somewhere else. In that case, start with how to arrange acoustic foam before you build anything window-specific.

Should You Cover the Whole Window With Acoustic Foam?

Window fully covered with acoustic foam panels

Full coverage is the blunt instrument option, and it works because you’re removing almost all of the reflective glass surface. The cost is obvious: you lose light, and you have to think about condensation.

When full coverage is worth it

If the room is a dedicated studio or you only use the window during sessions, full coverage can be the simplest fix. It’s also the most reliable method if the window is directly beside or behind the mic.

If you still need daylight, skip ahead to the removable insert method. It gives you most of the benefit without living in the dark, and it makes moisture checks easier too.

How to do full coverage without permanently gluing foam to glass

Instead of sticking foam straight onto the glass, mount it to a lightweight backing (thin plywood, foam board, or a simple frame) and attach that to the window frame. This keeps adhesive off the glass and lets you remove the whole panel if needed.

If you want a removable-but-strong connection between the backing panel and the trim, heavy-duty hook-and-loop strips like heavy-duty adhesive hook-and-loop strips can work well. They’re strong, so test in a corner first and avoid delicate paint.

If you must mount on the glass, use a truly removable method and test it on a corner first. Heat from direct sun can soften adhesives and make them fail (or leave residue when you peel them off).

Full coverage works best when you treat it like a temporary “recording mode.” That naturally leads into the option most people actually want: a removable insert panel. For adhesive options that work on different surfaces, the best adhesive for acoustic foam guide covers the tradeoffs.

What’s the Best Removable Window Foam Setup for Recording?

Removable acoustic panel fitted into a window opening

If you want the window to keep being a window, this is the method to start with. You build (or buy) a panel that fits the opening, then you pop it in when you’re recording.

Build a simple insert panel that friction-fits

Measure the inside of the window opening (the part you’d set a screen into), not the outer trim. You want an insert that presses in gently, not one that needs glue to stay put.

Build a thin frame that matches that opening and attach your foam to the room-facing side. If you care about looks, wrap the front with breathable fabric so the foam isn’t exposed.

Add a small handle or pull tab so you can remove it quickly. If it’s too tight, sand the frame edges rather than forcing it and cracking the trim.

If you want a deeper build guide, see DIY acoustic foam panels. The “mount foam to a frame” idea is the same, you’re just sizing it to a window opening.

Make it feel solid (without making it permanent)

If the insert rattles, add thin weatherstripping to the back edge so it compresses softly against the frame. You’ll get a snug fit and fewer vibration noises without needing screws.

If you want the foam itself to be removable from the insert frame, hook-and-loop fasteners like VELCRO Industrial Strength Fasteners keep it modular. That way, you can replace the foam later without rebuilding the frame.

If you want the insert to help with outside noise too, the seal matters more than the foam. Just remember: even a perfect seal won’t turn thin glass into a soundproof wall.

Once you’ve got a removable panel, you can decide how aggressive you want to be. Some rooms only need partial treatment to feel “fixed.”

How Can You Treat a Window Without Blocking All the Glass?

Partial window foam treatment with exposed glass

Partial treatment is about taking the edge off the reflection while keeping the room bright. It’s also the safest approach in humid climates because you’re not sealing foam against cold glass.

Treat the frame and the wall around the window first

Start by treating the hard surfaces around the window: the frame, the trim, and the wall right next to it. This won’t eliminate the glass reflection, but it reduces the “ring” that comes from the surrounding hard edges.

It’s also easier to mount foam on painted drywall than on glass. For general mounting guidance, see how to put acoustic foam on walls.

Cover only the lower half (or the perimeter) if you need daylight

If the window is in your mic’s line of sight, covering the lower half can knock down the reflection that hits the mic first. The top half stays clear so you keep daylight.

Perimeter-only foam (a border around the glass) is the least intrusive option, but it’s also the least effective. Think of it as “better than nothing” for casual voice work, not a magic fix for a bad room.

If you want something even more livable than foam, curtains are the obvious alternative. Just set expectations correctly and you’ll be fine.

Are Acoustic Curtains a Better Option Than Foam on Windows?

Heavy acoustic curtains covering a window

Curtains are popular because they don’t require adhesives, and you can open them in two seconds. The trade-off is that most curtains don’t absorb as much as foam, especially if they’re thin.

What curtains can (and can’t) improve

A heavy curtain adds a soft layer that can reduce some high-frequency slap and make the room feel less “bright.” It’s often enough to make speech recordings sound smoother, especially if the window is the main reflective surface.

But curtains won’t replace proper absorption if you’re doing critical vocal work, and they won’t soundproof the window by themselves. If you want other window-friendly options, see what you can use instead of acoustic foam.

How to make curtains work better

Pick the heaviest curtain you can tolerate and make sure it’s wide enough to bunch up when closed. That extra “fullness” creates more folds, which increases absorption.

Leave an air gap between the curtain and the glass if you can, because a soft layer with a gap tends to absorb better than a layer pressed flat. If you still need more control, that’s usually the sign to switch back to a removable insert panel.

Whether you choose foam or curtains, the mounting method matters. A clean install that you can undo is the one you’ll actually keep using.

How Do You Mount Acoustic Foam on Glass Without Damage?

Mounting methods for attaching acoustic foam to glass

Glass is unforgiving, and so is window trim, so the default should be removable. The goal is strong enough to hold panels during a session, and gentle enough to remove without scraping.

The safest approach: mount foam to a backing, not the glass

If you can, attach your foam to a lightweight backing board or a frame, then attach the backing to the window frame. This keeps adhesive off the glass and makes removal a one-piece operation.

It also reduces condensation risk because foam isn’t pressed tight against cold glass. If you need more mounting ideas, how to put acoustic foam on walls has options you can adapt.

If you must mount on glass: test removable methods first

Removable picture-hanging strips like Command picture hanging strips are usually safer than permanent glue, but sun exposure can still weaken them over time. Clean the glass, apply one test strip, and leave it for a day before committing to a full panel.

Suction cup hooks can work for very lightweight foam, but treat them as temporary. If a panel falling would damage gear, don’t trust suction cups alone. The is acoustic foam reusable guide covers what survives removal and what doesn’t.

Mounting solves the “falling off” problem, but there’s another one people forget: moisture. If you skip the moisture check, even a perfect mount can turn into a musty mess.

Will Foam on Windows Cause Condensation or Mold?

Diagram showing moisture risks from foam covering a window

If you cover a cold window with an insulating layer, you change how that surface dries. That’s not a deal-breaker, but it does mean you should avoid permanent installs and check the window occasionally.

Why condensation gets trapped

In cold weather, warm indoor air can condense on cold glass. If foam is pressed against the glass, that moisture has nowhere to evaporate, so it sits there.

Over time, trapped moisture can lead to musty-smelling foam, mold spots, or adhesive failure. That’s why removable inserts are safer than direct-to-glass installs.

How to avoid problems

Take the panel down periodically to let the window dry, especially in winter. If you notice fogging behind the foam, treat that as a warning sign and switch to a removable frame method.

Ventilation matters too, especially if your room runs humid. You don’t need to panic, but you do need to check it before it becomes mold.

Conclusion

If your recordings sound harsh and “glassy,” the window is often the reflection doing it. Acoustic foam can help, but only for that reflection problem, not for soundproofing.

For most rooms, a removable insert panel is the best balance: strong improvement when you’re recording, daylight when you’re not. Full coverage works for dedicated rooms, and partial treatment or curtains are decent compromises.

Whatever method you use, avoid permanent glue on glass and keep an eye on condensation. A clean install that you can undo is the one you’ll actually keep using. For broader foam options beyond windows, the acoustic foam hub has the full map.

Frequently Asked Questions

Can you put acoustic foam directly on a window?

You can, but it’s rarely the best option. It’s easier to trap condensation and harder to remove cleanly than mounting foam to a removable backing or insert.

Will acoustic foam on windows reduce traffic noise?

Not really, because foam doesn’t add mass and it doesn’t seal air gaps. For outside noise, you need sealing and mass-focused strategies, not acoustic treatment.

What’s the best way to keep daylight and still treat the window?

Use a removable insert panel you can install during sessions and remove afterward. If you want an even faster option, heavy curtains can help with reflections while staying easy to open.

Do I need to cover the entire window to get results?

Covering the entire glass surface is the most effective for reflections. Partial treatment can still help, but the more glass you leave exposed, the more reflection remains.

How do you remove adhesive residue from glass?

Start with warm soapy water and a plastic scraper, then use isopropyl alcohol for stubborn spots. Avoid metal blades on glass, and always test solvents on a small corner first.

Will foam on windows cause mold?

It can if moisture gets trapped behind the foam and never dries. Removable panels and quick moisture checks are the simplest way to prevent it.

How to Decorate With Acoustic Foam (Without Looking Like a Budget Studio)

Decorating with acoustic foam is one of the fastest ways to tame echo, but it can also make your room look like a budget studio overnight. If you’ve ever looked at your wall on a video call and thought “why does this look so messy,” this guide is for you.

Most foam looks wrong because it gets installed like an afterthought: random squares, mismatched colors, uneven spacing, and no visual anchor. The fix isn’t buying more foam — it’s making a few intentional design decisions before you stick anything to the wall.

This article covers color choices, layouts that look designed, ways to blend foam with decor, and simple cover/frame tricks when you hate the texture.

If you’re still deciding what to buy, start with the how to choose acoustic foam guide so you don’t decorate a product that can’t solve your problem. Otherwise, jump to the Quick Takeaway below and steal the design rules that make foam look intentional.

Quick Takeaway

If you want acoustic foam to look good, treat it like wall art: pick a palette, commit to a pattern, and keep spacing consistent. “Random squares everywhere” is what makes foam look cheap, even when the foam itself is fine. Start with one focal wall (usually behind your mic/monitors) and design that wall first. Once it looks right, copy the same spacing and alignment rules to the rest of the room.

How Do You Choose Colors for Acoustic Foam?

Room examples using matching, contrasting, and accent acoustic foam colors

Color is the quickest way to make foam disappear—or to make it look like a deliberate accent. Before you buy, decide whether you want “invisible treatment” (blend), “statement wall” (contrast), or “ties the room together” (accent).

Match the Wall (Invisible Treatment)

If you match your wall color, the foam texture becomes the only thing your eye notices, and even that fades at a distance. This is the safest option for living rooms, offices, and any space where you want the room to read “normal” on camera.

Dark neutrals (charcoal, dark gray) hide the wedge texture better than bright colors. If your walls are light, a slightly darker tone than the paint often looks more intentional than trying to color-match perfectly.

Self-adhesive foam is also easier to keep clean-looking, because you can place panels without smearing glue or leaving tape lines around the edges. A starter pack like 18 Pack Self-Adhesive Acoustic Foam Panels makes it easy to lay out a neat grid and adjust as you go.

Use Contrast (Make It a Feature)

Contrast only works when it looks planned, not accidental. Pick one contrasting color and repeat it elsewhere in the room (a rug stripe, a poster frame, a keyboard mat) so the foam feels connected.

If you’re not willing to repeat the color, don’t go bold. A strong contrast with no other “echo” in the room makes the wall look like a patch job.

Use an Accent Color (Tie Into Your Setup)

Accent color is the sweet spot for most creators because it looks intentional without shouting. Choose a foam color that matches one existing accent in your setup, then keep everything else neutral.

This works especially well for gaming rooms and studios where you already have a defined color theme. Once the palette is locked, the next step is making the layout look designed, which is where most foam installs fall apart.

What About Multi-Color Patterns?

Multi-color can look great, but only if you plan it like a pattern, not a pile of leftovers. Lay panels on the floor first, take a photo, and copy that map onto the wall so you don’t end up improvising mid-install.

If you want the easiest upgrade without thinking too hard, do a two-color checkerboard with consistent spacing. Then keep reading, because the pattern you choose matters less than how cleanly you execute spacing and alignment.

How Should You Arrange Acoustic Foam Panels to Look Good?

Decorative acoustic foam patterns including checkerboard and diagonal layouts

Once color is handled, layout is what separates a designed wall from random foam squares. A clean pattern also helps you keep coverage where it matters acoustically instead of scattering panels like stickers.

Start With One Focal Zone (Don’t Sprinkle)

Pick one wall to be your treatment feature, usually behind your microphone or behind your monitors. Treating one area well looks intentional and often solves the worst reflections at the same time.

If you need placement guidance, the how to arrange acoustic foam guide works as the acoustic map. Then come back here and make that map look good.

Patterns That Look Intentional in Real Rooms

Checkerboards work because your brain reads them as a design choice, not a coverage mistake. Diagonal stripes and centered blocks also work, as long as edges are straight and spacing is consistent.

If you want foam that looks more architectural on the wall, thicker pyramid panels tend to read more like a pattern and less like packing material. A 2-inch set like 24 Pack 2-Inch Pyramid Acoustic Foam Panels gives you deeper texture, which can look better on camera when you light the wall from the side.

Avoid patterns that require perfect measuring if you know you won’t measure. A slightly imperfect simple grid looks better than a complicated pattern that drifts by half an inch every row.

The Spacing Rule That Fixes 80% of “Ugly Foam”

Whatever spacing you pick, repeat it everywhere. Uneven gaps are what make foam look like it was installed panel-by-panel with no plan.

Painter’s tape is the cheat code here. Mark the outside edges of your layout first, then fill in the interior so every row stays aligned.

Don’t Sacrifice Performance for Aesthetics

Leaving small gaps between panels is usually fine for echo control, but huge decorative spacing can reduce coverage where you actually need it. If you’re treating a slapback wall, prioritize coverage at ear level and behind the mic over making the wall perfectly symmetrical.

How Can You Blend Acoustic Foam With the Rest of Your Room?

Room with acoustic foam integrated with art, shelving, and fabric panels

Foam looks cheap when it’s the only texture on the wall. When you break it up with other elements, it stops reading as padding and starts reading as part of the room.

Use Artwork as the Visual Anchor

Choose one piece of art (or one monitor/TV) to be the focal point, and build the foam layout around it. When the eye has a clear main thing to look at, the foam becomes supporting texture instead of the entire wall.

Keep the art centered and let the foam frame it like a border or halo. This is a simple way to make a foam install feel like a gallery wall instead of a sound booth.

Add Shelves (And Let Them Do Double Duty)

Floating shelves break up the foam visually and give you a place for books, plants, and small objects. Books and soft items also add a bit of absorption and diffusion, which can complement the foam.

Don’t overpack shelves with hard collectibles that rattle. If the shelf becomes a noise source, it defeats the point of improving the room sound.

Mix Materials Without Turning It Into a Different Category

If you want a living room look, foam alone is rarely the best aesthetic tool. Fabric-wrapped panels and slat panels usually look better, but they’re a different purchase decision than “I already have foam.”

If you’re choosing between foam and panels, read acoustic foam vs acoustic panels before you spend money twice. If you’re decorating foam you already own, keep going—covering and framing can get you surprisingly close to the panel look.

Can You Cover or Frame Acoustic Foam (Without Killing Performance)?

Acoustic foam panels covered with fabric and decorative frames

If you hate the foam texture, cover it. You can change the look completely as long as sound can still reach the foam.

Cover Foam With Breathable Fabric (What Works)

The blow test is still the simplest rule: if you can breathe through the fabric easily, sound will pass through it too. Speaker grille cloth and many thin polyester fabrics work well, while vinyl-like or tightly woven fabrics tend to reflect high frequencies.

Don’t paint foam to change color. Paint clogs the open-cell structure, which is why the answer to can you paint acoustic foam is basically “no — use fabric instead.”

Frame Foam Like Art (The Fastest Visual Upgrade)

A simple wood frame makes foam look finished, even if the foam itself is cheap. You can mount the foam on a thin backer board, then hang it like a picture so it’s removable.

This is also renter-friendly if you use the right mounting method. If you’re worried about walls, start with how to remove acoustic foam from walls so you don’t turn better audio into a drywall repair job.

Shadow Boxes and Lighting (Only If You Do It Safely)

Backlighting can look great, but don’t trap heat behind foam or run hot lights against flammable material. If you add LEDs, keep them low-heat, keep wiring clean, and treat fire safety as a real constraint, not a footnote.

How Should You Decorate With Acoustic Foam in Different Rooms?

Decorative acoustic foam approaches for different room types

The same foam can look cool studio in one room and why is this here in another. Use the ideas below to match the vibe of the space and the realities of what’s on camera.

Home Studios and Content Corners

Studios can lean into the foam look, especially if the background is part of your brand. Bold colors and clean geometry read as intentional when the rest of the setup looks purposeful.

If you actually like the classic wedge texture (and you’re going to make it a feature wall), start with a set that has a long review history and consistent cuts. JBER Acoustic Foam Wedge Panels is a solid baseline, and you can dress it up with better lighting and cleaner spacing.

If you’re building from scratch, start with placement first and aesthetics second. The how to arrange acoustic foam guide will keep you from decorating a wall that doesn’t need treatment.

Living Rooms

In living rooms, blending is usually the winning move. Match wall colors, break up foam with art, and keep the foam in one zone instead of covering every surface.

If you share the space with other people, less but placed well almost always wins the argument. You’ll also get a more natural sounding room than you would with wall-to-wall foam.

Home Offices (Video Calls)

Your camera angle matters more than your floor plan. Treat the wall behind your microphone, but think about what the foam looks like behind your head.

Frames and fabric covers do a lot of work here, because they read as decor on a call. Neutral colors also keep your background from looking visually noisy.

Bedrooms

Bedrooms need calm, not visual chaos. Stick to muted colors, keep patterns simple, and don’t over-treat the space.

If you’re unsure whether foam belongs in a bedroom at all, read should you put acoustic foam in a bedroom before you commit. It’ll help you avoid the dead room feeling that makes bedrooms uncomfortable.

Gaming Rooms

Gaming rooms can go bold because the whole room is already aesthetic-forward. If you’re using RGB lighting, pick foam colors that won’t clash under colored light and keep your layout symmetrical enough to look clean on stream.

What DIY Acoustic Foam Decor Projects Actually Work?

Step-by-step DIY decorative acoustic foam projects

DIY is where foam can start to feel custom instead of store-bought. The trick is clean cuts, clean mounting, and projects you can undo if you change your mind.

Cut Custom Shapes Without Making a Mess

Hexagons, letters, and simple geometric shapes look more modern than big wedge squares. Use a sharp blade and a template, and cut on a sacrificial surface so you don’t crush the foam edges.

If you want a safer cutting workflow, the best way to cut acoustic foam guide covers tools and techniques that keep lines clean. Clean edges matter more than perfect creativity when you’re trying to make foam look designed.

Mount Foam on Panels (So You Can Move It Later)

One of the cleanest looks is mounting foam to a thin board, then hanging the board like a picture. It gives you a crisp perimeter, makes removal easier, and lets you rearrange without ripping foam off the wall.

This approach also lets you use fewer wall adhesives. If you’re still deciding on mounting, best adhesive for acoustic foam is worth reading before you buy random tape and regret it.

Add Lighting Carefully

Lighting can add depth, but foam and heat are a bad combination. Keep lights low-heat, keep them accessible, and don’t hide wiring where it can’t be inspected.

What Mistakes Make Acoustic Foam Look Worse?

Common acoustic foam decorating mistakes and better alternatives

Most ugly foam isn’t a foam problem, it’s an installation problem. These mistakes are common, fixable, and usually cheaper than buying new panels.

Random Placement

Scattering panels around the wall makes the room look cluttered and the treatment look accidental. Pick a pattern or a zone, measure it once, and install it cleanly.

If you’re not sure where that zone should be, start with the how to arrange acoustic foam guide. You’ll get better sound and a cleaner layout in the same move.

Over-Coverage

Covering every wall tends to look overwhelming and can make a room feel smaller. It can also make the space sound unnaturally dead for voice and casual listening.

If you’re tempted to just add more, read can you put too much acoustic foam first. It’ll save you money and keep the room from feeling claustrophobic.

Bad Mounting (Peeling Corners, Sagging Panels)

Nothing makes foam look cheaper than corners peeling off and panels drifting out of alignment. Use a mounting method that matches your wall surface, and do a small test before committing to the whole layout.

If you’re mounting on tricky surfaces, how to put acoustic foam on wall and how to apply acoustic foam to brick are the two guides that prevent the fell-off-overnight nightmare. Fixing the mount first also makes your pattern look cleaner.

Conclusion

You can decorate with acoustic foam without turning your room into a cliche studio wall. The difference is intentionality: color, layout, and clean edges.

Start by choosing whether the foam should blend in or be a deliberate accent. Then commit to one pattern, keep spacing consistent, and use frames or fabric when you want a more finished look.

If you want a quick next step, pick one focal wall and redesign that wall first. Once it looks right, copy the same rules to the rest of the room.

Frequently Asked Questions

What color acoustic foam looks best?

If you want foam to disappear, dark neutrals (charcoal, dark gray) are the safest choice. If you want foam to be a feature, pick one accent color and repeat it elsewhere so it looks intentional.

How do I make acoustic foam look less like a studio?

Use one clean zone instead of covering every wall, and build the layout around art or shelving. If you hate the texture, cover or frame the foam so it reads like decor instead of sound treatment.

Can I paint acoustic foam?

Painting is possible, but it usually reduces absorption because paint clogs the open-cell structure. If you want color, buying foam in the right shade or covering it with breathable fabric is the better path.

Should I cover all my walls with acoustic foam?

No, and not just because it looks overwhelming. Full coverage often sounds unnaturally dead for voice, and it rarely improves recordings as much as treating the right reflection points.

How do I arrange foam so it still works acoustically?

Start with reflection points and the wall behind your mic/monitors, then keep your decorative pattern inside those zones. If you need a placement map, use the how to arrange acoustic foam guide and then apply the color/layout rules from this article.

How to Arrange Acoustic Foam: Strategic Placement for Best Results

Acoustic foam works, but only if you put it in the right spots. Strategic placement of 8-12 panels outperforms 30+ panels scattered randomly — position matters more than quantity.

Most people stick foam wherever it fits or looks good. This wastes money and leaves acoustic problems unsolved. The reflections causing your issues come from specific locations, and treating those locations fixes the problems while random coverage doesn’t.

Below, you’ll see exactly where to place foam for maximum impact, whether you’re building a recording studio, improving a home office, or just making a room sound better.

For a foundational understanding of how foam works, see how acoustic foam works.

Quick Takeaway

Start with first reflection points on side walls (highest impact), then the wall behind speakers or recording position, then the ceiling above your listening spot, then the rear wall behind you, and finally corners for bass control (which need bass traps, not standard foam). Cover 20-30% of wall surface at these priority positions. More coverage isn’t better — over-treatment makes rooms sound dead and unnatural. Test after each addition and stop when problems are solved.

Why Does Foam Arrangement Matter More Than Quantity?

Visual comparison of checkerboard, row, and cluster foam arrangement patterns

Sound doesn’t bounce randomly around your room. It follows predictable paths based on physics.

Understanding these paths tells you exactly where treatment helps and where it’s wasted.

The Physics of Room Reflections

When you speak or play music, sound radiates outward in all directions. Some travels directly to your ears (or microphone). The rest hits walls, ceiling, and floor, then bounces back.

These reflections arrive at your ears milliseconds after the direct sound. Early reflections (within 20-30ms) color your perception of the source.

Late reflections create reverb and echo. Both can be problematic, but early reflections cause more issues for critical listening and recording.

The key insight: reflections come from specific surfaces at specific angles. Treating those surfaces eliminates those reflections. Treating other surfaces does nothing for those particular problems.

Why Random Placement Fails

Sticking foam wherever it fits ignores reflection paths. You might cover 50% of your walls while missing the exact spots where problematic reflections originate.

Imagine a leak in your roof. Putting buckets randomly around the house doesn’t help—you need buckets where water actually drips. Acoustic treatment works the same way: you need absorption where reflections actually occur.

Random placement also tends to over-treat some areas while under-treating others. This creates uneven frequency response — some frequencies get absorbed too much, others not enough.

The result sounds worse than balanced treatment.

The Strategic Approach

Strategic placement identifies reflection paths first, then places treatment to intercept them. This approach uses fewer panels more effectively.

The mirror trick finds first reflection points. Bass builds up in corners.

The wall behind your speakers creates strong early reflections. These facts don’t change based on room size or shape — the physics is consistent.

Following a strategic approach, you’ll spend less money, achieve better results, and avoid the dead, over-treated sound that plagues many home studios.

How Do You Find Your First Reflection Points?

Person using the mirror test to locate a first reflection point

First reflection points are your highest-priority treatment locations. Sound bouncing off these spots reaches your ears just milliseconds after the direct sound, causing the most audible problems.

The Mirror Trick Explained

Sit in your primary listening or working position. Have a helper slide a mirror along the side wall at ear height (or do it yourself with a small mirror on a stick).

Watch the mirror as it moves along the wall. At certain positions, you’ll see your speaker (or where sound originates) reflected in the mirror. Mark these spots—they’re your first reflection points.

The physics is simple: if you can see the sound source in the mirror, sound from that source reflects off that spot directly to your eyes (and ears). These reflections arrive almost simultaneously with direct sound and cause comb filtering and imaging problems.

For first reflection points, a budget-friendly option like the Sonic Acoustics 24-pack fire-retardant wedge panels covers several reflection points in one purchase.

Typical First Reflection Locations

In most rooms, you’ll find first reflection points:

  • Side walls: Usually 2-4 feet from your listening position, at ear height
  • Ceiling: Directly above or slightly in front of your position
  • Floor: Between you and your speakers (often covered by carpet/rug)
  • Front wall: Beside your speakers (if speakers aren’t against the wall)

Side wall reflections typically cause the most problems because they’re at ear level and arrive with significant energy. Ceiling reflections matter in rooms with hard ceilings.

Floor reflections are often already addressed by carpet or rugs.

Marking and Treating First Reflections

Mark each first reflection point with painter’s tape. You’ll likely find 2-4 points on each side wall, plus ceiling locations.

Standard 12×12 or 24×24 inch panels work well at first reflection points. You don’t need massive coverage — just enough to catch the primary reflection.

One or two panels per marked spot typically suffices.

Mount panels centered on your marked points at ear height when seated. The goal is intercepting the reflection path, so precise positioning matters more than panel size. For mounting techniques, see the how to put acoustic foam on walls guide.

How Should You Arrange Foam Behind Speakers and Monitors?

Acoustic foam panels installed behind studio monitors

The wall behind your speakers creates strong early reflections that interfere with direct sound. Treating this area improves clarity and imaging noticeably.

Why This Wall Matters

Sound from your speakers travels forward to your ears, but also backward to the wall behind them. This backward sound reflects and returns, arriving at your ears shortly after the direct sound.

These reflections cause comb filtering—certain frequencies cancel out while others reinforce. The result is colored, inaccurate sound that changes based on where you sit.

For mixing and critical listening, this coloration prevents accurate decisions. For recording, reflections from this wall can reach microphones and contaminate captures.

Coverage Recommendations

Treat the wall behind speakers with 40-60% coverage in the area between and around the speakers. You don’t need floor-to-ceiling treatment—focus on the zone from speaker height down to desk level.

If your speakers are close to the wall (within 2 feet), more coverage helps. If they’re pulled out into the room (3+ feet), less treatment is needed because the reflection path is longer and weaker.

For near-field monitoring (speakers close to you), this wall treatment is especially important. The short distances mean reflections arrive quickly and with significant energy.

Panel Arrangement Patterns

Several arrangement patterns work well behind speakers:

Centered cluster: Group panels directly behind and between speakers. This catches the strongest reflections from both speakers.

Spread pattern: Distribute panels across the wall with small gaps. This provides more even coverage and can look more intentional.

Checkerboard: Alternate panels and bare wall in a grid pattern. This balances absorption with some remaining reflection for natural sound.

Any of these patterns works acoustically. Choose based on aesthetics and how much coverage you need.

How Do You Arrange Acoustic Foam on the Ceiling?

Acoustic treatment around a desk and listening position

Ceiling reflections contribute to room problems, especially in rooms with hard, flat ceilings. A ceiling “cloud” above your listening position addresses this.

When Ceiling Treatment Matters

Hard ceilings (drywall, plaster, concrete) reflect sound strongly. If your ceiling is within 10 feet and untreated, it’s contributing reflections that affect your sound.

Rooms with cathedral or vaulted ceilings have less ceiling reflection problems—the angled surfaces scatter sound rather than reflecting it directly back.

Drop ceilings with acoustic tiles already provide some absorption. Additional treatment may not be necessary unless you’re doing critical listening or recording.

Cloud Placement

A ceiling cloud is a group of panels mounted horizontally above your listening or recording position. The term “cloud” comes from the panels appearing to float below the ceiling.

Position the cloud so it covers the ceiling’s first reflection point — typically directly above your head or slightly forward toward your speakers. A 4×4 foot cloud (four 24×24 panels) handles most situations.

For ceiling clouds and behind-speaker treatment, thicker panels like the 2-inch self-adhesive pyramid foam panels (12-pack) reach lower frequencies that 1-inch foam misses.

The cloud doesn’t need to touch the ceiling. Mounting it 4-6 inches below the ceiling surface actually improves low-frequency absorption by creating an air gap.

Mounting Considerations

Ceiling mounting is more challenging than wall mounting. Adhesive alone often fails over time—gravity works against you constantly.

Secure mounting options include: – Wire suspension: Hang panels from eye hooks in ceiling joists – Z-clips: Metal brackets that interlock for secure mounting – T-bar grid: Suspended ceiling grid designed for acoustic panels – Direct mechanical fastening: Screws through panels into ceiling (damages panels)

For renters, freestanding panel frames or boom-mounted panels can provide ceiling-area treatment without permanent installation.

What’s the Best Way to Arrange Foam on the Rear Wall?

Room illustration showing acoustic foam coverage from 15 to 40 percent

The wall behind your listening position affects how your room sounds, but treatment choice here is less obvious than other locations.

Absorption vs Diffusion

The rear wall is where the absorption-versus-diffusion debate matters most. Both approaches work, but they create different results.

Absorption on the rear wall reduces overall reverb and creates a tighter, drier sound. This works well in small rooms or when you want maximum control.

Diffusion scatters rear-wall reflections without absorbing them, maintaining room liveliness while eliminating focused reflections. This works better in larger rooms or when you want natural ambience.

For most home studios under 200 square feet, absorption is the safer choice. Diffusion requires distance to work effectively—in small rooms, you’re too close to the rear wall for diffusion to function properly.

Absorption Arrangement

If using absorption on the rear wall, cover 40-60% of the wall surface at ear height. You don’t need floor-to-ceiling coverage—focus on the zone where reflections would reach your ears.

Spread panels across the wall rather than clustering them in one spot. This provides more even absorption and prevents creating a “dead spot” in one area while leaving others reflective.

Leave some bare wall if the room feels too dead. The rear wall is often where you can reduce coverage without losing much benefit—first reflection points and the front wall matter more.

Diffusion Arrangement

If using diffusers, center them on the rear wall at ear height. Diffusers need to be directly in the reflection path to work effectively.

Quality diffusers are expensive, so most people use fewer diffusers than they would absorption panels. A single 2×4 foot diffuser or a pair of smaller units often suffices for the rear wall.

Combine diffusion with absorption by placing absorptive panels in corners and diffusers on the flat wall sections. This addresses bass buildup while maintaining midrange liveliness.

For more on choosing between these approaches, see acoustic foam vs diffusers.

How Should You Arrange Foam in Corners?

Bass trap placement in room corners from floor to ceiling

Corners are where bass frequencies accumulate. Standard foam panels don’t address this—you need bass traps specifically designed for low-frequency absorption.

Why Corners Need Special Treatment

Low frequencies have long wavelengths. A 100Hz tone has a wavelength over 11 feet—it doesn’t “see” thin foam panels and passes right through.

But corners create pressure zones where bass energy builds up. The geometry of two or three surfaces meeting concentrates low-frequency energy.

This causes boomy, muddy bass that foam on flat walls can’t fix.

If your room sounds boomy or bass-heavy, corner treatment is essential. No amount of wall panels will solve corner-related bass problems.

Bass Trap Placement

Place bass traps in corners, starting with the front corners (behind/beside your speakers). These corners contribute most to what you hear at the listening position.

Floor-to-ceiling placement is ideal—bass traps work better with more surface area. If full-height traps aren’t practical, prioritize the upper portions of corners where you’re more likely to hear the effects.

Rear corners matter too, especially for music production where accurate bass response is critical. A complete corner treatment setup includes all four vertical corners.

Straddling Corners

Bass traps work best when they “straddle” the corner—mounted diagonally across the corner rather than flat against one wall.

This positioning places the trap in the highest-pressure zone where bass accumulates most. It also creates an air gap behind the trap, improving low-frequency absorption.

Commercial corner traps are often triangular or designed to fit across corners. DIY traps can be rectangular panels mounted on brackets that hold them diagonally.

For more on bass treatment, see bass traps vs acoustic foam.

How Does Arrangement Change by Room Type?

Foam arrangement layouts for a home studio, bedroom, and gaming room

Different rooms have different needs. Here’s how to adapt the general principles to specific spaces.

Home Recording Studio

Recording studios need the most thorough treatment because microphones capture everything.

Priority arrangement: 1. Heavy treatment behind microphone position (60-80% coverage) 2. First reflection points on side walls (2-3 panels each side) 3. Ceiling cloud above recording position 4. Corner bass traps (at least front corners) 5. Moderate treatment on remaining walls (20-30% coverage)

The area around the microphone matters most. Create a “recording zone” with concentrated treatment even if the rest of the room has less coverage.

For detailed studio placement, the priority list above applies — just increase coverage density around the mic position.

Home Office / Video Call Space

Home offices need enough treatment for clear video calls without over-treating a living space.

Priority arrangement: 1. Wall behind your camera/facing your microphone (40-50% coverage) 2. Side walls at desk level (1-2 panels each side) 3. Optional: ceiling treatment if echo is severe

You don’t need full room treatment for video calls—just enough absorption near your desk to control reflections that reach your microphone.

Aesthetic panels work well in offices. Fabric-wrapped options or decorative foam patterns look professional while providing absorption.

Living Room / Media Room

Living spaces need balanced treatment that improves sound without making the room feel dead or looking industrial.

Priority arrangement: 1. First reflection points for primary seating (2-4 panels) 2. Wall behind TV/speakers (30-40% coverage) 3. Optional: rear wall treatment if echo is noticeable

Living rooms often have built-in absorption from furniture, curtains, and carpet. You may need less treatment than you expect.

Prioritize aesthetics in living spaces. Art panels, fabric-wrapped treatments, and decorative patterns integrate better than industrial-looking foam. For ideas on improving foam appearance, see how to decorate with acoustic foam.

Bedroom Studio

Bedrooms have built-in absorption from bedding, clothes, and soft furnishings. Treatment needs are often minimal.

Priority arrangement: 1. First reflection points (if walls are bare at those spots) 2. Wall behind recording/listening position 3. Corner treatment only if bass is problematic

Do the clap test before buying anything. Many bedrooms only need 4-6 panels at first reflection points — the existing soft materials handle the rest.

If you do need a small starter set, a 12-pack self-adhesive wedge panel set covers the key spots without overbuying. If you’re wondering whether foam is even necessary for your space, the does acoustic foam work guide covers the fundamentals.

What Are the Most Common Arrangement Mistakes?

Before-and-after comparison of random versus strategic foam placement

Avoid these errors that waste money and produce poor results.

Mistake 1: Covering Only Corners

Some people put all their foam in corners because “that’s where sound builds up.” This addresses bass (if using proper bass traps) but ignores mid/high frequency reflections from walls.

Corners need bass traps, not standard foam. And wall treatment at first reflection points matters more for most acoustic problems than corner treatment.

Balance your arrangement: first reflection points first, then corners, then general coverage.

Mistake 2: Floor-to-Ceiling on One Wall

Covering one wall completely while leaving others bare creates uneven absorption. Some frequencies get over-absorbed while others remain problematic.

Distribute treatment across multiple walls rather than concentrating it on one. Even coverage produces more balanced results.

Mistake 3: Ignoring the Ceiling

Many people treat walls thoroughly while ignoring the ceiling entirely. In rooms with hard ceilings, this leaves significant reflections unaddressed.

At minimum, consider a ceiling cloud above your primary position. This single addition often provides as much improvement as several wall panels.

Mistake 4: Symmetrical Obsession

Acoustic treatment doesn’t need to be perfectly symmetrical. While balanced coverage helps, obsessing over mirror-image placement wastes panels.

Focus on treating actual reflection points rather than creating visual symmetry. If one side wall has a window and the other is bare drywall, they need different treatment—not identical coverage.

Mistake 5: Too Much Coverage

More isn’t always better. Rooms with 50%+ coverage often sound dead, muffled, and uncomfortable. Speech sounds unnatural, music loses life.

Aim for 20-30% coverage at strategic locations. Test after each addition and stop when problems are solved. You can always add more later if needed. For echo-specific treatment strategies, see how to stop echo with acoustic foam.

How Do You Test if Your Arrangement Is Working?

Person performing clap test in a treated room

After arranging your foam, verify that it’s actually solving your problems.

The Clap Test

Stand in your listening position and clap sharply. Listen to the decay—how long the sound rings before dying out.

In a well-treated room, the decay is short and tight. In a problematic room, you hear extended ringing, especially metallic-sounding flutter echo.

Compare different positions in the room. Treatment should reduce decay consistently, not just in one spot.

The Voice Test

Speak normally and listen to how your voice sounds. In an over-treated room, your voice sounds muffled and dead. In an under-treated room, it sounds echoey and distant.

Well-arranged treatment produces natural-sounding speech—clear and present without excessive reverb or unnatural deadness.

Recording Comparison

If you’re treating for recording, make test recordings before and after treatment. The difference should be obvious—treated recordings sound tighter and cleaner.

If recording quality hasn’t improved enough, reassess your arrangement. You may need more treatment at specific locations or different placement of existing panels.

The Bottom Line

Arranging acoustic foam strategically transforms room acoustics more effectively than random placement ever could. First reflection points, the wall behind your speakers, ceiling clouds, and corner bass traps—these priority locations deserve your panels before general wall coverage.

The 20-30% coverage guideline prevents over-treatment while ensuring meaningful improvement. Start with minimum effective treatment at priority locations, test results, and add more only where problems persist.

Every room is different, but the physics of sound reflection is consistent. Find your first reflection points with the mirror trick, treat those spots first, then expand coverage based on what you hear.

This approach uses fewer panels more effectively than any amount of random placement. For help choosing between foam types and thicknesses, see how to choose acoustic foam.

Frequently Asked Questions

What is the best pattern to arrange acoustic foam?

The best pattern prioritizes first reflection points on side walls, then the wall behind speakers, then ceiling and rear wall. Within each area, spread panels evenly rather than clustering them.

Checkerboard patterns work well for partial coverage. The specific pattern matters less than treating the right locations.

How far apart should acoustic foam panels be?

Spacing depends on your coverage goals. For first reflection points, panels can touch or have small gaps — you want complete coverage of the reflection zone.

For general wall treatment, 6-12 inch gaps between panels provide good coverage while using fewer panels. Avoid large gaps (2+ feet) that leave significant reflective areas.

Should acoustic foam be evenly distributed?

Not necessarily. Concentrate treatment at priority locations (first reflection points, behind speakers) rather than distributing evenly across all walls. Strategic concentration at problem areas works better than even distribution that may miss key reflection points while over-treating less important areas.

Do I need to cover the entire wall with acoustic foam?

No. Most rooms need only 20-30% wall coverage, concentrated at specific locations.

Full wall coverage often creates an over-treated, dead-sounding space. Start with first reflection points and add coverage only where testing reveals remaining problems.

Where should I NOT put acoustic foam?

Avoid placing foam where it won’t intercept reflections—low on walls below ear level, in corners without bass traps, or on walls far from your listening position. Also avoid over-treating any single surface while leaving others bare. Balance matters more than maximum coverage in any one location.

How do I know if I’ve arranged my foam correctly?

Do the clap test: a well-treated room has short, tight decay without metallic ringing. Your voice should sound natural — clear but not muffled.

Recordings should sound cleaner than before treatment. If problems persist, reassess placement at first reflection points and consider adding treatment at specific problem locations.

How to Apply Acoustic Foam to Brick (Without Ruining It)

Brick walls look incredible, but they’re one of the hardest surfaces to treat cleanly. Foam that would stay put on drywall can peel off brick overnight.

The wall installation guide covers standard methods that work on flat surfaces.

The reason isn’t the foam—it’s the brick. You’re trying to bond a soft panel to an uneven, dusty, porous surface.

In this guide you’ll get four practical paths: a permanent adhesive method, a removable “foam on a board” method, a furring-strip method that creates a flat surface, and no-drill freestanding options. Start with the Quick Takeaway, then pick the method that matches your constraints.

Quick Takeaway

If you want the strongest hold and you don’t care about removal, use a masonry-rated construction adhesive and support panels while it cures. On brick, surface prep and cure time matter more than the brand.

If you rent or you care about the brick finish, skip glue and mount foam to a backing board, then hang that board on anchors or a cleat system. If you don’t want to drill at all, treat the room with freestanding absorbers placed in front of the brick.

Quick note: this is acoustic treatment, not soundproofing. Foam helps with reflections in the room, not noise coming through the wall.

Why Is Brick Hard to Mount Acoustic Foam On?

Close-up of uneven brick texture and mortar joints for foam mounting

Most brick mounting failures come from the surface, not the foam. Once you see what brick does to adhesives, the right mounting method becomes obvious.

Brick Has Low Contact Area (Texture + Mortar Gaps)

Brick is a field of high points and valleys, so a foam panel only touches the peaks. That means your adhesive is holding onto a tiny percentage of the surface.

The best acoustic foam panels guide covers which products handle uneven surfaces better.

Mortar joints make the problem worse by creating voids behind the foam. Those air gaps let the panel flex, and flex is what slowly peels adhesives loose.

Brick Dust and Porosity Kill Adhesive Bonds

Brick and mortar shed fine dust, and that dust acts like a release layer. Even “clean” brick often has enough surface dust to make tape or spray adhesive fail.

Brick is also porous, so thin adhesives can soak in before they cure. That’s why thick, gap-filling adhesives or mechanical mounts tend to win on masonry.

Reversibility Matters More on Brick Than Drywall

On drywall, you can patch and repaint. On exposed brick, stains, chipped faces, and visible holes can be a dealbreaker.

So before you pick a method, decide whether you’re optimizing for maximum hold, easy removal, or preserving the look. That one decision will steer you toward glue, anchors, strips, or freestanding treatment.

What’s the Best Adhesive for Acoustic Foam on Brick?

Construction adhesive applied for mounting acoustic foam on brick

If you’re going to glue foam to brick, you need an adhesive that can fill gaps and bond to masonry. Thin spray adhesives can work on smooth walls, but brick is a different job.

Use a Gap-Filling Adhesive Rated for Masonry

Look for a construction adhesive that explicitly lists brick/concrete/stone and cures thick. A product like fast-curing construction adhesive for brick is built for uneven, porous surfaces where you need thickness to get contact.

This is the “I want it to stay up” option, not the “I want it to come down clean” option. If preserving brick is a priority, skip ahead to the no-glue mounting methods.

Prep and Support Matter More Than the Brand

Start by brushing the brick to knock loose debris off the surface. Then vacuum thoroughly and wipe with a damp cloth, because dust left behind is what makes mounts fail later.

Let the wall dry fully before you bond anything, because moisture slows curing and weakens adhesion.

When you mount the foam, press it into the texture and support it while the adhesive cures so it can harden without sagging.

When You Should Avoid Adhesive Completely

If your brick is painted, sealed, crumbling, or historically important, adhesive is a bad gamble. You can also end up with dark stains that don’t come out if the brick is very porous.

In those situations, it’s safer to mount foam to a board and mechanically hang the board, or treat the room with freestanding absorbers. That gets you acoustic improvement without turning “better audio” into “how do I fix my brick.”

For a similar masonry surface with less aesthetic risk, see how to put acoustic foam on cinder blocks. Brick is usually less forgiving than cinder block when you remove glued-on material.

How Do You Mount Acoustic Foam on Brick Without Glue?

Masonry anchors securing acoustic panel mounting hardware to brick

If you want a removable install, don’t try to anchor the foam itself. Build a mounting layer first, then attach foam to that layer with normal methods.

The Cleanest Method: Foam on a Backing Board

Mount your foam to a thin board (plywood or MDF), then hang the board on the brick. You get a flat surface for clean alignment, and you can take the whole thing down later.

A simple Z-hanger or French-cleat style bracket like aluminum Z-hanger (French cleat) makes this easy: mount one side to the brick, mount the other to your board, then lift the board on and off.

If you’re not sure where treatment belongs before you mount anything, start with placement first. The arrangement guide helps you pick the wall that actually affects recordings, so you don’t install a perfect mount in a useless spot.

Should You Drill Into Brick or Mortar?

For maximum hold, brick is usually stronger than mortar. Mortar is easier to drill and easier to patch later, but it can crumble and loosen over time.

If you think you’ll remove the mount later, mortar can be a reasonable compromise. If you want the mount to last and you don’t mind permanent holes, brick is the safer long-term anchor point.

Reinforce Anchors When the Surface Is Weak

Old mortar and soft brick can strip out, especially if you overtighten fasteners. In those cases, anchoring adhesive can help you set hardware more securely in masonry.

An example product is SIKA AnchorFix-2, which is made for anchoring hardware in concrete and brick.

This isn’t necessary in good brick, but it’s a useful fix when your anchor holes keep failing. If you’re trying to avoid drilling entirely, the next section covers furring strips and freestanding options instead.

For a baseline mounting overview (including removal considerations), see how to put acoustic foam on walls. Brick adds complexity, but the same “plan first, mount cleanly” rule still applies.

Should You Use Furring Strips for Acoustic Foam on Brick?

Wooden furring strips mounted to brick with acoustic foam attached

Furring strips solve the brick problem by removing it from the foam-mounting equation. You anchor wood strips to the brick, then mount foam to the wood like you would on a normal wall.

Why Furring Strips Work So Well on Brick

Once you have a flat wood surface, adhesives behave predictably and panels align cleanly. You also create a small air gap behind the foam, which can slightly improve low-mid absorption compared to foam glued directly to the brick.

This method is a strong middle ground when you want a “real install” but you don’t want to permanently glue foam onto a nice brick wall. The tradeoff is that the wood is a visible modification unless you design around it.

A Simple Layout That Stays Straight

Keep the strip layout simple and consistent, because the visual mess comes from crooked lines. If your panels are 12×12, plan strip spacing so panel edges land on wood instead of “floating” over mortar gaps.

Take the extra time to level the first strip, because every strip after that will visually follow it. If you rush this part, the foam can be perfectly mounted and still look sloppy.

Make Removal Easier Later

If you’re worried about resale or leases, treat the strips as the sacrificial layer. Foam can come off the strips later with less drama than foam coming off brick.

If you ever need to take treatment down cleanly, the removal guide is still relevant for “how do I avoid ripping things apart,” even though brick has different surface risks than drywall.

What’s the Best No-Drill Option for Brick Walls?

Freestanding acoustic panels placed in front of a brick wall

If you can’t drill, you can still treat the brick wall acoustically. You just treat the room in front of the brick instead of attaching foam to the brick itself.

Leaning “Absorber Wall” (Fastest Renter Option)

The easiest no-drill method is mounting foam to boards and leaning the boards against the wall. You get treatment at the reflection point without any brick contact, and you can move the boards if your layout changes.

This also works well in rentals where you need to remove everything without leaving a trace. If you’re setting up in an apartment, the apartment treatment guide helps set expectations for what foam can and can’t fix.

Ceiling-Hung Panels (If the Ceiling Is Allowed)

If drilling the ceiling is permitted, you can hang absorbers a few inches in front of the brick. That keeps the brick untouched and can be very effective in rooms where the brick wall is the loudest reflection.

It’s also a good solution for tall rooms where wall-only treatment isn’t enough. Just keep safety and load ratings as the priority over aesthetics.

Room Dividers for Open Plans

In open lofts, reflections don’t stay in one “room,” which makes freestanding treatment useful. A couple of movable absorbers can break up reflections and also create a quieter recording zone.

This is the same idea as “treat the mic position, not the whole building,” and it often beats trying to cover every hard surface. Once you’ve tested freestanding placement, you can decide if a permanent mount is worth it.

How Do You Treat Brick Walls Without Ruining the Look?

Acoustic treatment that complements exposed brick without hiding it

If your brick is part of the room’s character, wall-to-wall foam is usually the wrong move. Treating the right spots and keeping the brick visible gets more value per panel.

Treat Less Brick, But Treat the Right Spots

Start with first reflection points and the wall behind the mic/monitors, not random coverage. That usually gets you most of the clarity benefit while leaving most of the brick untouched.

The arrangement guide maps out those reflection points so you don’t waste material on surfaces that don’t matter.

Make Foam Look Intentional (Not Like a Patch Job)

When foam is visible, alignment and spacing matter as much as the product. Clean grids, consistent gaps, and deliberate color choices make foam read like design instead of clutter.

The styling guide covers layout and color choices that make foam read like design instead of a patch job.

Avoid Stains and Hard-to-Reverse Methods

Porous brick can stain from adhesives, especially on lighter-colored walls. If you care about the finish, reversible methods like boards, cleats, and freestanding mounts are the safer path.

What’s Different About Treating Lofts with Brick Walls?

Urban loft with brick walls and acoustic treatment panels

Brick is common in lofts, but the loft itself changes the treatment strategy. Tall ceilings and open plans create long reflection paths that small patches of foam may not fully tame.

High Ceilings Make Ceiling Reflections a Bigger Deal

In a loft, reflections can bounce off the ceiling and come back late, which makes the room feel “live.” That’s why ceiling-hung absorbers or overhead treatment can matter more than you’d expect.

If you only treat the brick wall and ignore the ceiling, you may still hear the room in your recordings. Start with the biggest reflection paths, not the most obvious surface.

Hard Surfaces Stack Up Fast

Brick plus concrete floors plus big windows is a worst-case combo for reflections. Rugs, curtains, and soft furniture reduce the amount of work your foam needs to do.

The acoustic foam buying guide covers how to size coverage for larger rooms.

If you’re fighting the whole-room “ring,” it can be useful to look at broader solutions too. The acoustic foam alternatives guide covers options that can complement foam without turning the space into a studio cave.

Expect to Use More Coverage (But Don’t Place It Randomly)

Large spaces often need more surface area treated to hear a clear change. The mistake is buying more foam and scattering it everywhere, which looks bad and underperforms.

Pick one recording zone, treat the reflection points around that zone, then expand only if the room still sounds live. This keeps both the sound and the visuals under control.

Conclusion

If you want acoustic foam on brick to actually stay up, match the mounting method to the surface. Brick’s uneven texture and dust layer is why “normal wall” tape and thin adhesives fail.

For maximum hold, use a masonry-rated construction adhesive and support panels while it cures. For removable installs, mount foam to a board and hang the board with anchors or a cleat system, or treat the room with freestanding absorbers.

If your brick looks good, don’t destroy it to fix echo. Treat the right reflection paths, keep the install clean, and choose reversible methods when you’re not sure you’ll want it there forever.

Frequently Asked Questions

Will acoustic foam damage my brick?

It depends on the method. Adhesives can stain porous brick and are hard to remove cleanly, while anchors leave holes.

If you need zero brick damage, use freestanding or ceiling-hung treatment instead.

Can I use regular spray adhesive on brick?

Most spray adhesives are too thin for brick texture and don’t bond well through dust and porosity. If you’re going adhesive-based, use a thick, masonry-rated construction adhesive and support panels while it cures.

Should I mount into brick or mortar?

Brick is usually stronger and holds anchors better long-term, while mortar is easier to drill and easier to repair later. If you plan to remove the mount, mortar can be the “less permanent” choice.

How do I clean brick before mounting foam?

Brush the surface, vacuum the dust, wipe with a damp cloth, and let the wall dry fully. Skipping the dust step is the fastest way to make a mount fail later.

What’s the best method for renters with brick walls?

Use foam mounted to boards that lean against the wall, or freestanding absorbers placed at reflection points. Avoid adhesives and avoid drilling unless your lease explicitly allows it.

Can I cover the entire brick wall with foam?

You can, but it’s usually unnecessary and it erases the brick aesthetic. Strategic placement at reflection points usually delivers most of the acoustic benefit with less material.

If you feel like you need wall-to-wall coverage, it’s worth re-checking placement first. The goal is to treat the reflection path, not to blanket the room.

How Many Decibels Does Acoustic Foam Reduce? Understanding Real Performance

How many decibels does acoustic foam reduce? It can make a room feel calmer, but it won’t block your neighbor’s bass or stop sound from leaving your room.

If you’re chasing a single dB number, it’s usually because the problem feels confusing. Reflections inside a room and sound transmission through walls behave like two different worlds.

That’s because foam is light and porous, so it’s good at absorbing mid/high reflections and shortening reverb. It’s bad at soundproofing because it doesn’t add mass or seal air gaps.

In this guide, you’ll get a realistic “what changes / what doesn’t” answer and the metrics that actually matter. The picks below make it easier to match the right measurement tools to your room.

Quick Takeaway

Acoustic foam reduces reflected sound (echo and reverb), not transmitted sound (noise through walls). If your goal is soundproofing, the honest answer is basically zero decibels.

Inside the room, you may measure a small drop in late reflections after treatment. The bigger win is a shorter reverb tail and clearer speech for your recordings.

What Does Acoustic Foam Actually Reduce?

Understanding diagram showing difference between sound absorption and sound blocking

The decibel question requires clarification about exactly what you are trying to measure. Foam interacts with sound energy in a specific way that differs from heavy construction materials, which explains why one room can feel “quieter” while another remains noisy.

How Does Sound Absorption Work?

Acoustic foam absorbs sound waves that would otherwise reflect off hard surfaces like drywall or wood. When foam absorbs a reflection, that sound energy is converted into small amounts of heat.

This process reduces the reverb time (RT60), which is how long sound takes to decay by 60 dB. It also lowers the overall level of reflected sound and clears up room noise caused by buildup—but there is a hard limit to what this “soaking up” of energy can do.

Why Foam Fails at Sound Transmission

Sound transmission is the sound passing through walls, floors, and ceilings into other rooms. Foam provides essentially zero reduction in transmission because it lacks the necessary density.

Sound blocking requires mass to reflect energy and a lack of pores to prevent air leaks. If you want to know how much quieter your neighbor’s music will be, the answer is not at all.

For a deeper look at the absorption versus blocking distinction, check out our guide on sound deadening vs acoustic foam.

If you just want the straight expectation-setting version, does acoustic foam work? draws the line clearly.

Measured Absorption Performance

Measurements absorption coefficient chart and nrc ratings for acoustic foam

Understanding what foam actually achieves requires looking at lab-measured performance metrics. These numbers show how foam handles specific frequencies rather than just a broad decibel figure, and those specifics are what dictate how your room actually sounds.

Understanding Absorption Coefficients

The absorption coefficient indicates what percentage of sound energy is absorbed at each frequency. A coefficient of 0.80 means 80% of the sound energy is absorbed while 20% reflects back.

Foam typically performs better at higher frequencies where the wavelengths are shorter. As you can see in the table below, performance drops off significantly in the lower bass regions.

Frequency2” Foam4” Foam
125 Hz0.100.25
250 Hz0.250.55
500 Hz0.550.85
1000 Hz0.800.95
2000 Hz0.900.95
4000 Hz0.850.90

What Is an NRC Rating?

The Noise Reduction Coefficient (NRC) is a scalar representation of the amount of sound energy absorbed by a surface. It is calculated by averaging the absorption coefficients at four key frequencies: 250 Hz, 500 Hz, 1000 Hz, and 2000 Hz.

Budget foam usually lands between 0.50 and 0.65, meaning it absorbs roughly 50-65% of the energy in the speech range. Premium, high-density foam can reach 1.0 or higher, effectively absorbing all incident sound energy in those bands.

Higher NRC ratings mean more effective control over mid-range “honk” and high-frequency “zing.” However, because NRC ignores everything below 250 Hz, it doesn’t tell you if the foam will fix a boomy bass problem.

To tackle those lower frequencies where NRC fails to give the full picture, you have to look at the physical profile of the panel itself. For a deeper dive into what frequencies foam handles best, see our guide on acoustic foam frequency absorption.

Why Thickness Changes the Decibel Math

The thickness of the foam directly dictates the lowest frequency it can effectively “grab” and convert to heat. A 2-inch panel is roughly the minimum required to handle the fundamental frequencies of the human voice.

If you switch to 4-inch foam, you aren’t just doubling the material; you are shifting the “absorption knee” lower. This allows the foam to reduce decibel buildup in the 250 Hz range, which is where most “muddiness” lives in a small room.

The Logarithmic Reality of Decibels

It is important to remember that decibels are logarithmic, which means a small number change equals a big energy change. A 3 dB reduction in reflected sound energy represents a 50% decrease in sound intensity.

While a 3 dB drop might look small on a handheld meter, the perceived change in clarity is dramatic. The “muddiness” clears up because you’ve effectively cut the competing noise floor of the room reflections in half.

Measuring Decibel Changes at Home

You might see small decibel changes inside a treated room, but it is usually in the late reflections. This is why a room feels less ringy even when the direct voice or speaker volume stays the same.

In a small bedroom, treating the primary reflection points can drop late-field room readings by 2 to 5 dB. The reflections stop stacking on top of the direct sound, creating a much cleaner environment.

If you’re treating a bedroom specifically, our guide on acoustic foam in a bedroom covers placement for that space.

If you want to measure this yourself, play pink noise and record from the same spot before and after treatment. Look for consistent trends in the 500 Hz to 4 kHz range where foam is most effective.

If you want to measure the improvement without the guesswork, a few key tools can help you establish a solid baseline.

If you just want a quick before-and-after check without a laptop, a simple Pyle Digital Handheld Sound Level Meter – Meter Automatic with A and C Frequency is perfect for tracking decibel snapshots as you add panels.

For those who need to see the RT60 decay and frequency response on a computer, a miniDSP UMIK-1 USB Measurement Calibrated Microphone is the industry standard for home studio calibration.

If you prefer a portable solution that works with your smartphone, a Dayton Audio iMM-6 Calibrated Measurement Microphone for iPhone, iPad Tablet and offers a calibrated way to get repeatable data using room-analysis apps.

Why Reverb Time Matters More Than Decibels

Reverb beforeafter reverb time measurements in treated room

Reverb time is often a much more meaningful metric for room quality than raw decibel levels. It tells you how quickly sound stops bouncing around, which directly impacts clarity—and measuring that speed starts with a specific technical benchmark.

What Is RT60?

RT60 measures how long it takes for sound to decay by 60 dB after the source stops. Untreated rooms often have an RT60 of 1 to 2 seconds, while recording spaces target 0.3 to 0.6 seconds. Getting your room down to those professional targets is where acoustic foam becomes the primary tool for the job.

How Foam Impacts Reverb Decay

Proper foam treatment typically reduces RT60 by 30% to 50% with moderate coverage. If you move to comprehensive coverage of 40% or more, you can see a reduction of up to 70%.

A room with a 1.2-second RT60 might drop to 0.6 seconds with good treatment. This creates a dramatic improvement in perceived acoustics even if the SPL meter doesn’t move much.

Measuring Real Improvements at Home

If you want numbers instead of just vibes, measure your RT60 before and after treating the room. Keep your microphone position and speaker volume exactly the same to ensure a fair comparison.

Handheld meters show overall levels, but RT60 is much more sensitive to the presence of acoustic foam. For specific echo issues, how to stop echo with acoustic foam helps you place panels where they matter.

Analyzing Real-World Scenarios

Scenarios different scenarios showing what foam can and cannot achieve

Decibel reduction expectations change significantly depending on your specific goal. Let’s look at how foam performs in common household and studio environments.

The Home Recording Studio

In a recording environment, the goal is to maximize the “Direct-to-Reverberant” ratio for your microphone. Foam helps by catching the sound that passes your head and prevents it from bouncing back into the mic capsule.

You can expect a 40% to 60% reduction in reverb time (RT60) with strategic placement at reflection points. This makes your EQ and compression work better because you aren’t trying to process a “muddy” room sound.

For more details on this use case, see whether acoustic foam improves recording. The focus here is controlling the “ring” of the room rather than trying to block the neighbors.

Dealing With Noisy Neighbors

If you are trying to block sound from an adjacent apartment, foam effectiveness is zero. You will see a 0 dB reduction in transmitted sound through the walls.

Foam cannot solve this problem because it lacks mass and cannot seal air gaps. You need construction solutions like additional drywall layers or specialized soundproofing barriers.

Fixing Home Theater Echo

In a home theater, foam helps improve dialogue clarity by reducing harsh reflections. The effectiveness is moderate to high, leading to a much more immersive listening experience.

Dialogue becomes easier to understand because the room reflections no longer mask the speaker’s voice. This is a case where the room feels quieter because the noise floor of the reflections is lower.

Why the Decibel Question Is Often Misleading

Misconception illustration of common misconception about foam and decibels

Asking how many decibels foam reduces often stems from a fundamental misunderstanding of acoustics. People often assume foam works like earplugs for a room, but the reality is more selective.

The Standard Misconception

Many users believe that adding foam will lower the overall volume of everything in the room. They expect a quieter room in the same way that closing a window reduces street noise.

The Reality of Acoustic Control

Foam selectively reduces reflected sound while leaving the direct sound from your speakers unchanged. It creates a controlled acoustic environment rather than a quieter space in the traditional sense.

Better Questions to Ask Instead

If you want to know if foam is the right choice, try asking these questions instead. Will foam reduce the echo in my room? Yes. Will foam improve my recording quality by cleaning up the room sound? Yes. Will foam stop sound from reaching my neighbors or block traffic noise? No, it won’t.

How to Maximize Your Room’s Performance

Maximizing optimal foam placement for maximum acoustic improvement

If you want the maximum impact from your foam treatment, strategic planning is essential. Coverage, placement, and thickness all play a role in how much sound you actually absorb.

Strategic Coverage Targets

More coverage generally leads to more absorption, but only up to a certain point. At 25% coverage, you get a noticeable improvement, while 40% offers a significant professional change.

Beyond 60%, you hit diminishing returns and risk making the room sound unnatural and “dead.” For choosing the right amount, see our guide on how to choose acoustic foam.

Placement vs. Random Coverage

Strategic placement always beats covering every square inch of a wall at random. Focus on first reflection points to get the maximum impact for the least amount of material.

Corners are another critical area where you should consider adding bass traps for low frequencies. For a full layout plan, see how to arrange acoustic foam.

Why Thickness and Quality Matter

Thicker foam is required to absorb lower frequencies that thinner panels simply miss. 2-inch foam is effective above 500 Hz, while 4-inch foam can reach down toward 250 Hz.

Higher density foam, ideally 1.5 pounds per cubic foot or more, also absorbs much more effectively. Cheap, low-density foam often underperforms significantly and fails to provide the control you need.

DIY Guide: How to Measure Your Room’s Improvement

Diy guide

If you want to move beyond “it sounds better” and see actual data, you can run a simple test with free tools. This process helps you identify if your foam is actually doing the job or if you need to adjust placement.

Step 1: Establish a Baseline

Before you stick any foam to the walls, set up your microphone in your primary recording position. Record a loud, sharp “clap” or use a “balloon pop” to generate a broad-spectrum impulse.

Open the recording in a free editor like Audacity and look at the “decay” of the waveform. Measure the time it takes for the tail of that clap to disappear into the noise floor.

Step 2: The First Reflection Test

Apply your first set of foam panels to the “first reflection points” on the side walls. Repeat the clap test and compare the visual length of the waveform tail to your baseline.

You should see a shorter, tighter decay pattern even if the initial peak of the clap is the same volume. This visual change is the “absorption” at work, showing you exactly how much room energy you’ve removed.

Step 3: Targeted Measurement with REW

If you want professional-grade data, download Room EQ Wizard (REW) and use a calibrated microphone. REW can generate a Waterfall Plot, which shows how specific frequencies decay over time in your room.

This allows you to see if you have “ringing” at specific frequencies that your foam isn’t catching. If you see a long tail at 200 Hz, you know you need thicker foam or bass traps in the corners.

Conclusion

Acoustic foam does not reduce sound by a simple decibel number in the way soundproofing materials do. It reduces reflected sound and reverb time while having almost no effect on sound transmission through walls.

For absorption, expect a 3 to 6 dB reduction in reflected sound levels and a significant drop in reverb. These improvements are essential for high-quality recording and accurate listening environments.

If you are trying to block noise from neighbors or prevent sound from escaping, foam is the wrong tool. That requires mass and sealing, which are completely different solutions from surface-level acoustic treatment.

Frequently Asked Questions

Will acoustic foam reduce noise by 10 dB?

Not in the sense of soundproofing through a wall. It can reduce the echo inside a room, but it won’t stop your neighbor’s music from coming through.

How much does acoustic foam reduce echo?

It reduces echo enough that a room sounds noticeably less ringy and more professional. The change is more obvious in the reverb decay time than on a single decibel meter reading.

Can acoustic foam make a room soundproof?

No, acoustic foam is too light and porous to block sound transmission. Soundproofing requires heavy mass and airtight seals that foam simply cannot provide.

How much foam do I need to notice a difference?

Most users notice a major change after treating the first reflection points and the wall behind their microphone. You do not need full coverage to hear a significant improvement in clarity.

Does thicker foam reduce more decibels?

Thicker foam reaches lower frequencies, which helps a room sound less boxy and more balanced. It still won’t block sound from entering or leaving the room through the walls.

How do I measure the acoustic improvement from foam?

Start with a simple before-and-after clap test or a short voice recording. For actual numbers, use a room-measurement app to track the RT60 reverb time from the same spot.

Does Bubble Wrap Work as Acoustic Foam? The Truth About This DIY Myth

Yes, bubble wrap can change the sound in a room — but it doesn’t work as acoustic foam for stopping echo.

If you tape it up and the room still sounds sharp when you clap or record, it’s because the plastic skin reflects sound instead of absorbing it.

By the end, you’ll know what bubble wrap actually does, why the physics make it a dead end for absorption, and what to use instead.

Below, I’ll show you why bubble wrap reflects sound, then walk you through a few budget-friendly materials that actually absorb echo when you place them at first reflection points.

Quick Takeaway

Bubble wrap is closed-cell plastic, so it reflects sound instead of absorbing echo in any meaningful way. If you need a budget fix, use porous absorption (foam, blankets, or mineral wool panels) placed at first reflection points.

Why Bubble Wrap Doesn’t Work

Diagram comparing sound reflecting off bubble wrap with foam absorption

Understanding the physics explains the failure. Once you see what bubble wrap is made of, it’s obvious why it can’t do a foam panel’s job.

Closed-Cell Structure

Acoustic absorption needs a porous surface that air (and sound) can move through. That airflow is what creates friction, which turns a little of the sound energy into heat.

Bubble wrap blocks that path because the bubbles are sealed. Sound waves hit the plastic skin and bounce back into the room.

If you want the short version of why “open-cell” matters, see open-cell vs closed-cell foam.

In other words, bubble wrap behaves like thin plastic sheeting. It adds reflections, not absorption.

Insufficient Thickness

Even if bubble wrap were porous, it’s still extremely thin. Thickness matters because lower frequencies need more depth to lose energy.

Thin materials only touch the very top end. The voice and room-reflection range that makes a room sound boxy needs real absorption depth.

Reflective Surface

Plastic is also a naturally reflective surface. In some setups, a wall covered in bubble wrap can actually sound more “zingy” because you’ve added another hard skin.

The Air Pocket Myth

People assume “air pockets” automatically mean absorption. With bubble wrap, the sealed pockets act more like little springs that bounce energy back.

Open-cell foam absorbs because air can move through the material. Closed-cell materials insulate heat better than they absorb sound.

Testing Bubble Wrap: What Happens

Test results comparing bubble wrap and acoustic foam

If you want to judge this honestly, you need a test that isolates echo (reflections), not “the room feels different.” Here’s what tends to happen when you do a quick clap/recording A/B and listen for the reverb tail.

Keep your test boring on purpose. Put your mic (or phone) in the same spot, speak the same line, and only change one thing: what’s on the wall at the first reflection point (usually behind your mic/desk, or the side wall next to it).

When you listen back, don’t focus on “brightness.” Listen for the half-second after you stop talking, because that’s where the room tail lives.

Absorption Coefficient

If you do a simple clap test, bubble wrap rarely changes what you care about. The room still has the same “ping” and “slap,” especially in the midrange.

If you want an easy way to catch yourself before you convince yourself it “worked,” record a short clap test. Clap three times with a pause between claps and listen for the tail between hits, not the hit itself.

Acoustic foam isn’t magic either, but it’s built for absorption. Bubble wrap is built for impact protection and packaging.

Real-World Effect

Covering walls with bubble wrap usually doesn’t reduce echo in a way you can hear on recordings. It’s wasted time and materials, and the room ends up sounding essentially the same.

Why People Think It Works

Some report “improvement” because they expected one, because adding any material changes the room a little, and because they’re comparing it to a totally bare wall. Most of the time they’re also mixing up sound blocking with absorption, so the echo problem stays.

Another trap is that bubble wrap can slightly change the tone of reflections by scattering the very top end. That can feel like “less harshness,” but the echo tail is still there, and that’s what microphones pick up in recordings.

Placement mistakes also make the myth stick. If you tape bubble wrap to a random wall, you might not be touching the reflection path that’s actually hitting your ears or your mic in the first place.

The key giveaway is this: your recordings still sound roomy, and your clap still rings. That’s the reflection problem bubble wrap can’t solve.

Want a fast A/B test? Record 10 seconds of voice in the same spot, then tape bubble wrap up behind the mic and record again.

If the second take still has the same “room tail” after your words, you didn’t absorb anything — you just changed the wall texture. Swap bubble wrap for one porous layer (a moving blanket, thick curtain, or a couple foam tiles) in the same spot and repeat.

What Bubble Wrap Actually Does

Legitimate uses for bubble wrap outside acoustic treatment

Bubble wrap has real uses—just not acoustic treatment.

Thermal Insulation

Bubble wrap can help a bit with thermal insulation because it traps air. That’s why you’ll see it used on windows in greenhouses and cold snaps.

That “trapped air” effect is heat-related, not sound-related. If you want the clean distinction, compare acoustic foam vs insulation.

Packaging Protection

This is where bubble wrap shines. It cushions impacts and protects fragile gear in transit.

That’s the real “strength” of bubble wrap: it protects objects, not sound. So when we talk about noise between rooms, it helps to reset expectations before you waste an afternoon taping plastic to a wall.

Sound Blocking (Minimal)

Bubble wrap has so little mass that it doesn’t meaningfully block sound between rooms. If your goal is blocking noise, you’re in the soundproofing world, not the treatment world.

That confusion is common, and this breakdown of sound deadening vs acoustic foam helps you pick the right approach.

One quick self-check is speech clarity. If you can hear words clearly through a wall, you’re dealing with sound transmission, not “room echo.”

That’s solved with sealing gaps and adding mass, not with thin plastic. Bubble wrap can reduce drafts and window rattles, but that’s comfort and vibration control, not real soundproofing.

Better DIY Alternatives

Effective DIY acoustic treatment alternatives to bubble wrap

If budget is the concern, these actually work.

The common thread is porosity: you want materials that let air move through them, not sealed plastic. Start by treating the first reflection points, because “smart placement” beats “more stuff on the wall” every time.

First reflection points are the spots where sound bounces once before it hits your ears or mic. Treat those first and the room stops sounding “roomy” without you covering every surface.

To find side-wall reflections, sit where you listen/record and have a friend slide a mirror along the wall. Where you can see the speaker (or the loudest surface) in the mirror is the spot to treat.

Moving Blankets

Moving blankets are a genuinely decent “temporary studio” move. They won’t fix bass, but they can tame harsh reflections and flutter echo fast.

If you want a simple, removable option for rentals, a quilted moving blanket is a practical first buy. Hang it behind your mic/desk (or behind your speakers) and you’ll hear more change than bubble wrap on an entire wall.

Don’t stretch it tight like a drum head. Leaving a little air gap helps it behave more like absorption and less like a reflective sheet.

If you want something that looks more like “home decor” than “moving day,” curtains are the next step. They won’t absorb as deeply as a thick panel, but they’re easy to live with.

Heavy Curtains

Thick curtains are similar: they’re not a full treatment plan, but they help. They’re also easy to remove if you’re renting.

DIY Rockwool Panels

If you want a big jump in sound quality per dollar, build DIY mineral wool panels. That’s the “this actually sounds different” tier because the material is thick and porous.

If you build panels, wrap the absorber in breathable fabric so sound can reach it instead of bouncing off the face. A fire-rated acoustic fabric is a clean way to do that.

If you want the “what material actually works” breakdown before you build, start with acoustic foam vs rockwool. It’ll save you from building a panel that looks great but underperforms because it’s too thin.

Budget Acoustic Foam

Even budget foam beats bubble wrap because it’s at least designed for absorption. If you’re new to foam and want safe “first buy” guidance, use best beginner acoustic foam.

If you want a basic starter pack that actually changes a small room, 2-inch acoustic foam wedge tiles are a safer “first buy” than trying to DIY with plastic. Treat behind your mic/desk first, then use the mirror trick to find the side-wall reflection points.

And if you want the “best overall” shortlist, best acoustic foam panels is the cleaner place to start.

Once you’ve got any porous absorption in the right spot, the room changes quickly. Soft furnishings can be enough to get you over the “my room sounds like a bathroom” hump while you decide what to buy.

Soft Furnishings

Start with what you already have: rugs, couches, bookshelves, and any fabric wall hangings. They won’t replace real treatment, but they can take the edge off reflections while you save for the right materials.

If you want a longer list of practical swaps, acoustic foam alternatives goes deeper than quick hacks.

Other Materials That Don’t Work

Other ineffective DIY acoustic materials compared with bubble wrap

Bubble wrap isn’t the only acoustic myth.

Most myths share the same problem: they change the wall’s texture, but they don’t add porous depth. If air can’t move through the material, you don’t get meaningful absorption.

Egg Cartons

Another popular myth. Cardboard doesn’t absorb sound effectively, and the “shape” doesn’t compensate for the wrong material.

Covering walls in egg cartons is also a fire hazard. And it looks terrible while still not fixing the room.

For the truth about egg cartons, see our guide on egg cartons vs acoustic foam.

For understanding why foam board insulation also doesn’t work, see our guide on whether foam board is acoustic.

Styrofoam/Polystyrene

Styrofoam is closed-cell, so it reflects sound instead of absorbing it. It has the same core problem as bubble wrap: sealed cells that don’t let air move through.

In some rooms, it can even add more reflections. It’s not acoustic treatment.

Cardboard

Cardboard is too thin and has the wrong material properties for absorption. It’s also a fire hazard if you start covering walls with it.

Even if it changes the look of the wall, it doesn’t deliver meaningful acoustic benefit. So you spend time installing it and still end up with the same echo.

Carpet on Walls

Carpet can absorb some high frequencies, so it may take the edge off flutter echo. But it won’t do much for mid-range reverb, and it won’t touch bass.

It’s better than nothing if it’s what you already have. It also tends to look odd on a wall, which is usually why people abandon it later.

The Cost Perspective

Cost comparison of bubble wrap and real acoustic treatment solutions

“Cheaper” only counts if it actually moves the needle. So let’s compare what you spend and what you get back in real acoustic benefit.

Bubble Wrap Cost

To cover significant wall area, you still need large rolls, mounting materials, and time to install. And after all that, you get basically zero acoustic benefit.

So it’s not a cheap fix. It’s just a waste of money that you’ll replace later.

Budget Foam Cost

Entry-level acoustic foam is a better use of money because a small pack can cover the high-impact spots first. It’s not a full solution, but it can actually change the room when you place it correctly.

The hidden cost of bubble wrap is that you’ll still end up buying real treatment later. So you pay twice: once in time and once in replacement materials.

True Budget Option

If money is extremely tight, start with what you already own. Heavy blankets, smarter furniture placement, and extra soft items can help while you save for proper treatment later.

The goal isn’t to cover the entire room. It’s to kill the strongest reflections first, then stop when your recordings sound controlled.

Spending money on bubble wrap for acoustics is one of those “cheap” ideas that gets expensive fast. Put that budget toward materials that are actually porous and thick.

Conclusion

Bubble wrap doesn’t work as acoustic foam because sound can’t get into it. It’s closed-cell plastic, so it reflects energy back into the room instead of absorbing it.

If you need a budget fix, use porous absorption in the right spots: blankets, curtains, DIY mineral wool panels, or real foam. Even the cheapest purpose-built option outperforms bubble wrap because it’s built for the job.

Save bubble wrap for shipping and gear protection. For acoustics, spend your effort on placement and materials that actually absorb reflections.

Frequently Asked Questions

Will multiple layers of bubble wrap help?

No. More layers just means more plastic surfaces reflecting sound back into the room.

Can bubble wrap help with soundproofing?

Not in a meaningful way. For soundproofing you need mass and air sealing, and bubble wrap doesn’t provide either.

Why do some people say bubble wrap works?

Mostly expectation bias and comparison to a totally bare room. In practice, the echo and “room sound” remain because bubble wrap doesn’t absorb reflections.

What’s the cheapest thing that actually works?

Start with what you already own: rugs, couches, bookshelves, and heavy blankets placed at reflection points. If you can buy one thing, DIY mineral wool panels are usually the best performance per dollar.

Is bubble wrap better than nothing?

Barely, and usually not in a way you’ll notice. Your time is better spent placing real absorption where the reflections actually hit.

Can I use packing materials for acoustic treatment?

Most packing materials are closed-cell or too thin, so they reflect sound instead of absorbing it. If it isn’t porous and thick, it won’t behave like acoustic treatment.

Does Acoustic Foam Make a Room Warmer? The Honest Answer

Does acoustic foam make a room warmer? Yes, but the “warmer” part is usually comfort, not temperature.

If you treated your walls and the room still feels cold, that mismatch is frustrating and it’s easy to think you bought the wrong foam.

That’s because acoustic foam is designed to absorb reflections inside the room, while heat loss usually comes from drafts, windows, and exterior-wall conduction.

Once you separate those two problems, you can stop chasing foam for warmth and fix what actually changes comfort.

Below, I’ll break down when foam can feel stuffier, what (if anything) changes the thermostat number, and the first draft checks to start with in a rental.

Quick Takeaway

Acoustic foam has minor insulating properties, but typical wall coverage won’t move room temperature in a meaningful way.

If warmth is your goal, start with air leaks and windows, then use foam where it shines: reducing echo and harsh reflections.

Understanding Foam’s Thermal Properties

Thermal conductivity comparison of acoustic foam and insulation materials

The thermal story comes down to one detail most people skip: acoustic foam is open-cell and porous.

Open-cell foam “breathes”

Acoustic foam absorbs sound because air can move into it and lose energy inside the material.

That same “breathing” behavior is why it doesn’t act like an air barrier for drafts.

Closed-cell foam and real insulation work differently, which is why the distinction matters.

If you want the quick breakdown on foam structure, see open-cell vs closed-cell foam.

Insulation needs thickness and continuity

So even if foam has a little thermal resistance on paper, it isn’t installed the way insulation is. Insulation only works when it’s continuous and thick across the whole heat path.

Thermal insulation works when it traps still air in a thick layer and covers the whole “path” heat wants to travel through.

Acoustic foam installs rarely do that because they focus on reflection points, not full-wall coverage.

That targeted placement is a feature for acoustics, and foam placement is worth doing right if echo is your real problem.

Drafts are convection, and foam doesn’t seal them

So even perfect foam coverage wouldn’t solve a drafty room. Drafts are moving air, and foam doesn’t seal the gaps where that air gets in.

Drafty rooms feel cold because moving air strips heat off your skin fast.

Foam on a wall doesn’t stop that air movement if the leak sits at a window sash, a door gap, or an outlet box.

Try a quick test: hold a tissue near the edges of your window and door when the HVAC runs.

If it flutters, that leak moves more heat than foam ever will.

For the “what it does vs what it doesn’t” line in plain English, does acoustic foam work? sets expectations the right way.

Actual Temperature Effects

Minimal room temperature difference with and without acoustic foam

So foam can have some thermal resistance on paper, but your room won’t behave like a lab sample.

Typical wall treatment: temperature stays the same

Treating the wall behind your desk, a couple side-wall reflection points, and maybe the back wall can make a room sound calmer.

That same setup almost never changes how warm the room feels, because the big heat paths stay untouched.

You’ll notice “less ring” and “cleaner audio” long before you notice “warmer room.”

Small treated enclosures can feel warmer (for a different reason)

So when people say foam made a room “warmer,” it’s usually in a tiny space where airflow changes. That can feel like warmth even if the thermostat number doesn’t move.

Closets, vocal booths, and tiny gaming nooks can feel warmer after treatment.

Your body heat and your gear heat build up faster when airflow drops, even if the actual room temperature didn’t change much.

If that’s your use case, acoustic foam vocal booth setups need ventilation planning as much as they need absorption.

More foam doesn’t equal “insulation”

That leads to the next misconception: adding more tiles won’t turn foam into insulation. More coverage changes reverb faster than it changes heat loss.

Covering more surface area can make a room sound deader, and that can feel “cozier” in a psychological way.

That comfort shift isn’t the same thing as insulation, and it’s easy to overdo it.

If your room starts to feel unnaturally lifeless, too much acoustic foam explains what to fix without ripping everything down.

Factors That Actually Affect Room Temperature

Major room temperature factors compared with acoustic foam

If your goal is a warmer room, these are the levers that actually move the needle.

Air leaks (the fastest win)

Drafts make a room feel colder than the thermostat number suggests.

Sealing obvious gaps around doors and windows beats adding more material to the middle of a wall.

If you can only do one thing in a rental, do the draft work first.

Windows and sunlight (comfort swings)

So after you deal with obvious air leaks, windows are usually the next comfort swing. They can leak cold at night and dump heat during the day, depending on sun exposure.

Windows change comfort in two directions.

Direct sun can roast a room, and nighttime glass can dump heat fast.

Curtains and window sealing usually beat “more foam” for comfort.

If you want three tools that make those comfort fixes easier (without changing your acoustic plan), start here:

HVAC and airflow

So once leaks and windows are under control, airflow decides whether the room feels comfortable. A room can read the same temperature and still feel colder if circulation is weak or uneven.

Airflow changes comfort as much as temperature.

A room with weak circulation can feel colder in winter and stuffier in summer, even at the same thermostat setting.

Foam shouldn’t block vents, returns, or radiator airflow, and it shouldn’t wrap around hot equipment.

When Thermal Effects Might Matter

Scenarios where acoustic foam thermal properties may matter

A few edge cases can make foam feel like it changed temperature, even though it isn’t acting like real insulation.

Heat sources right next to foam

Foam can restrict airflow when it sits tight around a heat source.

That matters for amps, PCs, dehumidifiers, and space heaters that rely on ventilation.

Fire-rated foam helps, but placement matters more, and acoustic foam safety is worth reading if “warmer room” means “foam near heaters.”

Exterior-wall “cold wall” perception

So even without a draft, a cold exterior wall can make you feel chilled. That’s radiant comfort, and foam only changes it a tiny amount.

Cold walls feel uncomfortable because they pull heat from you radiantly, not because your thermostat is lying.

Foam can change the feel of a wall to the touch a little, but it won’t fix the building problem that made the wall cold.

Stacked treatments (easy to mis-credit the foam)

So if you change multiple things at once, be careful what you credit. Comfort almost always comes from sealing and airflow first, not from wall foam.

If you add window sealing, thicker curtains, and then install foam, the room might feel warmer.

That improvement came from sealing and insulation, not from the acoustic panels you added for reflections.

Humidity Considerations

Humidity and moisture considerations for acoustic foam

Temperature isn’t the biggest climate risk with foam—moisture is.

Open-cell foam and moisture

Open-cell foam can hold moisture and odors when the room stays humid.

Wet foam also performs worse acoustically, so the “sound fix” you wanted can fade over time.

If you ever need to deal with damp foam, drying acoustic foam walks through safe options.

Ventilation beats more material

So if foam makes a room feel stuffier, treat it like an airflow problem first. Ventilation fixes humidity far more reliably than adding more porous material.

Small treated rooms can get humid fast, especially with people, computers, and closed doors.

Air exchange and humidity control fix that; more foam doesn’t.

If you notice musty smell or visible spotting, treat it like a humidity problem first, not a “buy different foam” problem.

Acoustic Foam vs Thermal Insulation

Comparison of acoustic foam purpose versus thermal insulation

This is the clean separation that keeps you from buying the wrong material.

Use foam for echo and clarity

Foam works best when you treat reflection paths, not when you blanket every surface.

If echo is the problem, stopping echo with acoustic foam shows the fastest path to “sounds better” without going overboard.

Use insulation for comfort

So if comfort is the goal, switch tools. Insulation and air-sealing address heat transfer in a way foam never will.

Comfort comes from sealing air leaks, reducing window loss, and controlling airflow.

If you want the full side-by-side framing, acoustic foam vs insulation makes the separation obvious.

Want both? Treat echo first, then fix drafts

So you don’t have to choose between “sounds better” and “feels better.” Treat echo first, then fix drafts and windows — and you’ll feel both wins fast.

That “porous open-cell foam” factor we talked about matters here too.

Foam can improve clarity fast, and draft fixes improve comfort fast, so you don’t need to pretend one product does both jobs.

If you’re still unsure which problem you’re actually solving, is acoustic foam worth it? helps you decide without the marketing fog.

Impact on HVAC and Energy

Energy and HVAC considerations for rooms with acoustic foam

Once you separate acoustics from insulation, the energy question gets easy.

Energy bills won’t change

Most rooms won’t show a measurable change in heating or cooling cost from acoustic foam.

Room comfort swings track drafts, windows, sunlight, and airflow far more than wall absorption panels.

Don’t block vents, returns, or radiators

So even if foam isn’t an insulation upgrade, it can still mess with comfort if you block airflow. Keep vents and radiators clear so your HVAC can do its job.

Foam should never interfere with the parts of your room that move air and manage heat.

Give vents and heaters space, and keep foam away from anything that gets hot.

Tiny rooms need ventilation planning

That matters even more in small treated spaces where heat and humidity build up fast. Plan ventilation the same way you plan foam placement: on purpose, not as an afterthought.

That “small booth feels warmer” effect comes from airflow changes, not magic insulation.

If you treat a tiny space, plan for fresh air the same way you plan for mic placement.

Conclusion

Acoustic foam won’t make a normal room warmer in a meaningful way.

Foam can make small treated enclosures feel stuffier, because airflow drops and body heat builds up faster.

If warmth is the real goal, chase drafts and windows first, then use foam for the thing it actually does well: controlling echo and reflections.

Humidity is the one climate factor worth watching with foam, so keep ventilation and moisture control in mind as you treat your room.

Frequently Asked Questions

Will acoustic foam help insulate my room?

Only a tiny amount, and most people won’t feel it.

Foam doesn’t seal drafts or cover the full heat path, so real insulation still does the heavy lifting.

Can acoustic foam replace thermal insulation?

No.

Acoustic foam treats sound reflections, while insulation targets heat transfer and air sealing.

Will acoustic foam make my room hotter in summer?

Not in a noticeable way.

Sunlight, windows, and airflow drive summer comfort more than a few foam panels on the wall.

Should I worry about condensation behind acoustic foam?

Most rooms won’t have an issue, especially with partial coverage and some air gap behind panels.

High humidity and cold exterior walls are where you pay attention to ventilation and moisture.

Can foam trap heat around equipment?

Yes, if you put it too close.

Amplifiers, PCs, and heaters need airflow, so keep foam clear of vents and hot surfaces.

Does foam color affect temperature?

Only in direct sunlight.

Dark foam absorbs more radiant heat when the sun hits it, so it can get warmer near a bright window.

Away from sun exposure, color won’t change room temperature in a meaningful way.

Should I remove acoustic foam in summer?

No.

Foam contributes so little to temperature that removing it won’t solve a warm-room problem.

Chase airflow and sunlight first, and keep your acoustic treatment consistent.

What should I do first if my room feels cold?

Start with drafts at doors and windows.

Once the leaks are under control, echo treatment becomes easier because you can place foam for sound without worrying about comfort.